Lad Stones Bouldering. By Greg Chapman
|
|
|
- Joshua Cook
- 6 years ago
- Views:
Transcription

1 Lad Stones Bouldering By Greg Chapman


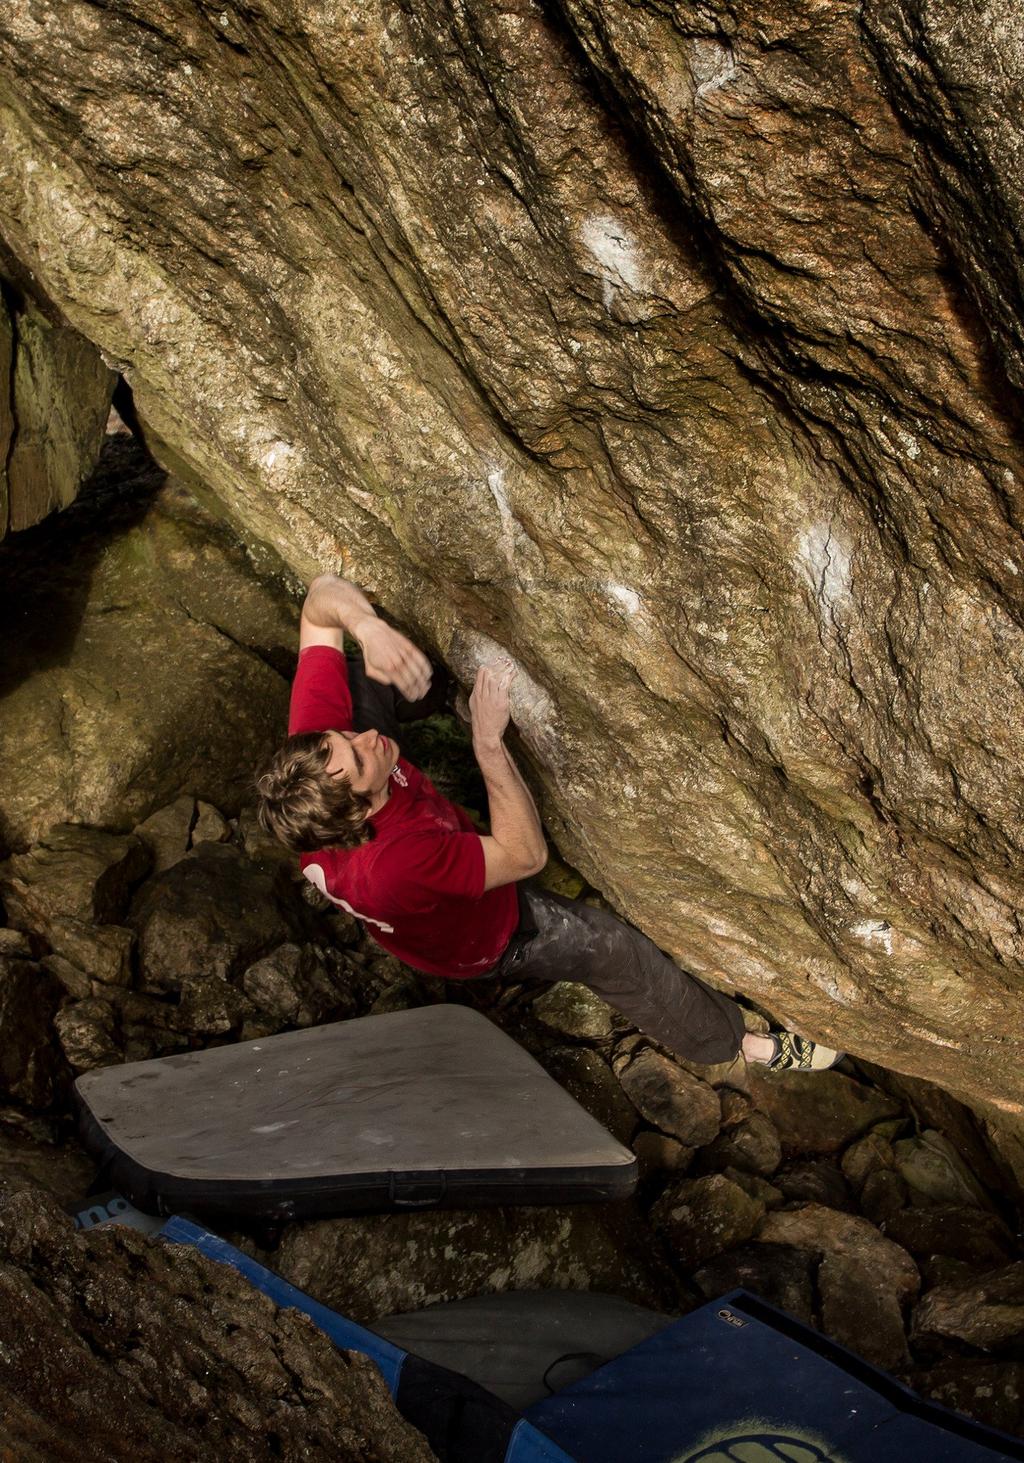
2 Introduction Approach & Overview Map Aspect Situated on the southern flanks of Wetherlam, east of Levers Water and the Coppermines Valley, the mighty Lad Stones sit in a quite corner of fellside, casting a silent gaze over the well trodden Tilberthwaite-Coniston track and an awe-inspiring panorama of southeast Lakeland. An intense yet excellent circuit centring on two vast (Bowderstone sized) boulders awaits the intrepid boulderer, 2km due west of Tilberthwaite car park. The rock is a metamorphose volcanic, verging on granite in its consistency and as such it provides excellent friction but can be tough on the skin. Right: Tom Newberry enjoying his own Underground Butler, 7B. Overview Discovered by Andy Hyslop as recently as 2003, the Lad Stones have gradually gained in popularity over the years with visitor numbers increasing as word spread and problem numbers increased. The steep, high and imposing Bothy & Panorama Stones offer a high concentration of mid to harder graded problems and for those stronger boulderers seeking somewhere off the beaten track this place is well worth checking out. Many notably strong and well known climbers (including the likes of John Gaskins, Jordan Buys, Dan Varian, Ben & Jon Freeman, Dave Jones, Tom Newberry, Dan Turner and Mick Adams) have visited and revisited the venue leaving a number of class problems of varying styles. Historically the rock and landings have been cause for the odd complaint, however the recent increased popularity has helped remove many dubious holds and MUCH groundwork has gone into improving the landings below all of the most popular faces. That said, many of the problems are quite high and the nature of the rock means there are undoubtedly a few dodgy holds lurking within the continuum, and as such I d recommend visiting the area with at least 3 crash pads and a spotter. Approach Use in conjunction with map below: Approximately 3km (1.8miles) north of Coniston on the A593 is a turn off signed to Tilberthwaite; follow this single track lane to just before the end of the road and a large (free) car park on the left. Follow the steep steps and subsequent path, at the east end of the car park, up the hill passing Tilberthwaite Quarry on your left. Continue on, avoiding any right forks in the path, to the top of the ghyll, where the ground levels off into an open expanse. Keep to the left side of the main beck and follow the obvious track as it curves southward for 250m, whereupon some convenient blocks provide stepping stones across the beck, 35m down to your right (where the stream makes a series of tight bends). Having crossed the beck contour around the right side of a grassy knoll (keeping you out of the bog) to reach another major track. Ignore and cross the track, striking a direct line up the incline of a small, shallow hanging valley in front of you. On reaching the top you will see the boulders ahead. Panorama Stone Top Block The Bothy Bella Conditions A surprisingly reliable venue; reasonable conditions can be found throughout the year. The situation of the boulders protects them from all but a severe north/north-easterly wind and with walls facing in varying directions you can usually find shelter, whether from the sun or the wind. In summer the is a good bet for fair conditions, as it does not come into the sun until late afternoon. The boulders also dry very quickly, although one or two lines do take some drainage immediately after a downpour. As the landings are predominately rocky platforms muddy terrain is rarely an issue. Wetherlam (762m) N 250m Car Park Yewdale Beck High Tilberthwaite > Hodge Close Right: One of four; Andy Goldsworthy s touchstone slate features in his renovated sheepfold opposite the car park. Tilberthwaite Gill Tilberthwaite Quarry Grades & Stars Some problems featured have had few repeats. As such please don't get too bothered if the rating of an odd problem is out by a grade or so. Stars are used to denote problems of particular quality. Generally anything with 3 stars offers a good line, great climbing and a decent landing. Problem Key Coloured diamonds are shown before each problem to give an idea of difficulty at a glance: Grade Spread (Font Grade) A-6B+ 6C-7A 7A+-7B 7B+-7C 7C+-8A 8A Approach Time: 25 Minutes Lad Stones Grassy Knoll Yewdale Moss Virtual Crag Ambleside A593 Font 3 to 4+ - V0 Font 5 to 6C+ - V1 to V5 Font 7A to 7C+ - V6 to V10 Font 8A to 8C - V11 to V15 Project Front Cover: Pete Wilkinson powering through the brilliant Warstarter, 7B+. Pete Wilkinson. > Coniston Coppermines Valley < > Coniston 1 2
 Tilted Traverse (6A+/V3) Starting on the far left, traverse the lip right into and up the arête.")
 Shadow Wall (3+/V0) The short wall.")

 Traci Lords SDS (8B+/V14) SDS Start sitting on a pointy rock down to the right and use a LH undercut and RH square-cut crimp to pull on. Then utilise poor holds to pull into the stand. Hard!")
 From the Earths Cauldron (6C/V4) The right side of the beautiful rounded arête on nice rock.")
 The Death Clock (7B+/V8) A quality and powerful problem starting on the lowest of the big pockets. From here veer up and right on small holds, finishing just right of the overlap.")
3 Lad Stones Tilted Boulder & The Bothy Lad Stones The Bothy This is the first boulder encountered from the approach described. It offers a few reasonable problems but on sharp rock The Bothy: Porn Star Face 1) Tilted Traverse (6A+/V3) Starting on the far left, traverse the lip right into and up the arête. 1 2) Monolith (7A+/V7) SDS A fierce problem up the centre left, starting on a mono and a poor edge. 3) Principia (7A+/V7) SDS The arête is good and sequencey but has a slightly infuriating landing. The stand up is also a good 5/V1. Sharp. * 4) Shadow Wall (3+/V0) The short wall The Bothy: Front Face The lower of the two main massive blocks, The Bothy offers a selection of good, often high and predominantly steep problems on solid rock. The Bothy: Porn Star Face The east face of the Bothy hosts some brilliant climbs tailor-made for board junkies everywhere. 6) Traci Lords (8A/V11) Use a good but tilted LH edge and small crimp to pull on and up to a poor RH crimp, then throw left to a good hold (crux) and finish via easier moves. Both awesome & top-end! ** 5 3 7) Traci Lords SDS (8B+/V14) SDS Start sitting on a pointy rock down to the right and use a LH undercut and RH square-cut crimp to pull on. Then utilise poor holds to pull into the stand. Hard! ** ) Shyla Stylez (7C/V9) A cool problem using the decent edge (RH) and an undercut pocket to pull on and blast direct to the good hold and up. * 9) From the Earths Cauldron (6C/V4) The right side of the beautiful rounded arête on nice rock. ** The Bothy: Front Face 1) Booze Baron (7C/V9) A hard problem up the undercut wall off a block using some nasty quartz holds. Was a good 7A+ until holds broke. 2) The Death Clock (7B+/V8) A quality and powerful problem starting on the lowest of the big pockets. From here veer up and right on small holds, finishing just right of the overlap. * 3) The Crack (6C/V4) The highball crack features good moves but sharp holds. 4) Smoking Guns (7B+/V8) Starting on slots as far back a possible deploy some big burly moves to a crux throw for a jug on the lip, followed by a high but relatively easy top out, moving right to finish. * 5) Bothy Traverse (6A/V2) A scary (pointless?) highball traverse starting on the big blocks to the left and finishing up the final moves of The Crack. Tilberthwaite Fells The area is rich in geological & archaeological features and was settled from an early period. However the most obvious signs of human activity are the extensive remains of slate quarries and copper mines. Many of the industrial machines are Scheduled Ancient Monuments. 10) Black Cauldron (7B+/V8) SDS A tough sitter to the arête. For the full tick start actually sitting, with your hands as low as possible. ** The Bothy: South Slab Above: Ben Freeman hanging tough on the crux move of the superb Traci Lords, 8A. The Bothy: South Slab A good high slab featuring some nice problems. 11) The Slab (3+/V0) The easy slab direct above a block is straightforward but high. * 12) Lard Lad (6B/V3) SDS Starting sitting in the pit, use holds on the lip to gain the slab with some difficulty before finishing direct with relative ease. The stand is 4/V0. * 13) Sky High (3+/V0) The left hand side of the slab starting off a big block provides nice delicate moves on good rock. 3 4

 Warm Up Wall Right (6B+/V3) SDS Use a couple of good edges to start then veer up, slightly right, on poor crimps to the break.")
 Project - Start up the niche bit then move out left up the steep hanging nose before questing on direct.")
 Warm Up Wall Left (5/V0) SDS Much of the same up the line immediately to the left. 26) Finger Tingler (3+/V0) The pleasant wall on great rock finishing at the ledge.")
 Spinal Caress (7A/V6) A decent problem but with a poor landing.")
4 Lad Stones Spinal Block & Low Boulder Lad Stones Panorama Stone - The Niche & Stella Face Spinal Block & Low Boulder These two smaller blocks offer a few less grand but reasonable problems and are situated in close proximity to one another between the two massive blocks. The Niche Photo-topo on previous page: 19) Warm Up Traverse (4/V0) Traversing the break rocking onto the ledge on the far left gets the blood pumping. A sitter starting in the pit is 5+/V1. The Niche Photo-topo on previous page: 23) Warm Up Wall Right (6B+/V3) SDS Use a couple of good edges to start then veer up, slightly right, on poor crimps to the break ) Project - The huge hanging arête started on the right and veering onto the left wall near the top. 21) Groove Armada (7C+/V10) Climb the central line up the hanging niche. Originally head pointed but has since been climbed ground up. *** 22) Project - Start up the niche bit then move out left up the steep hanging nose before questing on direct. 24) Warm Up Wall Centre (5+/V1) SDS Climb the thin wall direct via some straightforward edge pulling to the break. 25) Warm Up Wall Left (5/V0) SDS Much of the same up the line immediately to the left. 26) Finger Tingler (3+/V0) The pleasant wall on great rock finishing at the ledge. Spinal Block Spinal Block Low Block Low Block Stella Face The Stella Face of the Panorama Stone features excellent rock and some fabulous high problems up a gently overhanging face. Problems range in style from the super thin and technical Stella & Artois to the surprisingly thuggy Underground Butler. 14) Spinal Caress (7A/V6) A decent problem but with a poor landing. Start on the right side of the ramp and traverse left and up the hanging prow. 15) Spinal Tap (6A+/V3) Gain a big hold and make a long stretch to the top. Bottom Right: Jordan Buys on Groove Armada, 7C+. 16) Stoned Lad (7A/V6) SDS Up the undercut prow via some tricky moves. All foot blocks are out. 17) Aye Lad (6C/V4) SDS Start up the undercut prow then veer left and finish centrally. 18) Block Roof (6B/V3) SDS Climb the short roof direct. Blocks for feet is allowed. 33 Stella Face The Niche (Problem descriptions on the following page) This vast boulder is the best block at the venue and provides 3 brilliant faces offering some of the finest harder problems in the Lakes. The Niche face offers a handful of good crimpy warm-ups and, in Groove Armada, one standout mega-line of national status. There are also a couple of impressive projects still to do The Niche Stella Face Stella Face ) Underground Butler (7B/V8) SDS From two side pulls make burly moves up left to underucuts and then to a good hold above. Now veer left and up to gain the ledge via jugs. ** The stand is Dry Tooling Underground 5+/V1. 28) Crack Butler (7B+/V8) SDS This direct version of p27 follows the thin crack to the ledge. * 29) Artois (6C+/V5) The high wall above a platform is climbed direct. Despite a stretched start and slightly sharp holds this problem is excellent. ** 30) Arc of Despair (7C/V9) A ridiculously morpho (and infuriating) sit start off the block to the right into Artois. Start on a side pull and edge. 31) Stella (7C/V9) SDS A brilliant problem starting on a low in cut hold on the arête and a good edge on the face. Climb up to a big side pull and use it to gain a vertical slot and then the break. Now make a big move to an edge and the jug above. ** 32) Wife Beater (7B/V8) SDS Start up Stella but at the big side pull span right into and up Artois. * 5 6


 Cheap Seats (6C/V4) SDS Use small holds to pull on and gain the left arête and then the top. Can also be climbed into the reverse of p47 at 7A.")

 Mike s Prow (7B/V8) The mega prow above a wicker landing.")
5 Lad Stones If you like it steep with big moves this is the crème de la crème - a 35 degree overhanging face packed with good, hard straight-ups and links. Whilst the style is similar throughout, the holds vary greatly; from deep quartyz slots to tiny micro crimps. So whilst plenty of power and body tension is helpful a good base of digit strength will also come in handy. The rock is generally solid, however a word of caution with regards to the RH end of the central ledge: whilst this has had much of its loose material removed, it does still appear to be a little fragile in places and as such should be respected accordingly. Lad Stones Upper Outlying Blocks BraveStarr Block The small cave formed by a large perched block immediately to the rear of the hosts one good involved problem. Hobbledehoy Block A decent little block, seemingly supporting the. Provides a trio of reasonable problems ) Cheap Seats (6C/V4) SDS Use small holds to pull on and gain the left arête and then the top. Can also be climbed into the reverse of p47 at 7A ) BraveStarr (7A/V6) SDS Starting matched on the block at the back of the roof (marked with a star) climb out of the roof direct. All other detached blocks are out. Eyes of the hawk, speed of the puma! Bella Block An obvious low roof perched on a grassy platform just up from the NW corner of the Panorama Stone. Offers a gnarly one mover and a good traverse. 47) Hobbledehoy (6C/V5) Starting on the far right of the block traverse the lip leftward on slopers topping out the far left. Top Block A sizable squat block located a few metres up the hill above the SW corner of the Panorama Stone. 33) Mike s Prow (7B/V8) The mega prow above a wicker landing. Start with two holds on either side of the prow, make a tricky move to a tiny crimp on the prow and lunge for the glory jug. * 34) Lancaster Bomber (7C/V9) SDS The full sitter to the prow, using holds on either side, is a bit sharp but still very good! Finishes on the right. ** 35) Man Power (7C+/V10) Start 1.5m left of the prow on a high, thin LH clawable side pull and RH flake-crimp. Pull on with great difficulty and make hard move up right to in cut edge. Now rock left to better holds and a finish above the ledge. * 36) Project - A direct finish to Man Power. 37) Warstarter (7B+/V8) SDS From sitting on a block use a quartzy slot and decent side pull to make big move up right to a good edge. From here quest on up on very small crimps to the ledge. ** 38) Warstarter RH (7C/V9) SDS Start in the middle of the wall with both hands in quartz slots. Make a hard cross over move to the lower crimps of Warstarter and finish as per the original. ** 39) Axis (7C/V9) SDS An excellent flowing line starting as per Wartstarter but once at the lower crimps cross through LH to the high crimp of WS (i.e. the one you get RH on WS) and pull through to a gaston and up to the centre right of the ledge. Finish direct. Climbed starting up p38 is a good alternative start but the same grade. ** 40) Hades Lair (7A/V6) SDS From sitting on a block use a quartzy slot and decent side pull to make big moves direct, rocking left to finish. A lower start, via a tweaky move, is possible at 7A+/V7. ** 41) Rocko s Modern Life (7A+/V7) SDS From the far left side of the face use a big side pull to follow a diagonal line of holds into Hades Lair. The Links 42) Battalyst (7C/V9) SDS Start up p41 but continue right across the face and finish up p37. ** 43) Axis Powers (7C+/V10) SDS Start up p41 but continue right across the face to finish up p39. * 44) Hades RH (7B/V8) SDS Start up p38 then continue left across the face to finish up p40. * 48) Bella Despectus (6C/V4) Traverse the lip from the far right to the far left before topping out. 49) Bella Roof (7A+/V7) SDS Use sharp quartzy holds to pull on and make a tough move for the lip and a mantle finish ) Slanting Arête (6A/V2) SDS The LH arête. 51) The Six Grand Skip (6A+/V3) The RH arête rocking out left to finish
1/ Clatterjack 7a * SDS under right side of the roof. Out to lip, left to the arête and up before stepping back right to finish
 14 Crow Crag The potential of Crow Crag has gradually come to light though lines still remain unexplored. Despite the woodland location the excellent rock dries pretty quickly and there are some strong
Lund Stones. Lund Stones. Unknown Stones. Climbs - 40 Altitude 300m Faces South, South West Grid ref SE
 Climbs - 40 Altitude 300m Faces South, South West Grid ref SE 175713 Lund Stones Other condition info: An isolated edge with good rock, that, once cleaned, reveals fine and distinctive problems, across
Keeper Crack Area. Brimham Northern Edges. Unknown Stones. Climbs - 20 Altitude 270m Faces North, South, West and East
 Keeper Crack Area Climbs - 20 Altitude 270m Faces North, South, West and East Other condition info: Recently developed and redeveloped quality bouldering in the Keeper Crack area of Brimham North Edges.
A popular area with Joker s Wall offering steep and fingery problems for the strong with a few other good bits here and there.
 Cubic Area Brimham A popular area with Joker s Wall offering steep and fingery problems for the strong with a few other good bits here and there. Parking and approach Easily accessible in 2 minutes from
CRANBERRY. Introduction
 Introduction Introduction The Cranberry Boulders are a group of 60 problems set in a beautiful mossy forest above the Cranberry Creek. The boulders are located approximately 36km south of Revelstoke on
High Crag (Stump Cross)
") High Crag (Stump Cross) Climbs - 25 Altitude 410m Faces North West Other condition info: Smart little edge and boulders with a useful collection of routes and problems in a convenient and fine location.
High Crag (Stump Cross) Climbs - 25 Altitude 410m Faces North West Other condition info: Smart little edge and boulders with a useful collection of routes and problems in a convenient and fine location.
Topos curated by The Climbing Academy, Ring Road Boulders
 Ring Road Boulders Location and Approach There are various approaches to get to the bouldering. The one described here takes about 10 minutes. Park on Hartford drive, approached by turning right off the
12 Plantation Crack Area.
 12 Plantation Crack Area. There has always been some good, though limited, bouldering at Plantation Crack. Over the years this has been developed and now adds up to a fairly substantial area spread along
Ilkley Buckstones. Ilkley Buckstones. Unknown Stones. Climbs 60 (Font 4 to7b). Altitude 390m asl. Faces All directions but mostly north.
. Altitude 390m asl. Faces All directions but mostly north.") Ilkley Buckstones Climbs 60 (Font 4 to7b). Altitude 390m asl. Faces All directions but mostly north. Other condition info: A group of boulders set high on the moors above Ilkley and the Aire Valley but
Ilkley Buckstones Climbs 60 (Font 4 to7b). Altitude 390m asl. Faces All directions but mostly north. Other condition info: A group of boulders set high on the moors above Ilkley and the Aire Valley but
Hong Kong Bouldering. Steven Yip treading a Rocky Road (V6). Photo: Stuart Millis. HongKongClimbing.com. Page 36
. Photo: Stuart Millis. HongKongClimbing.com. Page 36") Hong Kong Bouldering Steven Yip treading a Rocky Road (V6). Photo: Stuart Millis Page 36 S hek Lung Kung General A fine set of boulders on very high friction rock. This area has the added bonus of a stunning
Hong Kong Bouldering Steven Yip treading a Rocky Road (V6). Photo: Stuart Millis Page 36 S hek Lung Kung General A fine set of boulders on very high friction rock. This area has the added bonus of a stunning
Far Crag. Far Crag. Unknown Stones. Heather Top Wall. Other condition info: A fine little bouldering area in a pleasant location.
 Far Crag General Information Other condition info: A fine little bouldering area in a pleasant location. It OS Ref. SE152637 faces west and provides a number of very GPS good problems. Ideal for a few
Little Simon s Seat. Little Simon s Seat. Unknown Stones. Climbs 32 Altitude 450m a.s.l. Faces North West
 Climbs 32 Altitude 450m a.s.l. Faces North West Other condition info: A jumble of boulders that are composed of good, silvery grit, set high on Simon s Seat. Problems have been done over the years but
Rowantree Tor. Rowantree Tor. Unknown Stones. Climbs - 50 Altitude 300m Faces South west
 Climbs - 50 Altitude 300m Faces South west Rowantree Tor Other condition info: Set in a fine position overlooking the upper section of Fosse Gill and at the end of Rowantree Crag Ridge, the area consist
Hong Kong Bouldering. Lai Chi Wai takes flight on Superhardness (V6). Photo: Stuart Millis HongKongClimbing.com. Page 42
. Photo: Stuart Millis HongKongClimbing.com. Page 42") Hong Kong Bouldering Lai Chi Wai takes flight on Superhardness (V6). Photo: Stuart Millis Page 42 L in Fa Shan General A superb set of boulders with problems of exceptional quality above generally flat
Hong Kong Bouldering Lai Chi Wai takes flight on Superhardness (V6). Photo: Stuart Millis Page 42 L in Fa Shan General A superb set of boulders with problems of exceptional quality above generally flat
Routes Third Friend Lucky E2 5c 8m * The right edge. Problems Green Wing V4 * A varied low traverse from right to left.
 West Chevin Boulders Situation and Character A woodland situation, just below the Chevin summit. It is fair to say these boulders will never achieve classic status due to the prevailing greenery (but don
Eskdale Granite Bouldering Copyright Philip Wake
 Eskdale Granite Bouldering Copyright Philip Wake Directions (from the south) From the M6 motorway leave at junction 36 for Kendal/Lakes. Follow signs for Barrow. Before you reach Barrow, turn right to
Clint Quarry History Overview Approach
 Clint Quarry History The quarry has spiked the interest of various people over the years though recent additions by Steve Dunning, Dave Sutcliffe, Neil McCallum, Steven Phelps and Martin Whitton have renewed
Brimham - The Central Area
 Brimham - The Central Area A fine circuit with some of the most travelled problems at Brimham and some neglected goodies. A varied array of edge and block challenges. Walking up the main track towards
Burley Moor Crags THE BURLEY MOOR CRAGS. Coldstone Beck Crag SE Unknown Stones Page 1
 THE BURLEY MOOR CRAGS SE145451 Coldstone Beck Crag is the obvious quarried area at the top of the footpath leading up from the parking spot on the Moor Road between Burley Woodhead and Ilkley. There is
Crimpy Roof Hare Heads
 Crimpy Roof Hare Heads General Information Grid Ref SE 213 651 Parking GPS 54.08003-1.676450 Altitude 272M Aspect All SW Conditions Quick drying, afternoon sun and all the wind Plod Time 5 Mins Landings
Sigsworth Crags. Unknown Stones
 Crags Crags Amongst the most significant Wild Bouldering developments of late, this fine collection of boulders, set above the hamlet of Wath, enjoy a stunning outlook over Upper Nidderdale. The walk in
Yeadon Crag. Parking and Approach: Boots or wellies are a must as the approach has a small, unavoidable boggy patch.
 Yeadon Crag Yeadon Crag is the southernmost end of the crag series which runs south from Sypeland and is unquestionably one of the most significant Wild Bouldering developments of recent years in Yorkshire.
The Southern Pinnacles. Go uphill a short way along the path. Just after it levels out and in a depression down to the left is:
 Brimham South Area This 2-part circuit takes in the Southern Pinnacles and blocks that lay alongside the snaking Pinnacles Path. This starts at the Main Car Park and follows it as far as the obvious grassy
Tan y Grisiau Boulders
 Tan y Grisiau Boulders Area: Blaenau Ffestiniog Aspect: South Rock type: Rhyolitic Tuff Approach: 10 15 minutes Altitude: 400m OS grid ref: 679 454 Hippocampus New Noise 8A/+ 8A/+ Flick of the Wrist 7C/+
11 Bat Buttress. Do not access this crag by crossing the wall from the National Trust Estate.
 11 Bat Buttress Bat Buttress is a series of walls and block set amid a bigger edge that has some fine routes. The rock is generally very good and the south facing aspect means it gets plenty of sunshine.
The Flu sits on a west facing hillside and doesn t get as much sun as the other areas. The stone tends to hold moisture much longer and becomes
 The Flu sits on a west facing hillside and doesn t get as much sun as the other areas. The stone tends to hold moisture much longer and becomes brittle when wet. So please refrain form climbing in the
Long Crag. Long Crag. Unknown Stones. Other condition info: Excellent rock and a spectacular position make the boulders wellworth
 General Information OS Ref. GPS See Map See Map Long Crag Long Crag Other condition info: Excellent rock and a spectacular position make the boulders wellworth a visit. Altitude Aspect Conditions 400m
Jenny Binks Boulders
 Climbs - 20 Altitude 370m Faces South Jenny Binks Boulders Jenny Binks Boulders Other condition info: A fine, quite high wall of perfect grit that is very Slipstones like and faces south in a fine position
4 - Flight of the Osprey - V1+ * Climb the nice arête on the far right from a sit start on an awesome side pull feature. Fun!
 Cave The first boulder(s) you encounter on the trail down, 2 minutes from the car. Home to some of the best boulder problems in Nelson, a little here for everyone. The Axe traverse should not be missed!
Twin Towers. Unknown Stones. Twin Towers. Climbs - 26 Altitude 230m Faces North West
 Climbs - 26 Altitude 230m Faces North West Twin Towers Twin Towers A small crag, which makes up what it lacks in volume with the striking quality of its highball routes each constructed of the finest Slipstones
Eastby. Eastby. Climbs 50+ Altitude 320m Faces South
 Eastby Climbs 50+ Altitude 0m Faces South Other condition info: Good all year venue. The crag is a big sprawling affair with many good areas. Generally the problems are quite high and some landings are
Bouldering Guide. The Shrine. February 06, 2010 Jason Allemann Kristal Dubois.
 The Shrine Bouldering Guide February 06, 2010 Jason Allemann Kristal Dubois www.topout.org The Shrine contains the largest concentration of developed boulders in the Ottawa/ Gatineau region. Most of the
Bear Mountain Bouldering A guide by Trent Hoover
 Bear Mountain Bouldering A guide by Trent Hoover The windmills of the Bear Mountain Wind Farm are a distinctive feature of the Bear Mountain climbing area 1 Bear Mountain Bouldering (August 2012) Bear
The First Wall is a good place to get warmed up with several short pleasant wall climbs and one tricky sitter.
 Gate House Crag This is an excellent and long overlooked moorland bouldering venue with good rock and flat landings. It is generally south facing, though with walls of varying aspect, and an easy 25 minute
The Nest Bouldering Guide By Marc Eveleigh Updated March 24 th, 2016
 The Nest Bouldering Guide By Marc Eveleigh Updated March 24 th, 2016 Introduction The Nest is a small bouldering area set in a neat section of canyon with a rushing stream. Originally called Mophead a
Carrock Fell Bouldering. By Greg Chapman
 Carrock Fell Bouldering By Greg Chapman N Introduction: Aspect & Conditions Quietly nestling on the Eastern flank of a remote North Lakes fell side lies a truly magical boulderering paradise. Countless
Gate House Crag. Unknown Stones. Gate House Crag (A4 Feb 17)
") Gate House Crag This is an excellent and long overlooked moorland bouldering venue with good rock and flat landings. It is generally south facing, though with walls of varying aspect, and an easy 25 minute
Gate House Crag This is an excellent and long overlooked moorland bouldering venue with good rock and flat landings. It is generally south facing, though with walls of varying aspect, and an easy 25 minute
Hudeshope Pennines
 408 Pennines 409 Monk's Moor Boulders OS Landranger Sheet: 92 Map Reference: NZ962289 Aspect: West to North West Altitude: 560m Approach: 30 minutes Mod - Severe 0 HS - HVS 0 E1 - E3 0 E4 and above 0 Bouldering
ID: 283 Distance: 6.2 miles Height gain: 500 Metres Map: Explore OL 19 Contributor David and Chris Stewart
 Walkingworld Wild Boar Fell ID: 283 Distance: 6.2 miles Height gain: 500 Metres Map: Explore OL 19 Contributor David and Chris Stewart Features Birds, Great Views, Hills or Fells Description: Wild Boar
Self-Guided Walk Langdale Pikes. Start & Finish: NT car park (free to members) at Sticklebarn - on the right just beyond the New Dungeon Ghyll hotel.
 at Sticklebarn - on the right just beyond the New Dungeon Ghyll hotel.") Self-Guided Walk Langdale Pikes Key Information These mountains form a collection of spires and cliffs on the north side of Langdale. This walk visits four of the main tops Pavey Ark, Harrison Stickle,
Self-Guided Walk Langdale Pikes Key Information These mountains form a collection of spires and cliffs on the north side of Langdale. This walk visits four of the main tops Pavey Ark, Harrison Stickle,
House Area: Frank Slide Bouldering
 House Area: Frank Slide Bouldering Trent Hoover and Kyle Marco The House Boulder Area, located at the northwest edge of Frank Slide, is one of the most easily accessible sectors at the Slide. From a large
CAPE ST. FRANCIS SEASIDE BOULDERING IN THE INDEPENDENT STATE OF THE EASTERN CAPE. 1st Edition NIEL MOSTERT
 CAPE ST. FRANCIS SEASIDE BOULDERING IN THE INDEPENDENT STATE OF THE EASTERN CAPE 1st Edition NIEL MOSTERT On the Cover: Martin Renz on Spongebob (7A), The Cove Cape St. Francis Seaside Bouldering in the
THE SMUGGLERS TERRACE. NORTH YORKSHIRE MOORS October 2014 Mini-Guide
 THE SMUGGLERS TERRACE NORTH YORKSHIRE MOORS October 2014 Mini-Guide Directions From the parking at Station Square, Ravenscar, follow the Cleveland Way north-west towards the hotel. When passing a second
Lost Causes. A Climbing Guide to the Mesilla Valley. Installment 2.4. Dona Ana Mountains Pizza Boulders. By: Charles Cundiff
 Lost Causes A Climbing Guide to the Mesilla Valley Installment 2.4 Dona Ana Mountains Pizza Boulders By: Charles Cundiff Pizza Boulders Legend has it that back in the day (somewhere between 1960 and 1986)
FROM JUTA TO ROSHKA via Chaukhi pass
 FROM JUTA TO ROSHKA via Chaukhi pass Duration: 1-2 days The hike can take one or two days, depending on how you plan it. I will focus on the 1-day version of the trek which takes 8-9 hours and starts in
You can also park on the side of the highway for a shorter approach; if you don t mind having your car towed. I was ticketed once and towed once.
 ARBUTUS GROVE Good problems, good views and closer than Squamish make this an attractive climbing spot for a few hours of fun. The freeway makes it a little noisy. Low vegetation (due to power line clearing)
Doolin - Bouldering DOOLIN B OULDERING. Al Sarhan on Fireworks 7b. Al Sarhan on Fireworks 7b
 Doolin - Bouldering replace front.pdf 14/09/2007 09:29:23 Al Sarhan on Fireworks 7b Doolin - Bouldering Al Sarhan on Fireworks 7b This is sample pdf download from the upcoming Burren and Aran Island Rock
EAGLE PASS. Introduction
 Introduction Introduction The Eagle Pass Boulders are located west of Revelstoke, BC above the Trans-Canada Highway on the south flank of the aptly named Boulder Mountain. Development started in the summer
Hiking Las Vegas.com
 Hike: Juniper Peak up and back Trailhead: Oak Creek Canyon marked Distance: 5.5 miles round trip Elevation gain: 2,200 feet Elevation peak: 6,109 feet Time: 4 to 5 hours - Up and back Difficulty: 3 Danger
Route #2) Mt. Massive - Southwest Slopes
 Mt. Massive - Southwest Slopes") Route #2) Mt. Massive - Southwest Slopes Difficulty: Class 2 Ski: Advanced, D6 / R2 / III Exposure: Summit Elevation: Trailhead Elevation: Elevation Gain: Round-trip Length: Trailhead: County Sheriff:
Route #2) Mt. Massive - Southwest Slopes Difficulty: Class 2 Ski: Advanced, D6 / R2 / III Exposure: Summit Elevation: Trailhead Elevation: Elevation Gain: Round-trip Length: Trailhead: County Sheriff:
Short Wall Hog's Back Caves 1. East Land 1332 and 2. King of Swing 1. Unnamed YankOnThis.com 2. Unnamed Lost and Alone Buttress 3. K7 4.
 12 Short Wall Short wall between black slabs and the buttress. East Land 1332 SDS - Start left of big bowl shaped hueco on large low pocket, traverse right into hueco, and then straight up. 2. King of
Camp Jack Wright PERMANENT ORIENTEERING COURSE (2004)
") Camp Jack Wright PERMANENT ORIENTEERING COURSE (2004) WHAT IS ORIENTEERING? The skill which enables a person to navigate with a map. In the competitive sport, the winner is the person who finishes in the
Camp Jack Wright PERMANENT ORIENTEERING COURSE (2004) WHAT IS ORIENTEERING? The skill which enables a person to navigate with a map. In the competitive sport, the winner is the person who finishes in the
Ash Head Crag. Ash Head Crag (A4) Unknown Stones
 Unknown Stones") Ash Head Crag Ash Head Crag (A4) Climbs - 140 Altitude 370m Faces NW to SW Condition info: A fine, remote crag high on Masham Moor with some good routes up to 10m and some excellent bouldering. Don't be
Ash Head Crag Ash Head Crag (A4) Climbs - 140 Altitude 370m Faces NW to SW Condition info: A fine, remote crag high on Masham Moor with some good routes up to 10m and some excellent bouldering. Don't be
Pontfadog. Walk A. Walk A
 Walk A A Bird s eye view of the village 2km. (1 1 /2 miles); height gain 45m. (150ft) about 45 minutes. Six minutes walk along the main road towards Glyn Ceiriog reach a signpost to Llwynmawr. Take the
beach. Make the ford and follow the trail out to the junction with Red Creek Tr in an open grassy area.
 Description: This is a moderate to slightly strenuous 22.8 mile backpack (add 2.6 miles if you do the packless out and back to the Lion s Head) that will have you exploring nearly every thing that is The
Gap of Dunloe. Bouldering Guide. -Main Face Area -Head of Gap Area -Black Valley Area. Eoin Kennedy 07/04/09
 Gap of Dunloe Bouldering Guide -Main Face Area -Head of Gap Area -Black Valley Area Eoin Kennedy 07/04/09 eoineoineoin@gmail.com 1 2 Introduction This is a basic guide for the some of the bouldering that
(west) onto Charleston Boulevard. Drive 16 miles on Charleston and turn right into Red Rock
 onto Charleston Boulevard. Drive 16 miles on Charleston and turn right into Red Rock") Hike: North Peak and Ice Box Overlook up and back Trailhead: 2.5 miles up the Rocky Gap Road not mark Distance: 5 miles round trip Elevation gain: 2,694 feet Elevation Peak: 7,094 feet Time: 3 to 5 hours
Hike: North Peak and Ice Box Overlook up and back Trailhead: 2.5 miles up the Rocky Gap Road not mark Distance: 5 miles round trip Elevation gain: 2,694 feet Elevation Peak: 7,094 feet Time: 3 to 5 hours
Lava Mountain Trail Distance: Elevation Range: Trail Type: Difficulty: Season: Driving Distance: Driving Time: USGS Maps: Pros Cons
 Lava Mountain Trail Distance: 13.4 miles (including the side trip to North Star Lake) Elevation Range: 5900'-8330' Trail Type: singletrack Difficulty: moderate Season: late June-October Driving Distance:
Merritts Traverse. 1928m
 Merritts Traverse 3 hrs Hard track 5.8 km Circuit 4 167m This walk starts with a scenic journey to the top of the hill on the chairlift. Starting along Merritts Nature walk, this walk soon detours down
Darwin s gigantic blunder
 Trail Darwin s gigantic blunder Explore how ice shaped the landscape and why Charles Darwin made a nice mess of Glen Roy Time: 1hr 10 mins Distance: 2 miles Landscape: rural At Glen Roy a curious feature
ENGLISHMAN. Introduction
 Introduction The Englishman Boulders are a collection of roughly 150 problems situated on the banks of Englishman Creek. The boulders are located approximately 20km west of Revelstoke on the 3 Valley/
Staples Lookout to Mt Wondabyne loop
 Staples Lookout to Mt Wondabyne loop 4 hrs 3 mins 1.8 km Circuit Hard track 337m This walk starts and finishes at Staples Lookout, on Woy Woy Rd. The walk follows sections of the Great North Walk around
Sponsored by. statestreet.com
 /STATESTREETISLANDWALK #ISLANDWALKJSY Sponsored by statestreet.com Important Information If you forget everything else PLEASE remember the following.» Remember to check OUT of every checkpoint» If you
The Cirque. Everything you need to know about climbing the Lotus Flower Tower. Southeast Face 2000 feet 19 pitches up 10 rappels down 5.
 The Cirque Cirque of the Unclimbables, Northwest Territories, Canada Created: Sept 4, 2011 Everything you need to know about climbing the Lotus Flower Tower Southeast Face 2000 feet 19 pitches up 10 rappels
San Luis Obispo. Bishop Peak Felsman Loop Eagle Rock Maino Open Space Poly Canyon Poly P Other Areas
 San Luis Obispo Bishop Peak Felsman Loop Eagle Rock Maino Open Space Poly Canyon Poly P Other Areas 1 JCT. ELEV. 72 400 00 0 FELSMAN LOOP GATE LOOP RIDGE 600 FENCE JCT. ELEV. 860 1000 1200 BISHOP PEAK
Erskine Creek via Pisgah Rock and Jack Evans
 Erskine Creek via Pisgah Rock and Jack Evans 4 hrs 30 mins 7.1 km Circuit Very experienced only 6 421m This walk visits some great lookouts and explores the lower section of Erskine Creek. Most of the
2017/08/27. Derek Marshall 1
 0/0/ Derek Marshall General St Francis is a seaside fun-in-the-sun holiday resort town. Bouldering is part of the fun, keep it fun! Directions & Map Get smart, use Google to get there! http://www.easterncaperockclimbing.co.za/location/cape-st-francis
Location: Height: Access: Distance: Elevation: Season: Difficulty: Lat/Long: Directions:
 Upper Eagle Falls Upper Eagle Falls (~20 ft.) is a short hike up from the roadside at the Eagle Falls picnic area. It is very difficult to get a parking spot here during the day, so it is recommended to
Hiking Las Vegas.com
 Hike: Mt. Wilson via First Creek Canyon route Trailhead: First Creek marked Distance: 10 miles up and back Elevation gain: 3,400 feet Elevation of Peak: 7,070 feet Time: 7 to 9 hours (up and back) Difficulty:
Leaden Boot Challenge 2016 ROUTE INSTRUCTIONS
 Leaden Boot Challenge 2016 ROUTE INSTRUCTIONS Section 1 Alstonefield to Ilam (CP2) From the village hall car park turn R then L and pass through the village keeping to the R to enter Church Street. Pass
Guide Book Excerpts. Wham Ridge 2006
 Guide Book Excerpts Wham Ridge 2006 Approach: Molus Lake / Elk Park / Vestal Creek Roach and Roach Description Take the Durango & Silverton Narrow Gauge train from either Durango or Silverton and get off
Skiing and Snowshoes on Un-groomed Fernan Saddle Terrain
 Skiing and Snowshoes on Un-groomed Fernan Saddle Terrain Three ski or snowshoe routes are available from the Fernan Saddle Parking Lot which either do not cover routes ordinarily groomed for snow machine
Introduction to Topographic Maps
 Introduction to Topographic Maps DIRECTIONS: Read all of the following content. READ EVERYTHING!! At the end of the packet, you will find two topographic maps. Your task is to indentify each of the elevations
VENICE TO ROME CYCLE ABOUT THE CHALLENGE ITALY CYCLE TOUGH
 ITALY CYCLE TOUGH ABOUT THE CHALLENGE Our exciting challenge takes us south on flat roads from the canals of Venice to the rolling hills of Tuscany and Umbria, passing terracotta-roofed towns and small
The Stell A Bouldering Guide Part One
 Northumbrian Mountaineering Club Supplement Alec Burns On The Figurehead Bob Smith A series of downloadable PDF guides to new bouldering venues, problems, highballs and routes in Northumberland. Including:
Leaden Boot Challenge ROUTE INSTRUCTIONS
 Leaden Boot Challenge ROUTE INSTRUCTIONS Section 1 Alstonefield to Ilam From the village hall car park turn R then L and pass through the village keeping to the R to enter Church Street. Pass the Church
IRON BARK and COLENSO HUTS 260 Series Map: 1:50, U21 NZ Grid GPS: Geodetic Datum 1949
 IRON BARK and COLENSO HUTS 260 Series Map: 1:50,000 260-U21 NZ Grid GPS: Geodetic Datum 1949 Topo50 Map: BK36 Taoroa Junction GPS: on WGS84 How to get to START: Exit Taupo on SH1 down the lake to Turangi
throu Booth Hill Green Belt
 s k r a p s l l u b m u r T Explore gh Geocaching throu Booth Hill Green Belt This was originally a concept to try and preserve some of the land in our town, without hurting the developers that are creating
How to Build A Super Powerful Grip
 How to Build A Super Powerful Grip A strong grip gives you a better first impression, as in "He has a firm handshake. " A strong grip shows you're in control, as in the saying, "She's got a good grip on
Canopy Tour & Aerial Adventure Course Selection Guide
 Canopy Tour & Aerial Adventure Course Selection Guide The Adventure Network offers a wide range of Canopy Tour and Aerial Adventure Course options for any size program. Whether your goal is to create a
The Mendip Way. Route Directions and Maps Uphill to Wells
 The Mendip Way Route Directions and Maps Uphill to Wells Website: www.mendiphillsaonb.org.uk Email: mendip@mendiphillsaonb.org.uk Facebook & Twitter: @MendipHillsAONB Phone: 01761462338 1 Uphill to Loxton
Girrakool to Wondabyne station
 Girrakool to Wondabyne station 4 hrs Hard track 9.5 km One way 4 438m This walk starts from the Girrakool picnic area and winds south, through the Brisbane Waters National Park. The walk crosses some long
Slad over to Pitchcombe and back
 The walk climbs up from Slad over Wickridge Hill, descends to near Pitchcombe, then climbs back over Wickridge hill and round the back of Slad. Page 1 Start Point: SO 8718 0732 The Woolpack, Slad Length:
Materials Selection Assignment
 PDES1155 Materials Technology Materials Selection Assignment Ice Axe James Higson 12/4/2012 Description and Design Requirements HEAD TIP SHAFT Classic (Walking) Ice Axe 1 Page 1 Climbing Ice Axe 2 The
Leura Cascades to Gordon Falls Reserve
 Leura Cascades to Gordon Falls Reserve 1 hr 15 mins 1.8 km One way Moderate track 200m From Leura Park to Gordon Falls Park, this diverse walk offers fantastic views of the Jamison Valley, as well as two
Self-Guided Walk Malham, Gordale and Malham Tarn
 Self-Guided Walk Malham, Gordale and Malham Tarn Combine all the major geological attractions of Malham in this walk and hopefully leave enough time to enjoy the cafes, pubs and shops of the village. Malham
Trephina Gorge is one of the many sights to see along the way. Photo: Bob West.
 If you re heading from Mt Isa to Alice Springs on a road trip, you can maximise your trip to see the most that Australia has to offer by taking the scenic route down the Plenty highway. Here are all the
McKenzie Pond, New York This guide book originally came into existance merely as a means to make discussing the bouldering here easier. It was not int
 M c K e n z i e b o u l d e r i n g P o n d g u i d e a l s o k i P p Y g R o o V e R k i D d o s u a V e McKenzie Pond, New York This guide book originally came into existance merely as a means to make
Axes. The information below will assist the Scout in obtaining their Forester badge.
 Axes The information below will assist the Scout in obtaining their Forester badge. Axes can come in different shapes and sizes, the two axes that are of most relevance to any Scout Troop will be the HANDAXE
Grizzly Peak A - East Ridge July 15, 2012
 Grizzly Peak A - East Ridge July 15, 2012 Difficulty: Difficult Class 2/Class 3 Upper Elevation: 13,995 feet Trailhead Elevation: 11,360 feet Elevation Gain: 3,000 feet Round-trip Length: 6.0 miles Trailhead:
The characters in the story
 Milly Hannah, her mother The characters in the story Ed and Lizzie Halford, of Caves House THE GUESTS: Adrian Bennett Susan Bennett Clive Penny Brett Anne Damian Charles Two other guests THE ACTORS: Caroline,
Battleship Beach. About 500m. Portland Heights Hotel. The George. Blacknor Fort p.56. Easton. Weston. Blacknor Beach p.60 GPS
 78 79 Blacknor Fort p.56 Blacknor Beach p.60 p.80 The George Reap Ln Weston Southwell Weston Rd Wide St Portland Heights Hotel Easton GPS 50.534080-2.449243 Wes ton St About 500m scan for map is typified
CWMGIEDD FROM ABERCRAVE
 Abercrave to Cwmgiedd Walk Page 1 Starting from The Abercrave Inn. Grid Ref: SN 824128 From the Abercrave Inn, an 11.3km (7 miles) walk to the foothills of the Cribarth Mountain, then through forest to
TUPPER DESIGNATED ACCESS ROUTE
 TUPPER DESIGNATED ACCESS ROUTE 1 FOR ACCESS/EGRESS TO CONNAUGHT, LOOKOUT, STONE ARCH, PORTAL PATHS AND TUPPER TRAVERSE EGRESS Length: 2.6km Vertical Gain: +162m / -83m (Values are for access. For egress,
Kirigalpoththa Nature Trail Horton Plains National Park
 Kirigalpoththa Nature Trail Horton Plains National Park Trail Difficulty: Easy Moderate Strenuous Tough Trail Head: Horton Plains Visitor Centre Nearest Town: Pattipola Nearest City: Nanu-Oya Access to
Berowra Waters to Cowan Station
 Berowra Waters to Cowan Station 3 hrs 30 mins 7.2 km One way Hard track 597m This is a hilly walk out of the beautiful Berowra Waters valley to Cowan Station. There are many wide views across Berowra Creek
Dnigi Hut. Dnigi is Dnaina for Moose. Location:
 Dnigi Hut in places. Stay on the main thoroughfare. Continue along the ridge top, going east to a pass above Knob Creek. Just beyond here look for a left turn which descends north-northwest (61,45.578,-148,52.414,2081
COSTA BLANCA MOUNTAIN WALKERS - WALK DESCRIPTION. Visit for more walks descriptions in Spain
 COSTA BLANCA MOUNTAIN WALKERS - WALK DESCRIPTION Visit www.walksinspain.org for more walks descriptions in Spain Walk description originally prepared by:- Ralph Phipps Last Updated 25th Sep 2015 Title
Cratcliffe Robin Hood s Stride Eagle Tor Rowtor Rocks Stanton Moor Harthill and more 5: The Cratcliffe Area
 No times observed, nor charitable lawes, The poor receive their answer from the dawes, Who, in their crawling language, call it plaine, Mock-beggar Manour, for they come in vaine. Taylor: Works from A
6 DAYS MACHAME ROUTES ON KILIMANJARO
 6 DAYS MACHAME ROUTES ON KILIMANJARO Day 1: Moshi Machame camp In the morning, we depart from our base hotel at approximately 8:00 AM for the Machame village where you begin the trek. From the park entrance