THE WORLD OF ZODIAC. To find out more information call us on 0860 ZODIAC ( ) or log onto
|
|
|
- Lucas Ryan
- 5 years ago
- Views:
Transcription


1
2 THE WORLD OF ZODIAC Zodiac, Mastering the Elements Renowned worldwide for the quality and reliability of its products in the global swimming pool industry, Zodiac is proud to be the market leader here in South Africa too. Zodiac, Success through Innovation One of the keys to Zodiac s success is its continuous presence on the leading edge of innovation and technology. This enables Zodiac to offer products that are efficient, safe, and compliant with the strictest standards and certification requirements. Numerous patents are the result of R&D programs focusing on quality and performance. Zodiac, Peace of Mind Zodiac strives to offer consumers superior quality products and service excellence. With dedicated staff throughout South Africa, you can be certain of premium after-sales service. Should you require assistance on your Zodiac product, need to locate a dealer near you or just wish to find out more information, log onto our website or call our toll free line. To find out more information call us on 0860 ZODIAC ( ) or log onto IMPORTANT INFORMATION PLEASE READ THIS INFORMATION BEFORE INSTALLATION. ALWAYS READ THE OWNERS MANUAL BEFORE USING. PLEASE SEND US YOUR WARRANTY CARD TO ENSURE YOUR WARRANTY IS REGISTERED AND RETAIN YOUR PROOF OF PURCHASE IN THE UNLIKELY EVENT OF FUTURE WARRANTY CLAIMS.
3 INDEX IntRODUCTION 4 section 1 installation 5 Preparing your pool 5 Assembling the Hoses 6 Assembling the Hose Protector 7 Adjustable Deflector Wheel 8 section 2 CORRECT SETTINGS 9 Correct Balancing 9 Pool Coverage 9 Auto Weir Valve 10 section 3 Care and maintenance 11 section 4 parts Identification 16 section 5 troubleshooting 17 section 6 Optional accessories 20 section 7 The Perfect partner for your 21 Baracuda t5 duo section 8 Getting to know you better 22 section 9 At your service 23 3
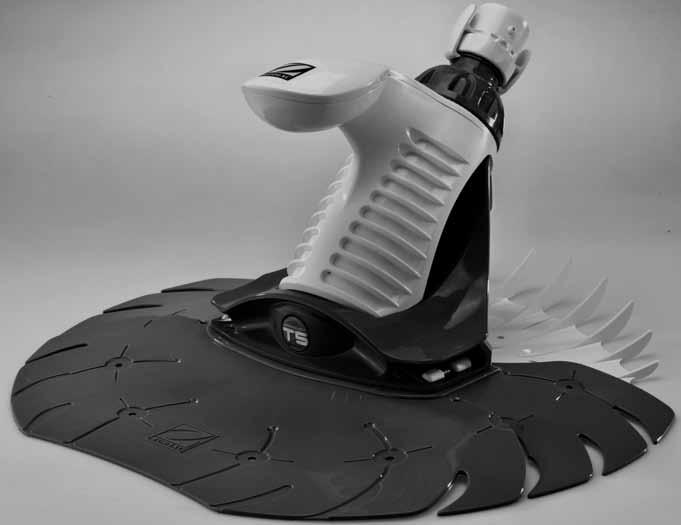
4 Introduction Dear Customer, Thank you for purchasing a BARACUDA T5 DUO. It is through customers such as you that our position as worldwide market leader in pool care remains unchallenged. At Zodiac, we are constantly striving to bring the latest innovation and technology to your pool via our range of products. The BARACUDA T5 DUO is the latest in this long line of pool care solutions. Its innovative Duralife Diaphragm System sucks up dirt, debris, bugs, leaves and even pebbles. Your BARACUDA T5 DUO has a Patented Duo Disc that optimises the collection of all dirt, debris and leaves in your pool. Your BARACUDA T5 DUO will quickly and quietly clean any average pool. In the event of requiring under-warranty repairs, please take your BARACUDA T5 DUO to your closest pool shop, or alternatively please phone our Customer Care Helpline 0860 ZODIAC ( ) and we will direct you to the ZODIAC warranty agent nearest to you. THE CONTENTS IN YOUR BARACUDA T5 DUO BOX ARE AS FOLLOWS: One BARACUDA T5 DUO Pool Cleaner 7 x 1.2m of Long-Life Twist Lock Hose One Adjustable Deflector Wheel One C-Clip Hose Weight One Quick Connector One Auto Weir Valve with 90 Elbow One Hose Protector One Warranty Card One Instruction Manual One Installation and Troubleshooting DVD This Pool Cleaner has several patents pending. Baracuda and T5 Duo are Registered Trade Marks of ZODIAC Pool Care South Africa (Pty) Ltd. Specifications and equipment subject to change without prior notice. 4
5 section 1 installation While the Baracuda T5 Duo is designed for easy installation, some preliminary steps will assist the installation process. Where possible, assembly should take place as close to the weir as possible. Preparing your pool and filtration system 1) Empty the weir basket. 2) Clean the pump basket. 3) Backwash and rinse the filter until the sight glass is clear. 4) Adjust all return jets (whether your pool has one, two or more) to point downwards and towards the center of the pool so that you DO NOT see a circular water flow or ripples on the surface of your pool. 5) Ensure your water chemistry is correct. See page 11 or below for more on this. Free Chlorine ph Total Alkalinity (ppm) Calcium Hardness (ppm) Cyanuric Acid (ppm) South African Standard 1 3 ppm Ideal reading/range 1 3 ppm * When using chemicals, always follow manufacturers directions and follow the advice of your pool professional. Always use protective clothing, gloves and glasses. Store and use chemicals out of the reach of children. 5
6 section 1 installation ASSEMBLING THE HOSEs With your swimming pool preparation complete, you are ready to begin installation. Switch your pool pump off. Your Quick Connector should already be connected to the cleaner head when received in the packaging. Remove this part from your cleaner and begin the following steps. 1. Connect the first length of hose to the Quick Connector and twist until it locks into place. 2. Push the Quick Connector with hose onto the head of the cleaner until you hear a click Step 1 Step 2 3. Insert your cleaner and first length of hose into your pool. Insert the male cuff into the female cuff and twist until the two lock together. The hoses must connect fairly tightly and setting 1 or 2 is recommended on the ratchet system. Continue attaching hose lengths until you reach the required length of your pool, submerging each hose length as you go. Use enough hose sections to reach the farthest point of the pool, and then add another section as shown in the diagram. The hose is now ready to be attached to the fittings in the weir. Note: Ensure only genuine Zodiac Twist Lock Hoses are used for optimum performance. Weir Weir 6
7 section 1 installation ASSEMBLING THE HOSE PROTECTOR With your swimming pool preparation complete, you are ready to begin installation. Switch your pool pump off. 1. Place the hose into one half of the Hose Protector. 2. Place the other half of the Hose Protector over the hose ensuring that the male clips line with the female clips. 3. Apply pressure to both halves of the Hose Protector until both pieces clip into place. Positioning THE HOSE PROTECTOR The ideal position to fit the Hose Protector is directly after the hose cuff. To Automatic Pool Cleaner (APC) Note: If the hose is connected directly to the Automatic Weir Valve (not advised), position the Hose Protector approximately 10cm from the hose cuff. IMPORTANT: Please note that the Hose Protector must be fitted to the section of the hose connected to the 90º Elbow or Automatic Weir Valve (i.e. furthest away from the APC). 7
8 section 1 installation Adjustable Deflector Wheel The Adjustable Deflector Wheel can be used to help direct the Baracuda T5 Duo away from steps and other obstacles in the pool. If you find your unit is getting stuck try using the Adjustable Deflector Wheel which is included in the box. To add this, disconnect the first hose length from the cleaner head. Slide the Deflector Wheel over the first hose length and clip the wheel onto the hose. Make sure the Adjustable Deflector Wheel is in the right position on the hose to deflect the cleaner head away from the difficult areas. It may take you some time to determine where the best position for your Deflector Wheel will be. For larger steps the deflector wheel should be further away from the cleaner head, and closer to the cleaner head for smaller steps. Connect the Cleaner 1. Submerge the cleaner and flood it with water. 2. When bubbles stop coming out of the Extension Pipe, connect the hose to the cleaner by pushing the Quick Connector onto the Outer Extension pipe until it locks into position. 3. Allow the cleaner to drift to the bottom of the pool. Installation is complete. Turn on the pool pump and begin cleaning. 8
9 section 2 Correct settings Correct balancing The Baracuda T5 Duo cycles on/off with the pool filtration pump vacuuming and cleaning surfaces randomly throughout the pool. The coverage of the cleaner is dependent on the pool s shape and available water flow. The main purpose of your Hose Weight is to adjust your cleaners balance which is vital for its performance. A properly balanced hose will create a 45º angle to the cleaner and the bottom of the pool. Make sure your disk is flat in the deepest part of the pool for correct balance. Incorrect Correct Balance Incorrect POOL COVERAGE While the return line water flow should not affect the natural movement of the hose, there are occasions where it can be beneficial. Return line pressure can be used to balance cleaning coverage, and guide the cleaner away from steps and corners. A return line located anywhere along the shaded area, can gently push the hose allowing the unit to free itself from any in-pool obstacles. 9
10 section 2 Correct settings AUto weir valve The Zodiac Auto Weir Valve is preset at the factory to obtain maximum pool cleaning efficiency. Your Baracuda T5 Duo is preset on setting 2. However, if you do experience difficulties, it can be manually adjusted to one of the three settings (high, medium or low - see Adjustment Settings below) Adjustment Settings You will only need to adjust the Auto Weir Valve if the following occurs Your Baracuda T5 Duo Pool Cleaner is performing too fast and/or climbing above the level of water. Your Baracuda T5 Duo Pool Cleaner is performing slowly and/or not climbing the pool walls. 10
11 section 3 CARE AND Maintenance Sunlight, water and pool chemicals create a harsh environment. With care and regular maintenance your Baracuda T5 Duo will remain in the best possible condition. To properly care for your unit: 1. Remove the Baracuda T5 Duo from the pool before shock treatment and reinstall at least four hours later. 2. The weir basket, pump basket, cartridge, sand filter (which ever is applicable) should be thoroughly cleaned on a regular basis to ensure optimum pool cleaner efficiency. 3. Before backwashing your filter, always disconnect the hose from the weir. 4. Never coil the hose and always store the hose straight. Note: Your pool cleaner will discolour over time, but this will not change the performance of the unit. 5. Large foreign objects, such as toys and branches should be removed manually from the pool cleaner. correct incorrect Zodiac recommends the following water chemistry readings for optimal performance of any pool equipment. South African Standard Ideal reading/range Free Chlorine ph Total Alkalinity (ppm) Calcium Hardness (ppm) Cyanuric Acid (ppm) 1 3 ppm ppm * When using chemicals, always follow manufacturers directions and follow the advice of your pool professional. Always use protective clothing, gloves and glasses. Store and use chemicals out of the reach of children. 11
12 section 3 CARE AND MAINTeNaNCE Clearing large debris from the Diaphragm If the cleaner stops, turn off the suction pump for the cleaner, remove the cleaner from the water, and then check the Diaphragm for blockages. 1. Turn cleaner over (see Figure 1). 2. Inspect Diaphragm for blockages. If you find debris or obstacles, remove carefully or access the Diaphragm. If not blocked, check the Diaphragm for wear or damage. Figure 1 To access or remove the diaphragm: 1. Unthread the Handnut by turning it anti-clockwise (see Figure 2). 2. Set the Handnut aside. Remove Engine Assembly, and Upper Thrust Washer from the body (see Figure 3). Figure 2 3. Set aside the Upper Thrust Washer. Note: Please note how the Thrust Washer is fitted as it needs to be replaced in the same way. Figure 3 Handnut Upper Thrust Washer Outer Extension Pipe 12
13 section 3 CARE AND MAINTeNaNCE 4. Unthread the Outer Extension Pipe from the Cup Assembly and separate Outer Extension Pipe from Inner Extension Pipe. (see Figure 4). Figure 4 5. Use a breaking action to separate the Inner Extension Pipe from the Cup Assembly. Once separation is achieved, push the Diaphragm through the Cup Assembly (see Figure 5). Outer Extension Pipe Cup Assembly Figure 5 6. Inspect the Diaphragm for wear and rinse it thoroughly with water. Replace it if necessary. Notch Tab To reinstall diaphragm: 1. Attach Diaphragm to Inner Extension pipe. Figure 6 Cup Assembly 2. Insert Inner Extension Pipe and Diaphragm into Cup Assembly. Align Diaphragm tabs with notches and pull straight through (do not twist) until the edge of the Diaphragm is visible (see Figures 6 and 7). Edge of Diaphragm Ensure the Diaphragm is flush with Cup Assembly Figure 7 Handnut Upper Thrust Washer 3. Thread on the Outer Extension Pipe and slide the Thrust Washer over the Outer Extension Pipe (see Figure 8). Outer Extension Pipe Figure 8 13
14 section 3 CARE AND MAINTeNaNCE 4. Remember to replace the Thrust Washer in the same way you removed it. The thicker edge must slide on first. This step is extremely important to ensure the Engine Assembly swivels freely. 5. Insert the engine into the body and thread the handnut down until tight (see Figure 9). Figure 9 6. Make sure the Extension Pipe swivels freely by spinning it (see Figure 10). Figure 10 Resetting the diaphragm: After several years of use you may find that the Diaphragm is stretched, and the cleaner will work very slowly or not at all. This doesn t mean you need to necessarily purchase a new Diaphragm, as by resetting the Diaphragm you can prolong the life of your Diaphragm. In order to do this, follow these steps. Please note: If the Diaphragm is torn, a new Diaphragm needs to be purchased. Stretched Diaphragm 14
15 section 3 CARE AND MAINTeNaNCE Outer Cup Inner Cup 1: Follow the above steps of removing the engine assembly from your pool cleaner (see Page 9). 2: Unthread the Outer Extension Pipe from the Cup Assembly. 3. On the inner cup of the Cup Assembly you will see a number 2. The arrow on the outer cup will point to this. Grip both outer cup and inner cup tightly and turn inner cup anti-clockwise to unlock (see Figure 11). 4. Wiggle and pull inner cup slightly out until a new line appears with number 1 on it(see Figure 12). Outer Cup Outer Cup Figure 11 Inner Cup Figure 12 Inner Cup 5. Turn inner cup clockwise until it locks. Only when you hear a click is the setting now locked on 1(see Figure 13). Check Diaphragm gap has closed and reassemble Engine Assembly as done before. Figure 13 15
16 section 4 Parts Identification No. Description Qty 1 Engine Assembly Complete 1 2 Hand Nut 1 3 Thrust Washer 1 4 Cap 1 5 Float 1 6 Cover 1 7 Outer Extension Pipe 1 8 Cup Assembly 1 9 Inner Extension Pipe Tube 1 10 Duralife Diaphragm 1 11 Body Bottom 1 12 Skid Plate 1 13 Front Disc 1 14 Rear Disc 1 15 Foot Pads 2 16 Auto Weir Valve 1 17 Quick Connector 1 18 Twist Lock Hose (1.2 metre) Degree Elbow 1 20 Hose Weight 1 21 Adjustable Deflector Wheel 1 16
17 section 5 TROUBLESHOOTING PROBLEM CHecks Solutions Your BARACUDA T5 DUO works slowly, runs then stops, or not at all. Your BARACUDA T5 DUO is working slowly and air bubbles are noticeable at the return jet Is the filter clean? Are the baskets clean? Is the vacuum lid sitting flush in the weir? Is the vacuum lid damaged? Are the Auto Weir Valve and the hose secure? Is the Diaphragm operational? Is the Diaphragm installed correctly? Flow is too low? Is there a suction leak in the system? Is the Auto Weir Valve below the water level? Backwash and rinse the filter thoroughly. Remove baskets, clean thoroughly (baskets must be in good condition). Remove and re-install. Replace vacuum lid. Make sure that the connections are sealed. Ensure the Diaphragm is not twisted or broken. Make sure the edge of the diaphragm is pulled through the inside cup properly. Check for: 1) Broken hose section. 2) Debris stuck in hose. 3) A suction leak - leak in the system. 4) Plumbing valves not set correctly to give the cleaner enough flow. Possible problem areas: 1) Possible leak at pump lid. 2) Check the pump lid O-ring. 3) Possible leak in the hose. 4) Suction leak between weir and pump piping. Check level of water. 17
18 section 5 TROUBLESHOOTING PROBLEM CHecks Solutions 18
19 section 5 TROUBLESHOOTING PROBLEM CHecks Solutions Your BARACUDA T5 DUO coverage is poor. For example, the cleaner does not reach parts of the pool and leaves large uncleaned patches. Or the cleaner moves in the same pattern, such as in the figure 8. Your BARACUDA T5 DUO falls on its side Is the hose affected by the return flow? Are the hoses long enough? Hose weight location? Is the float damaged? Is the Engine Assembly swivelling freely? Adjust the return outlet towards the bottom of the pool to make sure the jet of water does not influence the direction of the hose. Add more sections of hose Move the hose weight 15cm toward or away from the cleaner head to change the balance. If this doesn t work, rather remove the hose weight. Remember a hose weight is usually only necessary in pools which are 2m or more deep. Return to your nearest pool store for checking Check the Diaphragm is flush with the motor housing.(see pg 10). Remove Engine Assembly from main body and rinse both body and engine assembly with water to flush out debris. For additional assistance contact our customer service department on 0860 ZODIAC ( ) 19
20 section 6 Optional Accessories 20
21 section 7 The perfect partner for your Baracuda t5 duo A Clearwater Salt Chlorinator from ZODIAC. Installing a Clearwater Salt Chlorinator in conjunction with having a BARACUDA T5 DUO is the effortless way to having a crystal clear pool all the time. Clearwater Salt Chlorinators offer both convenience and peace of mind. Clearwater technology means that you are assured of quality and product excellence. ZODIAC is by far the most widely chosen brand of Chlorinator available in South Africa today. Your purchase will ensure that you get the best of all worlds. Firstly, you will enjoy the convenience of a fully automatic product, which allows you to spend time relaxing at the poolside. Perfect for a modern-day lifestyle. You will also experience the fantastic soft feeling that only a salt chlorinated pool can offer. No more red eyes or itchy skin, just smiles all the way! A PowerFirst Heat Pump from ZODIAC. Extend your swimming season and get even more pleasure from your pool by installing a PowerFirst Heat Pump. This market leading range of Heat Pumps from Zodiac utilizes only the best components and materials, ensuring you total peace of mind and enjoyment of your pool. PowerFirst is not only the most energy efficient range of Heat Pumps available today, but also the most environmentally friendly. To find out which model and size fits your pool, contact your local ZODIAC dealer, or call the ZODIAC Customer Care Helpline 0860 ZODIAC ( ) or go to 21
22 section 8 Getting to know you better At ZODIAC, we strive to give our consumers superior quality products as well as service excellence. To help us improve, please spare a moment of your time and let us understand your needs a little better. Once you have filled in the following survey please fax a copy to (011) Title... Name & Surname... Address... Are you male or female?... Date of birth... How long have you owned your current pool? Do you own any other ZODIAC products? If so, which ones?... Which of our products would you like to own?... Describe how you feel about owning a pool (love it / hate it)?... Why did you choose to purchase a ZODIAC product?... Why did you choose to purchase your BARACUDA T5 DUO? Have you ever called our Call Centre?... If so, please rate it on a scale of Extremely poor 4. Good 2. Poor 5. Extremely good 3. Acceptable Would you like to register for Aquasense, our monthly communication filled with information, tips and trends on pool care? (If yes, state here and fill in your address above)... 22
23 section 9 At your service If you are having a problem you cannot solve, mail or fax us the following information, along with a sketch of your pool shape, indicating the location of all weirs, vacuum lines, inlets, stairs, ladders, spas, waterfalls etc, or other significant features. Briefly describe the problem in the space below. (Send a photocopy and retain this page for future use.) Mail to: ZODIAC Pool Care SA, Private Bag X127, Halfway House, 1685 or Fax to: (011) Your Name... Tel No.... Postal Address...Code... Serial Number... Purchased from... Date of Purchase.../.../... Pool Surface (Tick one): Plaster Vinyl Fibreglass Other If other, please stipulate... Pool Size (Litres)... Pump Size... Type of Filter (Tick one): Sand D.E. Cartridge Filter Size (or Model No.)... My pool looks like this Briefly describe the problem Customer Care Helpline 0860 ZODIAC ( ) 23
24 Zodiac Pool care South Africa (pty) ltd Private Bag X127 Halfway House 1685 Customer Care Helpline 0860 ZODIAC ( ) WARNING: In terms of Section 2 of the Import and Export Control Act of 1989 (Act 45 of 1983), it is illegal to export Automatic Pool Cleaners and parts thereof. Section 4 of the Act provides that anyone convicted of exporting Automatic Pool Cleaners and parts thereof may be sentenced to a 10 (ten) year term of imprisonment and a fine of R (forty thousand Rand).
A BETTER LIFE IMPORTANT INFORMATION PLEASE READ THIS INFORMATION BEFORE INSTALLATION. ALWAYS READ THE OWNER S MANUAL BEFORE USING THIS PRODUCT.
 1 A BETTER LIFE For over 100 years we have been motivated by innovation... and innovation has inspired our greatest successes. Every day we strive to supply the highest quality products... and constantly
A BETTER LIFE IMPORTANT INFORMATION
 OWNER S MANUAL A BETTER LIFE For over 100 years we have been motivated by innovation... and innovation has inspired our greatest successes. Every day we strive to supply the highest quality products...
Hide-A-Hose. Instruction Manual & Warranty Card
 Hide-A-Hose Instruction Manual & Warranty Card MASTERING THE ELEMENTS Renowned worldwide for the quality and reliability of its products in the aeronautical and marine sectors, Zodiac has now brought its
Instructional Booklet
 Instructional Booklet 936-894-3292 Thank you for choosing The Bathmaster! You are on your way to creating an unmatched bathing experience both for you and the lucky animal. The Bathmaster is designed to
Retractable Hose Reel
 Retractable Hose Reel installation and Operation Please read before use We recommend keeping these instructions for future reference Hose Reel must be mounted before use Keep the hose retracted when not
Installation Guide: Round Trampoline
 Trampolines & trampoline parts designed to survive in the harsh Oz climate. www.oztrampolines.com.au Installation Guide: Round Trampoline Safety Tips Here at Oz Trampolines we are passionate about your
AUTO REWIND HOSE REEL USER MANUAL
 AUTO REWIND HOSE REEL USER MANUAL Models: US3025 IMPORTANT: READ BEFORE USE AND KEEP FOR FUTURE REFERENCE Welcome to trouble-free watering at its best! The Hoselink Auto Rewind Hose Reel is manufactured
DIAMOND TECH INTERNATIONAL Innovations For Creativity DIAMOND LASER BAND SAW OPERATIONS MANUAL
 SPEEDSTER-XL INSTRUCTION MANUAL DIAMOND TECH INTERNATIONAL Innovations For Creativity SPEEDSTER-XL DIAMOND LASER BAND SAW OPERATIONS MANUAL SPEEDSTER-XL INSTRUCTION MANUAL - PAGE 1 Before You Begin Read
300 ft. 5/8 Hose wagon
 300 ft. 5/8 Hose wagon Model 95956 Assembly And Operation Instructions Due to continuing improvements, actual product may differ slightly from the product described herein. (Garden hose is not included).
Product instruction manual Ream Cutting Systems RE3943, RE3946, RE3947, RE3971, RE3952E
 Product instruction manual Ream Cutting Systems RE3943, RE3946, RE3947, RE3971, RE3952E The Trimfast Ream Cutters are reliable, high performance cutters that will give you the results you need quickly
TITAN Fuel Tanks. INSTALLATION INSTRUCTIONS G e n e r a t i o n V
 TITAN pt. no.: 02 0000 0128 Important: Please read these instructions carefully and completely before starting the installation. TITAN Fuel Tanks INSTALLATION INSTRUCTIONS G e n e r a t i o n V Extended
LBH18BPK. Instruction Sheet
 LBH18BPK Instruction Sheet Included: 1. Backpack (includes belt and pouch) 2. Bottle and Hose Attachment Assembly 3. 1 each disposable 1.5 gallon Chemical Storage Bag 4. 1 each 1.5 gallon Warm Water Cleanout
Installation Instructions
 THE COLLECTION by Installation Instructions 0 BIDET FITTING Thank you for selecting American-Standard...the benchmark of fine quality for over 00 years. To ensure that your installation proceeds smoothly--please
INSTALLATION GUIDELINES
 IMPORTANT: To ensure this product is installed properly, you must read and follow these guidelines. The owner/user of this product must keep this information for future reference. This product must be
Additional information on your JetVac Automatic Pool Cleaning System
 JetVac Automatic Pool Cleaners Additional information on your JetVac Automatic Pool Cleaning System Contents Page 1 Page 2 Page 3 Page 4 Page 5 Page 6 Page 7 Important information for installer and pool
Installation Guide. Single-Control Kitchen Sink Faucets
 Installation Guide Single-Control Kitchen Sink Faucets K-6352 K-6353 M product numbers are for Mexico (i.e. K-12345M) Los números de productos seguidos de M corresponden a México (Ej. K-12345M) Français,
Urea/Adblue Hose Reel
 www.scintex.com.au sales@scintex.com.au Model: SHR3408 Urea/Adblue Hose Reel Product Manual Specifications Spring driven drum: for automatic rewind. Locking ratchet: to maintain the desired length of hose
WIDESPREAD LAVATORY MODELS WITH HI-ARC SPOUT
 5951, 5961, 5981, 5983, 5993 SERIES MT122B INSTALLATION INSTRUCTIONS THESE INSTRUCTIONS MUST BE LEFT WITH HOMEOWNER WIDESPREAD LAVATORY MODELS WITH HI-ARC TRADITIONAL CROSS NOTE: Handle Inserts are not
Genesis. Side Burner Accessory Installation. Step 3. Step 1. Step 2. For use with Genesis Gas Barbecues Only
 Genesis Side Burner Accessory Installation For use with Genesis Gas Barbecues Only Step 1 WARNING: All gas controls and supply valves should be in the OFF position. You will need: Side burner assembly
B U I L T B Y P R O F E S S I O N A L S F O R P R O F E S S I O N A L S
 B U I L T B Y P R O F E S S I O N A L S F O R P R O F E S S I O N A L S HISTORY Chapin are world leaders in the manufacture of compressed air sprayers ever since the first US patented pump sprayer in 1902.
Oletto Single Handle Commercial Style Kitchen Faucet
 INSTALLATION MANUAL Oletto Single Handle Commercial Style Kitchen Faucet KPF-2631 www.kraususa.com I Toll Free: 1.800.775.0703 I 2017 Kraus USA Inc. I REV. November 20, 2017 Congratulations on the purchase
Tools. For safety and easy faucet replacement, San-Ei recommends the use of the following helpful tools:
 BW-0BH INSTALLATION INSTRUCTIONS SINGLE HANDLE Kitchen Faucet Tools For safety and easy faucet replacement, San-Ei recommends the use of the following helpful tools: SAFETY GLASSES PIPE WRENCH PLIERS CHANNEL
INSTALLATION INSTRUCTIONS TOWNSEND
 INSTALLATION INSTRUCTIONS TOWNSEND.00 DECK MOUNT BATH FILLER.0 Thank you for selecting American Standard... the benchmark of fine quality for over 00 years. To ensure that your installation proceeds smoothly-please
31 Series. Serie 31 Série 31. Two Handle Kitchen Faucet Grifo Con Dos Manijas Para Cocina Robinet De Cuisine À Avec Deux Poignées COMPANY
 31 Series Serie 31 Série 31 Two Handle Kitchen Faucet Grifo Con Dos Manijas Para Cocina Robinet De Cuisine À Avec Deux Poignées 05-06-08 EO7284A 32947-0100 Copyright 2008, Price Pfister, Inc. A COMPANY
Auto Rewind Hose Reel 10M / 20M / 30M Models
 Auto Rewind Hose Reel 10M / 20M / 30M Models Instruction Manual 10M / 20M / 30M Auto Rewind Hose Reel Installation, Hose Replacement and Troubleshooting Guide Product Codes: 1110H / 1120H / 1130H Models
PARTS LIST EXTRACTOR ACCESSORIES
 PARTS LIST EXTRACTOR ACCESSORIES 3 - JET WAND - 4097101 101 4097961 HANDLE ASSEMBLY - INCLUDES: 1 102 9121210 1/4-20 X 5/8 HEX BOLT 2 103 ---------- HANDLE CLAMP 1 104 9120920 1/4-20 HEX NUT 2 105 9120777
FISH CAT SCOUT OWNER S MANUAL
 FISH CAT SCOUT OWNER S MANUAL ALWAYS WEAR A COAST GUARD APPROVED FLOTATION DEVICE WHEN OPERATING THE FISH CAT SCOUT. Know the limits of your abilities and the limits of your equipment. Changes in air temperature
I N ST R UC T I ON MODELS 1612E, 1712E & 1712RE SLICERS. FORM Rev. B (10-97) 1712RE 701 S. RIDGE AVENUE TROY, OHIO 45374
 1712RE 701 S. RIDGE AVENUE TROY, OHIO 45374") I N ST R UC 1712E T I ON MODELS 1612E, 1712E & 1712RE SLICERS S ML-104546 ML-104547 ML-104548 1612E 1712E 1712RE 701 S. RIDGE AVENUE TROY, OHIO 45374 FORM 19238 Rev. B (10-97) TABLE OF CONTENTS GENERAL......................................................................
I N ST R UC 1712E T I ON MODELS 1612E, 1712E & 1712RE SLICERS S ML-104546 ML-104547 ML-104548 1612E 1712E 1712RE 701 S. RIDGE AVENUE TROY, OHIO 45374 FORM 19238 Rev. B (10-97) TABLE OF CONTENTS GENERAL......................................................................
Voice Mail: (815) Fax: (815) OWNERS MANUAL
 Fax: (815) OWNERS MANUAL") www.countryhomescampers.com Email: info@countryhomescampers.com Voice Mail: (815) 346 3337 Fax: (815) 346 3337 OWNERS MANUAL Introduction: Your Country Homes Camper has been engineered and built with a
www.countryhomescampers.com Email: info@countryhomescampers.com Voice Mail: (815) 346 3337 Fax: (815) 346 3337 OWNERS MANUAL Introduction: Your Country Homes Camper has been engineered and built with a
Contents. Introduction...3 Description...3. Pack Contents...4. Rada Heavy Duty EV Shower Fittings Right Angled Connector (RAC)...
...") SHOWER FITTINGS PRODUCT MANUAL IMPORTANT Installer: This manual is the property of the customer and must be retained with the product for maintenance and operational purposes. Contents Introduction...3
SHOWER FITTINGS PRODUCT MANUAL IMPORTANT Installer: This manual is the property of the customer and must be retained with the product for maintenance and operational purposes. Contents Introduction...3
accidents which arise due to non-observance of these instructions and the safety information herein. CAUTION:
 AUTO REWIND HOSE REEL Model: 7640 CALIFORNIA PROPOSITION 65 WARNING: You can create dust when you cut, sand, drill or grind materials such as wood, paint, metal, concrete, cement, or other masonry. This
Contents. AFTER SALES SUPPORT / KB-8085
 Contents 02 Introduction 03 General Information and Safety Instructions 05 Assembly and Parts List 07 Getting Started 08 Other Useful Information 10 Warranty Card Introduction 1 2 Congratulations! You
UNODOS + / FLOCDOS +
 Operation manual UNODOS+ / FLOCDOS+ (01-09) page 1 of 7 UNODOS + / FLOCDOS + Table of contents page 1. Technical description... 2 1.1 The function... 2 1.2 Technical details... 2 1.3 The dosing performance...
Model 698/ and Model in 1 Hose Reel Owner s Manual
 Model 698/694 200 and Model 706 100 4 in 1 Hose Reel Owner s Manual 698/694 706 VISIT OUR WEBSITE: WWW.LIBERTYGARDENPRODUCTS.COM OR CALL US TOLL FREE AT 1-866-820-5805 LIBERTY GARDEN PRODUCTS, INC. 500
Oletto Single Lever Commercial Style Kitchen Faucet
 INSTALLATION MANUAL Oletto Single Lever Commercial Style Kitchen Faucet KPF-2630 www.kraususa.com I toll free: 1.800.775.0703 I 2014-2015 Kraus USA Inc. I RV. March 30, 2017 Thank you for your purchase
NEWMAR SERVICE SCHOOL
 NEWMAR SERVICE SCHOOL TRAINING INFORMATION GUIDELINE FOR FEBRUARY 2013 OUR PRODUCTS: NOVA DUAL PITCH AWNING G-2000/ G-1500 2 P a g e G-2085 G-5000 3 P a g e G-LINKS 4 P a g e NOVA/ G-2000/ G-1500 BASIC
JARVIS. Model 70 Airsnip Air Powered Scissors
 Air Powered Scissors EQUIPMENT SELECTION... Ordering No. Airsnip Model 70... 4019009 Air Filter/Regulator/Lubricator.. 3022003 Balancer... 1350084 Power--Pak (250 PSI)... 4026016 TABLE OF CONTENTS... Page
FORM (Apr. 2006)
") 2212 Slcier MODEL 2212 SLICER MODEL 2212 ML-136132 701 S. RIDGE AVENUE TROY, OHIO 45374-0001 937 332-3000 www.hobartcorp.com FORM 35215 (Apr. 2006) Installation, Operation, and Care of MODEL 2212 Slicer
2212 Slcier MODEL 2212 SLICER MODEL 2212 ML-136132 701 S. RIDGE AVENUE TROY, OHIO 45374-0001 937 332-3000 www.hobartcorp.com FORM 35215 (Apr. 2006) Installation, Operation, and Care of MODEL 2212 Slicer
Crespo Single Lever Pull Down Kitchen Faucet
 INSTALLATION MANUAL Crespo Single Lever Pull own Kitchen aucet KP-2720 www.kraususa.com I toll free: 1.800.775.0703 I 2014-2015 Kraus USA Inc. I RV. August 25, 2015 Thank you for purchasing Kraus We would
Maintenance 45 Serie CAUTION. Before resetting your electronic card that displays an error code.
 29-10-2013 CAUTION Before resetting your electronic card that displays an error code. Error Code H Service the stove COMPLETELY as described in this manual. Check the chimney pipe. Error Code O Service
Important! Read all of these instructions before assembling or riding the glider. For questions or help please call Glide Bikes at
 Go Glider Manual Congratulations on your purchase of the Go Glider! Your glider is designed for years of nearly carefree use by your child. These instructions include how to set up your glider and maintenance
Advantage Plus TIM-3600 Series Reel
 Read the following precautions and instructions before you begin assembly or using. Failure to comply with these instructions could result in personal injury or property damage. Keep these instructions
SOLAR PANEL CLEANING SYSTEM
 SOLAR PANEL CLEANING SYSTEM SOLAR PANEL CLEANING SYSTEM Maintaining a clean surface on your solar panels is essential for optimum energy output. The ProCurve Solar system is designed to clean solar panels
Crystal Compact Housing and Winter Kit
 Crystal Compact Housing and Winter Kit Operating instructions Page 3 Installation instructions Page 6 To be kept in the vehicle! Sales and Service in UK and Eire: Truma (UK) Ltd. Truma House, Eastern Avenue,
30M AUTOMATIC HOSE REEL Professional Series INSTRUCTION MANUAL
 30M AUTOMATIC HOSE REEL Professional Series INSTRUCTION MANUAL 1. BEFORE USE Please read these instructions carefully Do not attempt to open the cover. Only specialized personnel who have been trained
Entry class K 2.98 M plus
 Entry class K 2.98 M plus All-rounder with induction motor and convenient handle for mobility. Compact for easy storage. Suitable for light soiling (e.g. garden furniture, bicycles, small areas). Ideal
30m Foot Pedal Hose Reel
 30m Foot Pedal Hose Reel MODEL NO. HRF-300 OPERATING INSTRUCTIONS 0609 SPECIFICATIONS - MODEL NO. HRF-300 Hose Length: 30m + 2 metres Hose Diameter: 12mm (1/2 ) Hose Material: PVC Working Pressure: 150psi
4A1-114/114KR & 4A1-2 MANUAL TENSIONERS
 M L. C O O N AL TO 4A1-114/114KR & 4A1-2 W W W.T R AD IT IO MANUAL TENSIONERS READ THESE INSTRUCTIONS CAREFULLY. FAILURE TO FOLLOW THESE INSTRUCTIONS CAN RESULT IN SEVERE PERSONAL INJURY. GENERAL SAFETY
Insruction manual Dukki
 Insruction manual Dukki Introduction Pg. 1 Product description Pg. 2 3 Assembly and disassembly Pg. 4 Installation and adjustment Pg. 5 12 Maintenance Pg. 13 Parts Pg. 14-17 INDEX 1. Introduction 1 2.
Gerjak Dear Customer, You will find below information that includes: Is the caravan rail in order? Is everything in place?
 Gerjak Dear Customer, We would like to wish you much pleasure with your new Gerjak product. We very much appreciate that you have chosen our product! Following are some hints and tips to give you pleasure
OWNER'S MANUAL AWNING EXTEND R TABLE OF CONTENTS
 OWNER'S MANUAL AWNING EXTEND R RV Before operating the awning, carefully review the Owner's Manual. The manual contains important safety information, detailed operating instructions, common maintenance
Written By: Arthur Shi
 ipad 5 LTE LCD Replacement Follow this guide to replace the LCD screen in an ipad 5 LTE. Written By: Arthur Shi ifixit CC BY-NC-SA www.ifixit.com Page 1 of 26 INTRODUCTION Use this guide to replace the
ROCKING HAMMOCK GD-600. Model GD-600. Retain This Manual for Reference OWNER'S MANUAL
 NOTE: Please read all instructions carefully before using this product ROCKING HAMMOCK Table of Contents Safety Notice GD-600 Hardware Pack Assembly Instruction Parts List Warranty Ordering Parts Model
Installation Instructions for Wall Mount, Deck Mount and Pre-rinse Faucets
 Installation Instructions for Wall Mount, Deck Mount and Pre-rinse Faucets SAVE FOR END USER ELKAY 2222 CAMDEN COURT OAK BROOK, IL 60523 USA WALL MOUNT ASSEMBLY General Instructions Turn off the water
Contents. Company Background FLOWSTOPPER Plugging Device Kit and Replacement Parts Key Features & Benefits... 4
 Contents Company Background... 2 FLOWSTOPPER Plugging Device Kit and Replacement Parts... 3 Key Features & Benefits... 4 Frequently Asked Questions... 5 Step by Step Instructions... 6 FLOWSTOPPER Warranty...
INSTRUCTION MANUAL ALEKO RETRACTABLE AWNING
 INSTRUCTION MANUAL for ALEKO RETRACTABLE AWNING www.alekoproducts.com FAILURE TO FOLLOW THESE INSTRUCTIONS MAY RESULT IN PERSONAL INJURY! 1 Important Safety Precautions WARNING NOTE: FOR PERSONAL SAFETY,
Therme storage water heater. Table of contents. Symbols used. Symbols used Symbol indicates a possible hazard. Installation instructions
 Therme storage water heater Table of contents Symbols used... 8 Installation instructions Water supply... 9 Choice of location... 9 Installation of the Therme... 9 Fitting the draining and venting valve...
Contents. Awnings USA - Full Protective Hood Manual Instructions ft 11" - 11ft 6" Awnings
 Awnings USA - Full Protective Hood Manual Instructions Contents Warning We recommend that two or more people are required to lift the awning into place. 4ft 11" - 11ft 6" Awnings 8 x Expansion bolts **
Operation, Cleaning & Maintenance. For Aluminium Secondary
 , Cleaning & Maintenance For Aluminium Secondary Contents Horizontal Sliders 3 Vertical Sliders - Non-Balanced 4 Vertical Sliders - Balanced 5 Vertical Sliders - Tilt Back 6-7 Lift Outs 8 Hinged Units
Getting Started Guide
 Getting Started Guide Assembly Instructions User Guide Table Top Maintenance Warranty Information (800) 445-4559 www.designingfire.com Fax: 651-305-6347 @designingfire.com #253915-2528907 Installers: Please
Color Light Streams Lighted Bubbler Spillway Pot (CLSDLP) Installation Manual
 Installation Manual") Color Light Streams Lighted Bubbler Spillway Pot (CLSDLP) Installation Manual 27.75 23.75 25.50 20.75 Specifications: 8-13 GPM 12-14 VAC only (Class 2 transformer required) 3W max. 100 ft. cord, conduit
Color Light Streams Lighted Bubbler Spillway Pot (CLSDLP) Installation Manual 27.75 23.75 25.50 20.75 Specifications: 8-13 GPM 12-14 VAC only (Class 2 transformer required) 3W max. 100 ft. cord, conduit
300 Model 870 Four Wheel Hose Cart Owner s Manual
 300 Model 870 Four Wheel Hose Cart Owner s Manual IMPORTANT: READ THE OWNER S MANUAL BEFORE ASSEMBLING TOOLS REQUIRED: TWO ADJUSTABLE WRENCHES; HAND PUMP Estimated assembly time: 30 minutes PARTS LIST
TUBULAR BURNER CONVERSION KIT AGCK-TBXX / AECK-UBXX
 TUBULAR BURNER CONVERSION KIT AGCK-TBXX / AECK-UBXX IMPORTANT - READ ALL INSTRUCTIONS BEFORE YOU BEGIN THE INSTRUCTIONS HEREIN SHOULD BE PERFORMED BY A QUALIFIED SERVICE TECHNICIAN. THE GRILL MUST BE COMPLETELY
Compass Home 8' x 8' No Tools Gazebo with Awning and Anchor Bags Assembly Instruction for Gazebo (no tools required)
") Compass Home 8' x 8' No Tools Gazebo with Awning and Anchor Bags Assembly Instruction for Gazebo (no tools required) CAUTION: Read all instructions before assembly. Failure to do so may result in faulty
Compass Home 8' x 8' No Tools Gazebo with Awning and Anchor Bags Assembly Instruction for Gazebo (no tools required) CAUTION: Read all instructions before assembly. Failure to do so may result in faulty
Geotech Portable Bladder Pumps Installation and Operation Manual
 Geotech Portable Bladder Pumps Installation and Operation Manual Rev. 6/25/2010 Part # 11150272 Table of Contents SYSTEM DESCRIPTION... P. 02 FUNCTION AND THEORY...P. 02 SYSTEM COMPONENTS...P. 02 SYSTEM
Gas Go Anywhere /23/01
 Gas Go Anywhere 55014 02/23/01 FOR OUTDOOR USE ONLY This grill does not include an LP fuel tank. Check Package Contents You should have received the parts listed below. While we give much attention to
ipad mini 4 Wi-Fi Volume Control Buttons Replacement
 ipad mini 4 Wi-Fi Volume Control Buttons Replacement Replace the volume control buttons in an ipad mini 4 Wi-Fi. Written By: Evan Noronha ifixit CC BY-NC-SA www.ifixit.com Page 1 of 21 INTRODUCTION Use
PIONEER LITE PATIO AWNING OWNER'S MANUAL
 A Manual Crank Operated Awning RV OWNER'S MANUAL TABLE OF CONTENTS Introduction... 2 Operating the Awning... 3 To Open the Awning:... 3 Adjusting the Pitch... 4 Rain Release Setting... 4 Setting the Arms
Written By: Sam Lionheart
 ipad Air Wi-Fi LCD Replacement Use this guide to replace the LCD screen in your ipad Air. Written By: Sam Lionheart ifixit CC BY-NC-SA www.ifixit.com Page 1 of 27 INTRODUCTION Replace a damaged or nonfunctioning
STEALTH PRO OWNER S MANUAL
 STEALTH PRO OWNER S MANUAL ALWAYS WEAR A COAST GUARD APPROVED FLOTATION DEVICE WHEN OPERATING THE STEALTH PRO. Know the limits of your abilities and the limits of your equipment. Changes in air temperature
BERYL Service Guide. Travel Adjust OTT Change
 BERYL Service Guide Travel Adjust OTT Change SERVICE OVERVIEW This manual will guide you step by step performing a travel adjust and OTT setting change to your Beryl suspension fork. Please follow each
CHANGING YOUR LANDSCAPE SINCE 1945 OWNER S MANUAL. Tow Hitch Replacement Kit For Rough Cut Trailcutters. Starting Serial # L
 CHANGING YOUR LANDSCAPE SINCE 1945 OWNER S MANUAL Tow Hitch Replacement Kit For Rough Cut Trailcutters 21100 Starting Serial # L118-023001 Tools Required: Wrench/Socket Qty. Size (1) 1-1/8 (1) 1-1/16 (2)
1612P MODEL 1612P SLICER MODEL EXECUTIVE OFFICES 701 RIDGE AVENUE TROY, OHIO FORM (4-95)
") 1612P MODEL 1612P SLICER MODEL 1612P ML-104587 EXECUTIVE OFFICES 701 RIDGE AVENUE TROY, OHIO 45374-0001 FORM 19370 (4-95) Installation, Operation, and Care of MODEL 1612P SLICER SAVE THESE INSTRUCTIONS
1612P MODEL 1612P SLICER MODEL 1612P ML-104587 EXECUTIVE OFFICES 701 RIDGE AVENUE TROY, OHIO 45374-0001 FORM 19370 (4-95) Installation, Operation, and Care of MODEL 1612P SLICER SAVE THESE INSTRUCTIONS
MYRIAD Banner Stand is a trademark of Skyline Exhibits. Patent Pending PN32294-B. MYRIAD Banner Stand
 is a trademark of Skyline Exhibits Patent Pending 1.1 1. Banner Stand Setup 1.1 Remove banner stand from standard case or Arrive Portable Display & Workstation and assemble pole. 1.2 Insert pole into base
Mateo Single Lever Pull Out Kitchen Faucet
 INSTALLATION MANUAL Mateo Single Lever Pull Out Kitchen aucet KP-2610 www.kraususa.com I toll free: 1.800.775.0703 I 2014-2015 Kraus USA Inc. I RV. August 26, 2015 Thank you for purchasing Kraus We would
Emergency Management Portable Water System Set-up and Operations Manual
 Emergency Management Portable Water System Set-up and Operations Manual Emergency Management Portable Water System Set-up and Operations Manual WaterStep 2013-2 - Included in the Emergency Management Portable
Hose Reel Series L701/G701
 Hose Reel Series L70/G70.0 WARNING: Read carefully and understand all INSTRUCTIONS before operating. Failure to follow the safety rules and other basic safety precautions may result in serious personal
PARTS MANUAL. For AST and ATU Model Tuckunder Liftgates
 A N T H O N Y L I F T G A T E S, I N C. PARTS MANUAL For AST and ATU Model Tuckunder Liftgates MODELS AST-1500-SF AST-2000-SF AST-2500-SF AST-3000-SF ASTL-1800-SF ASTL-2500-SF ATU-1800-SF ATU-2500-SF ATU-3000-SF
Crystal Filter Housing
 Crystal Filter Housing Operating instructions Page 3 Installation instructions Page 6 To be kept in the vehicle! Sales and Service in UK and Eire: Truma (UK) Ltd. Beeches Park, Eastern Avenue, Burton upon
BowDown. MiniMuM Crossbar spread 24 (61CM) Steel Hook (2X) Buckle Strap (2X) Plastic Tube (2X) Plain Strap (2X) SHORT BLACK T-BOLT (2x) BOWDOWN (2x)
 Steel Hook (2X) Buckle Strap (2X) Plastic Tube (2X) Plain Strap (2X) SHORT BLACK T-BOLT (2x) BOWDOWN (2x)") BowDown MiniMuM Crossbar spread 24 (61CM) Heavy Duty strap (2x) SHORT BLACK T-BOLT (2x) BOWDOWN (2x) Bow Stern Tie Down Buckle Strap (2X) Plastic Tube (2X) Plain Strap (2X) Steel Hook (2X) IMPORTANT WARNING
BowDown MiniMuM Crossbar spread 24 (61CM) Heavy Duty strap (2x) SHORT BLACK T-BOLT (2x) BOWDOWN (2x) Bow Stern Tie Down Buckle Strap (2X) Plastic Tube (2X) Plain Strap (2X) Steel Hook (2X) IMPORTANT WARNING
HISTORY. 9 Wellsford Drive, Bendigo, Vic., 3550 Ph: (03) Fax: (03)
 Fax: (03)") HISTORY Spoutvac Industries Pty Ltd began in October 1987 as Australia s first major manufacturer of Industrial Vacuum & Water Jetting Systems. Spoutvac is today recognised as a leader in the applications
HISTORY Spoutvac Industries Pty Ltd began in October 1987 as Australia s first major manufacturer of Industrial Vacuum & Water Jetting Systems. Spoutvac is today recognised as a leader in the applications
INSTALLATION INSTRUCTIONS AND OWNER'S MANUAL AWNINGS. For trailers & motor homes with straight sides TOOLS REQUIRED
 AWNINGS INSTALLATION INSTRUCTIONS AND OWNER'S MANUAL For trailers & motor homes with straight sides TOOLS REQUIRED 1/4" electric drill Ratchet handle kit 3/8" & 7/16" socket No. 1 and No. 2 screwdriver
Operator's Manual. Model: RY10MK-PRO MPN: RA-MLT Gallon Direct Fire Melter Kettle Burner Model with Adjustable Flame-Out Valve
 Operator's Manual Model: RY10MK-PRO MPN: RA-MLT-0009 10 Gallon Direct Fire Melter Kettle Burner Model with Adjustable Flame-Out Valve U.S. Patent No. 9,739,021 For Technical Support Please Visit www.rynoworx.com
INSTRUCTIONS FOR MVK-NQM PILOT KIT
 MVK-NQM IMPORTANT READ AND UNDERSTAND THESE INSTRUCTIONS BEFORE INSTALLING These instructions must be used as a supplement to the instructions supplied with your gas log set. Follow the Gas Log Set instructions
RETRACTABLE HOSE REEL
 RETRACTABLE HOSE REEL 30 METRE HOSE LENGTH MODEL NO. YWRHR30A OPERATING INSTRUCTIONS INTRODUCTION - MODEL NO. YWRHR30A This reel is made of high-quality materials and parts, driven and released by a spring,
AUTO REWIND HOSE REEL WITH 50 FOOT HOSE. Model 46320
 AUTO REWIND HOSE REEL WITH 50 FOOT HOSE Model 46320 ASSEMBLY AND OPERATING INSTRUCTIONS 3491 Mission Oaks Blvd., Camarillo, CA 93011 Visit our Web site at http://www.harborfreight.com Copyright 2001 by
Blue Series Hot Melt Hose with RediFlext II Hanger System
 Instruction Sheet P/N 1124594_01 Blue Series Hot Melt Hose with RediFlext II Hanger System Safety WARNING! Allow only personnel with appropriate training and experience to operate or service the equipment.
VACATION'R A ROOM FOR VERTICAL ARM AWNINGS
 VACATION'R A ROOM FOR VERTICAL ARM AWNINGS RV Made of durable, lightweight polyester material - the same material used for tents. Does not require hardware that is attached to the RV. No rafters to install.
YAMAHA WINCH MOUNT KIT. Installation Instructions KIT NUMBER:
 YAMAHA WINCH MOUNT KIT Installation Instructions KIT NUMBER: 25-5160 CUSTOMER MUST RECEIVE A COPY OF THIS INSTRUCTION MANUAL AT TIME OF SALE 2005 CYCLE COUNTRY ACCESSORIES CORP. Rev. 2 9/22/06 Please Note:
Roller Bar End Cap (w/round Drive Shaft) Replacement Instructions for Vista and Motorized Awnings * Helpers needed *
 Replacement Instructions for Vista and Motorized Awnings * Helpers needed *") RETRACTABLE AWNINGS For Technical Support visit us at www.sunsetter.com/ownerscorner or Call Toll Free 800-670-7071 Fax 877-224-4944 Roller Bar End Cap (w/round Drive Shaft) Replacement Instructions for
RETRACTABLE AWNINGS For Technical Support visit us at www.sunsetter.com/ownerscorner or Call Toll Free 800-670-7071 Fax 877-224-4944 Roller Bar End Cap (w/round Drive Shaft) Replacement Instructions for
Perrin & Rowe Kitchen ROHL Pull-Out/Pull-Down COLORS/FINISHES. Polished Chrome Polished Nickel Satin Nickel English Bronze Inca Brass* 9 1/4
 PERRIN & ROWE TRADITIONAL PULL-DOWN FAUCET Perrin & Rowe Kitchen ROHL Pull-Out/Pull-Down U.4744 FEATURES Brass construction Metal lever CNC machined Dual spray with lock in modes 1 3/4 max installation
HAND HELD BALL VALVE & DETENT STYLE BALL VALVES
 HAND HELD BALL VALVE & DETENT STYLE BALL VALVES SERVICE PROCEDURE D SERIES J40 SERIES H-VO SERIES D00D SERIES J40 SERIES H-VO SERIES F00 SERIES H-VIT SERIES H-VO SERIES F SERIES F40 SERIES HVIT SERIES
PIONEER LITE PATIO AWNING
 A Manual Crank Operated Awning RV OWNER'S MANUAL Before operating the awning, carefully review the Owner's Manual. The manual contains important safety information, detailed operating instructions, common
INTRODUCTION. It is recommended that these instructions are read in conjunction with the torque wrench and pump operating instructions.
 HTWR1 HOSE REEL OPERATING Prepared by:rev NO:ECO:- Mark Dalley 1 4573 Approved by:- Martin Davies Date: 05/08/15 INTRODUCTION The Hi-Force HTWR1 hose reel is designed for torque wrench hose connection
Mandolin Slicer Quite possibly the safest mandolin in the world
 Mandolin Slicer Quite possibly the safest mandolin in the world MANDOLIN & COMPONENTS Handle Upper Plate Safe Hands Food Holder Non-Slip Retractable Leg Julianne Blades (3 sizes) Waffle / Crinkle Cut Blade
AFC-50 Automatic French Fry Cutter Instruction Manual
 AFC-50 Automatic French Fry Cutter Instruction Manual Fry Factory Inc. 67 Watts Ave, Charlottetown, PEI, C1E 2B7, Canada Phone: 902-368-2900 Fax: 902-368-8645 Email: info@fryfactoryinc.com Website: www.fryfactoryinc.com
Installation and User s Manual 12 x 10 MOTORIZED AWNING
 12 x 10 MOTORIZED AWNING Installation and User s Manual 12 x 10 MOTORIZED AWNING 088-1763-0 Stop Please read and understand this manual before any assembly or use of this product. Before beginning assembly
Contents. Introduction Technical description Adjusting your Goya The alternative methods of emergency parachute connection ...
 GOYA Contents Introduction... 3 Technical description... 3 Adjusting your Goya... 4 The alternative methods of emergency parachute connection... 6 Speed systém... 10 Towing... 10 Tandem flying... 10 Harness
ipad mini 4 Wi-Fi Display Assembly Replacement
 ipad mini 4 Wi-Fi Display Assembly Replacement Replace the display assembly, including the LCD screen, home button, and front glass digitizer in an ipad mini 4 Wi-Fi. Written By: Evan Noronha ifixit CC
get connected with Bradford fittings & valves Bradford Company, Inc
 get connected with Bradford fittings & valves Bradford Company, Inc. 800.789.1718 www.bradfordfittings.com Bradford your top quality, sanitary stainless steel fittings & valves manufacturer serving you