Formulate Designer Series 10 Backwall - Kit 02
|
|
|
- Ashlie Fisher
- 5 years ago
- Views:
Transcription


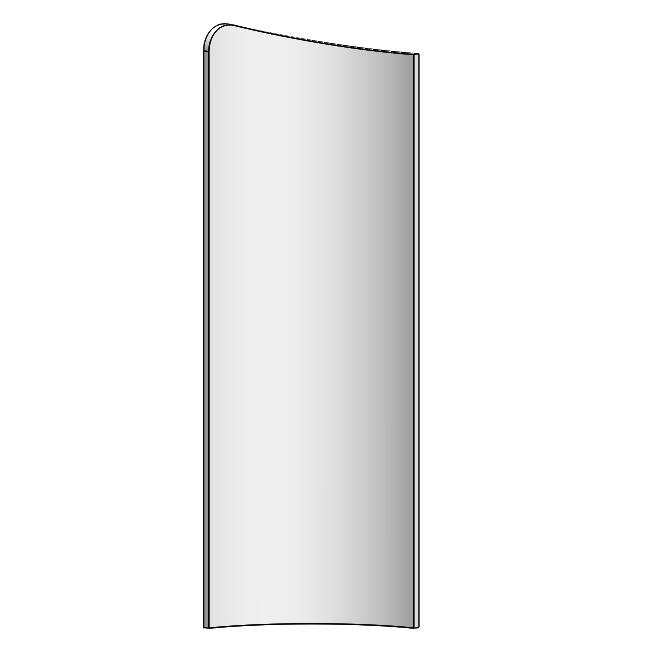
1 Formulate Designer Series 10 Backwall - Kit 02 FMLT-DS Formulate TM Designer Series 10ft displays have unique stylistic features and shapes, are portable and easy to assemble. The aluminum tube frame features snap-buttons and/ or spigot connections and zipper pillowcase fabric graphics. All displays come in portable, wheeled transit cases. Simply pull the pillowcase fabric graphic(s) over the frame and zip. features and benefits: - Premium aluminum tube frames with snap button/ spigot assembly - Easy to store and ship - Quick to set up - Weighted feet for added stability - Three zipper pillowcase fabric graphics - One Lumina 200 LED Light - Lifetime limited hardware warranty against manufacturer defects dimensions: Hardware Assembled unit: w x h x d mm(w) x mm(h) x mm(d) Approximate weight with cases: 66 lbs / 29.9 kgs Shipping Packing case(s): 1 OCE Case Shipping dimensions: w x h x d 425.5mm(w) x 1632mm(h) x 428.8mm(d) Approximate total shipping weight (includes cases & graphics): 79 lbs / 35.8 kgs Graphic Please be sure to include a 2 bleed around the perimeter. Refer to related graphic template for more information. Visit: graphic-templates additional information: Graphic material: dye-sublimation zipper pillowcase fabric We are continually improving and modifying our product range and reserve the right to vary the specifications without prior notice. All dimensions and weights quoted are approximate and we accept no responsibility for variance. E&OE. See Graphic Templates for graphic bleed specifications. 01/08/16 P. 1 of 7


2 Included In Your Kit Tools, Components, & Connectors ALLEN KEY SET x1 ES30 x14 LN114-SCRW x6 ES30-90B x6 STABILIZING BASE B-2 x2 STABILIZING BASE A x2 TC-30-A-90 x2 Graphics FMLT-DS A-G x1 FMLT-DS B-G x1 FMLT-DS C-G x1 P. 2 of 7
3 Included In Your Kit Tubes DS A-T1 x1 DS A-T2 x4 DS A-T3 x1 DS A-T4 x2 DS B-T1 x1 DS B-T2 x2 DS B-T3 x1 DS B-T4 x8 DS C-T1 x1 DS C-T2 x1 P. 3 of 7
4 PART CODE QTY DESCRIPTION DS A-T1 1 30MM STRAIGHT BOTTOM TUBE FOR FMLT DS A-T2 4 30MM STRAIGHT SIDE TUBE FOR FMLT DS A-T3 1 30MM STRAIGHT TOP TUBE FOR FMLT DS A-T MM CURVED CORNER TUBE FOR FMLT DS B-T1 1 30MM TOP CORNER FOR FMLT DS B-T2 2 30MM CURVED BOTTOM TUBE FOR FMLT DS B-T3 1 30MM CURVED TOP TUBE FOR FMLT DS B-T4 8 30MM STRAIGHT SIDE TUBE FOR FMLT DS C-T1 1 30MM CURVED TOP CORNER- RIGHT FOR FMLT DS C-T2 1 COPY OF DS B-T3 ES EXPANDING SPIGOT FOR 30MM TUBE ES30-90B 6 30MM CORNER CONNECTOR WITH M10 INSERT TC-30-A-90 2 TC-30-A ASSEMBLED AT 90 LN114-S LINEAR FOOT WITH COUNTERSUNK HOLES LN114-S3 2 LINEAR FOOT FOR TWO FRAMES, 450MM X 100MM X 5MM LN114-SCRW 6 M10X45MM SOCKET FLAT CAP SCREW, BLACK FINISH ALLOY STEEL DS A-G 1 FABRIC COVER FOR DS A DS B-G 1 FABRIC COVER FOR DS B DS C-G 1 FABRIC COVER FOR DS C P. 4 of 7
5 Labeling Diagram FRAME B FRAME A FRAME C OVERHEAD VIEW P. 5 of 7

6 Kit Assembly Step by Step Step 1. Locate the components neccessary for assembling Frame A. Assemble your frame in order according to the Labeling Diagram. Step 2. Locate the components neccessary for assembling Frame B. Assemble your frame in order according to the Labeling Diagram. Step 3. Locate the components neccessary for assembling Frame C. Assemble your frame in order according to the Labeling Diagram. Step 4. Fit graphic A onto Frame A. For ease of installation, pull the fabric cover over the top of the frame while the frame rests flat on the floor. Zip to enclose. Bottom Of Frame P. 6 of 7


7 Kit Assembly Step by Step Step 5. Fit graphic B onto Frame B. For ease of installation, pull the fabric cover over the top of the frame while the frame rests flat on the floor. Zip to enclose. Step 6. Fit graphic C onto Frame C. For ease of installation, pull the fabric cover over the top of the frame while the frame rests flat on the floor. Zip to enclose. Bottom Of Frame Bottom Of Frame Step 7. Locate both stabilizing Foot A assembles. Attach the feet on the left of Frame B and the Right of Frame C. Tighten the lock screw on the side of the ES30-90B to lock your feet into place. Step 8. Locate both stabilizing Foot B-2 assembles. Attach the feet on the left and right sides of frame A. Tighten in place using the lock screws. Connect frames A and C to the feet. Tighten the lock screw on the side of the ES30-90B to lock your feet into place. P. 7 of 7
Formulate Designer Series 10 Backwall - Kit 01
 Formulate Designer Series 10 Backwall - Kit 01 FMLT-DS-10-01 Formulate TM Designer Series 10ft displays have unique stylistic features and shapes, are portable and easy to assemble. The aluminum tube frame
Formulate Designer Series 10 Backwall - Kit 03
 Formulate Designer Series 10 Backwall - Kit 03 FMLT-DS-10-03 Formulate Designer Series 10ft displays have unique stylistic features and shapes, are portable and easy to assemble. The aluminum tube frame
Formulate Designer Series 10 Backwall - Kit 13
 Formulate Designer Series 10 Backwall - Kit 13 FMLT-DS-10-13 Formulate TM Designer Series 10ft displays have unique stylistic features and shapes, are portable and easy to assemble. The aluminum tube frame
Formulate Designer Series 10 Backwall - Kit 06
 Formulate Designer Series 10 Backwall - Kit 06 FMLT-DS-10-06 Formulate Designer Series 10ft displays have unique stylistic features and shapes, are portable and easy to assemble. The aluminum tube frame
Formulate Designer Series 10 Backwall - Kit 10
 Formulate Designer Series 10 Backwall - Kit 10 FMLT-DS-10-10 Formulate Designer Series 10ft displays have unique stylistic features and shapes, are portable and easy to assemble. The aluminum tube frame
FabLite Designer Series 10' Kit 12 - FL10-DS12
 FabLite Designer Series 10' Kit 12 - FL10-DS12 FL10-DS12 FabLite Designer Series 10ft displays have unique stylistic features and shapes, are portable and easy to assemble. The aluminum tube frame features
Formulate 10 Vertical Curve - Kit 11
 Formulate 10 Vertical Curve - Kit 11 FMLT-WV10-11 Formulate is a collection of sophisticated, ergonomically designed exhibit booths. Formulate combines state-of-the-art zipper pillowcase dye-sublimated
Formulate Master 10ft Straight 10ft Tall Fabric Backwall
 Formulate Master 10ft Straight 10ft Tall Fabric Backwall FMLT-WS1010 Formulate is a collection of sophisticated, ergonomically designed exhibit booths. Formulate combines state-of-the-art zipper pillowcase
TensionLite Plus 20 ft. S Shape Mural Wall Design 1
 TensionLite Plus 20 ft. S Shape Mural Wall Design 1 TensionLite is a collection of sophisticated, ergonomically designed exhibit booths. Formulate combines state-of-the-art zipper pillowcase dye-sublimated
Formulate 10 Straight - Kit 4
 Formulate 10 Straight - Kit 4 FMLT-WS10-04 Formulate TM is a collection of sophisticated, ergonomically designed exhibit booths. Formulate combines state-of-the-art zipper pillowcase dye-sublimated fabric
Formulate 10 Horizontal Curve - Kit 6
 Formulate 10 Horizontal Curve - Kit 6 FMLT-WH10-06 Formulate TM is a collection of sophisticated, ergonomically designed exhibit booths. Formulate combines state-of-the-art zipper pillowcase dye-sublimated
Formulate 10 Vertical Curve - Kit 5
 Formulate 10 Vertical Curve - Kit 5 FMLT-WV10-05 Formulate TM is a collection of sophisticated, ergonomically designed exhibit booths. Formulate combines state-of-the-art zipper pillowcase dye-sublimated
TensionLite Plus 10 ft. Wave Shape Mural Wall Design 2
 TensionLite Plus 10 ft. Wave Shape Mural Wall Design 2 TensionLite is a collection of sophisticated, ergonomically designed exhibit booths. Formulate combines state-of-the-art zipper pillowcase dye-sublimated
TensionLite Plus 10 ft. Wave Shape Mural Wall Design 5
 TensionLite Plus 10 ft. Wave Shape Mural Wall Design 5 TensionLite is a collection of sophisticated, ergonomically designed exhibit booths. Formulate combines state-of-the-art zipper pillowcase dye-sublimated
Tabletop Kit 01. features and benefits: dimensions: additional information:
 Tabletop Kit 01 TK-TTK-01 Make a statement with an easy-to-assemble tension fabric Hopup tabletop display with spotlights. A custom-printed stretch table throw that fits standard 6ft tables & a single-sided,
features and benefits: dimensions: Hardware Zoom Tent Assembled Unit: 115 w x h (per side) 2921mm(w) x mm(h)
 2921mm(w) x mm(h)") 10ft Outdoor Kit 04 TK-ODK-04 The Zoom 10ft square tent with custom printed canopy & two printed half-walls creates a semi-enclosed space. Two 13ft Zoom straight banners with ground spikes & double-sided
10ft Outdoor Kit 04 TK-ODK-04 The Zoom 10ft square tent with custom printed canopy & two printed half-walls creates a semi-enclosed space. Two 13ft Zoom straight banners with ground spikes & double-sided
10 Economy Popup Tent
 10 Economy Popup Tent ZM-TNT-ECO-3MX3M The Zoom Tent is great for outdoor fairs, exhibitions, sporting events and arenas, concerts, festivals and more. Strong, solid, stable, wind-resistant & durable.
Zoom 10 Standard Popup Tent
 Zoom 10 Standard Popup Tent ZM-TNT-STD-3MX3M The Zoom Tent is great for outdoor fairs, exhibitions, sporting events and arenas, concerts, festivals and more. Strong, solid, stable, wind-resistant & durable.
Icelock Ratchet 621 Icelock Lanyard 631 Icelock Valve 641 Icelock Smooth 651
 Extremely light-weight and low build height. Fabrication Tools make the weight fabrication process very effective Very strong and durable Socket Adapters rated up to 100kg (220lbs) and 166kg (365lbs) Easily
MYRIAD Banner Stand is a trademark of Skyline Exhibits. Patent Pending PN32294-B. MYRIAD Banner Stand
 is a trademark of Skyline Exhibits Patent Pending 1.1 1. Banner Stand Setup 1.1 Remove banner stand from standard case or Arrive Portable Display & Workstation and assemble pole. 1.2 Insert pole into base
W/ MAGNETIC TAPE ON FACE CENTER W/ MAGNETIC TAPE ON FACE CENTER W/ STEEL TAPE ON FACE BOTTOM L3-1 W/ STEEL TAPE ON FACE BOTTOM
 6 4 WITH CE 4 HALF UPRIGHT -1 1 & 5mm Hex key Tool Place vertical extrusion and lock horizontal extrusions by using 5mm hex key tool. W/ MAGNETIC TAPE W/ MAGNETIC TAPE / -2 /-1 HALF UPRIGHT Place horizontal
YOUR TRAVEL DISPLAY PORTABLE DISPLAYS YOU CAN TAKE ANYWHERE
 YOUR TRAVEL DISPLAY PORTABLE DISPLAYS YOU CAN TAKE ANYWHERE 10 Straight Billboard in a Bag by Brilliance $1,125.00 The Brilliance 10 straight Billboard-in-a-Bag has an ultra light weight aluminum alloy
ASSEMBLY INSTRUCTIONS
 ASSEMBLY INSTRUCTIONS NT-MG1158 58" Glass and Metal TV Stand Safety information and specifications...2 Tools needed...3 Parts...3 Hardware...4 Assembly instructions...5 Safety information and specifications
Premium - Retractable Stand
 Our Newest System! Elite - Retractable Stand The Elite is our top of the line banner stand. Upgraded benefits include a telescoping adjustable pole. Storage inside the base for the pole and top bar. A
Nova. Rollator OWNERS HANDBOOK. Product Code: WA01063
 Nova Rollator OWNERS HANDBOOK Product Code: WA01063 Your Tuni Nova Rollator Product Features 1. Easily removable bag attached. 2. Easy to fold, easy to store and transport. 3. Easy to adjust handle to
RPL FABRIC DISPLAY 10FT STRAIGHT
 Product Code: RPL4X3STRG1 RPL FABRIC DISPLAY 10FT STRAIGHT Product Features *Optional LED light Our ultra lightweight aluminum alloy fabric pop-up display in a matte satin anodized finish is an ideal eye-catcher
TWISTLOCK VEHICLE STABILIZER (TVS) SYSTEM INSTRUCTIONS
 SYSTEM INSTRUCTIONS") TWISTLOCK VEHICLE STABILIZER (TVS) SYSTEM 22-797010, 22-797020, 22-796161 INSTRUCTIONS COMPONENTS: 1. TVS-100, PN 22-797010: 47 60 (119 cm 152 cm) stroke TwistLock Vehicle Stabilizer. Component weight,
TWISTLOCK VEHICLE STABILIZER (TVS) SYSTEM 22-797010, 22-797020, 22-796161 INSTRUCTIONS COMPONENTS: 1. TVS-100, PN 22-797010: 47 60 (119 cm 152 cm) stroke TwistLock Vehicle Stabilizer. Component weight,
index Fabric Led Light Box 3-5 AE Frame Systems 6-7 Fabric Pop Up 8 Soho Fabric Walls 9-10 Stand Off, Counter, Accesories 11
 www.fabric-displays.com index Fabric Led Light Box 3-5 AE Frame Systems 6-7 Fabric Pop Up 8 Soho Fabric Walls 9-10 Stand Off, Counter, Accesories 11 T Stand, S Stand, AE Stand 12 Roll Ups, Table Tops 13
DO NOT USE WITH CROSSBAR SPREAD LESS THAN 24.
 TM Please read all instructions carefully before assembly, installation and/or use of this product. DO NOT USE WITH CROSSBAR SPREAD LESS THAN 24. WARNING: Do not exceed the weight limit of your vehicle
DO NOT use Alien Flier Zip Line Products until you have read and fully understand the SAFETY WARNINGS below!
 SAFETY WARNING DO NOT use Alien Flier Zip Line Products until you have read and fully understand the SAFETY WARNINGS below! Assumption of Risk Zip line construction and use can be dangerous. Ensure you
INSTRUCTION SHEET TWISTLOCK VEHICLE STABILIZER (TVS) SYSTEM PN S: , ,
 SYSTEM PN S: , ,") INSTRUCTION SHEET TWISTLOCK VEHICLE STABILIZER (TVS) SYSTEM PN S: 22-797010, 22-797020, 22-796161 COMPONENTS: 1. TVS-100, PN 22-797010: 47 60 (119 cm 152 cm) stroke TwistLock Vehicle Stabilizer. Component
INSTRUCTION SHEET TWISTLOCK VEHICLE STABILIZER (TVS) SYSTEM PN S: 22-797010, 22-797020, 22-796161 COMPONENTS: 1. TVS-100, PN 22-797010: 47 60 (119 cm 152 cm) stroke TwistLock Vehicle Stabilizer. Component
* * KR54-F, KR9854 & KR9954 Installation Instructions. Read All Warnings Before Starting Installation! Index:
 *941061-00* 941061-00 Keyed Removable Mullion KR54-F, KR9854 & KR9954 Installation Instructions CLASSIFIED CLASSIFIED C Read All Warnings Before Starting Installation! Index: General Information ----------------
* * 4023 KR. Step 1 Prepare the Keyed Removable Unit. Not for use on electric or fire rated removable mullions
 condition. *64009-00* 64009-00 Keyed Removable Mullions 403 KR Installation Instructions Not for use on electric or fire rated removable mullions This kit includes the following parts: (Not to scale) 5/6
Custom Sublimated Fabrics, Cut & Sew apparel manufacturing & pattern making
 Custom Sublimated Fabrics, Cut & Sew apparel manufacturing & pattern making We manufacture custom runs of apparel from our house patterns and from client provided patterns. Pattern making services available.
Otter Pro X-Over Lodge Installation and Set-Up Instructions
 Otter Pro X-Over Lodge Installation and Set-Up Instructions Otter Pro X-Over Lodge Fits Magnum Otter II & Pro Sled Only Parts Identification and Check List MODEL NUMBERS: Complete Pkg Pro X-Over Lodge
Displays & Banner Stands
 Display Solutions Displays & Banner Stands Item: OH-003 Pull Up Banner Stand 33 x 78 47 x 78 The 33" Retractable Roll Up Banner Stand made from anodized aluminum sets up in minutes and portable. A telescopic
Light Weight Style, Flexibility & Performance
 Light Weight Style, Flexibility & Performance MDB-204 Tension Fabric Never Looked So Good. Is a light-weight, portable, display system with multiple design possibilities. It combines an aluminum frame
INSTANT GARAGE MODEL NO: CIG81224 ASSEMBLY INSTRUCTIONS PART NO: ORIGINAL INSTRUCTIONS
 INSTANT GARAGE MODEL NO: CIG81224 PART NO: 3503578 ASSEMBLY INSTRUCTIONS ORIGINAL INSTRUCTIONS GC1117 INTRODUCTION Thank you for purchasing this CLARKE Instant Garage. When erected, the CIG81224 garage
Otter Pro XT Cabin Installation and Set-Up Instructions
 Otter Pro XT Cabin Installation and Set-Up Instructions Otter Pro XT Cabin Fits Medium Otter Pro and Otter II Sled Only Parts Identification and Check List MODEL NUMBERS: Complete Pkg Pro XT Thermal Cabin
Vanagon Ladder Kit Assembly & Installation Instructions
 Rocky Mountain Westy Vanagon Ladder Kit Assembly & Installation Instructions Introduction Thank you for purchasing the Rocky Mountain Westy Vanagon Ladder Kit. We pride ourselves in the products we develop
Kontrol Kube Advanced Owners Manual
 Mobile Containment. Simplified. TM Kontrol Kube Advanced Owners Manual KONTROL KUBE www.kontrolkube.com 800.343755 1 IMPORTANT SAFETY INFORMATION SAVE THESE INSTRUCTIONS. CAREFULLY READ AND FOLLOW THESE
Item #: BTOT Assembly Instructions
 Item #: BTOT Assembly Instructions For our most current instructions, to request missing, lost or broken parts, or for any other Customer Service issues, please visit our website at www.walkeredison.com
HARD DOOR UPGRADE KIT
 RV Accessories OWNER'S MANUAL HARD DOOR UPGRADE KIT FOR ADD-A-ROOM & BREEZEWAY SCREEN ROOMS THIS MANUAL SUPPLEMENTS THE ADD-A-ROOM INSTRUCTIONS TABLE OF CONTENTS First Time Assembly... 2 Assembling the
User s Manual Trampoline 8
 User s Manual Trampoline 8 Model! WARNING Read all precautions and instructions in this manual before using this equipment. Save this manual for future reference. Maximum user weight 17 lbs. ASSEMBLY IMPORTANT
ASSEMBLY INSTRUCTIONS
 ASSEMBLY INSTRUCTIONS NT-MG302FMS 56" TV Stand Safety information and specifications...2 Tools needed...3 Parts...3 Hardware...4 Assembly instructions...5 Safety information and specifications CAUTION:
2018 NEW PRODUCTS BANNER STANDS MOSQUITO IMAGINE X-TEND. *Image libraries, instructions and graphic templates available on
 BANNER STANDS IMAGINE MOSQUITO 33.5 IMG-850-S Size 15.75 silver: MSQT-400 Sizes - variable graphic height = 30.5-83.35 - graphic tensioner - integrated pole storage - interchangeable graphic cassette -
INSTALLATION SHEET -Explorer Sport Trac
 INSTALLATION SHEET -Explorer Sport Trac Long Neck Side Rail Clamps (x2) Cab Rail (BlackMax includes snaps on this rail) Side Rails Clamp Bolts Short Neck Side Rail Clamps (x2) Allen Wrench (3/16") Sport
INSTALLATION INSTRUCTIONS
 INSTALLATION INSTRUCTIONS KR54, KR1654, & KR4954 Keyed Removable Mullion NOT FOR USE ON ELECTRIC OR FIRE RATED MULLIONS. This kit includes the following parts: (Not to scale) WARNING Remove key, reinstall,
Otter XT Cabin Installation and Set-Up Instructions
 Otter XT Cabin Installation and Set-Up Instructions Otter XT Cabin Fits Medium Otter Wild Sled Only Parts Identification and Check List MODEL NUMBERS: Complete Pkg Otter XT Cabin 200962 2 1 PARTS LIST
10 X 20 X 8 Dome Canopy
 10 X 20 X 8 Dome Canopy Warning Keep all flame and heat sources away from this tent fabric. Refer to labels for flamability specification. It is not fire proof. The tent fabric will burn if left in continuous
300 ft. 5/8 Hose wagon
 300 ft. 5/8 Hose wagon Model 95956 Assembly And Operation Instructions Due to continuing improvements, actual product may differ slightly from the product described herein. (Garden hose is not included).
ABS Model Background Stand
 ABS Model Background Stand Product Overview: The completely redesigned Ravelli ABS model background stand is 10' tall by 12.3' wide. It is comprised of two tripod stands and four 3 cross bar sections and
CFF PRO SERIES SUPER DECLINE BENCH
 CFF PRO SERIES SUPER DECLINE BENCH Assembly & Care Instructions THANK YOU! We think you re gonna dig this decline bench (CFF ADB). Super adjustable and warrantied for life, please review these instructions
LEG KIT. Pizza Oven OWNER S MANUAL. For 6000 Series Portable Ovens
 Pizza Oven LEG KIT For 6000 Series Portable Ovens OWNER S MANUAL IMPORTANT: This instruction manual contains important information necessary for the proper assembly and safe use of the appliance. Read
Installation Instructions Traditional Awnings in a box Classic Awnings in a Box
 Installation Instructions Traditional Awnings in a box Classic Awnings in a Box Basic Tools Required (not included) Tape Measure & Pencil Level Phillips Screwdriver Drill with ¼ bit (Cement or Masonry
ROCKING HAMMOCK GD-600. Model GD-600. Retain This Manual for Reference OWNER'S MANUAL
 NOTE: Please read all instructions carefully before using this product ROCKING HAMMOCK Table of Contents Safety Notice GD-600 Hardware Pack Assembly Instruction Parts List Warranty Ordering Parts Model
YARDSCAPES PLANTER BLOCK DESIGN GUIDE
 PLANTER BLOCK DESIGN GUIDE PLANTER BLOCK Build a customized planter box or raised garden bed in varying sizes and configurations with the Planter Block. The attractive garden block can be stacked and secured
Bostonian style (DOME) Awning ASSEMBLY AND INSTALLATION INSTRUCTIONS
 Awning ASSEMBLY AND INSTALLATION INSTRUCTIONS") Bostonian style (DOME) Awning ASSEMBLY AND INSTALLATION INSTRUCTIONS CAUTION: When you are opening the box keep children away. This awning frame contains sharp metal and small hardware parts. Choking hazard:
Bostonian style (DOME) Awning ASSEMBLY AND INSTALLATION INSTRUCTIONS CAUTION: When you are opening the box keep children away. This awning frame contains sharp metal and small hardware parts. Choking hazard:
IMPORTANT OWNER-OPERATOR INSTALLATION INSTRUCTIONS C3215/C3215A
 IMPORTANT OWNER-OPERATOR INSTALLATION INSTRUCTIONS C3215/C3215A Minor movement (or settling) can occur in some incidental harsh driving conditions (On or off road). A rubber bed mat is not a requirement
READ ME FIRST! IMPORTANT WARNING! ENG. Roof top tent
 Roof top tent ENG TENT031 220 min READ ME FIRST! Thank you for purchasing a Front Runner Roof Top Tent. Before you start, take a moment to familiarize yourself with these Fitting Instructions and the components
ASSEMBLY & CARE INSTRUCTIONS
 ASSEMBLY & CARE INSTRUCTIONS 7 x TRAILER TENT SERIES 3 9 Part No. FT3711 - on road FT3923 - off road OPTIONAL SUNROOM Wall and floor kit Part No. FT3723 - on road FT39 - off road OPTIONAL SPARE ROOM Roof,
S E L E C T I O N. Abdominal Crunch. User manual
 and S E L E C T I O N T H E S T R E N G T H E V O L U T I O N User manual and and The identification plate of the and manufacturer, affixed along side the seat on the frame of the weight stack, gives the
Otter XT 650 Cabin Installation and Set-Up Instructions
 Otter XT 650 Cabin Installation and Set-Up Instructions Otter XT 650 Cabin Fits Medium Otter Wild Sled Only Parts Identification and Check List MODEL NUMBERS: Complete Pkg Otter XT 650 Cabin 200891 2 1
Side Posts. Galaxy. Orion. Polaris. Astral-TC Brooks Drive Baldwin Park, CA p f
 OTHER SHADEMAKER STYLES AVAILABLE Side Posts Polaris Orion Center Posts Corona Galaxy Beam Mount Astral-TC Nova 13401 Brooks Drive Baldwin Park, CA 91706 p 626.338.8810 f 626.338.8816 info@shademakerusa.com
Contents. Awnings USA - Full Protective Hood Manual Instructions ft 11" - 11ft 6" Awnings
 Awnings USA - Full Protective Hood Manual Instructions Contents Warning We recommend that two or more people are required to lift the awning into place. 4ft 11" - 11ft 6" Awnings 8 x Expansion bolts **
ASSEMBLY & CARE INSTRUCTIONS. 7 x4 TRAILER TENT SERIES 4 9. OPTIONAL SUNROOM Wall and floor kit. OPTIONAL SPARE ROOM Roof, wall and floor kit
 ASSEMBLY & CARE INSTRUCTIONS 7 x TRAILER TENT SERIES 9 Part No. TM709 OPTIONAL SUNROOM Wall and floor kit Part No. TM723 OPTIONAL SPARE ROOM Roof, wall and floor kit Part No. TM76 Please keep these instructions
Assembly Instructions: Square Tile Fire Pit With Embossed Side Panels
 Assembly Instructions: Square Tile Fire Pit With Embossed Side Panels FT501PTESMLID Part List Part List Description Qty. Drawings Part # A Mantle Frame 1 8-07-00158-01-055 B Side Panel 4 8-20-00059-01-077
80070 TOP MOUNT CAMPER SHELL and TRANSIT CONNECT RACK TMCS_3:1
 ASSEMBLY INSTRUCTIONS for : 80070 TOP MOUNT CAMPER SHELL and TRANSIT CONNECT RACK TMCS_3:1 (916) 638-8703 (800) 343-7486 11261 Trade Center Drive Rancho Cordova, CA 95742 www.kargomaster.com Transit ASSEMBLY
Factory Style Bow Kit
 Installation Instructions Factory Style Bow Kit Vehicle Application: Jeep Wrangler Unlimited 2004 2006 Part Number: 55003 www.bestop.com - We re here to help! Visit our web site and click on Ask a Question.
OWNER S MANUAL. ezup.com. 13 x 13 (4.0m x 4.0m) 10 x 10 (3.0m x 3.0m) 16 x 16 (5.0m x 5.0m)
 10 x 10 (3.0m x 3.0m) 16 x 16 (5.0m x 5.0m)") Shown: Aero Dome with optional awning, sidewall and custom graphics OWNER S MANUAL 10 x 10 (3.0m x 3.0m) 13 x 13 (4.0m x 4.0m) 16 x 16 (5.0m x 5.0m) ezup.com THANK YOU THANK YOU FOR PURCHASING YOUR AERO
Shown: Aero Dome with optional awning, sidewall and custom graphics OWNER S MANUAL 10 x 10 (3.0m x 3.0m) 13 x 13 (4.0m x 4.0m) 16 x 16 (5.0m x 5.0m) ezup.com THANK YOU THANK YOU FOR PURCHASING YOUR AERO
Otter Pro XT 1200 Cottage Installation and Set-Up Instructions
 Otter Pro XT 1200 Cottage Installation and Set-Up Instructions Otter Pro XT 1200 Cottage Fits Small Ultra-Wide Otter Pro and Otter II Sled Only Parts Identification and Check List MODEL NUMBERS: Complete
Assembly TOOLS REQUIRED: 17mm and 14mm or equivalent wrenches.
 Instructions for 3 Trimmer Rack, 3TR* *Patents Pending Assembly TOOLS REQUIRED: 17mm and mm or equivalent wrenches. 15 26 26 16 15 16 Attach the lower mounting brackets to the Trimmer Rack poles as shown
INSTALLATION SHEET. PARTS INCLUDED IN YOUR KIT. You may want to lay them out in this manner for accessibility.
 INSTALLATION SHEET Gas Struts (x2) Lower Hinge Rail Side Rails (L and R) Spring Bows (x2-short Bed) (x3-long Bed) L Bars (L and R) with clamps included L Channel w/seal MISSING PARTS??? Call Extang at
NOTICE: Once used, this shelter cannot be returned to the store. If you have a warranty claim, please contact Clam Corporation directly.
 Model No. - 8235 - p/n 108440 S p e c i f i c a t i o n s H e i g h t - 75 (24 packed) Width - 7 5 Depth - 144 (45 packed) W e i g h t 155 lbs. - Clam Customer Service Information - NOTICE: Once used,
LM601 Landmark Permanent Blind
 LM601 Landmark Permanent Blind Get parts online at www.huntriversedge.com P/N: 26742 REV1: 01/13/17 2017 RETI All Rights Reserved INTRODUCTION Landmark Permanent Blinds are engineered with you the hunter
HANDLE AND WHEEL KIT INSTALLATION
 HANDLE AND WHEEL KIT INSTALLATION Select EB and EM Series Generators Honda Power Equipment Your generator is equipped with a wheel kit and folding handle kit for easy transport and convenient storage.
10 X20 Dome Garage ITEM #: G Dimensions: 10ft. Wide x 20ft. Deep x 8ft. Center Height
 10 X20 Dome Garage ITEM #: G10208 Dimensions: 10ft. Wide x 20ft. Deep x 8ft. Center Height WARNING: Keep all flame and heat sources away from this tent fabric. It is not fire proof The fabric will burn
2522 and 2523 Fiber Optic Splice Organizer Tray
 2522 and 2523 Fiber Optic Splice Organizer Tray Instructions February 1996 Issue 1, 34-7039-6256-2 1 Table of Contents 1. General... 3 2. Kit Contents... 3 3. Available Kits and Accessories... 4 4. Tray
Owner's Manual. Safety Instructions. This Product is Produced Exclusively by
 Product May Vary Slightly From Pictured. Owner's Manual Safety Instructions! WARNING This equipment is for home use only. Do not use in institutional or commercial applications. Failure to follow this
INSTALLATION SHEET-Ford Flareside ʻ97
 INSTALLATION SHEET-Ford Flareside ʻ97 Part Nos. 7615, 2615 DOUBLE HOOK Side Rail Clamps Cab Rail (BlackMax includes snaps on this rail) Spring Bows Tailgate Rail Side Rails Tarp Clamp Bolts U Shaped Clamps
SteadiCam Parts List*
 SteadiCam Parts List* A. 1 Bogen 3232 Monopod Swivel Tilt Head B. 1 1/2 internal to 1/2 external brass bushing flare adapter (part 9402249 at osh.com¹) C. 2 3/8 internal to 1/2 external brass bushing flare
why go anywhere else?
 why go anywhere else? #4-1413 MCGILL ROAD, KAMLOOPS, BC V2C 6K7 T. 250.372.1055 TF. 877.372.1055 noranprinting.ca GRIMCO PREMIUM Retractable Banner Display BANNER DISPLAYS The GRIMCO PREMIUM is a single-sided
4812 HEAVY BAG STAND OWNER S MANUAL
 48 HEAVY BAG STAND OWNER S MANUAL Note:Warning Labels Everlast Worldwide, 00 Hwy DD, Moberly, MO 65270 Customer Service 800.821.7930 14 C4 48 HEAVY BAG STAND OWNER S MANUAL CONGRATULATIONS! YOU HAVE JUST
2-N-1 Expandable 12ft X 20ft / 20ft x 20ft 19ft7in Wide x 20ft Deep x 10ft3in Center Height (12x20) / 11ft7in Center Height (20x20)
 / 11ft7in Center Height (20x20)") 2-N-1 Expandable 12ft X 20ft / 20ft x 20ft 19ft7in Wide x 20ft Deep x 10ft3in Center Height (12x20) / 11ft7in Center Height (20x20) King Canopy Item #: EX1220 With 8 Legs, Cover with Leg Skirts (12x20
2-N-1 Expandable 12ft X 20ft / 20ft x 20ft 19ft7in Wide x 20ft Deep x 10ft3in Center Height (12x20) / 11ft7in Center Height (20x20) King Canopy Item #: EX1220 With 8 Legs, Cover with Leg Skirts (12x20
Compass Home 8' x 8' No Tools Gazebo with Awning and Anchor Bags Assembly Instruction for Gazebo (no tools required)
") Compass Home 8' x 8' No Tools Gazebo with Awning and Anchor Bags Assembly Instruction for Gazebo (no tools required) CAUTION: Read all instructions before assembly. Failure to do so may result in faulty
Compass Home 8' x 8' No Tools Gazebo with Awning and Anchor Bags Assembly Instruction for Gazebo (no tools required) CAUTION: Read all instructions before assembly. Failure to do so may result in faulty
When moving the frame don t force anything! Move the leg to allow the brace to go over the rod.
 THE IDLER Assembly and Care Instructions General notes Please read these instructions in their entirety before constructing your Idler Construction Before you begin constructing your Idler consider where
IMPORTANT OWNER-OPERATOR INSTALLATION INSTRUCTIONS C2204A
 IMPORTANT OWNER-OPERATOR INSTALLATION INSTRUCTIONS C2204A Warnings Truck Bed and Camper Protection Torklift does not recommend installing your camper on top of a plastic bed liner (or other compressible
/ Tool and Equipment Safety Tether System (T.E.S.T.S)
") 20 INSTRUCTIONS FOR USE AND PRODUCT GUIDE 799953 / 799955 Tool and Equipment Safety Tether System (T.E.S.T.S) Part # T353012 Rev 2 Reliance Industries LLC 2802 East X Street Deer Park, Texas 77536 281-930-800
20 INSTRUCTIONS FOR USE AND PRODUCT GUIDE 799953 / 799955 Tool and Equipment Safety Tether System (T.E.S.T.S) Part # T353012 Rev 2 Reliance Industries LLC 2802 East X Street Deer Park, Texas 77536 281-930-800
IMPORTANT OWNER-OPERATOR INSTALLATION INSTRUCTIONS. Part # A7006
 IMPORTANT OWNER-OPERATOR INSTALLATION INSTRUCTIONS Part # A7006 Parts List Wobble Stopper Body Wobble Stopper Shaft Camper Bracket Lower Bracket Assembly Upper Bracket Upper Bracket Clamp 3/8 SAE Flat
13401 Brooks Drive Baldwin Park, CA p f shademakerusa.com
 13401 Brooks Drive Baldwin Park, CA 91706 p 626.338.8810 f 626.338.8816 info@shademakerusa.com shademakerusa.com 2018 Shademaker. All rights reserved. SMOM-POLARIS-1018 W A R R A N T Y : Upon receipt of
banner stands Supreme I Supreme II Axis LiteBanner Tripod Brochure Stands More
 banner stands Supreme I Supreme II Axis LiteBanner Tripod Brochure Stands More Supreme I roll-up banner stand The most Supremely designed retractable banner stand in the industry Change graphics easily
CUSTOM CYLINDERS INTERNATIONAL, INC. SOCKET JENIE PRODUCTS
 CUSTOM CYLINDERS INTERNATIONAL, INC. SOCKET JENIE PRODUCTS The SOCKET JENIE product line was developed for use with a 110V or battery operated drill motor to reduce the amount of time required to set up
IMPORTANT OWNER-OPERATOR INSTALLATION INSTRUCTIONS C2213 / C2220
 IMPORTANT OWNER-OPERATOR INSTALLATION INSTRUCTIONS C2213 / C2220 Minor movement (or settling) can occur in some incidental harsh driving conditions (On or off road). A rubber bed mat is not a requirement
Instructional Booklet
 Instructional Booklet 936-894-3292 Thank you for choosing The Bathmaster! You are on your way to creating an unmatched bathing experience both for you and the lucky animal. The Bathmaster is designed to
X-Series Hexapod Assembly Instructions
 X-Series Hexapod Assembly Instructions General Warnings and Cautions Danger (May cause serious injury or death) Keep water, flammables, solvents and other liquids clear from actuator. Never place fingers,
13401 Brooks Drive Baldwin Park, CA p f shademakerusa.com
 13401 Brooks Drive Baldwin Park, CA 91706 p 626.338.8810 f 626.338.8816 info@shademakerusa.com shademakerusa.com 2018 Shademaker. All rights reserved. SMOM-LIBRA-0718 W A R R A N T Y : Upon receipt of
Professional Promotion Solutions
 Professional Promotion Solutions bigpitch.com.au about the big pitch co. Marquees professional branding solutions This is where we tell you about us, the Big Pitch Co. The Big Pitch Co. is the result of
4-foot Economy Sign Post. 4-foot post is rated at 2 pounds per foot. 7-foot Economy Sign Post
 Introduction: ComplianceSigns.com offers a variety of sign posts, sign mounting hardware, sign bases, mounting tape and more to mount your safety signs indoors or out. We offer three styles of sign posts,
Urea/Adblue Hose Reel
 www.scintex.com.au sales@scintex.com.au Model: SHR3408 Urea/Adblue Hose Reel Product Manual Specifications Spring driven drum: for automatic rewind. Locking ratchet: to maintain the desired length of hose
PROFILE SYSTEM HANDLES, LOCKS, STOPS HANDLE, LOCKS, STOPS 108 MINITEC PROFILE SYSTEM
 PROFILE SYSTEM HANDLES, LOCKS, STOPS s pot S, s k c ol, s e l dnah HANDLE, LOCKS, STOPS 108 MINITEC PROFILE SYSTEM HANDLE AL Part. N 21.1138/0 - Aluminium, natural anodized - Weight 0,050 kg - Show cases