IAN IAN 73271
|
|
|
- Loraine Ward
- 5 years ago
- Views:
Transcription

1 Before reading, unfold the page containing the illustrations and familiarise yourself with all functions of the device. Înainte de a citi instrucţiunile, priviţi imaginile şi familiarizaţi-vă cu toate funcţiile aparatului. Преди да прочетете отворете страницата с фигурите и след това се запознайте с всички функции на уреда. Πριν ξεκινήσετε την ανάγνωση, ανοίξτε τη σελίδα με τις εικόνες και εξοικειωθείτε με όλες τις λειτουργίες της συσκευής. Klappen Sie vor dem Lesen die Seite mit den Abbildungen aus und machen Sie sich anschließend mit allen Funktionen des Gerätes vertraut. RICE COOKER SRK 700 A1 KOMPERNASS GMBH Burgstraße 21 D Bochum RICE COOKER Operation and Safety Notes УРЕД ЗА ВАРЕНЕ НА ОРИЗ Инструкции за обслужване и безопасност FIERBĂTOR OREZ Instrucţiuni de utilizare şi de siguranţă Βραστήρας ρυζιού Υποδείξεις χειρισμού και ασφάλειας GB / CY Operation and Safety Notes Page 1 RO Instrucţiuni de utilizare şi de siguranţă Pagina 9 BG Инструкции за обслужване и безопасност Cтраница 17 GR / CY Υποδείξεις χειρισμού και ασφάλειας Σελίδα 25 DE / AT / CH Bedienungs- und Sicherheitshinweise Seite 33 Last Information Update Versiunea informaţiilor Актуалност на информацията Έκδοση των πληροφοριών Stand der Informationen: 02/2012 Ident.-No.: SRK700A REISKOCHER Bedienungs- und Sicherheitshinweise IAN IAN 73271


2
3 Content Page Safety information 2 Intended use 3 Technical Data 3 Items supplied 3 Appliance Overview 3 Before the First Use 3 Using the Rice Cooker 3 Cooking Rice...3 Steaming...5 Troubleshooting 6 Cleaning and care 7 Disposal 7 Warranty and Service 7 Importer 8 Read the operating instructions carefully before using the device for the first time and preserve this booklet for later reference. Pass this manual on to whoever might acquire the device at a future date
4 Rice Cooker Safety information Danger! Electric shock! Connect the rice cooker only to correctly installed and earthed mains sockets supplying a voltage that tallies with the details given on the appliance identification plate. Always remove the plug from the mains power sokket when you move or fill the device, in the event of problems, before cleaning the appliance and when the cooker is not in use! Never disconnect the appliance by pulling on the power cable. Always pull on the plug itself. Never touch the appliance plug with wet or moist hands. Never submerse the device in water or other liquids. Should the appliance ever fall into a liquid, IMMEDIATELY remove the plug from the mains power socket. Then, do not operate the appliance again until it has been inspected by an approved service company. Never subject the appliance to moisture and do not use it outdoors. Do not use the rice cooker while standing on a wet floor or when your hands or the appliance are wet. Position the power cable so that it does not come into contact with hot or sharp-edged objects. Do not kink or crush the power cable and do not wind it around the appliance. Arrange for defective power plugs and/or cables to be replaced at once by qualified technicians or our Customer Service Department. Risk of personal injury! Never leave the appliance unattended during operation. WARNING! Hot steam escapes from the steam hole and upon opening the cover! Risk of scalding! This symbol on the appliance warns you on the risk of burns caused by hot surfaces. This appliance is not intended for use by individuals (including children) with restricted physical, physiological or intellectual abilities or deficiences in experience and/or knowledge unless they are supervised by a person responsible for their safety or receive from this person instruction in how the appliance is to be used. Children should be supervised to ensure that they do not play with the appliance. Allow the appliance and accessories to cool completely before cleaning and storing them. Do not use an external timing switch or a separate remote control system to operate the appliance. Important! Appliance damage! When cooking, never cover the appliance lid with handtowels or anything similar. Never place the appliance adjacent to sources of heat. Never open the housing. If you do, the safety concept of the appliance can no longer be assured and the warranty becomes void. Only use the accessory parts provided with the appliance and never use the appliance without first inserting the cooking bowl
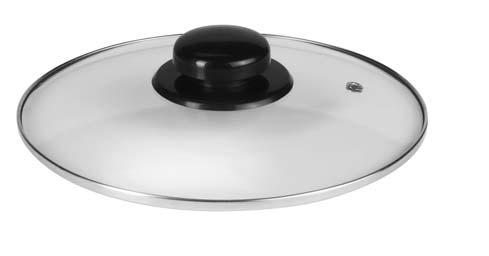
5 Intended use Only use the rice cooker for cooking rice and steaming foods, such as vegetables or fish. This rice cooker is not intended for commercial use; it is intended exclusively for use in private households! Technical Data Rated voltage: Power consumption: Items supplied V ~ / 50 Hz 700 W 1 Rice cooker, incl. cooking bowl and steaming attachment 1 power cable fitted with a plug 1 measuring cup 1 plastic spoon 1 operating manual The total capacity of the measuring cup is approximately 180 ml. The measuring cup has 2 different sets of measurement markings to make filling easier: 1/4 = approx. 45 ml 1/2 = approx. 90 ml 3/4 = approx. 135 ml 40 = approx. 40 ml 80 = approx. 80 ml 120 = approx. 120 ml 160 = approx. 160 ml Appliance Overview 1 Steam exit opening 2 Lid 3 Steamer attachment 4 Cooking bowl 5 Yellow control lamp (Keep-warm) 6 Red control lamp (Cooking) 7 Function selector switch for "Cooking" and "Keep-warm" 8 Connection socket for the power cable Before the First Use Carefully remove the rice cooker from the packaging. Remove all possibly remaining protective foils and clean any packaging-dust remnants from all components that will come into contact with foodstuffs. Clean the appliance as described in the chapter "Cleaning and Care". Using the Rice Cooker With this appliance, it is possible to cook rice as well as to steam other foods at the same time. Experiment with finding the right quantity of water and the right cooking time for the various combinations. Cooking Rice Note: Coat the inside of the cooking bowl 4 evenly with a little grease or vegetable oil to achieve a better cooking result. 1. Remove the lid Take the cooking bowl 4 out
6 Note: If the cooking bowl 4 is damaged, discontinue all further use! Due to the damage it may be that the safety shut-off of the appliance has triggered and the appliance does not allow itself to be switched on. 3. Measure the desired quantity of rice using the supplied measuring cup. As a general rule: A level measuring cup - filled with rice - yeilds a portion for one person. Determine the right quantity of rice and water for you in a few cooking attempts. 4. Thoroughly wash and sieve the loose rice. Nutrients will be lost with this, however, if you do not wash the rice this could lead to poor cooking results and elevated foam and steam formation in the cooking bowl 4. Also, always pay heed to the preparation instructions of the rice producer. 5. After washing it, pour the rice into the cooking bowl 4 and smooth it out. Note: Place at least 2 measuring beakers of rice into the rice cooker! A lesser volume of rice could cause inferior cooking results! 6. Then add water in the cooking bowl 4 as per the following cup markings: 2 Measuring beakers of rice = Water up to cup marking "2" 4 Measuring beakers of rice = Water up to cup marking "4" 6 Measuring beakers of rice = Water up to cup marking "6" 8 Measuring beakers of rice = Water up to cup marking "8" 10 Measuring beakers of rice = Water up to cup marking "10" Subject to taste preferences, salt can also be added to the rice. Note: If you use warm water the cooking time can be shortened. In this case, use somewhat less water than is given on the cup marking in the cooking bowl 4. Note: Subject to the type/sort of rice being prepared, it could be that you may have to insert a little more or less water to achieve an optimal cooking result. Vary the amount of water in accordance with your individual experiences and personal preference. 7. When the cooking bowl 4 is full, place it back in the rice cooker housing. Ensure that to avoid dirtying the cooking area, check to make sure there is no moisture or rice located on the outside of the cooking bowl 4. If necessary, wipe the outside with a clean cloth the cooking bowl 4 is not skewed or tilted when being placed in the rice cooker housing. Always insert the cooking bowl 4 correctly and precisely into the rice cooker housing. If you do not, it may be that the safety shut-off of the appliance will trigger and the appliance does not allow itself to be switched on. Note: This appliance is fitted with a safety switch: the cooking process cannot be started with an empty cooking vessel 4 without a lid 2. However, with the lid 2 in place the cooking process can also be started with an empty cooking vessel. 8. Close the appliance lid Insert the power cable into the socket 8 on the side of the appliance. 10. Insert the power plug into a properly installed power socket. The yellow control lamp 5 glows
7 Important! During the cooking process steam is emitted from the steam exit opening 1. NEVER hold your hands or other parts of the body over the steam exit opening 1 during the cooking process. There is a risk of receiving severe scalds! 11. Press the function selector switch 7 down. The yellow control lamp 5 extinguishes and the red control lamp 6 starts to glow. The cooking process begins. Note: If the cooking bowl 4 is not correctly positioned, the function selector switch 7 cannot be moved to the setting "Cooking". As soon as the rice is cooked, the rice cooker switches itself automatically back to the keep-warm setting. The red control lamp 6 extinguishes and the yellow control lamp 5 starts to glow. 12. Open the lid 2. The rice is now ready for consumption. Attention! For removal of the rice use exclusively the supplied plastic spoon. If you do not, the non-stick coating could be damaged. Steaming Important! Do not lift the steaming attachment 3 up during the steaming process - the escaping steam brings with it the real risk of scalding. The steaming attachment 3 becomes hot during the steaming process. When taking hold of the steaming attachment 3, use oven cloths or something similar to lift it from the cooking bowl 4. Note: Ensure that the cooking bowl 4 is also inserted correctly when it is used for steaming. The cooking bowl 4 must not be damaged. If it is, it may be that the safety shut-off of the appliance will trigger and the appliance does not allow itself to be switched on. 1. Pour the required amount of water into the cooking bowl 4. The cooking time is dependant on the inserted volume of water. Take note of the examples given in the following table. 1 filled measuring cup is sufficient for about 15 minutes of steaming. 2 filled measuring cups are sufficient for about 30 minutes of steaming, etc. If you do not consume the rice immediately During the keep-warm period, do not open the lid 2. Do not leave the rice for longer than 2 hours in the keep.warm state. Important! Always remove the plug from the mains power sokket when the rice cooker is not in use. Otherwise, there is a permanent risk of receiving an electric shock! - 5 -
8 Fish / seafood Mussels (cook until they are opened) Prawns (cook until a pink colour) Fish (Fillet) Steak Oysters (in the shell) Vegetables Mushrooms (whole) Peas (with pods) Asparagus Carrots (peeled) Green beans (cut) Green beans: (whole) Brussels sprouts Corncobs Water in milliliter approx. 120 ml approx. 140 ml approx. 180 ml approx. 240 ml approx. 300 ml Water in milliliter approx. 120 ml approx. 200 ml approx. 200 ml. approx. 240 ml approx. 240 ml approx. 300 ml approx. 300 ml approx. 360 ml Weight / quantity approx. 450 g approx. 350 g approx. 350 g approx. 450 g approx. 700 g Weight / quantity approx. 450 g approx. 350 g approx. 450 g approx. 450 g approx. 450 g approx. 450 g approx. 350 g 2 cobs 2. Place the food to be steamed in the steaming attachment Place the container on the cooking bowl Close the appliance lid Place the power plug in a wall socket. The yellow control lamp 5 glows. 6. Press the function selector switch 7 down. The yellow control lamp 5 extinguishes and the red control lamp 6 starts to glow. The steaming process begins. As soon as the added water has left the cooking bowl 4 by being completely turned to steam, the rice cooker automatically switches back to the "keeping warm" mode. The red control lamp 6 extinguishes and the yellow control lamp 5 starts to glow again. The food is now completely steamed and is ready to eat. Troubleshooting Defect Cause Solution The device does not function. The yellow indicator light 5 switches on, but the cooking process cannot be started. The rice cooker is not plugged in. The power socket is defective. The cooking bowl 4 is empty and, as such, the safety switch cannot be pressed down. Push the power plug into the wall socket. Use a different wall power socket. Fill the cooking bowl 4 with the foodstuffs to be cooked
9 Cleaning and care Danger! Electric shock! ALWAYS remove the plug from the wall socket before cleaning, and allow the appliance to cool completely before cleaning and storing it! Make certain that no liquid comes into contact with the heating plate and the insides of the rice cooker. Use a dry cloth to clean the rice cooker housing incl. the heating plate. Do not use harsh cleaners and abrasive materials. These could damage the upper surfaces. Clean the steaming attachment 3, the lid 2, the cooking bowl 4, the plastic spoon and the measuring cup in water containing a mild detergent. Dry all parts before using the appliance again. Disposal Do not dispose of the appliance in your normal domestic waste. This product is subject to the provisions of European Directive 2002/96/EC. Dispose of the appliance through an approved disposal centre or at your community waste facility. Observe the currently applicable regulations. In case of doubt, please contact your waste disposal centre. Dispose of all packaging materials in an environmentally friendly manner. Warranty and Service The warranty for this appliance is for 3 years from the date of purchase. The appliance has been manufactured with care and meticulously examined before delivery. Please retain your receipt as proof of purchase. In the event of a warranty claim, please make contact by telephone with our Service Department. Only in this way can a post-free despatch for your goods be assured. The warranty covers only claims for material and manufacturing defects, but not for transport damage, for wearing parts or for damage to fragile components, e.g. buttons or batteries. This product is for private use only and is not intended for commercial use. The warranty is void in the case of abusive and improper handling, use of force and internal tampering not carried out by our authorized service branch. Your statutory rights are not restricted in any way by this warranty. The warranty period will not be extended by repairs made under warranty. This applies also to replaced and repaired parts. Any damage and defects extant on purchase must be reported immediately after unpacking the appliance, at the latest, two days after the purchase date. Repairs made after the expiration of the warranty period are subject to payment. Service Great Britain Tel.: ( 0.10/Min.) kompernass@lidl.co.uk IAN CY Service Cyprus Tel.: kompernass@lidl.com.cy IAN
10 Importer KOMPERNASS GMBH BURGSTRASSE BOCHUM, GERMANY
11 CUPRINS PAGINA Indicaţii de siguranţă 10 Scopul utilizării 11 Date tehnice 11 Furnitura 11 Prezentarea aparatului 11 Înainte de prima utilizare 11 Utilizarea fierbătorului de orez 11 Fierberea orezului Fierberea pe aburi Remedierea defecţiunilor 14 Curăţarea şi îngrijirea 14 Eliminarea aparatelor uzate 15 Garanţia şi service-ul 15 Importator 15 Citiţi cu atenţie instrucţiunile de utilizare înainte de prima utilizare şi păstraţi-le pentru o consultare ulterioară. Dacă înmănaţ iaparatul unor terţi, ataşaţi şi instrucţiunile de utilizare R
12 Fierbător orez Indicaţii de siguranţă Pericol! Electrocutare! Conectaţi fierbătorul numai la o priză instalată reglementar şi pământată cu o tensiune de reţea identică cu tensiunea de pe plăcuţa de fabricaţie a aparatului. Dacă mişcaţi aparatul, dacă-l umpleţi, în caz de defecţiuni, înainte de curăţare sau când nu-l utilizaţi, scoateţi totdeauna ştecărul din priză! Nu trageţi de cablu pentru a scoate ştecărul din priză. Trageţi numai de ştecăr. Nu atingeţi ştecărul aparatului cu mâinile umede. Este interzisă introducerea aparatului în apă sau în alte lichide. Dacă aparatul a căzut în apă, scoateţi imediat ştecărul din priză. Apoi, nu mai puneţi aparatul în funcţiune, ci apelaţi la un atelier de service autorizat în vederea verificării. Nu expuneţi aparatul umidităţii şi nu-l utilizaţi în aer liber. Nu utilizaţi fierbătorul de orez dacă este aşezat pe o suprafaţă umedă sau dacă mâinile dvs. sau aparatul este umed. Pozaţi cablul astfel încât să nu intre în contact cu obiecte fierbinţi sau ascuţite. Nu îndoiţi şi nu striviţi cablul de alimentare şi nu-l înfăşuraţi în jurul aparatului. Dacă ştecărul sau cablul de alimentare se defectează, solicitaţi imediat repararea de către personal specializat sau de către serviciul clienţi, pentru a evita periclitările. Pericol de rănire! Nu lăsaţi aparatul nesupravegheat în timpul funcţionării. Atenţie! Din orificiul de ieşire a aburului şi la deschiderea capacului se degajă aburi fierbinţi! Pericol de opărire! Acest simbol de pe aparat vă avertizează contra pericolului de opărire din cauza suprafeţelor fierbinţi. Acest aparat nu este destinat utilizării de către persoane (inclusiv copii) cu capacităţi fizice, senzoriale sau mentale limitate sau cu o experienţă limitată şi/sau cunoştinţe limitate, cu excepţia cazului în care sunt supravegheate de către o persoană responsabilă cu siguranţa lor sau au primit instrucţiuni de la aceasta privind modul de utilizare a aparatului; Copiii trebuie supravegheaţi, pentru a împiedica utilizarea aparatului ca jucărie; Înainte de a curăţa sau de a pune la păstrare, aparatul şi accesoriile aşteptaţi ca acestea se răcească complet. Nu utilizaţi temporizatoare externe sau sisteme separate de comandă de la distanţă pentru operarea aparatului. Atenţie! Defectarea aparatului! Nu acoperiţi niciodată capacul cu prosoape sau alte material în timpul fierberii. Nu amplasaţi niciodată aparatul în apropierea surselor de căldură. Nu deschideţi niciodată carcasa. În acest caz nu mai este asigurată siguranţa şi se pierde garanţia. Utilizaţi numai accesoriile livrate şi nu folosiţi niciodată aparatul fără recipientul de fierbere. R
13 Scopul utilizării Utilizaţi fierbătorul de orez exclusiv pentru fierberea orezului şi pentru fierberea pe aburi a alimentelor, de ex. legume sau peşte. Acest apara t nu este destinat utilizărilor în scopuri economice, ci numai pentru utilizarea în locuinţele private! Date tehnice Prezentarea aparatului 1 Orificiu de ieşire a aburului 2 Capac 3 Vas de fierbere pe abur 4 Recipient de fierbere 5 Bec galben de control (menţinere la cald) 6 Bec roşu de control (fierbere) 7 Comutator cu funcţii pentru fierbere şi păstrare la cald 8 Bucşă de conexiune la reţeaua de curent Tensiune nominală: Consum: V ~ / 50 Hz 700 W Înainte de prima utilizare Furnitura 1 fierbător de orez, incl. recipient de fierbere şi vas pentru fierberea pe aburi 1 cablu de conectare cu ştecăr cu contact de protecţie 1 pahar gradat 1 lingură de plastic 1 instrucţiuni de utilizare Capacitatea totală a paharului gradat este de cca 180 ml. Pentru uşurarea umplerii, paharul gradat conţine două gradaţii diferite: 1/4 = cca 45 ml 1/2 = cca 90 ml 3/4 = cca 135 ml 40 = cca 40 ml 80 = cca 80 ml 120 = cca 120 ml 160 = cca 160 ml Scoateţi cu atenţie aparatul din ambalaj. Îndepărtaţi foliile de protecţie şi curăţaţi componentele care intră în contact cu alimentele de resturile de praf din ambalaj. Curăţaţi aparatul în modul descris în capitolul Curăţarea şi îngrijirea. Utilizarea fierbătorului de orez Cu acest aparat este posibil să fierbeţi orezul şi concomitent alte alimente pe aburi. Realizaţi experimente pentru a găsi cantitatea de apă necesară şi timpul corect de fierbere pentru diferitele posibilităţi combinatorii. Fierberea orezului Indicaţie: Ungeţi uniform interiorul recipientului de fierbere 4 cu puţină untură sau puţin ulei vegetal pentru a obţine rezultate mai bune. 1. Daţi capacul 2 la o parte. 2. Scoateţi recipientul de fierbere R
14 Indicaţie: Nu utilizaţi recipientul pentru fierbere 4, dacă este deteriorat! Din cauza deteriorării siguranţa ar putea fi declanşată, iar aparatul nu mai poate fi pornit. 3. Măsuraţi cantitatea dorită de orez cu ajutorul paharului gradat livrat. Orientativ: un pahar ras plin cu orez echivalează cu o porţie pentru o persoană. Stabiliţi cantitatea corectă de orez/ apă pentru dvs. prin mai multe încercări. 4. Spălaţi bine orezul şi scurgeţi apa. Prin spălare se pierd nutrienţi, totuşi, dacă orezul nu se spală rezultatele sunt nesatisfăcătoare, de asemenea se formează o cantitate mare de spumă şi aburi în recipientul de fierbere 4. Respectaţi, de asemenea, indicaţiile de preparare ale producătorului orezului. 5. După spălare, vărsaţi orezul în recipientul de fierbere 4 şi neteziţi-l. Indicaţie: Puneţi în fierbător cel puţin 2 pahare gradate de orez! O cantitate mai mică de orez duce la rezultate nesatisfăcătoare! 6. Apoi, turnaţi apă în recipientul de fierbere 4 până la marcajul CUP corespunzător: 2 pahare gradate de orez = apă până la marcajul CUP 2 4 pahare gradate de orez = apă până la marcajul CUP 4 6 pahare gradate de orez = apă până la marcajul CUP 6 8 pahare gradate de orez = apă până la marcajul CUP 8 10 pahare gradate de orez = apă până la marcajul CUP 10 După gust, orezului i se poate adăuga şi sare. Indicaţie: Dacă utilizaţi apă caldă, se reduce timpul de fierbere. Utilizaţi totuşi mai puţină apă, decât cantitatea pentru marcajul CUP 4. Indicaţie: În funcţie de sortimentul de orez, trebuie să utilizaţi o cantitate mai mare sau mai mică de apă, pentru a obţine un rezultat optim. Variaţi cantitatea de apă în funcţie de experienţa dvs. şi de gust. 7. După umplerea recipientului de fierbere 4, aşezaţi-l în carcasa aparatului. Atenţie pentru a evita murdărirea zonei de fierbere asiguraţi-vă că pe partea exterioară a recipientului de fierbere 4 nu există umiditate şi orez. Eventual, ştergeţipartea exterioară cu un prosop uscat nu poziţionaţistrâmb sau pe muchii recipientul de fierbere 4 în carcasa fierbătorului de orez. Aşezaţiîntotdeauna recipientul de fierbere 4 corect şi drept în carcasa fierbătorului de orez. În caz contrar, se poate declanşa siguranţaaparatului, iar aparatul nu mai poate fi pornit. Indicaţie: Acest aparat este dotat cu un întrerupător de sigurantă: Procesul de fierbere nu porneţte dacă recipientul pentru fierbere 4 este gol şi fără capac 2. Dar dacă este pus capacul 2 procesul de fierbere poate fi pornit chiar dacă recipientul pentru fierbere este gol. 8. Închideţi capacul Introduceţi cablul de conexiune în bucşa 8 din partea laterală a aparatului. 10. Introduceţi ştecherul într-o priză de alimentare instalată regulamentar. Se aprinde becul galben de control 5. R
15 Atenţie! În timpul fierberii, prin orificiul de abur 1 se degajă aburi. În timpul fierberii, nu ţineţi mâinile sau alte părţi ale corpului deasupra orificiului de aburi 1. Pericol de opărire! 11. Apăsaţi comutatorul cu funcţii 7 în jos. Becul galben de control 5 se stinge şi se aprinde becul roşu de control 6. Începe procesul de fierbere. Indicaţie: Dacă recipientul de fierbere 4 nu este aşezat în loc, comutatorul cu funcţii 7 nu poate fi reglat pe Fierbere. După fierberea orezului, aparatul comută automat pe funcţia de păstrare la cald. Becul roşu de control 6 se stinge şi se aprinde din nou becul galben de control Deschideţi capacul 2. Orezul este acum gata pentru consum. Atenţie! Pentru a scoate orezul folosiţi exclusiv lingura din material plastic primită cu aparatul. Altfel poate fi distrus stratul antiaderent. Dacă nu consumaţi imediat orezul: În timpul menţinerii la cald nu deschideţi capacul 2. Nu lăsaţi orezul mai mult de 2 ore în procesul de menţinere la cald. Atenţie! Dacă nu mai utilizaţi aparatul scoateţi totdeauna ştecărul din priză. Pericol de electrocutare! Fierberea pe aburi Atenţie! Nu ridicaţi vasul de fierbere pe aburi 3 în timpul fierberii, deoarece există pericol de opărire din cauza aburului care se degajă. În timpul fierberii, vasul de fierbere pe aburi se încălzeşte 3. Luaţi vasul de fierbere pe aburi 3 cu lavete de bucătărie de pe recipientul de fierbere 4. Indicaţie: Asiguraţi-vă că recipientul de fierbere 4 este aşezaţcorect chiar şi pentru fierberea cu aburi. Recipientul de fierbere 4 nu trebuie şa fie deteriorat. În caz contrar, se poate declanşa siguranţaaparatului, iar aparatul nu mai poate fi pornit. 1. Turnaţi cantitatea de apă dorită în rezervorul de fierbere 4. Timpul de fierbere depinde de cantitatea de apă din vas. Urmaţi exemplele din tabelul următor. 1 pahar gradat plin este suficient pentru cca 15 minute de fiert pe aburi. 2 pahare gradate sunt suficiente pentru cca 30 de minute de fiert pe aburi etc. Peşte/fructe de mare Scoici (până se deschid) Creveţi (până devin roz) Apă în mililitri cca 120 ml cca 140 ml Greutate/ cantitate cca 450 g cca 350 g Peşte (file) cca 180 ml cca 350 g Friptură cca 240 ml cca 450 g Stridii (în scoică) cca 300 ml cca 700 g R
16 Legume Apă în mililitri Greutate/ cantitate Remedierea defecţiunilor Ciuperci (întregi) Mazăre (cu păstaie) cca 120 ml cca 200 ml cca 450 g cca 350 g Sparanghel cca 200 ml cca 450 g Morcovi (curăţaţi) Fasole verde (tăiată) Fasole verde (întreagă) Varză de Bruxelles Ştiuleţi de porumb cca 240 ml cca 240 ml cca 300 ml cca 300 ml cca 360 ml cca 450 g cca 450 g cca 450 g cca 350 g 2 ştiuleţi 2. Puneţi alimentele pe care doriţi să le fierbeţi în vasul de fierbere pe aburi Aşezaţi vasul pe recipientul de fierbere Închideţi capacul Introduceţi ştecărul într-o priză. Se aprinde becul galben de control Apăsaţi comutatorul cu funcţii 7 în jos. Becul galben de control 5 se stinge şi se aprinde becul roşu de control 6. Începe procesul de fierbere pe aburi. Imediat ce apa din recipientul de fierbere 4 se evaporă complet, aparatul comută automat pe menţinere la cald. Becul roşu de control 6 se stinge şi se aprinde din nou becul galben de control 5. Alimentele sunt fierte şi pot fi consumate. Defecţiunea Cauza Remedierea Aparatul nu indică nicio funcţie. Becul galben de control 5 se aprinde, dar procesul de fierbere nu poate fi pornit. Fierbătorul de orez nu este conectat la priză. Priza este defectă. Recipientul de fierbere 4 este gol şi astfel comutatorul de siguranţă nu este apăsat. Curăţarea şi îngrijirea Introduceţi ştecărul în priză. Introduceţi aparatul într-o altă priză. Puneţi alimentele pe care doriţi să le fierbeţi în recipientul de fierbere 4. Pericol! Electrocutare! Înainte de curăţare şi de depozitare, scoateţi totdeauna ştecărul din priză şi aşteptaţi ca aparatul să se răcească complet! Asiguraţi-vă că pe plită şi în interiorul aparatului nu se vor infiltra lichide. Pentru curăţarea carcasei aparatului, inclusiv a plitei, utilizaţi o lavetă uscată. Nu utilizaţi substanţe de curăţare agresive sau abrazive. Acestea pot ataca suprafaţa aparatului. Curăţaţi vasul de fierbere pe aburi 3, capacul 2, recipientul de fiert 4, lingura de plastic şi paharul gradat în apă cu detergent de vase. Înainte de a utiliza din nou aparatul, aşteptaţi să se usuce toate componentele. R
17 Eliminarea aparatelor uzate Nu aruncaţi aparatul sub nicio formă în gunoiul menajer obişnuit. Acest produs cade sub incidenţa directivei europene 2002/96/EC. Eliminaţi aparatul prin intermediul unei firmei specializate şi autorizate sau prin intermediul serviciului local de eliminare a deşeurilor. Respectaţi reglementările actuale în vigoare. Dacă aveţi nelămuriri, contactaţi serviciul dumneavoastră local de eliminare a deşeurilor. Eliminaţi toate materialele de ambalare într-un mod ecologic. Garanţia şi service-ul Pentru acest aparat se acordă o garanţie de 3 ani începând cu data cumpărării. Aparatul a fost produs cu grijă şi verificat cu scrupulozitate înaintea livrării. Păstraţi bonul de casă pentru a dovedi cumpărarea. Dacă aveţi solicitări privind garanţia, contactaţi tele-fonic centrul dumneavoastră de service. Numai astfel poate fi asigurată o expediere gratuită a produsului dumneavoastră. Garanţia acoperă numai defectele de material sau de fabricaţie, nu şi deteriorările rezultate în urma transportului, piesele de uzură sau deteriorările apărute la componentele fragile, de ex. comutatoare sau acumulatoare. Aparatul este destinat numai pentru uz privat şi nu pentru o utilizare profesională. În cazul manevrării abuzive sau necorespunzătoare, uzului de forţă şi intervenţiilor care nu au fost realizate de către filiala noastră autorizată de service, garanţia îşi pierde valabilitatea. Drepturile dumneavoastră legale nu sunt limitate prin această garanţie. Perioada de garanţie obligatorie, prevăzută de lege, este inclusă în această garanţie. Acest lucru este valabil şi pentru piesele înlocuite şi reparate. Dacă la cumpărare se constată deteriorări sau vicii, acestea trebuie anunţate cel târziu în două zile de la data cumpărării. Reparaţiile necesare după expirarea perioadei de garanţie se efectuează contra cost. R Service România Tel.: kompernass@lidl.ro IAN Importator KOMPERNASS GMBH BURGSTRASSE BOCHUM, GERMANIA R
18 - 16 -
19 Cъдържание Cтраница Указания за безопасност 18 Предназначение 19 Технически характеристики 19 Окомплектовка на доставката 19 Преглед на уреда 19 Преди първата употреба 19 Работа с уреда за варене на ориз 19 Варене на ориз Варене на пара Отстраняване на повреди 22 Почистване и поддържане 23 Изхвърляне 23 Гаранция и сервиз 23 Вносител 23 Прочетете внимателно ръководството за експлоатация преди да използвате уреда за първи път и го запазете за по-нататъшна употреба. Когато предавате уреда на трети лица, предайте и това ръководство
20 Уред за варене на ориз Указания за безопасност Опасност! Токов удар! Включвайте уреда за варене на ориз само към инсталиран според инструкциите и заземен контакт с посоченото на фабричната табелка на уреда мрежово напрежение. Винаги изключвайте щепсела от контакта, когато премествате или пълните уреда, при повреди, преди почистване на уреда или ако няма да го използвате! Никога не дърпайте кабела, за да изключите щепсела от контакта. Издърпвайте самия щепсел. Не докосвайте щепсела на уреда с мокри или влажни ръце. В никакъв случай не потапяйте уреда във вода или други течности. Ако все пак уредът падне в течност, изключете веднага щепсела от контакта. След това не използвайте повече уреда, преди да го дадете за проверка от сертифициран сервиз. Не излагайте уреда на влага и не го използвайте на открито. Не използвайте уреда за варене на ориз, ако сте стъпили на влажен под или ако ръцете ви или уредът са мокри. Полагайте мрежовия кабел така, че да не влиза в допир с горещи предмети или предмети с остри ръбове. Не огъвайте и не притискайте кабела и не го увивайте около уреда. Дайте веднага повредения щепсел или кабел за смяна от оторизиран специалист или сервиз, за да избегнете опасности. ОПАСНОСТ ОТ НАРАНЯВАНЕ! Не оставяйте уреда без наблюдение по време на работа. ПОВИШЕНО ВНИМАНИЕ! От отвора за излизане на парата и при отваряне на капака излиза гореща пара! Опасност от попарване! Този символ на уреда ви предупреждава за опасността от изгаряне от горещи повърхности. Този уред не е предвиден за използване от лица (включително и деца) с ограничени физически, органолептични или умствени способности или от лица, които не притежават необходимия опит и/или знания, освен ако не са под надзора на лица, отговорни за тяхната безопасност или не са получили от тях указания как трябва да се използва уредът. Децата трябва да се наблюдават, за да е сигурно, че не играят с уреда. Преди да почистите и приберете уреда и принадлежностите му, ги оставете да се охладят напълно. За работа с уреда не използвайте външен таймер или отделна система за дистанционно управление. Внимание! Повреди на уреда! По време на варенето никога не покривайте капака с хавлиени кърпи или други подобни. Никога не инсталирайте уреда в близост до източници на топлина. Никога не отваряйте корпуса. В такъв случай безопасността не е гарантирана и даването на гаранция отпада. Употребявайте само съдържащите се в комплекта на доставката принадлежности и никога не използвайте уреда без поставен съд за варене
21 Предназначение Използвайте уреда за варене на ориз само за варене на ориз и варене на пара на хранителни продукти, като напр. зеленчуци или риба. Този уред за варене на ориз не е предназначен за професионална употреба, а само за използване в домашни условия! Технически характеристики Номинално напрежение: V ~ / 50 Hz Консумирана мощност: 700 W Окомплектовка на доставката 1 уред за варене на ориз, вкл. съд за варене и вложка за варене на пара 1 захранващ кабел с щепсел със защитен контакт 1 дозираща чаша 1 пластмасова лъжица 1 x ръководство за обслужване Пълната вместимост на дозиращата чаша е около 180 мл. За улесняване на пълненето дозиращата чаша има две различни скали: 1/4 = около 45 мл 1/2 = около 90 мл 3/4 = около 135 мл 40 = около 40 мл 80 = около 80 мл 120 = около 120 мл 160 = около 160 мл Преглед на уреда 1 Отвор за излизане на парата 2 Капак 3 Вложка за варене на пара 4 Съд за варене 5 Жълт контролен индикатор (поддържане в топло състояние) 6 Червен контролен индикатор (варене) 7 Превключвател на функциите Варене и Поддържане в топло състояние 8 Гнездо за включване на мрежовия проводник Преди първата употреба Извадете внимателно уреда за варене на ориз от опаковката. Отстранете евентуално наличните предпазни фолия и почистете частите, които влизат в контакт с хранителните продукти, от прашни остатъци от опаковката. Почистете уреда така, както е посочено в глава Почистване и поддържане. Работа с уреда за варене на ориз С този уред е възможно да се вари ориз и същевременно да се варят на пара други хранителни продукти. Експериментирайте в началото, за да откриете необходимото за тази цел количество вода и подходящото време за варене при различните възможности за комбинация. Варене на ориз Указание: Намажете вътрешната страна на съда за варене 4 равномерно с малко мазнина или растително олио, за да постигнете по-добър резултат от варенето. 1. Свалете капака Извадете съда за варене
22 Указание: Ако съдът за варене 4 е повреден, не го употребявайте повече! При повреди е възможно да се задейства защитното изключване на уреда и уредът да не може да се включи повече. 3. Измерете желаното количество ориз с помощта на дозиращата чаша от комплекта на достав-ката. Ориентировъчно: От една равна дозираща чаша - пълна с ориз - се получава една порция за един човек. Определете подходящото съотношение ориз/вода с няколко опита за варене. 4. Измийте старателно насипния ориз и го отцедете. При миенето се загубват хранителни вещества, но без миене могат да се получат по-лоши резултати от варенето и да се образува повече пяна и пара в съда за варене 4. Винаги вземайте под внимание и указанията за приготвяне на производителя на ориза. 5. След измиването сипете ориза в съда за варене 4 и го заравнете. Указание: Сипвайте най-малко две дозиращи чаши ориз в уреда за варене! При по-малко ориз могат да се получат лоши резултати от варенето! 6. След това налейте вода до съответната маркировка CUP в съда за варене 4: 2 дозиращи чаши ориз = вода до маркировката CUP 2 4 дозиращи чаши ориз = вода до маркировката CUP 4 6 дозиращи чаши ориз = вода до маркировката CUP 6 8 дозиращи чаши ориз = вода до маркировката CUP 8 10 дозиращи чаши ориз = вода до маркировката CUP 10 Към ориза може да се добави сол на вкус. Указание: Ако използвате топла вода, времето за варене може да се скъси. Тогава използвайте малко по-малко вода, отколкото се предвижда от маркировката CUP в съда за варене 4. Указание: В зависимост от сорта на ориза може да се наложи да налеете малко повече или малко по-малко вода, за да постигнете оптимален резултат от варенето. Променете количеството вода според опита си и по вкуса си. 7. След като напълните съда за варене 4, го поставете в корпуса на уреда за варене на ориз. Внимавайте от външната страна на съда за варене 4 да няма влага и ориз, за да избегнете замърсяване на мястото за готвене. Ако е необходимо, избършете и подсушете външната страна с чиста кърпа съдът за варене 4 да не е поставен накриво или под наклон в корпуса на уреда за варене на ориз. Винаги поставяйте съда за варене 4 правилно и изправен в корпуса на уреда за варене на ориз. В противен случай е възможно да се задейства защитното изключване на уреда и уредът да не може да се включи повече. Указание: Този уред е оборудван със защитен изключвател: Варенето не може да се стартира при празен съд за варене 4 без капак 2. Но с поставен капак 2 варенето може да се стартира с празен съд за варене. 8. Затворете капака Включете захранващия кабел в гнездото 8 отстрани на уреда. 10. Включете щепсела в инсталиран според инструкциите контакт. Жълтият контролен индикатор 5 светва
23 Внимание! По време на процеса на варене от отвора за излизане на парата 1 излиза пара. Никога не дръжте ръцете си или други части на тялото си над отвора за излизане на парата 1 по време на процеса на варене. Съществува опасност от попарване! 11.Натиснете превключвателя на функциите 7 надолу. Жълтият контролен индикатор 5 угасва и червеният контролен индикатор 6 светва. Процесът на варене започва. Указание: Ако съдът за варене 4 не е поставен или напълнен, превключвателят на функциите 7 не може да се превключи на Варене. Щом оризът е сварен, уредът за варене на ориз се връща автоматично към функцията за поддържане в топло състояние. Червеният контролен индикатор 6 угасва, а жълтият контролен индикатор 5 светва отново. 12. Отворете капака 2. Оризът е готов за консумация. Внимание! За изваждане на ориза използвайте само доставената пластмасова лъжица. В противен случай може да се повреди незалепващото покритие. Варене на пара Внимание! По време на варенето не повдигайте вложката за варене на пара 3, тъй като поради излизането на пара съществува опасност от попарване. Вложката за варене на пара 3 се нагорещява по време на варенето. Изваждайте вложката за варене на пара 3 от съда за варене 4 с ръкохватка за горещи тенджери или др.п. Указание: Внимавайте съдът за варене 4 да е поставен правилно и при варенето на пара. Съдът за варене 4 не трябва да е повреден. В противен случай е възможно да се задейства защитното изключване на уреда и уредът да не може да се включи повече. 1. Налейте желаното количество вода в съда за варене 4. Времето за варене зависи от налятото количество вода. Вземете под внимание примерите в следващата таблица. 1 пълна дозираща чаша е достатъчна за около 15 минути варене на пара. 2 пълни дозиращи чаши са достатъчни за около 30 минути варене на пара и т.н. Ако не консумирате ориза веднага: Не отваряйте капака 2 по време на поддържането в топло състояние. Не оставяйте ориза повече от 2 часа за поддържане в топло състояние. Внимание! Винаги изключвайте щепсела от контакта, когато няма да използвате повече уреда за варене на ориз. Съществува опасност от токов удар!
24 Риба/Морски дарове Миди (варене до отваряне) Скариди (варене до розово оцветяване) Зеленчуци Вода в милилитри Тегло/ Количество Гъби (цели) около 120 мл около 450 г Грах (с шушулките) около 200 мл около 350 г Аспержи около 200 мл около 450 г Моркови (остъргани) Зелен боб (нарязан) Зелен боб (цял) Брюкселско зеле Царевични кочани Вода в милилитри около 120 мл около 140 мл около 240 мл около 240 мл около 300 мл около 300 мл около 360 мл Тегло/ Количество около 450 г около 350 г Риба (филе) около 180 мл около 350 г Стек около 240 мл около 450 г Стриди (с черупките) около 300 мл около 700 г около 450 г около 450 г около 450 г около 350 г 2 кочана 2. Поставете хранителните продукти, които ще се варят, в съда за варене Сложете вложката в съда за варене Затворете капака Включете щепсела в контакт. Жълтият контролен индикатор 5 светва. 6. Натиснете превключвателя на функциите 7 надолу. Жълтият контролен индикатор 5 угасва и червеният контролен индикатор 6 светва. Варенето на пара започва. Щом налятата вода се изпари напълно от съда за варене 4, уредът за варене на ориз се превключва автоматично към функцията поддържане в топло състояние. Червеният контролен индикатор 6 угасва, а жълтият контролен индикатор 5 светва отново. Хранителните продукти в съда са сварени и могат да се консумират. Отстраняване на повреди Повреда Причина Отстраняване Уредът не показва, че функционира. Жълтият контролен индикатор 5 свети, но процесът на варене не може да започне. Уредът за варене на ориз не е включен в контакта. Електрическият контакт е повреден. Съдът за варене 4 е празен и защитният изключвател не може да се натисне надолу. Поставете щепсела в контакт. Използвайте друг електрически контакт. Поставете хранителните продукти, които ще се варят, в съда за варене
25 Почистване и поддържане Опасност! Токов удар! Преди почистване винаги изключвайте щепсела от контакта и оставяйте уреда да се охлади напълно, преди да го почистите и приберете! Внимавайте върху нагревателната плоча и във вътрешността на уреда за варене на ориз да не попада течност. За почистване на корпуса на уреда за варене на ориз вкл. нагревателната плоча използвайте суха кърпа. Не използвайте силни препарати за почистване и търкане. Те могат да разядат повърхността. Мийте вложката за варене на пара 3, капака 2, съда за варене 4, пластмасовата лъжица и дозиращата чаша във вода с разтворен миещ препарат. Подсушавайте всички части, преди да пуснете уреда да работи отново. Изхвърляне В никакъв случай не изхвърляйте уреда с битовите отпадъци. Този уред подлежи на европейската Директива 2002/96/EC. Изхвърляйте уреда чрез лицензирана фирма за изхвърляне на отпадъци или общинската служба за изхвърляне на отпадъци. Спазвайте актуално валидните разпоредби. В случай на съмнение се свържете със службата за изхвърляне на отпадъци. Предавайте опаковъчните материали за екологично изхвърляне. Гаранция и сервиз За този уред Вие получавате гаранция от 3 години от датата на закупуване. Уредът е произведен старателно и е проверен добросъвестно преди доставката. Запазете касовата бележка като доказателство за покупката. В гаранционен случай се свържете по телефона с вашия сервиз. Само по този начин може да се осигури безплатното изпращане на вашата стока. Даването на гаранция важи само за материални или фабрични дефекти, но не и за транспортни щети, износващи се части или при повреда на лесно чупливи части, напр. превключватели или акумулаторни батерии. Продуктът е предназначен единствено за домашна, а не за професионална употреба. При непозволена и неправилна употреба, при прилагане на сила или интервенции, които не са извършени от нашия оторизиран сервизен филиал, гаранцията отпада. Законните ви права не се ограничават от тази гаранция. Гаранционният срок не се удължава от гаранцията. Това важи и за сменени и ремонтирани части. За евентуалните, налични още при закупуването повреди и недостатъци трябва да се съобщи веднага след разопаковането, но най-късно два дена след датата на закупуване. След като изтече гаранционният срок, ремонтите трябва да се заплащат. Сервизно обслужване България Тел.: Е-мейл: kompernass@lidl.bg IAN Вносител KOMPERNASS GMBH BURGSTRASSE BOCHUM, GERMANY
26 - 24 -
27 Περιεχόμενα Σελίδα Υποδείξεις ασφαλείας 26 Σκοπός χρήσης 27 Τεχνικές πληροφορίες 27 Σύνολο αποστολής 27 Επισκόπηση συσκευής 27 Πριν την πρώτη χρήση 27 Χρήση του βραστήρα ρυζιού 27 Μαγείρεμα ρυζιού:...27 Μαγείρεμα στον ατμό...29 Διόρθωση βλαβών 30 Καθαρισμός και φροντίδα 31 Απομάκρυνση 31 Εγγύηση και σέρβις 31 Εισαγωγέας 32 Διαβάστε το εγχειρίδιο χειρισμού πριν από την πρώτη χρήση προσεκτικά και φυλάξτε το για μια μελλοντική χρήση. Παραδώστε το εγχειρίδιο σε όποιον παραδοθεί στη συνέχεια η συσκευή
28 Βραστήρας ρυζιού Υποδείξεις ασφαλείας Κίνδυνος! Ηλεκτροπληξία! Συνδέστε το βραστήρα ρυζιού μόνο σε μια σύμφωνα με τις προδιαγραφές εγκατεστημένη και γειωμένη πρίζα με την αναφερόμενη στην πινακίδα τύπου της συσκευής, τάση δικτύου. Βγάζετε πάντα το βύσμα από την πρίζα όταν μετακινείτε τη συσκευή, τη γεμίζετε, σε βλάβες, πριν καθαρίσετε τη συσκευή ή όταν δεν την χρησιμοποιείτε! Ποτέ μην τραβάτε στο καλώδιο για να τραβήξετε το βύσμα από την πρίζα. Τραβάτε από το ίδιο το βύσμα. Μην αγγίζετε το βύσμα συσκευής με βρεγμένα ή νωπά χέρια. Δεν επιτρέπεται σε καμία περίπτωση να βυθίσετε τη συσκευή σε νερό ή άλλα υγρά. Εάν κάποια φορά η συσκευή πέσει σε υγρό, βγάλτε αμέσως το βύσμα από την πρίζα. Στη συνέχεια μην τη θέσετε σε λειτουργία αλλά δώστε τη να ελεγχθεί από ένα εξουσιοδοτημένο συνεργείο σέρβις. Μην εκθέτετε τη συσκευή σε υγρασία και μην τη χρησιμοποιείτε σε εξωτερικό χώρο. Μη χρησιμοποιείτε το βραστήρα ρυζιού όταν βρίσκεστε σε υγρά δάπεδα ή όταν τα χέρια ή η συσκευή είναι βρεγμένα. Τοποθετήστε το καλώδιο έτσι ώστε να μην έρχεται σε επαφή με καυτά ή μυτερά αντικείμενα. Μη λυγίζετε ή σφίγγετε το καλώδιο και μην το τυλίγετε γύρω από τη συσκευή. Τα βύσματα ή καλώδια δικτύου με βλάβη πρέπει να αντικαθίστανται αμέσως από εξουσιοδοτημένο ειδικό προσωπικό ή από το τμήμα εξυπηρέτησης πελατών, ώστε να αποφεύγονται κίνδυνοι. ΚΙΝΔΥΝΟΣ ΤΡΑΥΜΑΤΙΣΜΟΥ! Μην αφήνετε τη συσκευή χωρίς επιτήρηση κατά τη λειτουργία. Προσοχή! Από την οπή εξόδου ατμού και κατά το άνοιγμα του καλύμματος βγαίνει καυτός ατμός! Κίνδυνος εγκαύματος! Αυτό το σύμβολο στη συσκευή, σας προειδοποιεί για κίνδυνο πυρκαγιάς από ζεστές επιφάνειες. Αυτή η συσκευή δεν προορίζεται για χρήση από άτομα (συμπεριλαμβανομένων παιδιών) με περιορισμένες φυσικές, αισθητηριακές ή πνευματικές δυνατότητες ή με έλλειψη εμπειρίας και/ ή με έλλειψη γνώσεων, εκτός εάν επιτηρούνται μέσω ενός υπεύθυνου ατόμου για την ασφάλειά τους ή εάν έχουν λάβει υποδείξεις για το πως χρησιμοποιείται η συσκευή. Τα παιδιά πρέπει να επιτηρούνται ώστε να εξασφαλίζεται ότι δεν παίζουν με τη συσκευή. Πριν καθαρίσετε και φυλάξετε τη συσκευή και τα αξεσουάρ, αφήστε τα να κρυώσουν πλήρως. Μη χρησιμοποιείτε εξωτερικό χρονοδιακόπτη ή ξεχωριστό τηλεχειριστήριο για να λειτουργήσετε τη συσκευή. Προσοχή! Βλάβες στη συσκευή! Κατά το μαγείρεμα ποτέ μην καλύπτετε το καπάκι με πετσέτες ή παρόμοια. Ποτέ μην τοποθετείτε τη συσκευή κοντά σε πηγές θερμότητας. Ποτέ μην ανοίγετε την επικάλυψη. Σε αυτή την περίπτωση δεν υπάρχει ασφάλεια και η εγγύηση ακυρώνεται. Χρησιμοποιείτε μόνο τα αξεσουάρ που περιλαμβάνονται στο σύνολο αποστολής και ποτέ μην χρησιμοποιείτε τη συσκευή χωρίς το τοποθετημένο δοχείο μαγειρέματος
29 Σκοπός χρήσης Χρησιμοποιείστε τον βραστήρα ρυζιού αποκλειστικά για το μαγείρεμα ρυζιού και για το μαγείρεμα στον ατμό τροφίμων όπως π.χ. λαχανικών ή ψαριού. Αυτός ο βραστήρας ρυζιού δεν προορίζεται για την επαγγελματική χρήση αλλά αποκλειστικά για τη χρήση στο ιδιωτικό νοικοκυριό! Τεχνικές πληροφορίες Ονομαστική τάση: Μέγιστη απορρόφηση ισχύος: Σύνολο αποστολής V ~ / 50 Hz 700 W 1 βραστήρας ρυζιού συμπεριλ. δοχείου μαγειρέματος και εξαρτήματος μαγειρέματος στον ατμό 1 γραμμή σύνδεσης με βύσμα επαφής γείωσης 1 δοχείο μέτρησης 1 πλαστικό κουτάλι 1 εγχειρίδιο χειρισμού Η συνολική χωρητικότητα του δοχείου μέτρησης ανέρχεται περίπου στα 180 ml. Για την διευκόλυνση της πλήρωσης το δοχείο μέτρησης έχει 2 διαφορετικές διαβαθμίσεις: 1/4 = περ. 45 ml 1/2 = περ. 90 ml 3/4 = περ. 135 ml 40 = περ. 40 ml 80 = περ. 80 ml 120 = περ. 120 ml 160 = περ. 160 ml Επισκόπηση συσκευής 1 Άνοιγμα εξόδου ατμού 2 Καπάκι 3 Εξάρτημα μαγειρέματος στον ατμό 4 Δοχείο μαγειρέματος 5 κίτρινη λυχνία ελέγχου (διατήρηση ζεστού) 6 κόκκινη λυχνία ελέγχου (μαγείρεμα) 7 Διακόπτης επιλογής λειτουργίας για "Βράσιμο" και "Διατήρηση ζεστού" 8 Υποδοχή σύνδεσης για τη γραμμή δικτύου Πριν την πρώτη χρήση Απομακρύνετε τον βραστήρα ρυζιού προσεκτικά από τη συσκευασία. Απομακρύνετε ενδεχόμενα υπάρχουσες μεμβράνες προστασίας και καθαρίζετε τα τμήματα που έρχονται σε επαφή με τρόφιμα, από υπολείμματα της συσκευασίας. Καθαρίστε τη συσκευή όπως περιγράφεται στο Κεφάλαιο "Καθαρισμός και φροντίδα". Χρήση του βραστήρα ρυζιού Με αυτή τη συσκευή είναι δυνατό να μαγειρέψετε ρύζι αλλά και ταυτόχρονα να μαγειρέψετε στον ατμό και άλλα τρόφιμα. Πειραματιστείτε λίγο ώστε να ανακαλύψετε την σωστή ποσότητα νερού και τον σωστό χρόνο μαγειρέματος για τις διαφορετικές δυνατότητες συνδυασμών. Μαγείρεμα ρυζιού: Υπόδειξη: Επιστρώστε το εσωτερικό του δοχείου μαγειρέματος 4 ομοιόμορφα με λίγο λίπος ή φυτικό λάδι, ώστε να επιτύχετε ένα καλύτερο αποτέλεσμα στο μαγείρεμα. 1. Απομακρύνετε το καπάκι Απομακρύνετε το δοχείο μαγειρέματος
30 Υπόδειξη: Εάν το δοχείο μαγειρέματος 4 έχει χαλάσει, μη συνεχίσετε τη χρήση του! Μέσω των φθορών μπορεί η απενεργοποίηση ασφαλείας της συσκευής να ενεργοποιηθεί και η συσκευή να μην μπορεί πλέον να ενεργοποιηθεί. 3. Μετρήστε την επιθυμητή ποσότητα ρυζιού με τη βοήθεια του απεσταλμένου δοχείου μέτρησης. Σαν πρότυπη τιμή ισχύει: Ένα γεμάτο δοχείο μέτρησης - γεμάτο με ρύζι - δίνει μια μερίδα για ένα άτομο. Προσδιορίστε την σωστή ποσότητα ρυζιού / νερού για εσάς μέσω μερικών δοκιμών στο μαγείρεμα. 4. Πλένετε καλά το ρύζι και το στραγγίζετε. Σε αυτή τη διαδικασία χάνονται θρεπτικές ουσίες αλλά ωστόσο χωρίς την πλύση μπορεί το αποτέλεσμα μαγειρέματος να είναι χειρότερο και να δημιουργηθεί αυξημένος αφρός και ατμός στο σκεύος βρασίματος 4. Προσέχετε πάντα τις υποδείξεις προετοιμασίας του παρασκευαστή ρυζιού. 5. Βάλτε το ρύζι μετά το πλύσιμο στο δοχείο μαγειρέματος 4 και λειάνετε το. Υπόδειξη: Βάλτε τουλάχιστο 2 δοχεία μέτρησης ρύζι στο βραστήρα ρυζιού! Σε λιγότερο ρύζι μπορεί τα αποτελέσματα να μην είναι καλά! 6. Στη συνέχεια βάλτε νερό έως το αντίστοιχο σημάδι CUP στο δοχείο μαγειρέματος 4: 2 Ποτήρια μέτρησης ρύζι = Νερό έως το σύμβολο CUP "2" 4 Ποτήρια μέτρησης ρύζι = Νερό έως το σύμβολο CUP "4" 6 Ποτήρια μέτρησης ρύζι = Νερό έως το σύμβολο CUP "6" 8 Ποτήρια μέτρησης ρύζι = Νερό έως το σύμβολο CUP "8" 10 Ποτήρια μέτρησης ρύζι = Νερό έως το σύμβολο CUP "10" Ανάλογα με τη γεύση σας, μπορεί επίσης να προστεθεί στο ρύζι και αλάτι. Υπόδειξη: Εάν χρησιμοποιήσετε ζεστό νερό, μπορεί να μειωθεί ο χρόνος βρασίματος. Ωστόσο χρησιμοποιείτε τότε λιγότερο νερό από ότι προβλέπει η σήμανση CUP στο σκεύος βρασίματος 4. Υπόδειξη: Ανάλογα με το είδος ρυζιού ίσως χρειαστεί να γεμίσετε με περισσότερο ή λιγότερο νερό, ώστε να επιτύχετε ένα βέλτιστο αποτέλεσμα μαγειρέματος. Μεταβάλετε την ποσότητα νερού σύμφωνα με τις εμπειρίες και τη γεύση σας. 7. Μετά το γέμισμα του δοχείου μαγειρέματος 4, τοποθετήστε το στο περίβλημα βραστήρα ρυζιού. Προσέξτε εδώ ότι δεν υπάρχει υγρασία και ρύζι στην εξωτερική πλευρά του δοχείου μαγειρέματος 4, ώστε να αποφύγετε ακαθαρσίες στον τομέα μαγειρέματος. Εάν απαιτείται πρέπει να σκουπιστεί η εξωτερική πλευρά με ένα καθαρό πανί το δοχείο μαγειρέματος 4 δεν τοποθετείται λοξό ή σφηνωμένο στο περίβλημα βραστήρα ρυζιού. Τοποθετείτε το δοχείο μαγειρέματος 4 πάντα σωστά και ίσια στο περίβλημα βραστήρα ρυζιού. Αλλιώς μπορεί να ενεργοποιηθεί η απενεργοποίηση ασφαλείας της συσκευής και η συσκευή να μην μπορεί πλέον να ενεργοποιηθεί. Υπόδειξη: Αυτή η συσκευή είναι εξοπλισμένη με ένα διακόπτη ασφαλείας:η διαδικασία μαγειρέματος δεν μπορεί να εκκινηθεί με άδειο δοχείο μαγειρέματος 4 χωρίς καπάκι 2. Με τοποθετημένο καπάκι 2 μπορεί ωστόσο η διαδικασία μαγειρέματος να εκκινηθεί και με άδειο δοχείο μαγειρέματος. 8. Κλείστε το καπάκι Εισάγετε τη γραμμή σύνδεσης στην υποδοχή σύνδεσης 8 στα πλάγια της συσκευής. 10. Εισάγετε το βύσμα σε μια σύμφωνα με τις προδιαγραφές εγκατεστημένη πρίζα. Η κίτρινη λυχνία ελέγχου 5 ανάβει
IAN TEA MAKER STK 650 A1 TEA MAKER CEAINIC ELECTRIC КАНА ЗА ЧАЙ ΒΡΑΣΤΗΡΑΣ ΤΣΑΓΙΟΥ TEEKOCHER. Operating instructions. Instrucţiuni de utilizare
 TEA MAKER STK 650 A1 TEA MAKER Operating instructions КАНА ЗА ЧАЙ Ръководство за експлоатация CEAINIC ELECTRIC Instrucţiuni de utilizare ΒΡΑΣΤΗΡΑΣ ΤΣΑΓΙΟΥ Οδηүίες χρήσης TEEKOCHER Bedienungsanleitung IAN
IAN IAN MINI CHOPPER SMZCD 400 A1. MINI CHOPPER Operating instructions. APARAT DE MARUNTIT Instrucţiuni de utilizare
 Before reading, unfold the page containing the illustrations and familiarise yourself with all functions of the device. Înainte de a citi instrucţiunile, priviţi imaginile şi familiarizaţi-vă cu toate
IAN DUAL HOTPLATE SDK 2500 A1 DVOSTRUKA PLOČA ZA KUHANJE DUAL HOTPLATE PLITĂ DE GĂTIT CU DOUĂ OCHIURI ДВОЕН КОТЛОН DOPPELKOCHPLATTE
 DUAL HOTPLATE DUAL HOTPLATE Operating instructions PLITĂ DE GĂTIT CU DOUĂ OCHIURI Instrucţiuni de utilizare MΑΓΕΙΡΙΚΗ ΕΣΤΙΑ ΔΙΠΛΗ Οδηүίες χρήσης DVOSTRUKA PLOČA ZA KUHANJE Upute za upotrebu ДВОЕН КОТЛОН
IAN HOT GLUE GUN PHP 500 C2 HOT GLUE GUN PISTOL DE LIPIT LA CALD ПИСТОЛЕТ ЗА ГОРЕЩО ЛЕПЕНЕ ΠΙΣΤΟΛΙ ΘΕΡΜΟΚΟΛΛΗΣHΣ HEISSKLEBEPISTOLE
 HOT GLUE GUN HOT GLUE GUN Translation of original operation manual ПИСТОЛЕТ ЗА ГОРЕЩО ЛЕПЕНЕ Превод на оригиналното ръководство за експлоатация PISTOL DE LIPIT LA CALD Traducerea instrucţiunilor de utilizare
IAN DUAL HOTPLATE SDK 2500 A1 DVOSTRUKA PLOČA ZA KUHANJE DUAL HOTPLATE PLITĂ DE GĂTIT CU DOUĂ OCHIURI ДВОЕН КОТЛОН MΑΓΕΙΡΙΚΗ ΕΣΤΙΑ ΔΙΠΛΗ
 DUAL HOTPLATE DUAL HOTPLATE Operating instructions PLITĂ DE GĂTIT CU DOUĂ OCHIURI Instrucţiuni de utilizare MΑΓΕΙΡΙΚΗ ΕΣΤΙΑ ΔΙΠΛΗ Οδηүίες χρήσης DVOSTRUKA PLOČA ZA KUHANJE Upute za upotrebu ДВОЕН КОТЛОН
IAN STEAM IRON DB 1400 A1 STEAM IRON GLAČALO NA PARU ПАРНА ЮТИЯ FIER DE CĂLCAT CU ABURI ΑΤΜΟΣΙΔΕΡΟ DAMPFBÜGELEISEN. Operating instructions
 STEAM IRON DB 1400 A1 STEAM IRON Operating instructions FIER DE CĂLCAT CU ABURI Instrucţiuni de utilizare GLAČALO NA PARU Upute za upotrebu ПАРНА ЮТИЯ Ръководство за експлоатация ΑΤΜΟΣΙΔΕΡΟ Οδηүίες χρήσης
IAN MILK FROTHER SMA 3 A1 MILK FROTHER MINI-MIXER LAPTE МИКСЕР ЗА МЛЯКО ΣΥΣΚΕΥΗ ΓΙΑ ΑΦΡΟΓΑΛΑ MILCHAUFSCHÄUMER. Operating instructions
 MILK FROTHER SMA 3 A1 MILK FROTHER Operating instructions МИКСЕР ЗА МЛЯКО Ръководство за експлоатация MINI-MIXER LAPTE Instrucţiuni de utilizare ΣΥΣΚΕΥΗ ΓΙΑ ΑΦΡΟΓΑΛΑ Οδηүίες χρήσης MILCHAUFSCHÄUMER Bedienungsanleitung
IAN CORDLESS TORCH LAH 55 A2 АКУМУЛАТОРЕН ПРОЖЕКТОР CORDLESS TORCH AKKU-HANDSTRAHLER ΕΠΑΝΑΦΟΡΤΙΖΟΜΕΝΟΣ ΠΡΟΒΟΛΕΑΣ ΧΕΙΡΟΣ
 CORDLESS TORCH LAH 55 A2 CORDLESS TORCH Operating instructions ΕΠΑΝΑΦΟΡΤΙΖΟΜΕΝΟΣ ΠΡΟΒΟΛΕΑΣ ΧΕΙΡΟΣ Οδηүίες χρήσης АКУМУЛАТОРЕН ПРОЖЕКТОР Ръководство за експлоатация AKKU-HANDSTRAHLER Bedienungsanleitung
Electric 2-STAGE SHARPENING FEATURES: system allows for safe, easy knife sharpening - Non-slip feet allows sharpener to stay in place while in use
 Electric FEATURES: - 2-Stage electric sharpening system allows for safe, easy knife sharpening - Non-slip feet allows sharpener to stay in place while in use 2-STAGE SHARPENING IMPORTANT SAFEGUARDS SAVE
Wireless Doorbell KH 206
 R Wireless Doorbell KH 206 KOMPERNASS GMBH BURGSTRASSE 21 D-44867 BOCHUM www.kompernass.com ID-Nr.: KH206-06/10-V2 R Wireless Doorbell Operating instructions Sonerie fără fir Instrucţiuni de utilizare
Contents. AFTER SALES SUPPORT / KB-8085
 Contents 02 Introduction 03 General Information and Safety Instructions 05 Assembly and Parts List 07 Getting Started 08 Other Useful Information 10 Warranty Card Introduction 1 2 Congratulations! You
IAN MILK FROTHER SMA 3 B1 MILK FROTHER MINI-MIXER LAPTE МИКСЕР ЗА МЛЯКО ΜΙΞΕΡ ΓΙΑ ΑΦΡΟΓΑΛΑ MILCHAUFSCHÄUMER. Operating instructions
 MILK FROTHER SMA 3 B1 MILK FROTHER Operating instructions МИКСЕР ЗА МЛЯКО Ръководство за експлоатация MINI-MIXER LAPTE Instrucţiuni de utilizare ΜΙΞΕΡ ΓΙΑ ΑΦΡΟΓΑΛΑ Οδηүίες χρήσης MILCHAUFSCHÄUMER Bedienungsanleitung
IAN HEATED CAR SEAT COVER UASB 12 A1 HUSĂ SCAUN AUTO ÎNCĂLZITĂ HEATED CAR SEAT COVER BEHEIZBARE AUTOSITZAUFLAGE
 HEATED CAR SEAT COVER UASB 12 A1 HEATED CAR SEAT COVER Operating instructions ОТОΠЛЯΕΜΑ ΠОДЛОЖΚΑ ЗА АВТОМОБИЛНА СЕДАЛКА Ръководство за експлоатация HUSĂ SCAUN AUTO ÎNCĂLZITĂ Instrucţiuni de utilizare BEHEIZBARE
SAFETY POLICY (NATURAL SCIENCES) PSYCHICO COLLEGE IBDP
 PSYCHICO COLLEGE IBDP") C O N T E N T S Science Labs 2-3 1. General Rules 2 2. Clothing 2 3. Accidents and Injuries 2 4. Handling Chemicals 3 5. Handling Glassware and Equipment 3 6. Heating Substances 3 Field Work 4 1. Preparation
C O N T E N T S Science Labs 2-3 1. General Rules 2 2. Clothing 2 3. Accidents and Injuries 2 4. Handling Chemicals 3 5. Handling Glassware and Equipment 3 6. Heating Substances 3 Field Work 4 1. Preparation
electric knife sharpener
 electric knife sharpener USER GUIDE Now that you have purchased a Kitchen Living product you can rest assured in the knowledge that as well as your year parts and labour guarantee you have the added peace
User Manual. 110 Cup (55 Cup Raw) Rice Cooker. Model: 177GRCLP, 177GRCNAT 10/2017. Please read and keep these instructions. Indoor use only.
 Rice Cooker. Model: 177GRCLP, 177GRCNAT 10/2017. Please read and keep these instructions. Indoor use only.") 110 Cup (55 Cup Raw) Rice Cooker Model: 177GRCLP, 177GRCNAT 10/2017 Please read and keep these instructions. Indoor use only. www.avantcoequipment.com 1 NOTE: Save these instructions for future reference.
110 Cup (55 Cup Raw) Rice Cooker Model: 177GRCLP, 177GRCNAT 10/2017 Please read and keep these instructions. Indoor use only. www.avantcoequipment.com 1 NOTE: Save these instructions for future reference.
IAN IONIC HAIRDRYER SHTD 2200 A1 IONSKO SUŠILO ZA KOSU IONIC HAIRDRYER USCĂTOR DE PĂR CU FUNCŢIE DE IONIZARE СЕШОАР ЗА КОСА С ЙОНИЗИРАЩА ФУНКЦИЯ
 IONIC HAIRDRYER SHTD 2200 A1 IONIC HAIRDRYER Operating instructions USCĂTOR DE PĂR CU FUNCŢIE DE IONIZARE Instrucţiuni de utilizare IONSKO SUŠILO ZA KOSU Upute za upotrebu СЕШОАР ЗА КОСА С ЙОНИЗИРАЩА ФУНКЦИЯ
Cordless Electric Teakettle. Model 685
 Cordless Electric Teakettle Model 685 Important Safeguards When using electrical appliances, basic safety precautions should always be followed, including the following: 1. Read all instructions. 2. Do
INSTRUCTIONS MANUAL ΕΓΧΕΙΡΙΔΙΟ ΛΕΙΤΟΥΡΓΙΑΣ
 INSTRUCTIONS MANUAL ΕΓΧΕΙΡΙΔΙΟ ΛΕΙΤΟΥΡΓΙΑΣ CONVECTOR PANEL HEATER ΘΕΡΜΑΝΤΙΚΟ ΣΩΜΑ ΤΥΠΟΥ ΚΟΝΒΕΚΤΟΡ Model / Μοντέλο: MCH20018 Keep these instructions in a safe place for future reference. Φυλάξτε τις οδηγίες
User Manual. 1000W Stackable 1.2 Cu. Ft. Commercial Microwave. Model: 180MW112T 05/2017. Please read and keep these instructions. Indoor use only.
 1000W Stackable 1.2 Cu. Ft. Commercial Microwave Model: 180MW112T 05/2017 Please read and keep these instructions. Indoor use only. IMPORTANT SAFETY INSTRUCTIONS When using electrical equipment, basic
ELECTRIC KNIFE SHARPENER User Guide
 BRAND ELECTRIC KNIFE SHARPENER User Guide Item: 717822 Ginnys.com 800-544-1590 Facebook.com/GinnysBrand Pinterest.com/GinnysBrand Ginnys.com/Blog Thank you for purchasing a Ginny s Brand Electric Knife
IAN HAND MIXER SHM 300 B1 HAND MIXER RUČNI MIKSER МИКСЕР ΜΙΞΕΡ ΧΕΙΡΟΣ HANDMIXER. Operating instructions. Upute za upotrebu
 HAND MIXER SHM 300 B1 HAND MIXER Operating instructions RUČNI MIKSER Upute za upotrebu МИКСЕР Ръководство за експлоатация ΜΙΞΕΡ ΧΕΙΡΟΣ Οδηүίες χρήσης HANDMIXER Bedienungsanleitung IAN 102824 Before reading,
Meat Slicer INSTRUCTION MANUAL CAUTION! ONE YEAR LIMITED WARRANTY
 ONE YEAR LIMITED WARRANTY INSTRUCTION MANUAL The original registered owner of this product should contact SKYFOOD EQUIPMENT LLC at 305-868-16 for any warranty problems or service. SKYFOOD EQUIPMENT LLC
AZ1138. MP3-CD Soundmachine FM MW B A S S RE FLEX SPEA K E R SYST EM
 CD MW FM TAPE MP3-CD Soundmachine DIGITAL TUNER B A S S RE FLEX SPEA K E R SYST EM LIFT TO OPEN CD RADIO CASSETTE ER OPEN -10 4 PRESET 3+10 CD MW FM TAP 5 4 32 1 DIGITAL TUNER B ASS RE FLEX SPEAKER SYSTEM
EN BG RO HR GR LT LV RS
 EN BG RO HR GR LT LV RS FAN HEATER 2-9 Usage and Storage Instructions ВЕНТИЛАТОРНА ПЕЧКА 10-17 Инструкции за употреба и съхранение AEROTERMĂ 18-25 Instrucţuni de utilizare şu depozitare FEN GRIJALICA 26-33
INSTANT GARAGE MODEL NO: CIG81224 ASSEMBLY INSTRUCTIONS PART NO: ORIGINAL INSTRUCTIONS
 INSTANT GARAGE MODEL NO: CIG81224 PART NO: 3503578 ASSEMBLY INSTRUCTIONS ORIGINAL INSTRUCTIONS GC1117 INTRODUCTION Thank you for purchasing this CLARKE Instant Garage. When erected, the CIG81224 garage
Operator s Manual. Medium-Duty Electric Slicers ENGLISH. Item Model Description Drive Peak HP Voltage Amps Hz Plug
 Medium-Duty Electric Slicers 40950 40951 Item Model Description Drive Peak HP Voltage Amps Hz Plug 40950 SLM250/S 10 Knife Medium-Duty Slicer 1/3 2.5 Belt 120 60 5-15P 40951 SLM300P/S 12 Knife Medium-Duty
Invacare HomeFill II Oxygen System
 Invacare HomeFill II Oxygen System Model IOH200AW en Compressor User Manual................................ 3 el es fr it nl pt Σ υµπιε στής E γχειρίδιο χρήσης......................... 35 Compresor Manualdel
Noul sistem de sine de ghidaj pentru o precizie maxima!!!
 Noul sistem de sine de ghidaj pentru o precizie maxima!!! 1 Acestea sunt elementele care compun noul sistem FSN Sine de ghidaj Sina de ghidaj / cod comanda FSN 800 1600Z00005 FSN 1100 1600Z00006 FSN 1600
IAN HEAT GUN PHLG 2000 C2. HEAT GUN Operation and Safety Notes. PIŠTOLJ ZA VRUĆI ZRAK Upute za posluživanje i za Vašu sigurnost
 HEAT GUN PHLG 2000 C2 HEAT GUN Operation and Safety Notes PIŠTOLJ ZA VRUĆI ZRAK Upute za posluživanje i za Vašu sigurnost SUFLANTĂ AER CALD Instrucţiuni de utilizare şi de siguranţă В ПИСТОЛЕТ ЗА ГОРЕЩ
Product instruction manual Ream Cutting Systems RE3943, RE3946, RE3947, RE3971, RE3952E
 Product instruction manual Ream Cutting Systems RE3943, RE3946, RE3947, RE3971, RE3952E The Trimfast Ream Cutters are reliable, high performance cutters that will give you the results you need quickly
UNI EN ISO 9001: 2008
 GB USAGE AND MAINTENANCE INSTRUCTIONS FOR PRESSURE COOKERS WITH LEVER HANDLES MOD. 03200 Capacity 3,5 5 7 9 lt. MOD. 03200 INDUCTION Capacity 3,5 5 6 7 lt. Company with certified quality system UNI EN
1 Pan - 6 Ways to Cook!
 1 Pan - 6 Ways to Cook! Broil Bake Sauté Fry Steam Braise To see our entire collection of Copper Chef products and all other available accessories, please visit: CopperChef.com *Only Use Nonmetallic Utensils
Installation and User s Manual 12 x 10 MOTORIZED AWNING
 12 x 10 MOTORIZED AWNING Installation and User s Manual 12 x 10 MOTORIZED AWNING 088-1763-0 Stop Please read and understand this manual before any assembly or use of this product. Before beginning assembly
Instructions for use, installation, and connection. Gas Built in Hob
 Instructions for use, installation, and connection Gas Built in Hob RB3311SGBS RB3312SGBS RB3311DGBS RB3311MGBS RB3311NGBS RB6313SGBST RB6323SGBST RB6314SGBS RB6313DGBST RB6313MGBST RB7312SGBS RB7313SGBST
Sunjoy D-DNC492PST 3-Seat Striped Adjustable Tilt Canopy. Wicker Metal Swing. Owner s Manual IMPORTANT
 Sunjoy D-DNC492PST 3-Seat Striped Adjustable Tilt Canopy Wicker Metal Swing Owner s Manual IMPORTANT Thank you very much for choosing Sunjoy Group. Please take time to read these instructions thoroughly
MAX Series 9514 OPERATOR S MANUAL
 MAX Series 9514 OPERATOR S MANUAL Persons under age 18 are not permitted to operate or have accessibility to operate this equipment per U.S. Dept. Of Labor Employment Standards Administration Fact Sheet
Mini Chopper SMZ 260 B1
 KITCHEN TOOLS Mini Chopper SMZ 260 B1 R Mini Chopper Operating instructions Aparat de tocat Instrucţiunile Višenamjenski aparat za usitnjavanje Upute za upotrebu Мултифункционален чопър Ръководство за
Fan Heater Inverter Laser Clean
 Fan Heater Inverter Laser Clean LC-43G LC-45 EN GR INSTRUCTIONS MANUAL ΕΓΧΕΙΡΙΔΙΟ ΧΡΗΣΗΣ This EN product INSTRUCTIONS is not suitable for primary MANUAL heating purpose. Το GR προϊόν ΕΓΧΕΙΡΙΔΙΟ αυτό δεν
PLEASE READ BEFORE USE AND SAVE THESE INSTRUCTIONS
 Sauce Flip Pan PLEASE READ BEFORE USE AND SAVE THESE INSTRUCTIONS Thank you for purchasing Cook s Companion Sauce Flip Pan. This pan is designed to be one of the most used pans in your kitchen. The Fusion
Professional Mandoline Manual. Model: 90797
 Professional Mandoline Manual Model: 90797 Introduction Your MIU France Stainless Steel Mandoline features a selection of blades with variable thickness adjustments which make it one of the most versatile
USER MANUAL. PRESSURE COOKER Ø22cm 7.6L Ref. Number: TRAS
 BEFORE USING READ THE COOKER PRESSURE USER MANUAL PRESSURE COOKER Ø22cm 7.6L Ref. Number: TRAS 0506 www.tramontina.com.au USER MANUAL TRAMONTINA PRESSURE COOKER CONTENT IMPORTANT SAFEGUARDS INTRODUCTION
For Outdoor Use Only!
 ITEM NAME: Red Ember Bronze Crossweave Firebowl Fire Pit with Free Cover and Fire Tool with Optional Grill Grate SKU: ALZ109 For Outdoor Use Only! 1. Improper installation, adjustment, alteration, service
Current Situation of Water and Sanitation BULGARIA
 Current Situation of Water and Sanitation BULGARIA Diana Iskreva-Idigo NGO Earth Forever Sofia, December, 2005 Water Availability and Accessibility 98.6% of the population lives in settlements with centralized
IMPORTANT NOTICE. Professional Mandoline Manual
 IMPORTANT NOTICE PLEASE DO NOT RETURN TO STORE. If you have any problems with this unit, contact Consumer Relations for service. PHONE: 206-605-0555 Please read operating instructions before using this
Laser Multipoint Verde-50mW Rosu-80mW Nr. Ref
 Laser Multipoint Verde-50mW Rosu-80mW Nr. Ref. 152.752 Manual de instructiuni Manual de utilizare Va multumim pentru achizitionarea produsului nostru, va rugam sa cititi cu atentie acest manual inainte
Professional Mandoline Manual. Model: 90757
 Professional Mandoline Manual Model: 90757 Introduction Your MIU France Composite Mandoline features a selection of blades with variable thickness adjustments which make it one of the most versatile kitchen
1 Pan - 6 Ways to Cook!
 1 Pan - 6 Ways to Cook! Broil Bake Sauté Fry Steam Braise To see our entire collection of Copper Chef products and all other available accessories, please visit: CopperChef.com *Only Use Non-Metallic Utensils
Natural Himalayan Salt Lamp
 Model: Elora Natural Himalayan Salt Lamp Questions or Concerns? Please contact us Monday - Friday 9:00am - 5:00pm PST at (888) 726-8520 or email support@levoit.com Thank You. Thank you for purchasing your
For Outdoor Use Only!
 ITEM NAME: Red Ember 4 ft. Smokestack Rubbed Bronze Fireplace with Cover SKU: ALZ655-1 For Outdoor Use Only! 1. Improper installation, adjustment, alteration, service or maintenance can cause injury or
SINGLE BURNER STOVE IMPORTANT OPERATING INSTRUCTIONS COOKING & STORAGE POSITION PARTS IDENTIFICATION
 SINGLE BURNER STOVE OPERATING INSTRUCTIONS PARTS IDENTIFICATION Electronic Lighter Ignites the burner. Liquid Guard Holds liquid overflow. Windshield Prevents flame from being extinguished by wind. Ensures
Digital Glass Scale SGW 180 A1
 7 PERSONAL CARE Digital Glass Scale SGW 180 A1 Digital Glass Scale Operating instructions Дигитален кантар Ръководство за експлоатация Digitalna osobna vaga Upute za upotrebu Ψηφιακή ζυγαριά Οδηγίες χρήσης
EN BG RO HR GR RU LT LV EE MK
 EN BG RO HR GR RU LT LV EE MK FAN HEATER 2-8 Usage and Storage nstructions ВЕНТИЛАТОРНА ПЕЧКА 9-15 Инструкции за употреба и съхранение AEROTERMĂ 16-22 nstrucţuni de utilizare şu depozitare FEN GRJALA 23-29
RITA SLOW COOKER NSC-15 (NSC-15F) Save these instruction for future use
 Save these instruction for future use") RITA SLOW COOKER NSC-15 (NSC-15F) r INSTRUCTION MANUAL Save these instruction for future use When using electrical appliances, basic safety precautions should always be followed, including the following:
RITA SLOW COOKER NSC-15 (NSC-15F) r INSTRUCTION MANUAL Save these instruction for future use When using electrical appliances, basic safety precautions should always be followed, including the following:
OWNER S MANUAL L-OF079PST-1
 OWNER S MANUAL L-OF079PST-1 WARNING: This outdoor fireplace is intended for outdoor use only. Do not use on wooden decks. This outdoor fireplace is intended to burn wood logs only. Do not burn coal, leaves,
Romania Great Britain France Italia Polska
 Romania Numai pentru tarile membre UE Nu aruncati masinile electrice in gunoiul menajer! Conform directivei europene 2002/96/CE pentru masini electrice si electronice vechi corelata cu legislatia locala,
HANG GLIDER (RECHARGEABLE)
") HANG GLIDER (RECHARGEABLE) 91192 ASSEMBLY AND OPERATING INSTRUCTIONS 3491 Mission Oaks Blvd., Camarillo, CA 93011 Visit our Web site at http://www.harborfreight.com IMPORTANT: If damage is caused due to
HANG GLIDER (RECHARGEABLE) 91192 ASSEMBLY AND OPERATING INSTRUCTIONS 3491 Mission Oaks Blvd., Camarillo, CA 93011 Visit our Web site at http://www.harborfreight.com IMPORTANT: If damage is caused due to
Everyday life at home puts high demands on cookware. IKEA 365+ stainless steel cookware is rigorously tested to cope with everyday use.
 IKEA 365+ cookware Everyday life at home puts high demands on cookware. IKEA 365+ cookware is rigorously tested to cope with everyday use. We guarantee the function of IKEA 365+ cookware for 15 years for
INSTRUCTIONS. To fill in anonymous questionnaires. Table 1 Minimum number of vessels to be filled out questionnaires
 INSTRUCTIONS To fill in anonymous questionnaires Article 1. This manual defines procedures for completion of mandatory economic information that needs to be collected through an anonymous questionnaire.
IAN KITCHEN SCALE SKWS 5 A1 KITCHEN SCALE KUHINJSKA VAGA CÂNTAR DE BUCĂTĂRIE КУХНЕНСКА ВЕЗНА KÜCHENWAAGE. Upute za upotrebu
 KITCHEN SCALE KITCHEN SCALE Operating instructions CÂNTAR DE BUCĂTĂRIE Instrucţiuni de utilizare KUHINJSKA VAGA Upute za upotrebu КУХНЕНСКА ВЕЗНА Ръководство за експлоатация KÜCHENWAAGE Bedienungsanleitung
AFC-50 Automatic French Fry Cutter Instruction Manual
 AFC-50 Automatic French Fry Cutter Instruction Manual Fry Factory Inc. 67 Watts Ave, Charlottetown, PEI, C1E 2B7, Canada Phone: 902-368-2900 Fax: 902-368-8645 Email: info@fryfactoryinc.com Website: www.fryfactoryinc.com
Electric Knife. USA: Canada :
 Electric Knife USA: 1-800-851-8900 Canada : 1-800-267-2826 840080100 IMPORTANT SAFEGUARDS When using electrical appliances, basic safety precautions should be followed, including the following: 1. Read
13401 Brooks Drive Baldwin Park, CA p f shademakerusa.com
 13401 Brooks Drive Baldwin Park, CA 91706 p 626.338.8810 f 626.338.8816 info@shademakerusa.com shademakerusa.com 2018 Shademaker. All rights reserved. SMOM-LIBRA-0718 W A R R A N T Y : Upon receipt of
IAN AROMA DIFFUSER SAD 12 B2 AROMA DIFFUSER АРОМАТИЗИРАЩ ПУЛВЕРИЗАТОР AROMA-DIFFUSER. Operating instructions. Ръководство за експлоатация
 AROMA DIFFUSER SAD 12 B2 AROMA DIFFUSER Operating instructions АРОМАТИЗИРАЩ ПУЛВЕРИЗАТОР Ръководство за експлоатация AROMA-DIFFUSER Bedienungsanleitung IAN 96963 Before reading, unfold the page containing
Operator's Manual. Model: RY10MK-PRO MPN: RA-MLT Gallon Direct Fire Melter Kettle Burner Model with Adjustable Flame-Out Valve
 Operator's Manual Model: RY10MK-PRO MPN: RA-MLT-0009 10 Gallon Direct Fire Melter Kettle Burner Model with Adjustable Flame-Out Valve U.S. Patent No. 9,739,021 For Technical Support Please Visit www.rynoworx.com
IAN HAMMOCK. VISEĆA LEŽALJKA Uputstvo za rukovanje. HAMMOCK Instructions for use. HAMAC Instrucţiuni de utilizare
 HAMMOCK HAMMOCK Instructions for use HAMAC Instrucţiuni de utilizare ΑΙΏΡΑ Οδηγιεσ χρησησ IAN 282517 VISEĆA LEŽALJKA Uputstvo za rukovanje ХАМАК Ръководство за обслужване HÄNGEMATTE Bedienungsanleitung
DEHUMIDIFIER 2-6. Usage and Storage Instructions ИЗСУШИТЕЛ ЗА ВЪЗДУХ Инструкции за употреба и съхранение USCĂTOR DE AER 12-16
 EN BG RO HR GR LT LV DEHUMIDIFIER 2-6 Usage and Storage Instructions ИЗСУШИТЕЛ ЗА ВЪЗДУХ 7-11 Инструкции за употреба и съхранение USCĂTOR DE AER 12-16 Instrucţuni de utilizare şu depozitare SUŠAČ ZRAKA
Thank you for purchasing ANYWARE cookware by Little Griddle! ANYWARE
 A WORD FROM THE MAKER (READ ME FIRST!!!): Thank you for purchasing ANYWARE cookware by Little Griddle! ANYWARE is made from cast aluminum with an advanced ceramic coating and a hightemperature nonstick
ACCENDA Instructions for use and safety
 ACCENDA Instructions for use and safety READ CAREFULLY BEFORE USE Please store these safety warnings in a safe place for future reference. NOTICE: BUYER ASSUMES ALL RESPONSIBILITY FOR SAFETY AND USE THAT
S E L E C T I O N. Abdominal Crunch. User manual
 and S E L E C T I O N T H E S T R E N G T H E V O L U T I O N User manual and and The identification plate of the and manufacturer, affixed along side the seat on the frame of the weight stack, gives the
Assembly Instructions & User s Manual 26 Florence Folding Leg Fire Pit
 Assembly Instructions & User s Manual 26 Florence Folding Leg Fire Pit FSMVPT6022 Please keep this instruction manual for future reference Customer Service: (888) 922-2336 7:00 am to 2:00 am CST (daily)
Blue Series Hot Melt Hose with RediFlext II Hanger System
 Instruction Sheet P/N 1124594_01 Blue Series Hot Melt Hose with RediFlext II Hanger System Safety WARNING! Allow only personnel with appropriate training and experience to operate or service the equipment.
1 Pan - 6 Ways to Cook!
 1 Pan - 6 Ways to Cook! Broil Bake Sauté Fry Steam Braise To see our entire collection of Copper Chef products and all other available accessories, please visit: CopperChef.com *Only Use Nonmetallic Utensils
Art PRESOSTAT ELECTRONIC
 INSTRUCTIUNI DE FOLOSIRE PRESOSTAT ELECTRONIC GARDENA Bine aţi venit in gradina GARDENA Art. 1739 PRESOSTAT ELECTRONIC Citiţi aceste instrucţiuni cu atenţie. Utilizaţi aceste instrucţiuni pentru a va familiariza
Micro Hi-Fi System MCM118 MCM118B
 Micro Hi-Fi System MCM118 MCM118B Important notes for users in the U.K. Mains plug This apparatus is fitted with an approved 13 Amp plug. To change a fuse in this type of plug proceed as follows: 1 Remove
BOAT COVER USER GUIDE BOAT ACCESSORIES
 BOAT COVER USER GUIDE BOAT ACCESSORIES Boat Cover Warranty Details The product is guaranteed to be free from defects in workmanship and parts for a period of 36 months from the date of purchase. Defects
TWO BURNER STAINLESS STEEL PROPANE STOVE
 ROTATE TO LIGHT 842-A250-0_SSCmpStove.qxd 11/26/03 2:59 PM Page 1 OWNER S MANUAL FAILURE TO FOLLOW ALL S AND INSTRUCTIONS IN THIS MANUAL COULD LEAD TO PERSONAL INJURY, INCLUDING DEATH. RETAIN THIS MANUAL
RH ALPHA INSTRUCTION MANUAL
 Alpha RH ALPHA INSTRUCTION MANUAL Quick info Before first use, read these instructions including their notes with care and keep them stored for future reference! The following pictograms are used on our
USER MANUAL PLEASE READ AND UNDERSTAND THIS MANUAL COMPLETELY BEFORE USE.
 Adventure Kings Roof Top Tent USER MANUAL PLEASE READ AND UNDERSTAND THIS MANUAL COMPLETELY BEFORE USE. Warning Improper installation or use of your Roof Top Tent may result in serious injury or death.
PS-10 PS-12D PS-12. Primo Slicer Manual FOR OPERATOR-DO NOT DISCARD
 PS-10 PS-12D PS-12 Primo Slicer Manual FOR OPERATOR-DO NOT DISCARD TABLE OF CONTENTS 1. BRIEF INTRODUCTION 2. OPERATION 3. SLICING 4. MAINTENANCE AND CLEANING 5. TROUBLESHOOTING IMPORTANT The operator
INSTRUCTION BOOKLET. Cordless Lithium Electric Knife
 INSTRUCTION BOOKLET Cordless Lithium Electric Knife CEK-120 For your safety and continued enjoyment of this product, always read the Instruction Book carefully before using. CONTENTS Important Safeguards...
ORIGO 1500, 3000 ORIGO 6000, 6100, Alcohol stoves Operating manual Spirituskocher Bedienungsanleitung... 24
 C C _Origo_5 6.book Seite Freitag,. Dezember 8 : 5 EN Alcohol stoves Operating manual............... 8 DE Spirituskocher Bedienungsanleitung............ ORIGO FR ES Cuisinières à alcool Notice d utilisation..............
Everyday life at home puts high demands on cookware. IKEA 365+ stainless steel cookware is rigorously tested to cope with everyday use.
 IKEA 365+ cookware Everyday life at home puts high demands on cookware. IKEA 365+ stainless steel cookware is rigorously tested to cope with everyday use. We guarantee the function of IKEA 365+ cookware
THE EXPERT IN BUILT-IN APPLIANCES HBEIFV TC3B-2
 THE EXPERT IN BUILT-IN APPLIANCES HBEIFV TC3B-2 BG,, -.,.,. -., Eurolux. 2 BG - 2 СЪДЪРЖАНИЕ: Инструкции за безопасност Описание Работна повърхност и панел за управление на нагревателите Работа с уреда
Est A TRADITION OF EXCELLENCE INSTRUCTION BOOK.
 Est. 1887 A TRADITION OF EXCELLENCE INSTRUCTION BOOK www.wolseleygrooming.co.uk Stockshop (L.E.) Ltd., Lodge Trading Estate, Broadclyst, Exeter EX5 3BS Email: service@stockshop.co.uk Tel: 01392 460077
The guarantee for FAVORIT cookware with non-stick coating remains in force for ten (10) years from the date of purchase. For details see page 5-6.
 years from the date of purchase. For details see page 5-6.") FAVORIT Everyday life at home puts high demands on cookware. FAVORIT is our top of the line cookware, rigorously tested to comply with our strict standards for quality and durability. This means we can
FAVORIT Everyday life at home puts high demands on cookware. FAVORIT is our top of the line cookware, rigorously tested to comply with our strict standards for quality and durability. This means we can
1 Pan - 6 Ways to Cook! Works in the Oven & On All Stovetops! electric gas ceramic induction. Broil Bake Sauté Fry Steam Braise
 *only use non-metal utensils 1 Pan - 6 Ways to Cook! Broil Bake Sauté Fry Steam Braise Non-stick Cerami-Tech Ceramic Coating Even Heating Good for All Surfaces Easy Cleaning Durable, Stain Resistant Coating
The wall where the product will be placed must not be constructed in wood, or in any case, made of an
 Dear Client, GB We thank you for having chosen one of our products, the fruit of technological experience and of continual research for a superior quality product in terms of safety, dependability, and
ROOFTOP CARGO BAG (FRONT OF VEHICLE) HOOK (x4) ATTACHMENT STRAP (x4)
 HOOK (x4) ATTACHMENT STRAP (x4)") CargoPack, DryTop, SoftTop ROOFTOP CARGO BAG Zipper Flap HOOK (x4) Grab handle ATTACHMENT STRAP (x4) (FRONT OF VEHICLE) Naked roof STRAP (2X) IMPORTANT WARNING IT IS CRITICAL THAT ALL YAKIMA RACKS AND
CargoPack, DryTop, SoftTop ROOFTOP CARGO BAG Zipper Flap HOOK (x4) Grab handle ATTACHMENT STRAP (x4) (FRONT OF VEHICLE) Naked roof STRAP (2X) IMPORTANT WARNING IT IS CRITICAL THAT ALL YAKIMA RACKS AND
1000M MANUAL Signature Series Slicer OPERATORS MANUAL
 1000M MANUAL Signature Series Slicer OPERATORS MANUAL Persons under age 18 are not permitted to operate or have accessibility to operate this equipment per U.S. Dept. Of Labor Employment Standards Administration
LAWN MOWER PREMIUM-HD ORIGINAL OWNER S MANUAL
 LAWN MOWER PREMIUM-HD ORIGINAL OWNER S MANUAL MODEL:0503GLM139H-SP CAUTION: Read and follow all Safety Rules and Instructions before operating this equipment Thank you for choosing our Gasoline Lawnmower.
1612P MODEL 1612P SLICER MODEL EXECUTIVE OFFICES 701 RIDGE AVENUE TROY, OHIO FORM (4-95)
") 1612P MODEL 1612P SLICER MODEL 1612P ML-104587 EXECUTIVE OFFICES 701 RIDGE AVENUE TROY, OHIO 45374-0001 FORM 19370 (4-95) Installation, Operation, and Care of MODEL 1612P SLICER SAVE THESE INSTRUCTIONS
1612P MODEL 1612P SLICER MODEL 1612P ML-104587 EXECUTIVE OFFICES 701 RIDGE AVENUE TROY, OHIO 45374-0001 FORM 19370 (4-95) Installation, Operation, and Care of MODEL 1612P SLICER SAVE THESE INSTRUCTIONS
User Manual for Separera 40
 User Manual for Separera 40 User Manual for Separera 40 Congratulations on your purchase of a Separera 40. Before installing your new Separera 40, we recommend that you read through this instruction in
RADIANT PANEL HEATER Operation and Storage Manual of Panel Heater ЛЪЧИСТ ПАНЕЛЕН КОНВЕКТОР 12-21
 EN BG RO HR GR RADIANT PANEL HEATER 2-11 Operation and Storage Manual of Panel Heater ЛЪЧИСТ ПАНЕЛЕН КОНВЕКТОР 12-21 Инструкция за експлоатация и съхранение на панелен конвектор PANOU DE ÎNCĂLZIRE RADIANT
USER MANUAL PLEASE READ AND UNDERSTAND THIS MANUAL COMPLETELY BEFORE USE.
 Self-inflating Foam Mattress USER MANUAL PLEASE READ AND UNDERSTAND THIS MANUAL COMPLETELY BEFORE USE. Warning & Safety Information Keep the mattress well away from naked flames and sharp objects. DO NOT
Air Mattress. Model No.: EAM-DQ1 & EAM DT1. Questions or Concerns? (855)
") Air Mattress Model No.: EAM-DQ1 & EAM DT1 Questions or Concerns? (855) 686-3835 support@etekcity.com Thank You. Thank you for purchasing the EAM-DQ1/EAM-DT1 Air Mattress by Etekcity. We are dedicated to
Air Mattress Model No.: EAM-DQ1 & EAM DT1 Questions or Concerns? (855) 686-3835 support@etekcity.com Thank You. Thank you for purchasing the EAM-DQ1/EAM-DT1 Air Mattress by Etekcity. We are dedicated to
Quik Shade Go Hybrid Backpack Canopy 6 x 6 ft.
 DO NOT RETURN YOUR CANOPY TO THE PLACE OF PURCHASE Please contact ShelterLogic for questions, comments, parts & accessories, or assistance with any warranty related issues. www.shelterlogic.com/support
Truma inet Box. Operating instructions Page 2 To be kept in the vehicle!
 Truma inet Box Operating instructions Page 2 To be kept in the vehicle! Truma inet Box Table of Contents Symbols used... 14 Intended use... 14 Operating instructions Safety instructions... 15 Display and
1 Pan - 6 Ways to Cook!
 1 Pan - 6 Ways to Cook! Broil Bake Sauté Fry Steam Braise To see our entire collection of Copper Chef products and all other available accessories, please visit: CopperChef.com *Only Use Nonmetallic Utensils
VIBRATION SANDER 0503SA0115
 VIBRATION SANDER 0503SA0115 (NOT FOR PROFESSIONAL USE) ORIGINAL INSTRUCTION MANUAL Read this manual before using the machine. Carefully read this manual before using the machine. Make sure that you know