User Manual for Separera 40
|
|
|
- Claude Ellis
- 6 years ago
- Views:
Transcription

1 User Manual for Separera 40
2
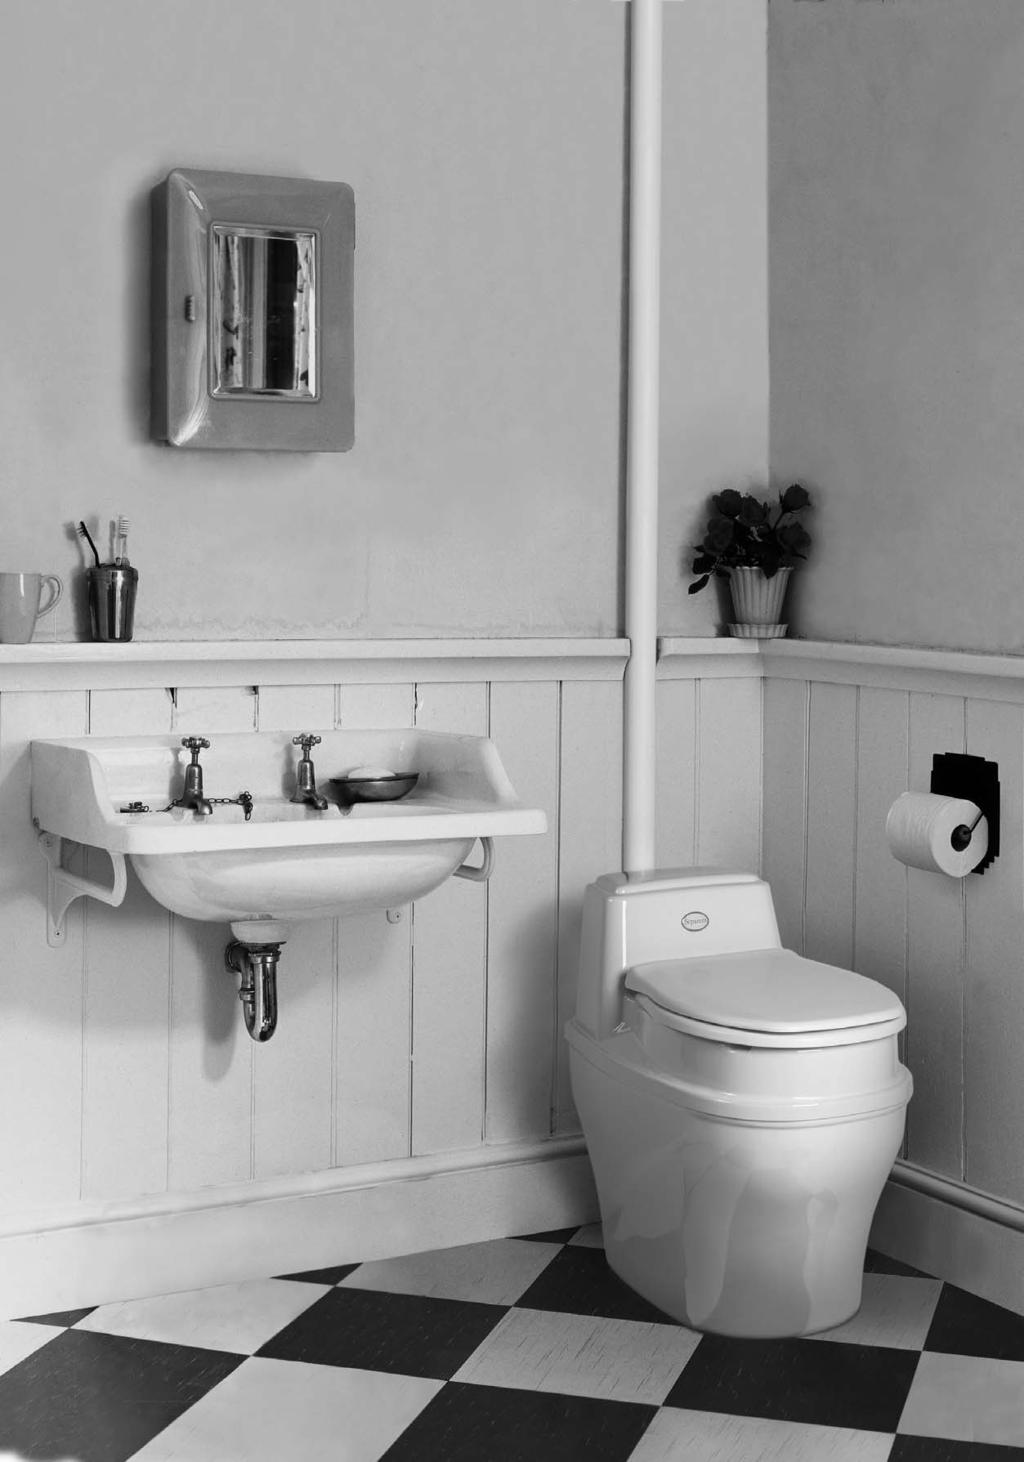
3 User Manual for Separera 40 Congratulations on your purchase of a Separera 40. Before installing your new Separera 40, we recommend that you read through this instruction in its entirety. We know from experience that the faults which may occur, almost always has to do with installation and maintenance. In order to get a hassle free use, take a moment and go through the instruction. It is absolutely worth it. A Separera which has been properly installed, is completely odour free. If odour should appear, you have most likely missed or misunderstood something in the use- and care manual. We mention this now to remind you how important it is to get the toilet correctly installed from the start; reading this manual is the best guarantee to reaching full product satisfaction. Important things to always remember: The moisture content is an important component of the biological process, so it is important to retain the moisture as long as possible, even when the toilet is switched off. Apart from the natural needs being taken care of during a visit to the toilet, the only thing that should go into the toilet is toilet paper. 1
4 How the Separera 40 works This urine separating toilet is constructed from eco-friendly material and is designed to cope with high demand over many years.what does separating waste mean? Well, the toilet is designed so that on any toilet visit, solid waste is separated from the liquid (urine).this means that Separera has two chambers, one for urine, and another for solid waste. Both must be dealt with in accordance with local regulations. Contacting Environmental Health Contact Environmental Health office regarding local health regulations. This always applies when installing any type of toilet. The Separera box contains Toilet with fan Lid Urine hose (1.5 m) Screw with washer for wall bracket according to option A Special Humus Ventilation Pipe 50 cm for wall Mesh Cover 2 Composting Chambers (40 litres) Latrine Bags (10) The installation kit (accessories) The installation kit contains; ventilation pipes (4x1.1 m ventilation pipe with 55 mm outer diameter), exterior pipe (1 x 1.1m with 110 mm outer diameter), insulation (2 x 1 m), reducing coupling, roof flashing and insect netting. The connection kit used in installation option B can be ordered by your retailer Further accessories Pipe Bends 30 and 45, Insulation, Ventilation Pipe, Special Humus, Ejector Tank, Latrine Bags. Separera in cross section 1. Lid for vegetable waste 2. Upper section 3. Toilet seat 4. Air intake 5. Screen 6. Urine bowl 7. Urine hose 8. Lower section 9. Hose connection 10. Fixing holes 11. Floor bushing 12. Connector pipe 13. Composting chamber 14. Cord with plug 15. Inner container 16. Nylon clips 17. Fan kit 18. Wall bracket 19. Lid
5 MAINTENANCE Urine drainage Urine can be drained away in a number of different ways. Check what is required by your local authority; there are variations depending on ground conditions and the water table. You should never just deal with it as you see fit, as this could have a harmful effect. A household of 4 people will produce around 35 litres of urine per week; this is equivalent to about 3 kg of artificial fertiliser, which is a considerable amount. There must be a drop in the hose coming out and away from the toilet to avoid salt deposits; for longer hoses, it may be helpful to connect it to a 32 mm PVC pipe. GREY WATER: Connect the hose to an existing drainage system such as a percolation basin or similar. It is important that pipes have enough of a drop for urine not to remain standing in the hose. If necessary, the hose may be angled to create a water trap. In this case it is important to pour through a litre of hot water now and again to prevent the build-up of salt deposits in the hose. Electrical connection Separera is approved for installation in wet rooms. For permanent installation, a qualified electrician must install a multi-pole switch. If the mains supply cable is damaged it must be replaced by the manufacturer or another qualified person. Solid waste With normal use, a family of four produces around 7 litres of solid waste per week. To create compost that is nice and loose, add a few litres of Special Humus once a week. You need to base the emptying frequency on how often the toilet is used and by how many people. For example, after 4-6 weeks use by 4 people it will be time to switch composting chambers. Lift out the inner container and carry it out, add a little ordinary topsoil and put the lid on. Place the container in a shady place in the garden for post-composting. It takes 6 to 9 months of post-composting as a rule before the contents can be used as a fertiliser. Put a latrine bag in the other inner container and fit this in place beneath the toilet. INFILTRATION: May consist of a pit or a ditch outside the house. Put large stones/macadam around the hose mouth and then fill with sand. EJEKTORTANK: If you want to use the urine as liquid fertiliser, there is a special tank available as an accessory; it can be ordered from your dealer or from us. Urine contains large quantities of nutrient salts, making it a useful fertiliser for lawns. With the ejector tank you get the correct dilution for watering; connection to 1/2 garden hose. Infiltration Ejector tank Grey water drainage General advice Wash the urine bowl with water now and again to prevent salt deposits. If insects get into the toilet, you can sprinkle BioLet Insektsstopp on the compost. If you do experience a bad smell in the room, check the pipe connections are properly sealed and that there is an adequate air supply. To clean the toilet, use only mild detergent. Never use abrasive cleaning agents. If you leave the house for more than 2 days, switch off the fan and put the lid down. If there is a good natural. 3
6 INSTALLATION The toilet room itself The toilet can be placed anywhere you like; it does not need to have a particular room temperature. However, the composting process will be more rapid in a warmer room, as the microorganisms thrive in a warm environment. It must be possible to conduct urine away from the toilet. Separera is therefore most suitable as a summer toilet, as there may be problems with managing the urine in wintertime. mm 300 Option A: 370 mm Option B: 415 mm FAN 4 Air supply Make sure there is a good air supply, for example, through a 10 mm gap under the door or via a vent. Air will be evacuated via the toilet, so cross-draughts must be avoided. Ventilation Ventilation can be either via an external wall or up through the roof. Option A ventilation through external wall The toilet is accompanied by an installation kit according to Option A. Lift off the upper section (2) of the toilet, remove the inner container (15) and floor bushing (11). Position the lower section (8) against the external wall of the room. Use the accompanying washers, 10 mm, to get the correct distance from the wall before marking. Mark for wall bracket, ventilation pipe, floor bushing and hose. Drill a hole in the external wall for the ventilation pipe 55 mm, hole centre 300 mm from the floor. Saw holes for the floor bushing and for the urine hose, 25 mm. Fit the ventilation pipe and seal against the external wall using silicone. On the outside the pipe must be properly sealed against the external wall. Fit the mesh cover. through screws with nuts FAN Option A w A L washers SOLID WASTE snapcoupling ejectortank URINE Pass the urine hose through the floor and seal with silicone. Set the lower section in position and seal between the floor and the toilet. Fit the floor bushing to the toilet and through the floor. Connect the urine hose to the urine bowl, making sure there are no kinks in the hose. Fix the hose in place using hose clamps, being careful not to damage the nipple. Fit the ventilation pipe to the fan kit (17). Screw the floor bushing and the lower section securely to the floor. Fit the inner container using the plastic clips. Screw the toilet securely to the wall using screws and washers. Replace the upper section. Place the composting chamber on a level surface immediately beneath the toilet Measure from the upper edge of the composting chamber to the lower edge of the floor bushing, add 10 cm, and then cut the connection pipe. The stop edge of the pipe must be up against the composting chamber. Place a bag in the composting chamber and fold it over the edge, then put on the lid with the hole and pass the pipe up through the floor bushing. Set the chamber in position and let the pipe down through the hole in the lid so that the edge rests on the lid. Plug into an earthed socket. Pour approximately 5 litres Special Humus into the toilet.
7 Option B ventilation via the roof Prior to mounting the Installation Kit and Connection Kit are needed; these can be purchased from the place where the toilet was purchased. To install the ventilation pipe, loosen the two through screws holding the fan motor in place. Then install it using the two extra screws that are in the lower section, under the fan motor. Place the connecting piece on the fan cover. Lift off the upper section (2) of the toilet, remove the inner container (15) and floor bushing (11). Position the lower section (8) against the wall of the room. Use the accompanying washers, 60 mm, to get the correct distance from the wall before marking. Mark for wall bracket, floor bushing and hose. FAN Measure up and drill a hole in the roof for the ventilation pipe, 55 mm. Saw holes for the floor bushing and for the urine hose, 25 mm. Install the ventilation pipe, and seal the passage through the exterior roof using asphalt sealant to prevent leaks. Insulate all piping that passes through cold spaces (e.g. in the loft and on the outside of the building) this is to prevent condensation. Cut the exterior pipe to fit the angle of the roof. RUBBER FLASHING pre-mounted screws Position the rubber flashing use soapy water to make this easier. For those with a tin roof, it may be best to get a metal worker to make some metal flashing. Place the outer pipe with rubber flashing over the insulated ventilation pipe. Adjust the rubber flashing to the external roof and seal firmly with asphalt sealant between the flashing and the roof. Once all the piping is insulated and covered, fit the reducing joint on the top, and then fit the mesh cover. W A L Attachment Option B (from above) sealing using asphalt sealant roof covering (tile, felting or tin/plastic) pip spacers fix the cover using screws and nuts Pass the urine hose through the floor and seal with silicone. Set the lower section in position and seal between the floor and the toilet using silicone. Fit the floor bushing to the toilet and through the floor. Connect the urine hose to the urine bowl, making sure there are no kinks in the hose. Fix the hose in place using hose clamps, being careful not to damage the nipple. B1 MAX 45 nonsleeved sleeved pipe Use no more than 2 pipe bends, and none over 45 angle, to ensure a natural draught. Screw the floor bushing and the lower section securely to the floor. Fit the ventilation pipe and the connecting piece to the fan kit (11). Screw the toilet securely to the wall using screws and washers. Fit the inner container using the plastic clips. Replace the upper section. Place the composting chamber on a level surface immediately beneath the toilet. Measure from the upper edge of the composting chamber to the lower edge of the floor bushing, add 10 cm, and then cut the connection pipe. The stop edge of the pipe must be up against the composting chamber. Place a bag in the composting chamber and fold it over the edge, then put on the lid with the hole and pass the pipe up through the floor bushing. Set the chamber in position and let the pipe down through the hole in the lid so that the edge rests on the lid. Pour approximately 5 litres Special Humus into the toilet. Plug into an earthed socket. IMPORTANT! Insulate the pipe according to the instructions. Do not use pipe bends over 45 and avoid having more than two; this is to ensure a natural draught when the toilet is closed. B2 5
8 Swedish Ecology AB Klippan 1J S Göteborg Sweden Tel: Fax:
Therme storage water heater. Table of contents. Symbols used. Symbols used Symbol indicates a possible hazard. Installation instructions
 Therme storage water heater Table of contents Symbols used... 8 Installation instructions Water supply... 9 Choice of location... 9 Installation of the Therme... 9 Fitting the draining and venting valve...
Contents. Introduction...3 Description...3. Pack Contents...4. Rada Heavy Duty EV Shower Fittings Right Angled Connector (RAC)...
...") SHOWER FITTINGS PRODUCT MANUAL IMPORTANT Installer: This manual is the property of the customer and must be retained with the product for maintenance and operational purposes. Contents Introduction...3
SHOWER FITTINGS PRODUCT MANUAL IMPORTANT Installer: This manual is the property of the customer and must be retained with the product for maintenance and operational purposes. Contents Introduction...3
GoBidet Bidet Attachment
 GoBidet Bidet Attachment 151 Ruths Place #5 Sequim, WA 98382 Tel 1-800-681-0753 Fax +1 360-681-4029 www.go-bidet.com MODEL #2003C In this box: 1 User Manual 1 GoBidet Unit w/ mounting bracket, nut, rubber
Entry class K 2.98 M plus
 Entry class K 2.98 M plus All-rounder with induction motor and convenient handle for mobility. Compact for easy storage. Suitable for light soiling (e.g. garden furniture, bicycles, small areas). Ideal
Installation instruction
 Installation instruction Ci51 116 FACTS Technical specifications Model i51 Log box (option) Output 6-11 kw Nominal output 8 kw Efficiency 80 % Weight (kg) 215 50 Powerstone (option): + 100 kg Width (mm)
Entry class K Order number:
 Entry class K 2.110 Small, lightweight all-rounder for occasional use for light soiling. For example, garden furniture, bicycles, cars and small areas around the house. Ideal for use as a second machine.
Auxiliary 63.5l Fuel Tank Ford/Mazda Pick-up Truck 2012-Current READ ME! IMPORTANT WARNING!
 Auxiliary 63.5l Fuel Tank Ford/Mazda Pick-up Truck 2012-Current ENG FTFM006 90 min READ ME! Thank you for purchasing a Front Runner Ford/Mazda Pick-Up Truck 2012 - Current Fuel Tank. Before you start,
Installation Instructions
 Installation Instructions C 880 www.contura.eu 50 CERTIFICATE EC Declaration of conformity www.contura.eu Manufacturer name address Place of manufacture NIBE AB/NIBE STOVES Box 134, Skulptörvägen, SE-285
Installation Instructions for. Thrifty King CT Series Fountains
 Installation Instructions for Thrifty King CT Series Fountains Congratulations, you have just purchased the finest watering fountain on the market. This unit is built to give you excellent service when
INSTALLATION INSTRUCTIONS
 INSTALLATION INSTRUCTIONS Pictures in this manual are shown with the optional visual display indicator installed on the filter. BLUE FLAME & BLUE FLAME II MAXX LP FILTER KIT (423-375-001A) SHIVVERS SHIVVERS
Optional Controls (Depends which set was purchased) Set A (Remote control kit)
 Set A (Remote control kit)") Primrose Awnings - Full Cassette Manual & Electric Instructions Contents Warning 1.5m - 3.5m Awnings 8 x Expansion bolts ** 2 x brackets 1 x Awning 1 x Winder 4.0m - 5.0m Awnings 12 x Expansion bolts **
Primrose Awnings - Full Cassette Manual & Electric Instructions Contents Warning 1.5m - 3.5m Awnings 8 x Expansion bolts ** 2 x brackets 1 x Awning 1 x Winder 4.0m - 5.0m Awnings 12 x Expansion bolts **
Reverse Osmosis system 50 GPD Instruction manual EN
 Reverse Osmosis system 50 GPD Instruction manual EN Contents 1. Unpacking 2. Scope of supply 3. Insertion of the membranes 4. Connecting the lines 5. Installation 6. First commissioning 7. Consumables
Tools. For safety and easy faucet replacement, San-Ei recommends the use of the following helpful tools:
 BW-0BH INSTALLATION INSTRUCTIONS SINGLE HANDLE Kitchen Faucet Tools For safety and easy faucet replacement, San-Ei recommends the use of the following helpful tools: SAFETY GLASSES PIPE WRENCH PLIERS CHANNEL
Installation Instructions
 Installation Instructions C750 C750A www.contura.eu 50 CERTIFICATE EC Declaration of conformity www.contura.eu Manufacturer name address Place of manufacture NIBE AB/NIBE STOVES Box 134, Skulptörvägen
INSTALLATION INSTRUCTIONS AND OWNER'S MANUAL AWNINGS. For trailers & motor homes with straight sides TOOLS REQUIRED
 AWNINGS INSTALLATION INSTRUCTIONS AND OWNER'S MANUAL For trailers & motor homes with straight sides TOOLS REQUIRED 1/4" electric drill Ratchet handle kit 3/8" & 7/16" socket No. 1 and No. 2 screwdriver
Optional Controls (Depends which set was purchased) Set A (Remote control kit)
 Set A (Remote control kit)") Primrose Awnings - Half Cassette Manual & Electric Instructions Contents Warning 1.5m - 3.0m Awnings 4 x Expansion bolts (2 per bracket)** 2 x brackets 1 x Awning 1 x Winder handle 3.5m - 4.0m Awnings
Primrose Awnings - Half Cassette Manual & Electric Instructions Contents Warning 1.5m - 3.0m Awnings 4 x Expansion bolts (2 per bracket)** 2 x brackets 1 x Awning 1 x Winder handle 3.5m - 4.0m Awnings
7. Do not dispose of the packaging immediately.the package insert contains a template for mounting the slide bar A/Rev01 G1/2" G1/2" G1/2"
 INSTALLATION INSTRUCTIONS Magnetic Slide Shower 550 552 BEFORE YOU BEGIN MAGNETIC SLIDE SHOWER All information is based on the latest product information available at the time of publication. Kohler Co.
Installation Instructions
 Installation Instructions C810 www.contura.eu 50 CERTIFICATE Declaration of performance according to Regulation (EU) 305/2011 No. C810-CPR-130610-SE-1 PRODUCT Product type Stove lit with solid biofuels
Installation Instructions
 Installation Instructions C 780 www.contura.eu 50 CERTIFICATE PERFORMANCE DECLARATION No. C780-CPR-130612-SE-1 PRODUCT Product type Stove lit with solid biofuels Type designation Contura 780 Manufacturing
Environmental products for the home and garden
 TM Environmental products for the home and garden TM 1993 Straight is established 2003 Straight is admitted to the AIM market 2005 Straight acquired Blackwall Limited, becoming the UK s largest supplier
SOFT TOP ROOF TENT INSTRUCTION MANUAL
 SOFT TOP ROOF TENT INSTRUCTION MANUAL CONTENTS SET UP INSTRUCTIONS: 1. INSTALLING YOUR ROOF TOP TENT P2-3 2. SETTING UP YOUR ROOF TOP TENT P4 3. PACKING DOWN YOUR ROOF TOP TENT P5-6 4. TIPS & TRICKS P7
Installation Instructions for. Thrifty King CT Series Fountains
 Installation Instructions for Thrifty King CT Series Fountains Congratulations, you have just purchased the finest watering fountain on the market. This unit is built to give you excellent service when
Installation and User s Manual 12 x 10 MOTORIZED AWNING
 12 x 10 MOTORIZED AWNING Installation and User s Manual 12 x 10 MOTORIZED AWNING 088-1763-0 Stop Please read and understand this manual before any assembly or use of this product. Before beginning assembly
INSTRUCTIONS FOR INSTALLATION, USE AND MAINTENANCE YSEN
 INSTRUCTIONS FOR INSTALLATION, USE AND MAINTENANCE YSEN READ THE INSTRUCTION BOOKLET AND THESE SUPPLEMENTARY INSTRUCTIONS CAREFULLY BEFORE INSTALLATION These instructions together with those in the instruction
Installation Instructions
 Installation Instructions C 710 www.contura.eu 50 CERTIFICATE Declaration of performance according to Regulation (EU) 305/2011 No. C710-CPR-160329-SE-1 PRODUCT Product type Stove lit with solid biofuels
Primrose Awnings - Full Cassette Manual & Electric Instructions
 Primrose Awnings - Full Cassette Manual & Electric Instructions Contents Warning 2.0m - 3.5m Awnings 8 x Expansion bolts ** 2 x brackets 1 x Awning 1 x Winder 4.0m - 5.0m Awnings 12 x Expansion bolts **
Installation instructions
 Installation instructions C 790T www.contura.eu 82 CERTIFICATE PERFORMANCE DECLARATION No. C790T-CPR-130612-SE-1 PRODUCT Product type Type designation Manufacturing number Intended area of use Fuel Stove
Rhino-Rack Sunseeker II Base Tent (32119)
") Important: Please read these instructions carefully prior to installation. Please refer to your fitting instruction to ensure that the roof racks are installed in the correct locations. Check the contents
Important: Please read these instructions carefully prior to installation. Please refer to your fitting instruction to ensure that the roof racks are installed in the correct locations. Check the contents
Installation instruction
 Installation instruction C 35T-Low www.contura.eu 82 CERTIFICATE PERFORMANCE DECLARATION No. C35TL-CPR-130618-SE-1 PRODUCT Product type Type designation Manufacturing number Intended area of use Fuel Stove
Primrose Awnings - Standard Manual Instructions
 Primrose Awnings - Standard Manual Instructions Contents Warning 1.5m - 3.0m Awnings 4 x Expansion bolts (2 per bracket)** 2 x brackets 1 x Awning 1 x Winder handle 3.5m - 4m Awnings 6 x Expansion bolts
Installation Instructions
 Installation Instructions C 556 www.contura.eu 50 CERTIFICATE PERFORMANCE DECLARATION No. C556-CPR-130601-SE-2 PRODUCT Product type Stove lit with solid biofuels Type designation Contura 556 Manufacturing
Harrie Leenders Fuga el - Instructions for Installation, Use and Maintenance INSTRUCTIONS FOR INSTALLATION, USE AND MAINTENANCE
 INSTRUCTIONS FOR INSTALLATION, USE AND MAINTENANCE FUGA el 1 2 1. Flue 2. Case 3. Ceramic glass 4. Aeration slide 5. Convection fins 6. Door handle 7. Base 3 4 READ THE INSTRUCTION BOOKLET AND THESE SUPPLEMENTARY
Cassette-folding arm-awning markilux 990
 Cassette-folding arm-awning markilux 990 Mounting instructions 1. Overview 1 Projection profile 2 Folding arm 3 Fabric 4 Console 5 Cassette 6 Covering cap 7 Wall bracket 2. Mounting brackets 2.1 Overview
Installation Instructions for Wall Mount, Deck Mount and Pre-rinse Faucets
 Installation Instructions for Wall Mount, Deck Mount and Pre-rinse Faucets SAVE FOR END USER ELKAY 2222 CAMDEN COURT OAK BROOK, IL 60523 USA WALL MOUNT ASSEMBLY General Instructions Turn off the water
ASSEMBLY GUIDE. Customer Service: INCH² 2-BURNER & 864 INCH² 2-BURNER
 ASSEMBLY GUIDE 688 INCH² 2-BURNER & 864 INCH² 2-BURNER DANGER If you smell gas: 1. Shut off gas to the appliance. 2. Extinguish any open flames. 3. Open lid. 4. If odor continues, keep away from the appliance
Primrose Awnings Half Cassette Manual & Electric Instructions
 Primrose Awnings Half Cassette Manual & Electric Instructions Contents for 2.5m, 3m Awnings 4 x Expansion bolts (2 per bracket)** 2 x brackets 1 x Awning Contents for 3.5m, 4m Awnings 6 x Expansion bolts
Blue Series Hot Melt Hose with RediFlext II Hanger System
 Instruction Sheet P/N 1124594_01 Blue Series Hot Melt Hose with RediFlext II Hanger System Safety WARNING! Allow only personnel with appropriate training and experience to operate or service the equipment.
ASSEMBLY & CARE INSTRUCTIONS
 ASSEMBLY & CARE INSTRUCTIONS 7 x TRAILER TENT SERIES 3 9 Part No. FT3711 - on road FT3923 - off road OPTIONAL SUNROOM Wall and floor kit Part No. FT3723 - on road FT39 - off road OPTIONAL SPARE ROOM Roof,
ASSEMBLY GUIDE. Customer Service: INCH² 3-BURNER & 545 INCH² 3-BURNER
 ASSEMBLY GUIDE 455 INCH² 3-BURNER & 545 INCH² 3-BURNER DANGER If you smell gas: 1. Shut off gas to the appliance. 2. Extinguish any open flames. 3. Open lid. 4. If odor continues, keep away from the appliance
Ultraflow Compact Housing and Winter Kit
 Ultraflow Compact Housing and Winter Kit Operating instructions Page 2 Installation instructions Page 8 To be kept in the vehicle! Comfort on the move Ultraflow Compact Housing and Winter Kit 1 Compact
Installation instruction
 Installation instruction C 560T www.contura.eu 66 CERTIFICATE EC Declaration of conformity Manufacturer name address Place of manufacture NIBE AB / Contura Box 134, Skulptörvägen 10, SE-285 23 Markaryd
PARTS LIST COLT COLT HEPA
 PARTS LIST COLT 800-1250 - 1450 COLT HEPA - 1250-1450 MOTOR / LID ITEM PART NO. PART DESCRIPTION QTY. 101 0891201 TOP COVER 1 102 0294341 TOP MOTOR SEAL 1 103 0299861 STRAIN RELIEF CORD CLAMP 1 104 0891131
ASSEMBLY & CARE INSTRUCTIONS. 7 x4 TRAILER TENT SERIES 4 9. OPTIONAL SUNROOM Wall and floor kit. OPTIONAL SPARE ROOM Roof, wall and floor kit
 ASSEMBLY & CARE INSTRUCTIONS 7 x TRAILER TENT SERIES 9 Part No. TM709 OPTIONAL SUNROOM Wall and floor kit Part No. TM723 OPTIONAL SPARE ROOM Roof, wall and floor kit Part No. TM76 Please keep these instructions
READ ME FIRST! IMPORTANT WARNING! ENG. Roof top tent
 Roof top tent ENG TENT031 220 min READ ME FIRST! Thank you for purchasing a Front Runner Roof Top Tent. Before you start, take a moment to familiarize yourself with these Fitting Instructions and the components
Primrose Awnings Half Cassette Manual & Electric Instructions
 Primrose Awnings Half Cassette Manual & Electric Instructions Contents Contents for 2m, 2.5m, 3m Awnings 2 x wall brackets 4 x expansion bolts (2 per bracket)** 1 x Awning Contents for 3.5m, 4m and 4.5m
Primrose Awnings Full Cassette Manual & Electric Instructions
 Primrose Awnings Full Cassette Manual & Electric Instructions Contents for Full Cassette Awning 1 x Remote control receiver box 2 x Remote hand-held zappers 1 x 5 metre cable 1 x Template sticker **The
Hose Reel Series L701/G701
 Hose Reel Series L70/G70.0 WARNING: Read carefully and understand all INSTRUCTIONS before operating. Failure to follow the safety rules and other basic safety precautions may result in serious personal
Installation instruction
 NO DK FR NL Installation instruction 2 Installasjonsanvisning 17 Monteringsvejledning 33 Guide d installation 49 Installatie instructies 65 Installation instruction C850W contura.eu 2 CERTIFICATE Declaration
Installation instruction
 Installation instruction C 550 www.contura.eu 66 CERTIFICATE PERFORMANCE DECLARATION No. C550-CPR-130601-SE-1 PRODUCT Product type Stove lit with solid biofuels Type designation Contura 550 Manufacturing
jointed arm awning _EN
 jointed arm awning TRENDLINE SUNBOX MOUNTING INSTRUCTIONs 930101_EN jointed arm awning TRENDLINE SUNBOX mounting instructions Contents Page 1. Safety 1.1 Explanation of the safety notes...3 1.2 General
BEV-TENT COMPONENTS. Made in South Africa
 BEV-TENT COMPONENTS REB MARKETING Distributing Agent Tel: (011) 452 9131 Cell: 072 965 6792 Fax: (011) 609 4615 15 Imvubu Road, Sebenza Ext 6, Edenvale orders@rebmarketing.co.za BEV-TENT 001 90 deg Elbow
Otter Pro XT Cabin Installation and Set-Up Instructions
 Otter Pro XT Cabin Installation and Set-Up Instructions Otter Pro XT Cabin Fits Medium Otter Pro and Otter II Sled Only Parts Identification and Check List MODEL NUMBERS: Complete Pkg Pro XT Thermal Cabin
Getting Started Guide
 Getting Started Guide Assembly Instructions User Guide Table Top Maintenance Warranty Information (800) 445-4559 www.designingfire.com Fax: 651-305-6347 @designingfire.com #253915-2528907 Installers: Please
Otter XT Cabin Installation and Set-Up Instructions
 Otter XT Cabin Installation and Set-Up Instructions Otter XT Cabin Fits Medium Otter Wild Sled Only Parts Identification and Check List MODEL NUMBERS: Complete Pkg Otter XT Cabin 200962 2 1 PARTS LIST
Minibar User Manual MBA 4000 W
 Minibar User Manual MBA 4000 W Read this manual prior to initial operation of the product! Dear Customer, We hope that your product, which has been manufactured in modern facilities and passed through
MYRIAD Banner Stand is a trademark of Skyline Exhibits. Patent Pending PN32294-B. MYRIAD Banner Stand
 is a trademark of Skyline Exhibits Patent Pending 1.1 1. Banner Stand Setup 1.1 Remove banner stand from standard case or Arrive Portable Display & Workstation and assemble pole. 1.2 Insert pole into base
Installation Guide. Single-Control Kitchen Sink Faucets
 Installation Guide Single-Control Kitchen Sink Faucets K-6352 K-6353 M product numbers are for Mexico (i.e. K-12345M) Los números de productos seguidos de M corresponden a México (Ej. K-12345M) Français,
NM-11 INSTRUCTION MANUAL WARNING!! TO REDUCE THE RISK OF INJURY, USER MUST READ AND UNDERSTAND THIS INSTRUCTION MANUAL. ORIGINAL INSTRUCTIONS
 NM-11 INSTRUCTION MANUAL WARNING!! TO REDUCE THE RISK OF INJURY, USER MUST READ AND UNDERSTAND THIS INSTRUCTION MANUAL. ORIGINAL INSTRUCTIONS Date of purchase:... NM-11 manual.en 05/2017 - SSM Produkt
TITAN Fuel Tanks. INSTALLATION INSTRUCTIONS G e n e r a t i o n V
 TITAN pt. no.: 02 0000 0128 Important: Please read these instructions carefully and completely before starting the installation. TITAN Fuel Tanks INSTALLATION INSTRUCTIONS G e n e r a t i o n V Extended
Come rain or shine its fine out with ScooterPac. Take a quick read of this manual to get the most out of your folding canopy.
 YOUR USER MANUAL Come rain or shine its fine out with ScooterPac. Take a quick read of this manual to get the most out of your folding canopy. Contents 1 Quick start guide 5 Fitting your canopy 9 Detailed
Mod. MONTANA WOOD BURNING STOVE USAGE AND MAINTENANCE INSTRUCTIONS
 Mod. MONTANA WOOD BURNING STOVE USAGE AND MAINTENANCE INSTRUCTIONS Nutrients Ashes Fertilizer Wood: an ecological fuel Wood is a renewable source of energy which answers the energy and environmental demands
Perrin & Rowe Kitchen ROHL Pull-Out/Pull-Down COLORS/FINISHES. Polished Chrome Polished Nickel Satin Nickel English Bronze Inca Brass* 9 1/4
 PERRIN & ROWE TRADITIONAL PULL-DOWN FAUCET Perrin & Rowe Kitchen ROHL Pull-Out/Pull-Down U.4744 FEATURES Brass construction Metal lever CNC machined Dual spray with lock in modes 1 3/4 max installation
PARTS LIST MODEL M-1 - PIG
 PARTS LIST MODEL M-1 - PIG FAN HOUSING ASSEMBLY ITEM PART NO. DESCRIPTION QTY 101 1090601 LABEL KIT - M-1 PIG 1 102 2590019 SWIVEL COUPLING ASSEMBLY - INCLUDES: 1 102A 2590111 HOSE COUPLING GASKET 1 103
Clay Adaptors & Insert Stove Kits
 Clay Adaptors & Insert Stove Kits September 2014 Tel: +353 46 95 58030 Fax: +353 46 95 58034 Email: sales@miflues.ie Web: www. miflues.ie INTRODUCTION CLAY ADAPTORS Mi-Flues Clay Adaptors are specially
AUTO REWIND HOSE REEL USER MANUAL
 AUTO REWIND HOSE REEL USER MANUAL Models: US3025 IMPORTANT: READ BEFORE USE AND KEEP FOR FUTURE REFERENCE Welcome to trouble-free watering at its best! The Hoselink Auto Rewind Hose Reel is manufactured
INSTRUCTIONS MANUAL CAST IRON STOVE
 INSTRUCTIONS MANUAL CAST IRON STOVE CA-SGB06 Warning: Use outdoors only Read the instructions before using the appliance and retain for future reference. 1 These instructions give some important information
BEV-TENT COMPONENTS. Made in South Africa
 BEV-TENT COMPONENTS REB MARKETING Distributing Agent Tel: (011) 452 9131 Cell: 072 965 6792 Fax: (011) 609 4615 15 Imvubu Road, Sebenza Ext 6, Edenvale orders@rebmarketing.co.za BEV-TENT 001 90 deg Elbow
Otter Pro X-Over Lodge Installation and Set-Up Instructions
 Otter Pro X-Over Lodge Installation and Set-Up Instructions Otter Pro X-Over Lodge Fits Magnum Otter II & Pro Sled Only Parts Identification and Check List MODEL NUMBERS: Complete Pkg Pro X-Over Lodge
Crystal Filter Housing
 Crystal Filter Housing Operating instructions Page 3 Installation instructions Page 6 To be kept in the vehicle! Sales and Service in UK and Eire: Truma (UK) Ltd. Beeches Park, Eastern Avenue, Burton upon
» GEMINI 390 CARAVAN«
 TRAVEL-SMART AWNING SERIES» GEMINI 390 CARAVAN«Model No. 12010223900000 Document-No.: FC-90015-390 Issue:October 2015 Top Quality Camping WELCOME Thank you for purchasing your Westfield awning. Please
S36 230V MOTOR COVER
 S36 230V MOTOR COVER S36 230V MOTOR COVER Pos Article Number Description QTY 1 590450601 AC FOAM PACKING 1 2 590396701 MANOMETER KIT 1 3 590415301 COUNTER SET 1 4 590450201 CORD SET PACKING 1 5 590449601
Parts Catalog T7/T71/T73 M40000/M40001/M40003
 T7/T71/T73 M40000/M40001/M40003 REPAIR PARTS CATALOG NO. For machines starting with Serial No. T10001 ISSUED August 2010 ORDERS Please use Part Numbers when ordering and include the machine Serial Number
Here is a report of my 12volt electrics project.
 Here is a report of my 12volt electrics project. The aim was to provide enough 12v power to run the fridge and lights for a minimum of 48 hours without charging. Most of our camping is in caravan parks
Color Light Streams Lighted Bubbler Spillway Pot (CLSDLP) Installation Manual
 Installation Manual") Color Light Streams Lighted Bubbler Spillway Pot (CLSDLP) Installation Manual 27.75 23.75 25.50 20.75 Specifications: 8-13 GPM 12-14 VAC only (Class 2 transformer required) 3W max. 100 ft. cord, conduit
Color Light Streams Lighted Bubbler Spillway Pot (CLSDLP) Installation Manual 27.75 23.75 25.50 20.75 Specifications: 8-13 GPM 12-14 VAC only (Class 2 transformer required) 3W max. 100 ft. cord, conduit
Auto Rewind Hose Reel 10M / 20M / 30M Models
 Auto Rewind Hose Reel 10M / 20M / 30M Models Instruction Manual 10M / 20M / 30M Auto Rewind Hose Reel Installation, Hose Replacement and Troubleshooting Guide Product Codes: 1110H / 1120H / 1130H Models
Installation Instructions. Woolly Mammoth Stoves Albert Road, Braintree, Essex, CM7 3JQ
 Installation Instructions Woolly Mammoth Stoves 20-28 Albert Road, Braintree, Essex, CM7 3JQ INSTALLATION INSTRUCTIONS TO BE READ IN CONJUNCTION WITH THOSE IN THE INSTRUCTION BOOKLET These instructions
» AQUILA 320(HIGH TOP) «
 «") PERFORMANCE SERIES» AQUILA 320(HIGH TOP) «Model No. :12020253200000 Document-No.: FC-90037 Issue: November 2015 Top Quality Camping WELCOME Thank you for purchasing your Westfield Aquila 320 awning.please
PERFORMANCE SERIES» AQUILA 320(HIGH TOP) «Model No. :12020253200000 Document-No.: FC-90037 Issue: November 2015 Top Quality Camping WELCOME Thank you for purchasing your Westfield Aquila 320 awning.please
Model 698/ and Model in 1 Hose Reel Owner s Manual
 Model 698/694 200 and Model 706 100 4 in 1 Hose Reel Owner s Manual 698/694 706 VISIT OUR WEBSITE: WWW.LIBERTYGARDENPRODUCTS.COM OR CALL US TOLL FREE AT 1-866-820-5805 LIBERTY GARDEN PRODUCTS, INC. 500
Form No.: LITPLUMBPAK1/2007AD 2005 Plumb Pak Printed in the U.S.A.
 Catalog Addendum Table of Contents CONTENTS Table of Contents Brass Drainage...2 Plastic Drainage...3 Strainers...5 Bath Drains...6 Water Supplies...7 Sink & Faucet...9 Hose & Fittings...8 Bathroom Accessories...9
Country. Instruction. Valley.
 Instruction Country www.combicamp.com Valley Contents UK Instruction 3 Before you set out 4 Hitching the COMBI-CAMP 5 Opening the trailer and erecting the tent 6 Final adjustment 7 Integrated sun canopy
TCWS54 SEE THRU DIAMOND BURNER INSTALLATION KIT INSTRUCTIONS
 INSTALLER: Leave this manual with the appliance. CONSUMER: Retain this manual for future reference. These instructions are supplementary to the Installation and Operating Instructions supplied with the
INSTALLATION GUIDE INTRODUCTION
 INSTALLATION GUIDE for for HotEdge Rail Rail INTRODUCTION HotEdge Rail is a patent pending one-piece roof edge ice melt systems engineered to easily install on standing seam, pro panel, and corrugated
A few days before you set off. 1. Clean
 The summer soon comes around! Now the weather s getting a bit warmer many of us are planning to take our caravan or motorhome out of storage, and hit the road for our first getaway of the year. If your
User s Manual Trampoline 8
 User s Manual Trampoline 8 Model! WARNING Read all precautions and instructions in this manual before using this equipment. Save this manual for future reference. Maximum user weight 17 lbs. ASSEMBLY IMPORTANT
Crystal Compact Housing and Winter Kit
 Crystal Compact Housing and Winter Kit Operating instructions Page 3 Installation instructions Page 6 To be kept in the vehicle! Sales and Service in UK and Eire: Truma (UK) Ltd. Truma House, Eastern Avenue,
OW LEE CASUAL FIRESIDE Q&A
 Are the fire pits certified? All of our units are lab tested and certified by Labtest Certification, we are ANSI and CSA approved for the United States and Canada. The Casual Fireside Fire Pits BTU rated?
Travel Pod Xpress Instructions & care manual
 Travel Pod Xpress Instructions & care manual Kampa UK Limited Witham, CM8 3EU mcl/kampa/2013 12 CARE WELCOME Thank you for purchasing your Kampa awning. Please read these instructions carefully before
Meat Slicer INSTRUCTION MANUAL CAUTION! ONE YEAR LIMITED WARRANTY
 ONE YEAR LIMITED WARRANTY INSTRUCTION MANUAL The original registered owner of this product should contact SKYFOOD EQUIPMENT LLC at 305-868-16 for any warranty problems or service. SKYFOOD EQUIPMENT LLC
AQUA PRODUCTS MODEL G. Cleaners B-17 ASSORTED AQUA PRODUCTS CLEANERS
 Cleaners B-17 DESCRIPTIONS OF THESE ITEMS ARE ON THE NEXT 4 PAGES 99A MODEL G Cleaners B-18 Edited 2-7-06 1 3288-001 HANDLE ASSY. (Blue & White, Bracket included) - Aquabot, AB+RC, AB Turbo, AMAX Jr A10000B
33100 LH - Batwing Awning RH - Batwing Awning
 33100 LH - Batwing Awning 33200 RH - Batwing Awning 1. Check Part No./Kit is correct 3. Fit roof rack accessory 2. Read through instruction before installing 4. Check and recheck all fasteners are secure
Read all instructions and warnings before using this fireplace. WARNING
 Frame User Manual 1 Operating Manual Thank you for purchasing this Signi Fires product. Signi Fires is very safety conscious, we have taken every care in designing, manufacturing and assembling your Signi
Handöl 21, 22 and 23T. Installation Instructions SE DE NO GB
 Installation Instructions 511293 IAV SE/EX 0543-2 SE DE NO GB Installationsanvisning 2 Installationsanleitung 18 Installasjonsanvisning 36 Installation Instructions 54 Handöl 21, 22 and 23T Dear Handöl
Parts Catalog T7/T71/T73 M40000/M40001/M40003
 T7/T71/T73 M40000/M40001/M40003 REPAIR PARTS CATALOG NO. M30202(R) For Machines with Serial No. T6183-T9031 ISSUED July 2009 ORDERS Please use Part Numbers when ordering and include the the machine Serial
SOUDATHERM SFI 600P. Revision date: 19/06/2015 Page 1 of 6
 Revision date: 19/06/2015 Page 1 of 6 Technical data: Basis Polyurethane Foam Consistency Liquid Curing system Moisture curing Skin formation (20 C and 60% R.H.)* 8 min Curing time (20 C and 60% R.H.)*
Installation Instructions
 Installation Instructions For use in and IE only C i4 FS www.contura.eu 2 CERTIFICATE DECLARATION OF PERFORMANCE No. Ci4FS-CPR-130619-SE-1 PRODUCT Product type Type designation Manufacturing number Intended
INSTALLATION & MAINTENANCE MANUAL FOR FLUE RENOVATION SYSTEM - FitFire & Fitfireplus
 INSTALLATION & MAINTENANCE MANUAL FOR FLUE RENOVATION SYSTEM - FitFire & Fitfireplus Edition Revision Approved by Written by 1 1.2 C. Lezzi C. Lezzi Date 14/02/2011 Page 12 Code 01_01 Manuale_inst_Fitfire-plus
INSTALLATION INSTRUCTIONS TOWNSEND
 INSTALLATION INSTRUCTIONS TOWNSEND.00 DECK MOUNT BATH FILLER.0 Thank you for selecting American Standard... the benchmark of fine quality for over 00 years. To ensure that your installation proceeds smoothly-please
OW LEE CASUAL FIRESIDE Q&A
 Can you burn wood in the Casual Fireside pieces? No, these are not wood burning units. Casual Fireside Fire Pits are set-up to run on Propane but are easily converted to Natural Gas. Contact your local
Installation manual. Awning. V480 Cannes
 Installation manual Awning V480 Cannes Installation manual awning V480 Cannes Content 1. Awning * 2. Wall supports 3. Extra support(s) (with an awning bigger than 350 cm) 4. Mounting plates (optional)
USER MANUAL PLEASE READ AND UNDERSTAND THIS MANUAL COMPLETELY BEFORE USE.
 Adventure Kings Roof Top Tent USER MANUAL PLEASE READ AND UNDERSTAND THIS MANUAL COMPLETELY BEFORE USE. Warning Improper installation or use of your Roof Top Tent may result in serious injury or death.