Caribbean/Mediterannean
|
|
|
- Pauline Boyd
- 5 years ago
- Views:
Transcription


1 Caribbean/Mediterannean 2 Burner Stove 3 Burner Stove Propane Galley Range Operating and Installation Manual This instruction manual contains important information necessary for the assembly, installation and safe operation of this stove Serial # Form# Issue#1 Mar 15th 2016
2
3 Table of Contents 4...General Warnings 6...LP Gas Cylinder Specs and Installation 7...About our Dickinson Stove 8...Stove Specifications 9...Accessories 10...Standard Cutout Installation 11...Gimbal Cutout Installation 12...Built In Kit Cutout Installation 13...Installation 14...Fuel Systems 15...Operation Maintenance 19...Caribbean Exploded Diagram 20...Mediterannean Exploded Diagram 21...Caribbean Wiring Diagram 22...Mediterranean Wiring Diagram 23...Troubleshooting 24...Replacement Parts 25...Warranty Policy 26...Warranty Form 3
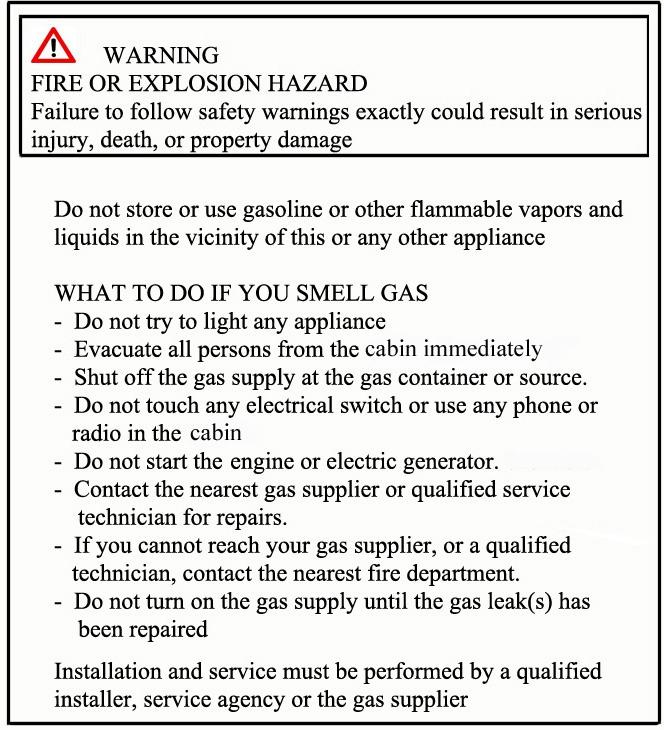
4 Ÿ Leak test all connections before 1st use Ÿ Leak test all connections after each tank refill Ÿ Never check for leaks using an open flame. Use soapy water on the connections and look for bubbles being produced. Ÿ Always check the stove, tank and hose connections prior to each use Ÿ This stove is configured for propane. Do not use natural gas. Ÿ Never use charcoal, lava rocks or any other source of solid fuel in this stove Ÿ Ensure that flames are coming out the entire circumference of the burners or length of the broiler. Occasionally insects can enter the unit when not in use and create blockages which can lead to fires. Ÿ Never use or store gasoline or any other flammable products in or near your heater Ÿ Keep children and pets away from a hot appliance. DO NOT allow children to operate Ÿ Do not leave this stove unattended when in use Ÿ Keep any electrical cords away from the stove when it is in use Ÿ DO NOT operate under the influence of alcohol or drugs Ÿ Do not use any other regulator than ones supplied or recommended by Dickinson Marine Ÿ This stove becomes hot when in use. To avoid burns - DO NOT attempt to move - Wear protective equipment - DO NOT touch any hot surface - Do not wear loose clothing while operating Ÿ This stove is not intended for commercial use Ÿ Adhere to all clearances listed in this manual Ÿ For recreational vehicle installation, the Standard for Recreational Vehicles, ANSI A119.2, or the Standard for Gas Equipped Recreational Vehicles and Mobile Housing CSA Z
5 Ÿ A manufactured home (USA only) or mobile home OEM installation must confirm with the Manufactured Home Construction and Safety Standard, Title 24 CFR, Part 3280,or, when such standard is not applicable, the Standards for Manufactured Home Installations, ANSI A225.1/NFPA 501A, or Standard for Gas Equipped Recreational Vehicles and Mobile Housing, CSA Z240.4 Ÿ Toddlers, young children, and others may be susceptible to accidental contact burns. A physical barrier is recommended if there are at risk individuals in the house. To restrict access to a fireplace or stove, install an adjustable safety gate to keep toddlers, young children and other at risk individuals out of the room and away from hot surfaces Ÿ Clothing or other flammable material should not be placed on or near the appliance Ÿ Any safety screen, guard or barrier removed for servicing the appliance must be replaced prior to usage Ÿ Label all wires prior to disconnecting when servicing controls. Wiring errors can cause improper and dangerous operation after service. Verify proper operation after service prior to firing. Ÿ Installation and repair should be done by a qualified service person. The appliance should be inspected before use and at least annually by a professional service person. More frequent cleaning might be required due to excessive lint from carpeting, bedding material etc. It is imperative that control compartments, burners and circulating air passageways of the appliance be kept clean. *** FAILURE TO ADHERE TO THE SAFETY WARNINGS LISTED IN THIS MANUAL COULD RESULT IN DAMAGE TO PROPERTY OR SEVERE PERSONAL INJURY*** 5
6 LP GAS CYLINDER SPECS AND INSTALLATION Ÿ The stove and its individual shutoff valve must be disconnected from the gas supply piping system during any pressure testing of that system at test pressures in excess of 1/2 PSI (3.5kPa) Ÿ The appliance must be isolated from the gas supply piping system by closing it s individual manual shut-off valve during any pressure testing of the gas supply piping system in equal or less than 1/2 PSI (3.5kPa) Ÿ The LP gas supply cylinder to be used MUST be constructed and marked in accordance with the specifications for LP gas cylinders, U.S. Department of Transportation (DOT) or the standard for cylinders, spheres and tubes for the Transportation of Dangerous Goods, CAN/CSA-B339 Ÿ The propane supply cylinder system must be installed with proper vapor withdrawal capabilities Ÿ A pressure regulator must be used in the operation of this unit which will emit the propane at a pressure of 11 W/C Ÿ Any replacement regulators must be of those specified by the appliance manufacturer 6
7 About our Propane Galley Stoves One of our newer appliances, our Dickinson propane galley ranges are clean burning appliances designed for use in marine environment but are adaptable to many applications. With a large range of setting they are ideal for all cooking situations and are great to have in any galley. Made out of attractive stainless steel our stoves are durable and beautiful. The stainless design is resistant to corrosion and will keep its shine for many years. The burners have porcelain capping for a nice glossy black look which looks great with grained finish of the stove. Paired with the laser cut lettering, the propane galley ranges are a must have. Each Dickinson range comes standard with one set of polished pot holders, a stainless cooking rack, a finished wood cutting board as well as a stainless steel potholder rail. The stoves are designed to sit in a standard cut out and can be mounted three different ways. Straight into a cut out, built in with stainless steel accent pieces or gimbal mounted for use in light chop. Any way it is mounted, your propane range will offer dependable service for years to come. When not in use, place the cutting board into the stove top and you have increased counter space. These stoves operate on 11 W/C pressure and require a dedicated regulator or a 2 stage regulator for a multiple appliance set up. All burners are equipped with thermocouple controlled flame out protection as well as automatic spark ignition for ease of use and the oven is thermostatically controlled and maintains a nice even temperature. All around the stoves are easy to use and reliable. 7
8 Mediterranean Galley Specifications Caribbean lbs (x2) Galley Dimensions Height Width Depth Weight Burner BTU Range Small Top Large Top Broiler Oven Oven Temperature Range Oven Size (Usable) Height Width Depth Gimbal Point Height From Front From Rear lbs Product Features Automatic Spark Ignition - Each burner is equipped with an automatic spark ignitor which is engaged as soon as the burner knob is pressed down to allow gas. This does not allow for any build up of propane gas that could create a potentially dangerous situation. Thermocouple Controlled Flame Out Prevention - Each burner is equipped with flame out protection. In the event that a burner is accidentally blown out, the thermocouple will sense the lack of heat and disengage the valve and prevent any gas build up. Thermostatically Controlled Oven - The oven in our propane galley range is controlled thermostatically with a probe located inside the oven that regulates the cooking temperature. With a cooking range from 250 to 450 degrees your oven is capable of cooking a variety of items Triple Burner - The large burner is a patented triple burner design which allows the Dickinson propane galley range to boast the most powerful marine stove burner (11000 BTUs). The Burner can be turned down to a third of the BTU s for slower cooking. 8

9 Included Accessories Cutting Board - The cutting board is a nice addition to the propane galley. It sits flush in the sink cutout creating more counter space and has cut outs in the back eliminating the need to remove the pot holder rail. Mediterranean Caribbean Cooking Grate - The cooking grate is made of beautifully polished stainless steel and sits tight on four anti-rattle pins. It is equipped with locking slides on the front and back for your pot holder rail as well as 4 adjustable leveling points for your cutting board. Mediterranean Caribbean Pot Holders - Your propane galley comes with a set of pot holders. They can be adjusted to fit any sized pot as they are placed individually on the pot holder rail and once in place will not move. Mediterranean A Caribbean Pot Holder Rail - The pot holder rail serves the dual purpose of holding the pot holders and offering a small raised barrier against sliding pots in small chop Tie Down Bar - This is used to secure the stove underneath at the back where it is inaccessible 9
10 Standard Cutout If installing your Mediterranean or Caribbean propane stove into a cutout, the cutout needs to be a minimum of 20.5 wide for either stove and 22 deep for the Mediterranean or 16.5 for the Caribbean. A cutout is not necessary as the stove can be freestanding. Once mounted the stove needs to be secured with the tie down bar and two screws in the front below the door
11 Built In Kit Cutout The built in kit is designed to give your stove that pre-existing built-in look. There are three different ways to install the kit. Please note the cutout width below that applies to your application. 1) The brackets can be mounted on the counter top so that they sit 3/8 higher then the rest of the counter top. Cutout width for this install would be 20.5 to ) The brackets can be mounted to the sides of the cabinets so that they are level with the counter top. Cutout width for this install would be minimum 22.5 wide. 3) The brackets can be mounted to the sides of the stoves so that they are level with the stove top. Cutout width for this install would be 20.5 to Built In Kit Part # Caribbean Mediterranean
12 Gimbal Cutout To install the stove on a gimbal you would need to locate the proper area to mount the gimbal brackets to allow the stove to swing freely with no obstruction. To do this you would need to make a cardboard template of the side of the stove and pierce it where the mounting bolt would screw in. Swing the stove from this hole to visualize the arc of the stove and identify the proper gimbal mounting points. The minimum cutout width is 22 and if your cutout is too wide you can place shims underneath the gimbal mounting brackets to close the gap. Be sure to adhere to the proper clearances and to allow for enough slack on the propane line to accommodate the swinging. Gimbal Kit Part #
13 Installation The specifics of your installation will differ depending on the method of installation. Fuel lines, securing methods and clearances will depending on if the stove is gimbaled or installed in a cutout secured to the deck. Standard Cut Out/Built in Cut Out In this installation you would secure the stove to the deck using a combination of the tie down bar and screwing down the body. To secure the stove you would first need to screw down the tie down bar in the appropriate spot in the cut out. To do this you would need to measure the distance from where the front of the stove will be located to the back edge of the bottom of the stove. When have this measurement you would screw the tie down bar to the deck so that the bend in the tie down bar is level with where the back of the stove will be. Slide the stove into the cutout and the bottom panel will slide underneath the tie down bar. This will only prevent the stove from tipping in rough weather. To secure the stove further, once it is slide into place you would remove the door and on either side of the stove there are holes in the bottom panel. You need to drive screws through these holes to secure the stove. The combination of the tie down bar and the screws will hold the Stove securely. Clearances for all Installations No clearance is needed on either side of the stove as well as below. 2 of clearance is required behind the stove for the propane hookup, however the counter top can be brought right up to the back of the stove in stationary installations as the oven vents inside the cook top where the burners are located and not out the back. Above the stove we recommend at least 36 of clearance. Batteries for Electronic Spark Ignitor When you opened the oven, there should have been 2 or 3 (depending on the model) 9V batteries. These are included to power the spark ignitor. To install the batteries, you must remove the door. To accomplish this, undo the 2 1/4-20 acorn nuts holding on the bottom door panel. Once removed, the door should pull free. This will expose the spark boxes at the bottom of the unit. Unscrew the caps and place the batteries in with the electrodes sticking out and screw the cap back into the spark box. 13

14 LPG System Installation Fuel Supply **In some cases the solenoid valve is installed on the high pressure side of the system (ie before the LPG regulator). See solenoid manufacturers instruction for proper installation 1. Starting from the propane tank itself, the fuel line attachments should occupy the following positions: 1) Pressure gauge, 2) Low pressure or two stage regulator, 3) Solenoid (optional), 4) The appliance itself 2. In gimbaled installations, the gas supply line should be a flexible fire resistant hose, UL/CGA approved for use with propane systems with a 3/8 (10mm) forged female flare nut machine crimped on each end. 3. If your range is a standard or built in style installation, you should use either soft copper tubing or a UL/CGA approved gas hose with a 3/8 (10mm) forged female flare nuts machine crimped on each end. 4. Because every connection is a potential leak, the fuel line should be one continuous length of hose or tubing. DO NOT make a T off the fuel line between an existing appliance and the gas cylinder to feed another appliance. You may install a T ONLY within the fuel tanks enclosure (propane locker) 5. Be sure not to kink the hose or piping connecting the regulator with the range by bending it too sharply during installation - remember that the pressure (North American) on the downstream side of the regulator is PSI (28mBar) 6. Protect the hose against vibration and damage by securing it tightly to bulkheads and hull side with non-corrosive ties or clamps which will not cut, abrade or pinch it. 7. Fuel lines must be protected by close fitting grommets and sealants where they pass through decks and bulkheads and the passage must be made vapor tight. Also they should be installed so that they are readily accessible for inspection 14
15 First Use Operation Once your stove is installed it is recommended that you use a soapy water solution to check for leaks at the connection at the back. Cover the entire connection in the solution and turn the gas on at the tank. DO NOT light the stove but rather observe the connection for any air bubbles. If no bubbles appear after 2 minutes, light the stove. If you do observe bubbles, shut the gas off, tighten the connection and allow 5 minutes for the escaped gas to dissipate and then turn the gas back on. DO NOT use the stove until you are sure the connection at the back is sealed. Always use 2 wrenches when connection the propane hose to the fitting. Top Burners Before lighting the top burners ensure that the large burner top is seated properly on its base and that the small burner top(s) are not loose. To light the burners, press in the knob (this will engage the electronic spark ignition) and turn counter-clockwise to the High position. The burner should light within 5 seconds. If the burner does not light, turn the knob to the off position and allow any gas to dissipate before attempting to light again. NOTE - The burners may take a little longer to light on initial usage as the air will need to bleed out of the lines. Small Burner(s) - Each small burner is a single ring burner with a maximum out put of 7000BTU and a minimum of 2300BTU once warmed up. Once lit, flame should be coming out of the entire circumference of the burner. If flame is missing in any area it could mean that the burners flame spreader is clogged at that point and needs to be cleaned (see Maintenance). Large Burner - The large burner is a triple ring burner with a maximum out put of 11000BTU and a minimum of 3600BTU. Once lit, flame should come out of all three rings however, the middle ring and inner ring flames will merge when on high due to the pressure of the gas so all 3 rings may not be visible. Flame should be visible around the inner and outer edge of the outer ceramic ring as well as the circumference of the inner ceramic cap. The flame will not be uniform around the outer ring as the individual flames will be smaller at 4 points due to the design of the large flame spreader. Oven Oven Burner - The oven burner is a single ring burner located underneath the heat diffusion plate in the oven. To light the burner, press in the knob (this will engage the electronic spark ignition) and turn counter-clockwise. The burner may take upwards of 10 seconds to light on initial use as the air bleeds out of the copper line and may take 10 seconds before the thermocouple engages. The Oven burner will operate on high setting until the desired temperature is reached and then will automatically re-adjust to maintain temperature. It is recommended to use a secondary thermometer to gauge the accuracy of the oven temperature but a 25 degree disparity is normal. If the difference is more then you may have to adjust the oven valve (See Troubleshooting) Broiler Burner - The broiler burner is located in the top of the oven. To light the burner, press in the knob (this will engage the electronic spark ignition) and turn clockwise. If you wish to use the broiler and have just used the oven, allow 30 seconds from the time the oven has been turned off before you light the broiler. Should the broiler not light within 5 seconds, turn the knob to the off position and allow 2 minutes for the accumulated gas to dissipate. The broiler burner has no high-low setting and can not be used at the same time as the oven burner. If the broiler does not light you may have to clean the orofice (See Maintenance) NOTE - DO NOT light the broiler or oven with the oven door closed 15
16 Cooking with the Top Burners Operation It is recommended that you use the appropriate sized pots and pans when cooking. When using a smaller pot on the large burner ensure the flame is adjusted so that it is not burning up the sides of the pot. This could heat the handle(s) and lead to burns. Also crowding the cooking area with a pot or pan that is much larger can lead to uneven heat distribution. The cooking performance is greatly affected by the type of cookware used. Proper cookware will reduce cooking times, use less energy and produce more even cooking results. For best results use a heavy gauge metal pan with a smooth flat bottom, straight sides and a tight fitting lid. Cookware with uneven, warped, or grooved bottoms, do not make good contact with the heating surface and will reduce heat conductivity and result in slower less even heating. The pan material determines how evenly and quickly heat is conducted from the heat source to the food. Some widely used pan materials are. Aluminum excellent heat conductor. Some food will cause it to darken or pit. Often used as a bottom coating to improve the heating of other pan materials. Copper - excellent heat conductor. Discolors easily, requires constant polishing. Often used as a bottom coating to improve the heating of other pan materials. Stainless Steel - slow heat conductor. Develops hot spots, and produces uneven cooking results. Durable, attractive and easy to clean. Will distribute heat better if other materials are combined or sandwiched together as a bottom coating. Cast Iron Slow heat conductor. Cooks evenly once temperature is reached. Heavy, needs seasoning to make cleaning easier and to prevent sticking and rusting. Glass Slow heat conductor. Easy to clean. Some types may only be used in the oven. Porcelain Enamel glass-like substance fused to metal. Heating characteristics depend on base material. Easy to clean. Oven Cooking Considerations Aluminum Foil If you cover the cooking rack with aluminum foil it may prevent the hot air from naturally circulating around the oven and could cause uneven cooking and burnt food. To catch spills, place some foil on the drip tray below the rack. Do not place aluminum foil in the bottom of the oven and cover the burner. Do not crowd a rack with pans. Never place more than one cookie sheet, one cake pan or two round pans on the rack. Allow two inches between the pan and the oven walls 16
17 CARE AND CLEANING Maintenance WARNINGS: 1. Before cleaning the cook-top, ensure that the burners are turned off and that all components are cool enough to safely touch. 2. After cleaning re-assemble all components before attempting to operate the cook-top. Proper cleaning is necessary to maintain appliance performance and appearance. Wipe up spills that occur while cooking, but wait for cooker to cool. Spills that remain on hot burner components will be very difficult to clean, especially if allowed to burn on. Spills of certain foods, such as tomatoes, citrus juices, vinegar, alcohol and milk are harmful if allowed to stand for any length of time. 1. Do not use any abrasive chemical cleaners on the inside, or outside of your range. Any household liquid cleaner is recommended. 2. Use a clean cloth or sponge to apply cleaners. 3. Remove stains as quickly as possible before they become set. 4. Do not let food spills or burnt foods build up on any surface of your galley range. 5. You can use a household oven cleaner for the oven, but remember to follow the product manufacturer's directions. 6. Do not use steel wool or SOS-type pads to clean any part of your stove, as these products will embed fine steel particles in the surface of the stainless steel causing it to bleed in a marine environment. Use bronze wool or some other nonmetallic abrasive if you must. Be aware, that your range has a fine finish that can be scratched by some abrasive pads or cleaners. PROLONGED LAY UP The Dickinson Propane Stove has been designed to have a long life, with every day use. However, if you leave your boat unattended for a long period of time, particularly in high heat and humid conditions, or long winter conditions, the high temperature lubricant in the gas control valves may settle, resulting in difficulty in turning the control valves and possibly seizure of the valve. NOTE: As part of preventative maintenance, if you anticipate a prolonged lay-up period for your stove, it is advisable that you periodically rotate your gas valves from time to time, to prevent possible valve seizure. In the event that your valve does seize, it will be best to remove the control panel from the range by first pulling off the control knobs, then unscrew the acorn nuts and remove the panel. We highly recommend that you do NOT open and service the gas valve as it is very difficult to re-assemble, ( it may damage internal parts and / or may leak). With that being said you have a 50/50% chance of fixing or breaking the valve. Use pliers or vise grips on the brass shaft then PUSH IN and turn counterclockwise ONLY. This will either loosen the shaft or break it (the shaft will turn but not operate the valve). NOTE: If you don't have experience with gas and would like to fix the valve and not take the chance of breaking it call or better yet tech support for guidance. NOTE: Do a soap test on the valve after assembly to ensure there are no leaks. 17
18 CLEANING ORIFICE The orifices of the burners are accessed by removing the 4 screws on the inside walls of the cooking area and then lift the top off the stove. The large burner cap and body is simply lifted off the burner base support. This reveals the small hole which is the gas inlet orifice. The small burner cap is unscrewed counterclockwise. Remove the two small screws on top of the burner base and then lift off the assembly. It is advisable to unscrew and remove the orifice for cleaning. Cleaning the orifice in place may result in a repeat blockage soon after re-using the cook-top, however turning the orifice drill clockwise, the twisted flutes of the drill may remove the debris upwards and out (works 70% of the time). When putting parts back on, make sure the burner tops are put on before the stove top is reinstalled. NOTE: When putting the small burner back on, make sure to screw in the screws evenly. Start one screw off, then start the other, then adjust each one incrementally. If you don't, the burner will go in crooked, and you will risk damaging it. CLEANING THE OVEN HEAT-DISPERSER Maintenance 1. Open the oven 2. Then lift up plate, and pull towards you. 3. Now you can clean the heat-disperser, by following the same care and cleaning instructions listed above. 18
19 19 CARIBBEAN
20 20 MEDITERRANEAN


21 Caribbean Wiring Diagram Small Burner Large Burner Oven/Broiler Large Burner Small Burner Broiler Oven Oven/Broiler Top Burners Power Wire Ignitor Wire NOTE: Older models may not be wired in this order but the configuration will be the same as the same spark igniters are always paired together 21


22 Mediterranean Wiring Diagram Left Small Right Small Large Oven/Broiler Large Burner GROUND Left Small Right Small Broiler Oven Oven/Broiler Large Burner Small Burners Power Wire Ignitor Wire Ground Wire NOTE: Older models may not be wired in this order but the configuration will be the same as the same spark igniters are always paired together 22
23 Troubleshooting Dickinson Marine has a complete and comprehensive set of instructions that can help guide you through any and all minor issues that may arise with your propane stove. Once you have narrowed down your issue, please visit our website, us or call our tech department to receive a set of instructions to help clear up these issues. Q - I have installed my tie down bar but do not know where to secure the stove in the front - Remove the door and there will be a hole on either side of the battery boxes to secure a screw Q - None of my burners will light - Is the gas cylinder and/or solenoid open? - Is your gas cylinder empty? Q - When I light my burners the flame seems small - If the orifice in the burner cup is dirty it can cause a smaller flame - If all burners are smaller it can mean there is not enough pressure in the system caused by a faulty regulator or more than one appliance in the system using up the propane. Q - When I engage my knobs I do not hear the spark igniter click - Are the batteries in the sparker box dead? - Is there a loose wire at the sparker box? Q - When I light my burner it ignites but does not stay lit - Is the top of the burner sitting properly on the base? (large burner only) - Are you holding the knob in for more than 5 seconds? - When the burner is lit is the flame uniform around the whole burner? Stuck on food can clog burner jets and reduce the flame output around the thermocouple Q - When I try to light the broiler I hear the sparker but the burner does not light - The sparker may have moved slightly and may be either too close to the burner or too far away - The sparker may be sparking above the holes on the burner bar. It needs to be below Q - My oven gets hotter/not as hot as the temperatures listed on the front - You can calibrate the temperature using the set screw on the oven valve Q - My oven burner does not shut off once it gets to temperature - The oven probe line may be kinked Q - My potholders are loose and won t stay in one spot. - Spread apart the brackets and it will increase tension when they are on the searail Q - My cutting board does not sit flat when its mounted in the stove - Adjust the leveling studs in the corners of the cooking grill. Q - My stove is gimbaled but does not sit level when unlocked - All gimbaled stoves sit tilted slightly to compensate for the weight of the door when it is open. Your gimbaled stove should always be in the locked position when not in use. 23
24 Parts List Replacement Parts - Accessory Caribbean Cutting Board Mediterranean Cutting Board Caribbean Pot Holder A Mediterranean Pot Holders Pot Holder Rail Caribbean Cooking Grate Mediterranean Cooking Grate Burner Control Knob Oven Control Knob Replacement Parts - Internal Spark Ignitor Box Large Burner Thermocouple Small Burner Thermocouple Oven Burner Thermocouple Broiler Thermocouple Large Burner Small Burner Oven Burner Broiler Burner Large Burner Gas Valve Small Burner Gas Valve Oven/Broiler Gas Valve Stove Accessories Caribbean Built In Kit Mediterranean Built in Kit Gimbal Mount Propane System Parts ft Low Pressure Propane Hose ft Low Pressure Propane Hose Disposable Bottle Kit (includes ) Low Pressure Regulator (single appliance) Fittings Kit (hose to regulator & regulator to tank connections - boats only) Solenoid Valve SV-S121 1/4 NPT female Gas Sniffer with Shut Down Low Pressure 2 Stage Regulator (single or multiple appliance) Appliance Fittings & Shut-offs for 2 Stage regulator (regulator to hose) Appliance Fittings & Shut-offs & Solenoid for 2 Stage Regulator (regulator to hose) rd Appliance Shut-off Fittings Kit Add On for 2 Stage Regulator 24
25 LIMITED WARRANTY WARRANTY PROVISIONS : Dickinson warrants this product to be free of defects in workmanship and materials for a period of one year. This warranty is limited to claims submitted in writing within a one-year period following the date of purchase. If any part of your new product fails because of a manufacturing defect within the warranty period Dickinson offers to replace said parts free of charge, provided, however, that such parts have not been improperly repaired, altered or tampered with or subjected to misuse, abuse or exposed to corrosive conditions. This warranty, however, is limited by certain exclusions, time limits and exceptions as listed below. Read these limitations and exclusions carefully. TIME LIMIT : This warranty is given too and covers only the original purchaser. Coverage terminates one year from the date of purchase for parts replacement. EXCLUSIONS : This warranty does not cover or include : (a) Any normal deterioration of the product and appearance of items, due to wear and/or exposure; (b) any guarantees, promises, representations, warranties or service agreements given or made by an authorized distributor or other person selling this product, other than those specifically stated herein; (c) any damage or defect due to accident, improper repair, alteration, unreasonable use including failure to provide reasonable and necessary maintenance, misuse or abuse of the equipment, or exposure to corrosive conditions. This warranty is conditioned upon normal use, reasonable and necessary maintenance and service of your product, and written notice being given promptly upon Buyer's discovery of a warranty claim, pursuant to paragraph 6 below. Reasonable and necessary maintenance is maintenance which you are expected to do yourself or have done for you. It is maintenance, which is necessary to keep your product performing its intended function and operating at a reasonable level of performance. DAMAGE LIMITATION WARNING : IN NO EVENT SHALL Dickinson BE LIABLE FOR ANY INCIDENTAL OR CONSEQUENTIAL DAMAGES, INCLUDING (BUT NOT LIMITED TO) LOSS OF USE OF THE PRODUCT, LOSS OF TIME, INCONVENIENCE, EXPENSES FOR TRAVEL, LODGING TRANSPORTATION CHARGES, LOSS BY DAMAGE TO PERSONAL PROPERTY OR LOSS OF INCOME, PROFITS OR REVENUE. ORAL OR IMPLIED WARRANTY LIMITATIONS : The foregoing warranty is exclusive and in lieu of all other warranties, written or oral, expressed or implied, including but not limited to any warranty or merchantability or fitness for a particular purpose. TRANSFER LIMITATIONS : This warranty is not assignable or transferable. It covers only the original purchaser. CLAIM PROCEDURE : In the event of a defect, problem or that a breach of this warranty is discovered, in order to protect any warranty rights you must promptly notify Dickinson. Give name, address, and model name, location of unit, description of problem and where you can be reached during business hours. RESERVED RIGHT TO CHANGE : Dickinson reserves the right to make changes or improvements to products it produces in the future without imposing on itself any obligations to install the same improvements in the products it has previously manufactured. SECOND OR SUBSEQUENT OWNER : Dickinson does not give any warranty to secondary or subsequent purchasers, and it disclaims all implied warranties to such owners. INSPECTION : To assist you in avoiding problems with your product and to validate this warranty you are required to do the following : (a) read the warranty; (b) inspect the product. Do not accept delivery until you have examined the product with your supplier; (c) ask questions about anything you do not understand concerning the product. OWNER REGISTRATION : Fill out the WARRANTY CARD within 30 days from the date of delivery. WARRANTY : RETURN OF THE CARD IS CONDITION PRECEDENT TO WARRANTY COVERAGE AND PERFORMANCE. IF YOU DO NOT FILL OUT AND MAIL THE CARD AS DIRECTED, YOU WILL NOT HAVE A WARRANTY. LEGAL RIGHTS : This warranty gives you specific legal rights and you may also have other rights, which may vary within different government jurisdictions. 25
26 # Ave, Surrey, B.C. Canada V3S 7X1 WARRANTY FORM I have read and understand the Limited Warranty and the Instruction Manual and agree to the terms and conditions (please print) Date Purchaser's Name.. Address Model Name... Serial Number Date Of Purchase.. Signature.. Name of Seller... Seller Location Note: The warranty form can be filled out and sent from the website: 26
INSTALLATION AND OPERATING MANUAL
 Quality Check: Date: Low Pressure Lpg. INSTALLATION AND OPERATING MANUAL This manual MUST be read carefully and all requirements carried out to ensure satisfactory performance Dickinson Marine (1997) Ltd
Professional Series Galley Range
 Professional Series Galley Range OWNER S MANUAL Read all instructions and warnings before operating. Force 10 Manufacturing Corporation Unit A 19169 21 st Ave Surrey, BC V3S 3M3 Tel: 604.536.0379 Fax:
TWO BURNER STAINLESS STEEL PROPANE STOVE
 ROTATE TO LIGHT 842-A250-0_SSCmpStove.qxd 11/26/03 2:59 PM Page 1 OWNER S MANUAL FAILURE TO FOLLOW ALL S AND INSTRUCTIONS IN THIS MANUAL COULD LEAD TO PERSONAL INJURY, INCLUDING DEATH. RETAIN THIS MANUAL
Gas Conversion Kits and Instructions
 Gas Conversion Kits and Instructions INSTALLATION FORM RGM 432/433-GC (Version D.1) Obsoletes Form RGM 432/433-GC (Version D) APPLIES TO: Model FT and Model SFT All gas conversion must be done by a qualified
Operator's Manual. Model: RY10MK-PRO MPN: RA-MLT Gallon Direct Fire Melter Kettle Burner Model with Adjustable Flame-Out Valve
 Operator's Manual Model: RY10MK-PRO MPN: RA-MLT-0009 10 Gallon Direct Fire Melter Kettle Burner Model with Adjustable Flame-Out Valve U.S. Patent No. 9,739,021 For Technical Support Please Visit www.rynoworx.com
Genesis. Side Burner Accessory Installation. Step 3. Step 1. Step 2. For use with Genesis Gas Barbecues Only
 Genesis Side Burner Accessory Installation For use with Genesis Gas Barbecues Only Step 1 WARNING: All gas controls and supply valves should be in the OFF position. You will need: Side burner assembly
Gas Go Anywhere /23/01
 Gas Go Anywhere 55014 02/23/01 FOR OUTDOOR USE ONLY This grill does not include an LP fuel tank. Check Package Contents You should have received the parts listed below. While we give much attention to
TUBULAR BURNER CONVERSION KIT AGCK-TBXX / AECK-UBXX
 TUBULAR BURNER CONVERSION KIT AGCK-TBXX / AECK-UBXX IMPORTANT - READ ALL INSTRUCTIONS BEFORE YOU BEGIN THE INSTRUCTIONS HEREIN SHOULD BE PERFORMED BY A QUALIFIED SERVICE TECHNICIAN. THE GRILL MUST BE COMPLETELY
Instructions for Converting Range to Operate on Liquefied Petroleum Gas
 INSTALLATION AND SERVICES MUST BE PERFORMED BY A QUALIFIED INSTALLER IMPORTANT: SAVE INSTRUCTION MANUAL FOR THE LOCAL INSPECTOR S USE. READ AND SAVE THESE INSTRUCTIONS FOR FUTURE REFERENCE This conversion
TCWS.38NG03.C BLACK DIAMOND BURNER KIT INSTRUCTIONS
 IMPORTANT: THESE INSTRUCTIONS ARE TO REMAIN WITH THE HOMEOWNER These instructions are supplementary to the Installation and Operating Instructions supplied with the fireplace and should be kept together.
OWNER S MANUAL INSTALLATION - OPERATION - MAINTENANCE
 Seaward Products LPG GAS STOVES OWNER S MANUAL INSTALLATION - OPERATION - MAINTENANCE FOR GAS OPERATED STOVES IMPORTANT: Read all instructions before operating stove. Save the Owner s Manual / Installation
DIAMOND TECH INTERNATIONAL Innovations For Creativity DIAMOND LASER BAND SAW OPERATIONS MANUAL
 SPEEDSTER-XL INSTRUCTION MANUAL DIAMOND TECH INTERNATIONAL Innovations For Creativity SPEEDSTER-XL DIAMOND LASER BAND SAW OPERATIONS MANUAL SPEEDSTER-XL INSTRUCTION MANUAL - PAGE 1 Before You Begin Read
User Manual. 110 Cup (55 Cup Raw) Rice Cooker. Model: 177GRCLP, 177GRCNAT 10/2017. Please read and keep these instructions. Indoor use only.
 Rice Cooker. Model: 177GRCLP, 177GRCNAT 10/2017. Please read and keep these instructions. Indoor use only.") 110 Cup (55 Cup Raw) Rice Cooker Model: 177GRCLP, 177GRCNAT 10/2017 Please read and keep these instructions. Indoor use only. www.avantcoequipment.com 1 NOTE: Save these instructions for future reference.
110 Cup (55 Cup Raw) Rice Cooker Model: 177GRCLP, 177GRCNAT 10/2017 Please read and keep these instructions. Indoor use only. www.avantcoequipment.com 1 NOTE: Save these instructions for future reference.
280 Propane Barbecue Assembly Manual
 280 Propane Barbecue Assembly Manual 85-3001-8 (G20718) Propane 1 Year limited Warranty Read and save manual for future reference. Assemble your grill immediately. Missing or damaged parts claims must
TCWS54 SEE THRU DIAMOND BURNER INSTALLATION KIT INSTRUCTIONS
 INSTALLER: Leave this manual with the appliance. CONSUMER: Retain this manual for future reference. These instructions are supplementary to the Installation and Operating Instructions supplied with the
Fire's Edge Fire Pit/Fire Pit Inserts For (Automated) Model 100-A
 Model 100-A") Fire's Edge Fire Pit/Fire Pit Inserts For (Automated) Model 100-A OWNER S MANUAL / OPERATING AND MAINTENANCE INSTRUCTIONS For your safety: If you smell gas: 1. Shut off gas to the appliance 2. Extinguish
Fire's Edge Fire Pit/Fire Pit Inserts For (Automated) Model 100-A OWNER S MANUAL / OPERATING AND MAINTENANCE INSTRUCTIONS For your safety: If you smell gas: 1. Shut off gas to the appliance 2. Extinguish
Boardwalk Fire Pit Table
 Boardwalk Fire Pit Table Installation Instructions 1 P a g e Contents Required Tools....3 Placing the Table 5 Gas Connection..6 Igniter Installation (pt 1)...7 Fire Pit Assembly....8 Igniter Installation
OW LEE CASUAL FIRESIDE Q&A
 Are the fire pits certified? All of our units are lab tested and certified by Labtest Certification, we are ANSI and CSA approved for the United States and Canada. The Casual Fireside Fire Pits BTU rated?
Installation Guide. LPKPDR - Universal LP Conversion Kit for Professional & Designer Ranges/Rangetops. Viking Range, LLC.
 Installation Guide Viking Range, LLC 111 Front Street Greenwood, Mississippi 38930 USA (662) 455-1200 For product information, call 1-888-845-4641 LPKPDR - Universal LP Conversion Kit for Professional
Style # Laguna Propane Tank Cover Owner s Manual
 Style # 26100117 Laguna Propane Tank Cover Owner s Manual Warning: For outdoor use only DO NOT use for cooking DO NOT use under any overhead enclosure Manufactured as Model # 6561 in China for: Restoration
Instructions for use, installation, and connection. Gas Built in Hob
 Instructions for use, installation, and connection Gas Built in Hob RB3311SGBS RB3312SGBS RB3311DGBS RB3311MGBS RB3311NGBS RB6313SGBST RB6323SGBST RB6314SGBS RB6313DGBST RB6313MGBST RB7312SGBS RB7313SGBST
LP/High Altitude LP/High Altitude Natural Gas Conversion Kit For United States Installations
 LP/High Altitude LP/High Altitude Natural Gas Conversion Kit For United States Installations Installation Instructions For Model Series G Furnaces, P(G,N) Gas/Electric Appliances, and R Gas/Electric Appliances
Stonefire Fire Pit Table. Installation Instructions for SF-32-K
 Stonefire Fire Pit Table Installation Instructions for SF-32-K / 1 2 IMPORTANT Please consult your Crystal Fire instruction manual for detailed instructions and important information related to the burner
CONVERSION INSTRUCTIONS
 CONVERSION INSTRUCTIONS Natural Gas to Propane Gas Conversion Kit For Thermador Professional Cooktops and Ranges Model STARLPKIT Part No. 35-00-682 Contains 7mm Hex Main Orifices This kit is used to convert
OW LEE CASUAL FIRESIDE Q&A
 Can you burn wood in the Casual Fireside pieces? No, these are not wood burning units. Casual Fireside Fire Pits are set-up to run on Propane but are easily converted to Natural Gas. Contact your local
ASSEMBLY GUIDE. Customer Service: INCH² 2-BURNER & 864 INCH² 2-BURNER
 ASSEMBLY GUIDE 688 INCH² 2-BURNER & 864 INCH² 2-BURNER DANGER If you smell gas: 1. Shut off gas to the appliance. 2. Extinguish any open flames. 3. Open lid. 4. If odor continues, keep away from the appliance
Instructions for Converting Range to Operate on Liquefied Petroleum Gas
 INSTALLATION AND SERVICES MUST BE PERFORMED BY A QUALIFIED INSTALLER IMPORTANT: SAVE INSTRUCTION MANUAL FOR THE LOCAL INSPECTOR S USE. READ AND SAVE THESE INSTRUCTIONS FOR FUTURE REFERENCE This conversion
INSTALLATION AND OPERATIONS GUIDE FOR GRAND CANYON GAS JUMBO/JUMBO SLIMLINE LOG SYSTEMS
 Burner Systems: JUMBOSLIMBRNR-24 JUMBOSLIMBRNR-30 JUMBOBRNR-36 / JUMBOSLIMBRNR-36 JUMBOBRNR-42 / JUMBOSLIMBRNR-42 JUMBOBRNR-48 / JUMBOSLIMBRNR-48 JUMBOBRNR-60 / JUMBOSLIMBRNR-60 INSTALLATION AND OPERATIONS
Brooks Fire Pit Table. Installation Instructions for Brooks Fire Pit Table BRK-1224
 Brooks Fire Pit Table Installation Instructions for Brooks Fire Pit Table BRK-1224 1 IMPORTANT Contents Please consult your Crystal Fire instruction manual for detailed instructions Required and important
Uptown Fire Pit Table
 Uptown Fire Pit Table Installation Instructions 1 P a g e Contents Contents..2 Required Tools..3 Placing and assembling the Table. 4 Gas Connection..5 Igniter Installation....6 Locating Propane tank 8
Getting Started Guide
 Getting Started Guide Assembly Instructions User Guide Table Top Maintenance Warranty Information (800) 445-4559 www.designingfire.com Fax: 651-305-6347 @designingfire.com #253915-2528907 Installers: Please
Outdoor Hearth Products United States Price List April 1, 2018
 Outdoor Hearth Products United States Price List April 1, 2018 2340 Logan Avenue, Winnipeg, MB, Canada Phone 204-632-1962 Fax 204-632-1960 Table of Contents Outdoor Linear Product Page Number Linear Burner
FORCE 10 MARINE BARBEQUES
 FORCE 10 MARINE BARBEQUES PROPANE MODELS Model 3500 % Large Propane Model 3550 % Small Propane OWNER S MANUAL AND WARRANTY FORCE 10 MARINE LTD. 23080 Hamilton Road, Richmond, B.C. Canada V6V 1C9 Telephone
Key Largo Fire Pit. Installation Instructions. 1 P a g e. NorthlineExpress.com. Toll-Free
 Key Largo Fire Pit Installation Instructions 1 P a g e Contents Contents..2 Required Tools..3 Placing and assembling the Table. 4 Gas Connection..5 Igniter Installation....6 Locating Propane tank 8 Finishing
Sierra Linear Fire Pit Table. Installation Instructions for Sierra Fire Pit Table
 Sierra Linear Fire Pit Table Installation Instructions for Sierra Fire Pit Table 1 2 IMPORTANT Contents Please consult your Crystal Fire instruction manual for detailed instructions and important information
INSTALLATION AND OPERATIONS GUIDE FOR GRAND CANYON GAS LOG FIRE PIT SERIES ONLY
 INSTALLATION AND OPERATIONS GUIDE FOR GRAND CANYON GAS LOG FIRE PIT SERIES ONLY Installation and service must be provided by a qualified installer, service agency or gas supplier Grand Canyon Gas Logs,
PS-10 PS-12D PS-12. Primo Slicer Manual FOR OPERATOR-DO NOT DISCARD
 PS-10 PS-12D PS-12 Primo Slicer Manual FOR OPERATOR-DO NOT DISCARD TABLE OF CONTENTS 1. BRIEF INTRODUCTION 2. OPERATION 3. SLICING 4. MAINTENANCE AND CLEANING 5. TROUBLESHOOTING IMPORTANT The operator
TC30 HEARTWOOD BURNER INSTALLATION INSTRUCTIONS
 INSTALLER: Leave this manual with the appliance. CONSUMER: Retain this manual for future reference. These instructions are supplementary to the Installation and Operating Instructions supplied with the
ASSEMBLY GUIDE. Customer Service: INCH² 3-BURNER & 545 INCH² 3-BURNER
 ASSEMBLY GUIDE 455 INCH² 3-BURNER & 545 INCH² 3-BURNER DANGER If you smell gas: 1. Shut off gas to the appliance. 2. Extinguish any open flames. 3. Open lid. 4. If odor continues, keep away from the appliance
Seaward Products. OWNER S MANUAL Installation Operation - Maintenance. Hillerange Model 2172 Princess Model 3372 LPG GAS STOVES
 Seaward Products OWNER S MANUAL Installation Operation - Maintenance LPG GAS STOVES Hillerange Model 2172 Princess Model 3372 Two Burner Gimbaled Gas Range Three Burner Built-in Gas Range IMPORTANT: Read
POWER STOVE OWNER S MANUAL. Woodland Group Inc th Ave Kirkland, WA Made in the U.S.A. Phone: (425) Fax: (425)
 Fax: (425)") The Woodland POWER STOVE TM OWNER S MANUAL Woodland Group Inc. 544 7th Ave Kirkland, WA 98033 Phone: (425) 481-8187 Fax: (425) 488-3619 www.powerstove.net Made in the U.S.A. 1 Warning READ AND UNDERSTAND
The Woodland POWER STOVE TM OWNER S MANUAL Woodland Group Inc. 544 7th Ave Kirkland, WA 98033 Phone: (425) 481-8187 Fax: (425) 488-3619 www.powerstove.net Made in the U.S.A. 1 Warning READ AND UNDERSTAND
Assembly/Installation/Use Instructions:
 IMPORTANT We highly recommend that our products be installed and serviced by professionals who are certified in the U.S. by NFI (National Fireplace Institute) or in Canada by WETT (Wood Energy Technical
CERO Instructions for use and safety
 CERO Instructions for use and safety READ CAREFULLY BEFORE USE Please store these safety warnings in a safe place for future reference. NOTICE: BUYER ASSUMES ALL RESPONSIBILITY FOR SAFETY AND USE THAT
Product instruction manual Ream Cutting Systems RE3943, RE3946, RE3947, RE3971, RE3952E
 Product instruction manual Ream Cutting Systems RE3943, RE3946, RE3947, RE3971, RE3952E The Trimfast Ream Cutters are reliable, high performance cutters that will give you the results you need quickly
Key Largo Fire Pit. Installation Instructions for Key Largo, all base materials and top styles. 1 P a g e
 Key Largo Fire Pit Installation Instructions for Key Largo, all base materials and top styles 1 P a g e Contents Contents 2 Required Tools...3 Placing and assembling the Table. 4 Gas Connection..5 Igniter
CONVERSION INSTRUCTIONS
 CONVERSION INSTRUCTIONS Propane Gas to Natural Gas Conversion Kit For Thermador Professional Cooktops and Ranges Model STARNGKIT Part No. 35-00-679 Contains 7mm Hex Main Orifices This kit is used to convert
Lit Table Top Firepit Bio-Ethanol Fireplace. User Manual. Model: GF301650
 Lit Table Top Firepit Bio-Ethanol Fireplace User Manual Model: GF301650 1 Moda Flame Lit Table Top Firepit Bio-Ethanol Fireplace Included in delivery (Parts List): A. Fireplace body 1pc B. Glass 1pc C.
TC36 CHALET II BURNER KIT INSTALLATION INSTRUCTIONS
 INSTALLER: Leave this manual with the appliance. CONSUMER: Retain this manual for future reference. These instructions are supplementary to the Installation and Operating Instructions supplied with the
SERVICE MANUAL V-SERIES HEAVY DUTY BROILERS, DOUBLE DECK AND RANGE MATCH MODELS - NOTICE - For a complete listing of models, see the MODELS section.
 SERVICE MANUAL V-SERIES HEAVY DUTY BROILERS, DOUBLE DECK AND RANGE MATCH MODELS For a complete listing of models, see the MODELS section. - NOTICE - This Manual is prepared for the use of trained Vulcan
TC30 BLACK DIAMOND BURNER KIT INSTRUCTIONS
 IMPORTANT: THESE INSTRUCTIONS ARE TO REMAIN WITH THE HOMEOWNER These instructions are supplementary to the Installation and Operating Instructions supplied with the fi replace and should be kept together.
Intrepid 2 Intrepid 3
 Intrepid 2 Intrepid 3 Model Nos. V 10 / V10-3 NAT GAS Model Nos. V12 / V12-3 L.P.G DECORATIVE COAL EFFECT GAS STOVE USER INSTRUCTIONS This appliance is only for use on Natural Gas (G20) at a supply pressure
Viking Use/Installation Guide
 Viking Use/Installation Guide Viking Range Corporation 111 Front Street Greenwood, Mississippi 38930 USA (662) 455-1200 For more product information, call 1-888-VIKING1 (845-4641) or visit the Viking Web
Read all instructions and warnings before using this fireplace. WARNING
 Frame User Manual 1 Operating Manual Thank you for purchasing this Signi Fires product. Signi Fires is very safety conscious, we have taken every care in designing, manufacturing and assembling your Signi
300 ft. 5/8 Hose wagon
 300 ft. 5/8 Hose wagon Model 95956 Assembly And Operation Instructions Due to continuing improvements, actual product may differ slightly from the product described herein. (Garden hose is not included).
Pine Ridge Fire Pit Table. Installation Instructions for Pine Ridge fire pit models PR-1242-K and PR-2424-K
 Pine Ridge Fire Pit Table Installation Instructions for Pine Ridge fire pit models PR-1242-K and PR-2424-K Contents Required Tools...2 Placing and assembling the Table. 3 Gas Connection..4 Igniter Installation....6
TC36 CHALET BURNER KIT INSTALLATION INSTRUCTIONS
 INSTALLER: Leave this manual with the appliance. CONSUMER: Retain this manual for future reference. These instructions are supplementary to the Installation and Operating Instructions supplied with the
ACCENDA Instructions for use and safety
 ACCENDA Instructions for use and safety READ CAREFULLY BEFORE USE Please store these safety warnings in a safe place for future reference. NOTICE: BUYER ASSUMES ALL RESPONSIBILITY FOR SAFETY AND USE THAT
How to Set up Your Configurable (Home and Camping) Stir Fry Stove
 Stir Fry Stove") How to Set up Your Configurable (Home and Camping) Stir Fry Stove Setting up the outdoor stir fry stove is quick and easy. However, EXERCISE EXTREME CAUTION and apply common sense -- you are dealing with
How to Set up Your Configurable (Home and Camping) Stir Fry Stove Setting up the outdoor stir fry stove is quick and easy. However, EXERCISE EXTREME CAUTION and apply common sense -- you are dealing with
S420 Barbecue Assembly Manual
 TM MC S420 Barbecue Assembly Manual 85-3062-2 (G45123) Propane 85-3063-0 (G45124) Natural Gas 1 YEAR LIMITED WARRANTY READ AND SAVE MANUAL FOR FUTURE REFERENCE. Assemble your grill immediately. Missing
PLEASE READ BEFORE USE AND SAVE THESE INSTRUCTIONS
 Sauce Flip Pan PLEASE READ BEFORE USE AND SAVE THESE INSTRUCTIONS Thank you for purchasing Cook s Companion Sauce Flip Pan. This pan is designed to be one of the most used pans in your kitchen. The Fusion
TC42 TRANQUILITY BURNER KIT INSTRUCTIONS
 IMPORTANT: THESE INSTRUCTIONS ARE TO REMAIN WITH THE HOMEOWNER These instructions are supplementary to the Installation and Operating Instructions supplied with the fi replace and should be kept together.
ASSEMBLY & OPERATING INSTRUCTIONS POWER BURNER, L.P. (PROPANE) POWER BURNER, N.G. (NATURAL GAS)
 POWER BURNER, N.G. (NATURAL GAS)") ASSEMBLY & OPERATING INSTRUCTIONS MODEL #96000 MODEL #96001 POWER BURNER, L.P. (PROPANE) POWER BURNER, N.G. (NATURAL GAS) TABLE OF CONTENTS PAGE # SAFETY INSTRUCTIONS.........2 THE LOCATION FOR YOUR POWER
ASSEMBLY & OPERATING INSTRUCTIONS MODEL #96000 MODEL #96001 POWER BURNER, L.P. (PROPANE) POWER BURNER, N.G. (NATURAL GAS) TABLE OF CONTENTS PAGE # SAFETY INSTRUCTIONS.........2 THE LOCATION FOR YOUR POWER
Installation & User Manual EW5000 Outdoor Cooking Fire
 Installation & User Manual EW5000 Outdoor Cooking Fire IMPORTANT: Please read this manual before installing and using the ESCEA EW5000 Cooking fire. Failure to follow these instructions may lead to a possible
TCWS54 BLACK DIAMOND BURNER KIT INSTRUCTIONS
 INSTALLER: Leave this manual with the appliance. CONSUMER: Retain this manual for future reference. These instructions are supplementary to the Installation and Operating Instructions supplied with the
INSTANT GARAGE MODEL NO: CIG81224 ASSEMBLY INSTRUCTIONS PART NO: ORIGINAL INSTRUCTIONS
 INSTANT GARAGE MODEL NO: CIG81224 PART NO: 3503578 ASSEMBLY INSTRUCTIONS ORIGINAL INSTRUCTIONS GC1117 INTRODUCTION Thank you for purchasing this CLARKE Instant Garage. When erected, the CIG81224 garage
COOK & GRILL STOVE. Model ASSEMBLY AND OPERATING INSTRUCTIONS
 COOK & GRILL STOVE Model 43343 ASSEMBLY AND OPERATING INSTRUCTIONS Due to continuing improvements, actual product may differ slightly from the product described herein. 349 Mission Oaks Blvd., Camarillo,
LDR Brachytherapy Seed Sterilization and Sorting Tray
 LDR Brachytherapy Seed Sterilization and Sorting Tray Table of Contents General Precautions... 2 Customer Responsibility... 3 Description... 4 Features and Specifications... 5 Operation... 6 Changing Covers
CRD120SC TUBING CUTTER
 CRD120SC TUBING CUTTER OPERATIONS MANUAL 1 VERSION 2.1 LAST EDITED 05.01.2018 cleanroomdevices.com Table of Contents Table of Contents....2 1.0 General Product & Safety Information... 3 1.1 Product Information
The Vintage Fire Pit Table
 Warranty: Fire pit tables are covered under a 1- year manufacturer s warranty. Please visit http://www.outdoorrooms.com/warranty-form/ to register your product. Thank you for purchasing an Outdoor GreatRoom
Colonial and Grand Colonial Fire Pit Tables. Installation Instructions for
 Colonial and Grand Colonial Fire Pit Tables Installation Instructions for Colonial-48-M-K, Col-48-MNB-K, Grand-Colonial-48-K, CM-48-DIN-K, MNB-48-DIN-K, GC-48-DIN-K, CM-48-PUB-K, MNB-48-PUB-K, GC-48-PUB-K
SMART BIO-ETHANOL ELECTRONIC BURNER
 SMART BIO-ETHANOL ELECTRONIC BURNER User s Manual What s in the box: Smart Burner Remote Control AC Adapter Filling Hose User s Manual 1pc 1pc 1pc 1pc 1pc Preparations Remove all packaging materials prior
FIERO Instructions for use and safety
 FIERO Instructions for use and safety READ CAREFULLY BEFORE USE Please store these safety warnings in a safe place for future reference. NOTICE: BUYER ASSUMES ALL RESPONSIBILITY FOR SAFETY AND USE THAT
S405 Barbecue Assembly Manual
 S405 arbecue ssembly Manual 85-02-6 (G4705) Propane Year limited Warranty Read and save manual for future reference. If pre-assembled, leave this manual with unit for consumer s future reference. For product
t420 Barbecue Assembly Manual
 t20 Barbecue Assembly Manual 85-300-2 (G510) Propane 85-3005-0 (G5105) Natural Gas 1 Year limited Warranty Read and save manual for future reference. If pre-assembled, leave this manual with unit for consumer
Owner's Manual. Safety Instructions. This Product is Produced Exclusively by
 Product May Vary Slightly From Pictured. Owner's Manual Safety Instructions! WARNING This equipment is for home use only. Do not use in institutional or commercial applications. Failure to follow this
BURNER MANUAL Read and understand the entire Burner Manual prior to use. Please store these safety warnings in a safe place for future reference.
 BURNER MANUAL Read and understand the entire Burner Manual prior to use. Please store these safety warnings in a safe place for future reference. BURNER PARTS LIST A. Burner Tray B. Stainless Outer Burner
3. SS 4. SS 5. SS 6. SS
 Fry, Steam, Braise, Roast, Broil, Bake, Grill, Simmer and Saute all in one pan Unique splatter guard lid with built-in thermometer for frying Increased cooking surface due to square design Spoon rest lid
Thermostatic Griddle Field Service Kit Instructions
 Thermostatic Griddle Field Service Kit Instructions The following document provides instructions on how to install a Garland Thermostatic Griddle Field Kit and is applicable to each 2 section of a Garland
READ AND SAVE THESE INSTRUCTIONS! EasyAwn Standard Awning Installation
 EasyAwn Installation, Care and Maintenance Manual EasyAwn Quality, Since 1946 EasyAwn, LLC Toll Free: 877-EasyAwn http://www.easyawn.com READ AND SAVE THESE INSTRUCTIONS! EasyAwn Standard Awning Installation
NATURAL GAS CONVERSION KIT
 Model #: 85-2261-4 / G501-0057-03 NATURAL GAS CONVERSION KIT ONLY Compatible with barbecues that bear this SYMBOL: 04-14-17 FOR YOUR SAFETY CAUTION: Read and follow all safety statements, assembly instructions,
TC42 CHALET II BURNER KIT INSTALLATION INSTRUCTIONS
 INSTALLER: Leave this manual with the appliance. CONSUMER: Retain this manual for future reference. These instructions are supplementary to the Installation and Operating Instructions supplied with the
TCWS.54NG03C2 BLACK DIAMOND BURNER KIT INSTRUCTIONS
 IMPORTANT: THESE INSTRUCTIONS ARE TO REMAIN WITH THE HOMEOWNER These instructions are supplementary to the Installation and Operating Instructions supplied with the fi replace and should be kept together.
AUTO REWIND HOSE REEL WITH 50 FOOT HOSE. Model 46320
 AUTO REWIND HOSE REEL WITH 50 FOOT HOSE Model 46320 ASSEMBLY AND OPERATING INSTRUCTIONS 3491 Mission Oaks Blvd., Camarillo, CA 93011 Visit our Web site at http://www.harborfreight.com Copyright 2001 by
RAFTER VI. Installation and Operation CAREFREE WITH AUTOMATIC AWNING SUPPORT. RV Accessory PRODUCT OVERVIEW
 CAREFREE RAFTER VI RV Accessory WITH AUTOMATIC AWNING SUPPORT Installation and Operation PRODUCT OVERVIEW The gives the awning user the ability to easily tighten the center fabric when the awning is extended.
READ AND SAVE THESE INSTRUCTIONS! EasyAwn Spear Awning Installation
 EasyAwn Installation, Care and Maintenance Manual EasyAwn Quality, Since 1946 EasyAwn, LLC Toll Free: 877-EasyAwn http://www.easyawn.com READ AND SAVE THESE INSTRUCTIONS! EasyAwn Spear Awning Installation
EB300. Ethanol Burner. User s Manual Installation Instructions
 EB300 Ethanol Burner User s Manual Installation Instructions EB300 Burner Burner Lid User s Manual What s in the box: 1pc 1pc 1pc Installation Instructions EB300 - User s Manual The Ignis Ethanol Burner
Cast Iron Cookware Ustensiles de cuisson en fonte Utensilios de cocina de hierro fundido INSTRUCTIONS INSTRUCTIONS INSTRUCCIONES
 Cast Iron Cookware Ustensiles de cuisson en fonte Utensilios de cocina de hierro fundido INSTRUCTIONS INSTRUCTIONS INSTRUCCIONES WELCOME TO THE WORLD OF KITCHENAID. We re committed to helping you create
Thank you for purchasing ANYWARE cookware by Little Griddle! ANYWARE
 A WORD FROM THE MAKER (READ ME FIRST!!!): Thank you for purchasing ANYWARE cookware by Little Griddle! ANYWARE is made from cast aluminum with an advanced ceramic coating and a hightemperature nonstick
PROPANE LANTERNS LIMITED WARRANTY. All propane lanterns carry a
 PROPANE LANTERNS 14201 14201 Single Mantle Propane Lantern Adjusts to 300 candlepower illumination Valve adapter Burns 8 hours at maximum setting 14202 14202 Double Mantle Propane Lantern Adjusts to 600
INSTALLATION & OPERATING INSTRUCTIONS FOR. FIREPLACE GAS LOGS Model Numbers: MO18NG, MO24NG, SH18NG, SH24NG, CSO30NG
 INSTALLATION & OPERATING INSTRUCTIONS FOR FIREPLACE GAS LOGS Model Numbers: MO18NG, MO24NG, SH18NG, SH24NG, CSO30NG Applicable for use with all styles and sizes of Dual Burner Natural Gas Log Sets. Note:
TECHNICAL SUPPORT HOT LINE HOURS: 7:30-3:30
 TECHNICAL SUPPORT HOT LINE 1-800-526-0725 HOURS: 7:30-3:30 TO: Service Providers BULLETIN No: 0102-1 FROM: SUBJECT: BOB VAN WYCK Technical Support Manager Burner Pilot Tube Replacement DATE: Feb 1, 2001
PATRIOT INSTRUCTION MANUAL SL300C 12 MEAT SLICER 1/2 HP
 INSTRUCTION MANUAL SL300C 12 MEAT SLICER 1/2 HP This manual contains important information regarding your Patriot unit. Please read this manual thoroughly prior to equipment set-up, operation and maintenance.
Blue Series Hot Melt Hose with RediFlext II Hanger System
 Instruction Sheet P/N 1124594_01 Blue Series Hot Melt Hose with RediFlext II Hanger System Safety WARNING! Allow only personnel with appropriate training and experience to operate or service the equipment.
APPENDIX A LIGHT SOURCE
 APPENDIX A LIGHT SOURCE GASOLINE LANTERN One source of artificial light for the field kitchen is the gasoline lantern (NSN 6260-00-170-0430). It is a one-mantle lantern with a heat-resistant globe or globe
Alcott Fire Table. Installation Instructions for ALC-1224
 Alcott Fire Table Installation Instructions for ALC-1224 IMPORTANT Please consult your Crystal Fire instruction manual for detailed instructions and important information related to the burner installation
Safety instructions and warnings Package contents and parts Tool requirements Product features... 4
 Door Awning : PN Series Owner s Manual For safety reasons, please carefully read and understand all written instructions and warnings in this manual prior to assembling or installing this product. Table
LA STRADA Instructions for use and safety
 LA STRADA Instructions for use and safety READ CAREFULLY BEFORE USE Please store these safety warnings in a safe place for future reference. NOTICE: BUYER ASSUMES ALL RESPONSIBILITY FOR SAFETY AND USE
HD81 RIVER ROCK / STONE BURNER ASSEMBLY
 INSTALLER: LEAVE THIS MANUAL WITH THE APPLIANCE. CONSUMER: RETAIN THIS MANUAL FOR FUTURE REFERENCE. 1 INSTALLATION AND OPERATING INSTRUCTIONS CERTIFIED UNDER CANADIAN AND AMERICAN NATIONAL STANDARDS: CSA
Manufactured in New Zealand Metal Fab Industries Ltd PO Box Greenmount Auckland
 Manufactured in New Zealand Metal Fab Industries Ltd PO Box 58-473 Greenmount Auckland Www.metalfab.co.nz LOGAIRE STAINLESS STEEL BBQ 2,3 & 4 Burner Models IMPORTANT Please read all instructions before
The Cove Fire Pit. Installation Instructions for CV-30
 The Cove Fire Pit Installation Instructions for CV-30 1 2 IMPORTANT Contents Please consult your Crystal Fire Burner Owner s instruction manual for detailed instructions and important information related