IAN PNEUMATIC PAINT SPRAY GUN PDFP 500 B2 PNEUMATSKI PIŠTOLJ ZA ŠTRCANJE BOJE PNEUMATIC PAINT SPRAY GUN PISTOL DE VOPSIT CU AER COMPRIMAT
|
|
|
- Baldwin Strickland
- 5 years ago
- Views:
Transcription

1 PNEUMATIC PAINT SPRAY GUN PNEUMATIC PAINT SPRAY GUN Translation of the original instructions PISTOL DE VOPSIT CU AER COMPRIMAT Traducerea instrucţiunilor de utilizare original ΠΙΣΤΟΛΙ ΒΑΦΗΣ ΑΕΡΟΣ Μετάφραση των αυθεντικών οδηγιών λειτουργίας PNEUMATSKI PIŠTOLJ ZA ŠTRCANJE BOJE Prijevod originalnih uputa za uporabu ПНЕВМАТИЧЕН ПУЛВЕРИЗАТОР ЗА БОЯ Превод на оригиналното ръководство за експлоатация DRUCKLUFT-FARBSPRITZPISTOLE Originalbetriebsanleitung IAN
2 Before reading, unfold the page containing the illustrations and familiarise yourself with all functions of the device. Prije nego što pročitate tekst, otvorite stranicu sa slikama i upoznajte se na osnovu toga sa svim funkcijama uređaja. Înainte de a citi instrucţiunile, priviţi imaginile şi familiarizaţi-vă cu toate funcţiile aparatului. Преди да прочетете отворете страницата с фигурите и след това се запознайте с всички функции на уреда. Πριν ξεκινήσετε την ανάγνωση, ανοίξτε τη σελίδα με τις εικόνες και εξοικειωθείτε με όλες τις λειτουργίες της συσκευής. Klappen Sie vor dem Lesen die Seite mit den Abbildungen aus und machen Sie sich anschließend mit allen Funktionen des Gerätes vertraut. GB / CY Translation of the original instructions Page 1 HR Prijevod originalnih uputa za uporabu Stranica 9 RO Traducerea instrucţiunilor de utilizare original Pagina 19 BG Превод на оригиналното ръководство за експлоатация Cтраница 29 GR / CY Μετάφραση των αυθεντικών οδηγιών λειτουργίας Σελίδα 39 DE / AT / CH Originalbetriebsanleitung Seite 49


3 A B C D
4 Contents Introduction...2 Intended use... 2 Features... 2 Package contents... 2 Technical details... 2 Safety information...3 Original accessories/auxiliary equipment... 3 Safety instructions for fine spray systems... 4 Operation...4 HVLP properties... 4 Connecting the device... 4 Preparing the surface... 5 Switching the appliance on/off... 5 Setting the paint jet pattern... 5 Adjusting the paint flow... 5 Adjusting the airflow... 6 Maintenance and cleaning...6 Disposal...7 Warranty...7 Service...8 Importer...8 Translation of the original Conformity Declaration...8 GB CY 1
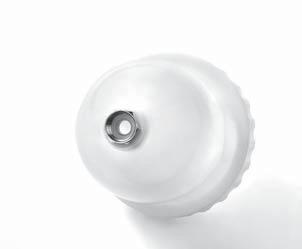
5 GB CY PNEUMATIC PAINT SPRAY GUN Introduction Congratulations on the purchase of your new appliance. You have selected a high-quality product. The operating instructions are part of this product. They contain important information about safety, usage and disposal. Before using the product, please familiarise yourself with all operating and safety instructions. Use the product only as described and for the range of applications specified. Please also pass these operating instructions on to any future owner. Intended use This compressed air-powered appliance is designed solely for the application/spraying of solvent-based and water-soluble paints, glazes, foundation, clear varnishes, vehicle paints, stains, wood preservatives, pesticides, oils and disinfectants. The appliance is not suitable for working with emulsions or latex paints, lye, acidic coatings, granular and gritty spray materials or spray- or drip-resistant materials. Any other usage of or modification to the appliance is deemed to be improper and carries a significant risk of accidents. The manufacturer accepts no responsibility for damage(s) resulting from improper usage. This appliance is intended for domestic use only. Symbols on the compressed air tool: WARNING! Read the operating instructions before use. Always wear safety goggles. Always wear a mask. Features Venting Flow cup lid Flow cup Stroke limiter screw (paint flow-rate control) Control for round/broad jet Compressed-air connection Airflow control Trigger Nozzle head Needle Spring Brush Filter Inner screw thread (flow cup) Package contents 1 pneumatic paint spray gun 1 flow cup 1 flow cup lid 1 cleaning brush 1 filter 1 set of operating instructions Technical details Max. working pressure: 3 bar Nozzle size: Ø 1.4 mm Flow cup: approx. 500 ml Recommended viscosity: DIN / Sec. Noise emission value: Noise measurement value determined in accordance with EN The rated noise level at the working location is typically as follows: Sound pressure level: L pa = 72.1 db(a) Uncertainty: K pa = 2.5 db Always wear hearing protection. Always wear protective gloves. 2
6 WARNING! Safety information WARNING! Read all safety warnings and all instructions. Failure to follow the warnings and instructions may result in electric shock, fire and/or serious injury. Save all warnings and instructions for future reference. WARNING! KICKBACK! At high working pressures, kickback can occur which can lead to danger due to continuous loads under certain circumstances. WARNING! RISK OF SUFFOCATION! When working with nitrogen, there is a risk of suffocation!therefore, work only in wellventilated rooms. WARNING! RISK OF INJURY! Never exceed the maximum permissible operating pressure of 3 bar. Use a pressure reducer to adjust the working pressure. RISK OF INJURY! MISUSE!Do not point the tool towards people or animals! SMOKING PROHIBITED: RISK OF EXPLO- SION/FIRE! Do not cause any sparks or ignite any naked flame. WARNING! RISK OF INJURY! Never use oxygen or other flammable gases as an energy source. WARNING! RISK OF INJURY! First detach the hose from the compressed air source before disconnecting the supply hose from the appliance. In this way, you avoid uncontrollable thrashing about of the supply hose or kickback. Use suitable body protection equipment to protect yourself. Wear a mask with an active carbon filter and safety goggles! Keep children and other bystanders at a distance while operating the tool. Distractions can cause you to lose control. Disconnect the appliance from the compressed air source before starting any repairs or maintenance work, as well as during any breaks in work and before transportation. When undoing the hose coupling, hold the hose firmly in your hand to prevent injuries caused by a thrashing hose. Ensure there is no damage. Check the appliance for any possible defects before use. If the appliance exhibits any faults, it should not be used under any circumstances. Do not kink the appliance's hose. Otherwise, it could get damaged. Please heed the safety instructions provided by the manufacturer of the spray medium. Stay alert, watch what you are doing and use common sense when operating the appliance. Do not use any appliance while you are tired or under the influence of drugs, alcohol or medication. Do not remove any type plates. These contain important information for the safe operation of the appliance. If you are inexperienced with the appliance, seek training in how to use it safely. Original accessories/auxiliary equipment Use only the additional equipment and accessories specified in the operating instructions. Using accessories other than those recommended in the operating instructions can lead to a risk of injury. GB CY 3
7 GB CY Safety instructions for fine spray systems Keep your work area clean, well lit and free of paint and solvents, cloths and other inflammable materials. Possible risk of spontaneous combustion. Have a fully-functioning fire extinguisher available at all times. Ensure adequate ventilation in the spray zone and sufficient fresh air in the entire room. Evaporation of flammable solvents will cause an explosive environment. Do not spray or clean with materials whose ignition point is lower than 21 C. Use materials based on water, non-volatile hydrocarbons or similar materials. The evaporation of volatile solvents will cause an explosive environment. Do not spray near ignition sources such as static electric sparks, open flames, ignition flames, hot items, motors, cigarettes and sparks caused by plugging in/unplugging power cables or by operating switches. These ignition sources could cause a fire to ignite in the environment. Do not spray any material if you do not know whether it is potentially dangerous. Unknown materials could cause dangerous conditions. Wear additional personal protective equipment such as suitable gloves and a protective mask/respirator when spraying or handling chemicals. Wearing appropriate protective equipment for the conditions reduces your exposure to dangerous substances. Do not spray yourself, other people or animals. Keep your hands and other body parts out of the spray jet. If the spray jet pierces the skin, seek medical assistance immediately. The sprayed material can even penetrate through a glove and into the skin and thus into your body. Do not treat such a penetration injury like a normal cut. A high-pressure jet can inject toxic materials into the body and cause serious injuries. In the event of a chemical penetration of the skin, seek medical assistance immediately. Be aware of the potential hazards of the sprayed material. Take note of the markings on the container and the manufacturer's information on the sprayed material, including the instruction to use personal protective equipment. The manufacturer's instructions are to be followed to reduce the risk of fire or injuries caused by poisons, carcinogens, etc. Never spray without the nozzle head fitted. Using a special nozzle with the appropriate nozzle head reduces the likelihood of highpressure jets piercing the skin and injecting poisons into your body. Operation HVLP properties This appliance has a HVLP system (high volume, low pressure). This ensures increased material (paint) application and lower consumption. IMPORTANT: Do not exceed the maximum working pressure of 3 bar. Connecting the device The product may only be operated using cleaned, condensate- and oil-free compressed air and may not exceed the maximum operating pressure of 3 bar on the appliance. To ensure that you can regulate the air pressure, the compressed air source should be equipped with a (filter) pressure reducer. You will need a flexible compressed air hose with a quick-disconnect coupling and a suitable compressed air source to operate this appliance. Follow all the operating and safety instructions for the compressed air source and any special instructions regarding paint preparation. NOTE Take note of the correct working pressure. Excessively high pressure leads to strong dispersion and overly-rapid liquid evaporation. The surfaces become rough and develop poor adhesion properties. If, however, the working pressure is too low, the paint will not be adequately dispersed. This leads to wavy surfaces and droplets. 4
8 Connect the compressed air hose with the quick-action coupling to the compressed-air connection on the appliance. The connection locks automatically. Set the working pressure on the filter pressure reducer of the compressed air source to 3 bar. Preparing the surface Carefully cover a large area around the spray surface. Any surface that is not masked could become contaminated. Ensure that the spray surface is clean, dry and free of grease. Polished surfaces should be lightly sanded and the sanding dust removed. Switching the appliance on/off Working methods: Fit the filter in the gun (see fig. C). Open the vent while working. When thinning, ensure that the spray material and the thinners are suitable for each other. Using an unsuitable thinner can lead to the formation of lumps which, in turn, can block the spray gun. Screw the flow cup gun. clockwise onto the spray Fill the flow cup with spray material and screw the lid on firmly. Hold the spray gun at a constant distance from the object. The ideal spraying distance is approx. 15 cm. Work out the right settings by carrying out a test. Do not switch the appliance on/off over the spray surface, rather start/end the spraying process approx. 10 cm from the spray surface. Setting the paint jet pattern The appliance has two settings: round jet and broad jet. Round jet Setting the round jet: Broad jet Use the round jet for small surfaces, corners and edges. Turn the control clockwise. Setting the broad jet: You can use the broad jet vertically or horizontally for larger surfaces. Turn the control clockwise. The nozzle head can be turned into any position between the horizontal and the vertical. Adjusting the paint flow NOTE The front locking bolt is designed to limit the adjustment range of the stroke limiter screw. Increasing the paint flow: Turn the stroke limiter screw Decreasing the paint flow: Turn the stroke limiter screw anticlockwise. clockwise. GB CY Switching on: To switch on, pull the trigger pressed in. and keep it Switching off: To stop working, simply release the trigger. 5
9 GB CY Adjusting the airflow NOTE We recommend starting with the airflow set to maximum. To do this, open the airflow regulator to maximum as described below in the section "Increasing the airflow". Increasing the airflow: NOTE Increasing the airflow is generally advisable if the dispersion is too coarse. Turn the airflow control Decreasing the airflow: NOTE anticlockwise. Decreasing the airflow is generally advisable if the paint mist is too strong. Turn the airflow control clockwise. Maintenance and cleaning WARNING! RISK OF INJURY! Disconnect the appliance from the compressed air supply. NOTE Thorough cleaning after every use is very important for safety and operation. Otherwise, the needle could get blocked and proper operation of the appliance cannot be guaranteed. Wear suitable gloves when cleaning. Do not use any hydrocarbon-based solvents like benzene, ethyl chloride, etc., as these could trigger chemical reactions with some of the materials in the paint spray gun. This can lead to dangerous reactions. CAUTION! Never immerse the paint spray gun completely in solvent. After every use, squirt thinners (only outside risk of explosion!) or water through the appliance. To clean the housing, the nozzle head and the spray holes inside it, use the supplied cleaning brush or a cloth. Never use petrol, solvents or cleansers which can damage plastic. First, unscrew the stroke limiter screw it in an anticlockwise direction. Remove the spring. Remove the needle Clean the needle (see fig. B). Replace the needle by turning using pliers (see fig. A). carefully with the brush in the paint spray gun. Push the spring onto the end of the needle. Screw the stroke limiter screw it clockwise. tight by turning Screw the flow cup anticlockwise off the spray gun. Remove the filter as shown in fig. C and clean it with the cleaning brush. Also clean the inner screw thread of the flow cup using the cleaning brush (see fig. D). Replay the filter in the spray gun (see fig. C) and screw the flow cup clockwise firmly onto it. For rust protection purposes, you can spray a little sewing machine oil through the spray gun after cleaning. Oil all moving parts from time to time. After cleaning the needle, the thread and seal must be lightly greased with a suitable lubricant. Do not use any silicon-based lubricants. Store compressed-air appliances only in dry rooms. 6
10 Disposal The packaging consists of environmentally friendly material. It can be disposed of in the local recycling containers. Your local community or municipal authorities can provide information on how to dispose of the worn-out appliance. Environmental compatibility and material disposal: Paints and lacquers are considered special waste which must be disposed of accordingly. Observe the local regulations. Observe the manufacturer s instructions. Environmentally harmful chemicals must not be allowed to get into the ground, groundwater or any body of water. Spraying work next to bodies of water or adjoining surfaces thereof (catchment basin) is therefore not permitted. When buying paints, lacquers pay attention to their environmental compatibility. Warranty This appliance is provided with a 3-year warranty valid from the date of purchase. The appliance has been manufactured with care and inspected meticulously prior to delivery. Please retain your receipt as proof of purchase. In the event of a warranty claim, please contact your Customer Service unit by telephone. This is the only way to guarantee free return of your goods. The warranty only covers claims for material and manufacturing defects, not for damage sustained during carriage, components subject to wear and tear or damage to fragile components such as switches or batteries. This appliance is intended solely for private use and not for commercial purposes. The warranty shall be deemed void in cases of misuse or improper handling, use of force and modifications/repairs which have not been carried out by one of our authorised Service centres. Your statutory rights are not restricted by this warranty. The warranty period is not prolonged by repairs effected under the warranty. This also applies to replaced and repaired components. Any damage and defects present at the time of purchase must be reported immediately after unpacking, but no later than two days after the date of purchase. Repairs carried out after expiry of the warranty period shall be subject to charge. GB CY 7
11 GB CY Service WARNING! Have the power tool repaired by the Service centre or a qualified technician and only using genuine replacement parts. This will ensure that the safety of the appliance is maintained. NOTE Replacement parts not listed (such as needles, springs, flow cups) can be ordered via our service hotline. Service Great Britain Tel.: ( 0.10/Min.) kompernass@lidl.co.uk IAN CY Service Cyprus Tel.: kompernass@lidl.com.cy IAN Translation of the original Conformity Declaration We, KOMPERNASS HANDELS GMBH, documents officer: Mr. Semi Uguzlu, BURGSTR. 21, BOCHUM, GERMANY, hereby declare that this product complies with the following standards, normative documents and EC directives: Machinery Directive (2006/42/EC) Applied harmonised standards: EN 1953:2013 Type designation of machine: Pneumatic paint spray gun Year of manufacture: Serial number: IAN Bochum, 01/02/2016 Importer KOMPERNASS HANDELS GMBH BURGSTRASSE BOCHUM GERMANY Semi Uguzlu - Quality Manager - The right to effect technical changes in the context of further development is reserved. 8
12 Sadržaj Uvod...10 Namjenska uporaba Oprema Opseg isporuke Tehnički podaci Sigurnosne napomene...11 Originalni pribor / dodatni uređaji Sigurnosne napomene za sustave za fino raspršivanje Puštanje u pogon...13 Osobine HVLP Priključivanje uređaja Priprema površine za nanošenje boje raspršivanjem Uključivanje/isključivanje uređaja Podešavanje mlaza boje Reguliranje količine boje Reguliranje količine zraka Održavanje i čišćenje...14 Zbrinjavanje...15 Jamstvo...16 Servis...16 Uvoznik...16 Prijevod originalne izjave o sukladnosti...17 Tehnički podaci HR 9
13 HR PNEUMATSKI PIŠTOLJ ZA ŠTRCANJE BOJE Uvod Čestitamo na kupnji Vašeg novog uređaja. Time ste se odlučili za vrlo kvalitetan proizvod. Upute za rukovanje sastavni su dio ovog proizvoda. One sadrže važne napomene za sigurnost, rukovanje i zbrinjavanje. Prije uporabe uređaja upoznajte se sa svim pripadajućim uputama za uporabu i svim sigurnosnim napomenama. Proizvod koristite isključivo na opisani način i u navedenim područjima uporabe. U slučaju predaje proizvoda trećim osobama, priložite i predajte svu njegovu dokumentaciju. Namjenska uporaba Ovaj uređaj na komprimirani zrak namijenjen je nanošenju / raspršivanju lakova koji sadrže otapala i koji se mogu razrijediti vodom, lazura, temeljnih boja, prozirnih lakova, površinskih lakova za vozila, bajca, sredstava za zaštitu drveta, sredstava za zaštitu biljaka, ulja i sredstava za dezinfekciju. Uređaj nije prikladan za preradu disperzijskih boja i boja koje sadrže prirodni kaučuk, lužina, premaza na bazi kiselina, zrnatih materijala za raspršivanje niti za materijale koji sprječavaju prskanje i kapanje. Svaki drugi način uporabe i svaka izmjena uređaja smatra se nenamjenskom i krije znatnu opasnost od nezgode. Za štete nastale nenamjenskom uporabom ne preuzimamo nikakvu odgovornost. Uređaj je namijenjen isključivo za uporabu u privatne svrhe. Simboli na alatu na komprimirani zrak: WARNING! Prije uključivanja uređaja pročitajte upute za uporabu. Uvijek nosite zaštitne naočale. Oprema Odzračivanje Poklopac spremnika za tekućine Spremnik za tekućine Vijak graničnika (reguliranje količine boje) Regulator za okrugli / široki mlaz Priključak komprimiranog zraka Regulator za reguliranje količine zraka Aktivacijska poluga Glava mlaznice Igla Opruga Četka Filtar Unutrašnji navoj (spremnik za tekućine) Opseg isporuke 1 Pneumatski pištolj za štrcanje boje 1 Spremnik za tekućine 1 Poklopac spremnika za tekućine 1 Četka za čišćenje 1 Filtar 1 Upute za uporabu Tehnički podaci Radni tlak: Veličina mlaznice: Spremnik za tekućine: Preporučena viskoznost: maks. 3 bara Ø 1,4 mm 500 ml DIN / sek. Vrijednost emisije buke: Vrijednost buke izmjerena sukladno normi EN Ocijenjena razina buke na mjestu korisnika iznosi: Razina zvučnog tlaka: L pa = 72,1 db (A) Nesigurnost: K pa = 2,5 db (A) Uvijek nosite zaštitu dišnih putova. Uvijek nosite zaštitu sluha. Uvijek nosite zaštitne rukavice. 10
14 WARNING! Sigurnosne napomene UPOZORENJE! Pročitajte sve sigurnosne napomene i upute. Nepridržavanje sigurnosnih napomena i uputa može uzrokovati strujni udar, požar i/ili teške ozljede. Sačuvajte sve sigurnosne napomene i upute za uporabu u budućnosti! UPOZORENJE! SILE POVRATNOG UDARA! Pri velikim radnim tlakovima može doći do nastajanja sile povratnog udara, koja u određenim okolnostima može uzrokovati opasnosti uslijed trajnog opterećenja. UPOZORENJE! OPASNOST OD GUŠENJA! Prilikom rada s dušikom postoji opasnost od gušenja! Stoga radite samo u dobro prozračenim prostorijama! UPOZORENJE! OPASNOST OD OZLJEDA! Nikada ne prekoračujte maksimalni dopušteni radni tlak od 3 bara. Za podešavanje radnog tlaka koristite reduktor tlaka. OPASNOST OD OZLJEDA! ZLOUPORABA UREĐAJA! Uređaj nikada ne usmjeravajte na ljude i/ili životinje. OPASNOST OD EKSPLOZIJE / POŽARA! ZABRANJENO PUŠITI! Ne palite iskre ili otvoreni plamen. UPOZORENJE! OPASNOST OD OZLJEDA! Kao izvor energije nikada ne koristite kisik ili zapaljive plinove. UPOZORENJE! OPASNOST OD OZLJEDA! Najprije skinite crijevo s izvora komprimiranog zraka i tek nakon toga skinite opskrbno crijevo s uređaja. Na taj ćete način spriječiti nekontrolirano trzanje i bacanje opskrbnog crijeva. Za Vašu osobnu zaštitu koristite prikladna sredstva za zaštitu tijela. Nosite zaštitu za dišne putove s filtrom s aktivnim ugljenom i zaštitne naočale. Djecu i druge osobe držite podalje tijekom korištenja uređaja. U slučaju nepažnje možete izgubiti kontrolu nad uređajem. Prije poravaka i održavanja kao i u slučaju prekida rada ili prije transporta uređaja, obavezno isključite s izvora komprimiranog zraka. Prilikom otpuštanja spojke, crijevo čvrsto držite u ruci kako biste izbjegli ozljede izazvane povratnim trzajem crijeva. Pazite na oštećenja. Prije korištenja uređaja obavezno provjerite da nije oštećen. Ukoliko ustanovite nedostatke, uređaj ni u kom slučaju ne smijete koristiti. Nemojte presavijati crijevo uređaja. U protivnom može doći do njegovog oštećenja. Molimo pridržavajte se sigurnosnih napomena proizvođača sredstva za raspršivanje. Uvijek budite pažljivi i pazite na ono što radite, i na razuman način započnite radove. Ne koristite uređaj ako ste umorni ili pod utjecajem droga, alkohola ili lijekova. Ne uklanjajte tipske pločice - one su sigurnosno relevantni dijelovi uređaja. Ako nemate iskustva u rukovanju uređajem, trebali biste se osposobiti za sigurno rukovanje uređajem. HR 11
15 HR Originalni pribor / dodatni uređaji Koristite isključivo opremu i dodatne uređaje navedene u uputama za uporabu. Uporaba drugih dijelova opreme od onih preporučenih u uputama za rukovanje može uzrokovati opasnosti od ozljeda. Sigurnosne napomene za sustave za fino raspršivanje Radni prostor održavajte čistim, dobro osvijetljenim i bez spremnika za boje i otapala, krpa i drugih zapaljivih materijala. Postoji opasnost od samozapaljenja. U svakom trenutku pripravnima držite ispravne aparate / uređaje za gašenje požara. Osigurajte dostatno prozračivanje u području raspršivanja i dostatnu količinu svježeg zraka u cijeloj prostoriji. Isparavanjem zapaljivih otapala nastaje eksplozivno okruženje. Raspršivanje i čišćenje ne obavljajte s materijalima s plamištem nižim od 21 C. Koristite materijale na bazi vode, teško isparljivih ugljikovodika ili slične materijale. Isparavanjem zapaljivih otapala nastaje eksplozivno okruženje. Raspršivanje ne obavljajte u područjima izvora paljenja, kao što su statičko električno iskrenje, otvoreni plamen, plamen za paljenje, vrući predmeti, motori, cigarete i iskre koje nastaju spajanjem i odvajanjem električnih kabela ili aktivacijom prekidača. Takvi izvori iskrenja mogu u okruženju izazvati zapaljenje. Ne raspršujte materijale za koje nije poznato predstavljaju li opasnost. Nepoznati materijali mogu uzrokovati opasne uvjete. Tijekom raspršivanja i rukovanja kemikalijama nosite dodatnu osobnu zaštitnu opremu kao što su odgovarajuće zaštitne rukavice i zaštitna maska ili maska za zaštitu dišnih putova. Nošenje zaštitne opreme za odgovarajuće uvjete umanjuje izloženost opasnim tvarima. Ne prskajte sebe, druge osobe ili životinje. Ruke i druge dijelove tijela držite dalje od mlaza raspršivanja. Ako mlaz raspršivanja prodre kroz kožu, odmah potražite liječničku pomoć. Raspršivani materijal može u kožu prodrijeti čak i kroz rukavice i te se ubrizgati u tijelo. Ubrizgavanje u tijelo ne tretirajte kao običnu posjekotinu. Mlaz pod visokim tlakom može u tijelo ubrizgati otrove i uzrokovati ozbiljne ozljede. U slučaju ubrizgavanja kroz kožu odmah zatražite liječničku pomoć. Pazite na eventualne opasnosti uzrokovane raspršivanim materijalom. Pazite na oznake na spremniku ili na informacije proizvođača materijala za raspršivanje, uključujući i naputke za uporabu osobne zaštitne opreme. Morate poštivati naputke proizvođača kako biste smanjili rizik od požara, kao i ozljede izazvane otrovima, karcinogenim tvarima, itd. Nikada ne raspršujte bez montirane glave mlaznice. Uporaba specijalnog umetka mlaznice s odgovarajućom glavom mlaznice umanjuje vjerojatnost da mlaz pod visokim tlakom prodre kroz kožu i otrove unese u tijelo. 12
16 Puštanje u pogon Osobine HVLP Ovaj uređaj raspolaže sustavom HVLP (High Volume Low Pressure). Taj sustav omogućuje povećano nanošenje materijala (boje) uz manju potrošnju. VAŽNO: Ne prekoračujte radni tlak od maksimalno 3 bara. Priključivanje uređaja Ovaj proizvod smijete koristiti isključivo s komprimiranim zrakom iz kojeg su uklonjeni kondenzat i ulje, a tlak na uređaju ne smije premašiti maksimalni radni tlak od 3 bara. Kako biste mogli regulirati tlak, izvor komprimiranog zraka mora biti opremljen reduktorom tlaka (s filtrom). Za rad ovog uređaja potrebno je fleksibilno crijevo za komprimirani zrak s brzom spojkom i odgovarajući izvor komprimiranog zraka. Obratite pozornost na napomene za rad i sigurnosne napomene izvora komprimiranog zraka, te na posebne napomene za pripremu boje. NAPOMENA Pazite na ispravan radni tlak. Previsoki radni tlak uzrokuje prejaku finu raspodjelu i prebrzo isparavanje tekućine. Površine postaju hrapave i razvijaju loše osobine prianjanja. Ako je s druge strane radni tlak prenizak, boja se neće dovoljno raspršiti. Pritom dolazi do valovitih površina i stvaranja kapljica. Priključite crijevo za komprimirani zrak pomoću brze spojke na priključak za komprimirani zrak na uređaju. Spoj se automatski zaključava. Na reduktoru tlaka s filtrom na izvoru komprimiranog zraka podesite vrijednost radnog tlaka na 3 bara. Priprema površine za nanošenje boje raspršivanjem Okruženje površine na koju se materijal nanosi raspršivanjem široko i temeljito prekrijte. U protivnom može doći do onečišćenja svih nepokrivenih površina. Osigurajte da površina na koju se materijal nanosi raspršivanjem bude čista, suha i odmašćena. Glatke površine izbrusite i nakon toga odstranite brusnu prašinu. Uključivanje/isključivanje uređaja Napomene za rad: Umetnite filtar u pištolj (vidi sliku C). Tijekom rada otvorite odzračivanje. Prilikom razrjeđivanja pazite na kompatibilnost razrjeđivača i materijala za raspršivanje. Ako koristite pogrešan razrjeđivač, može doći do stvaranja grudica i uslijed toga do začepljenja pištolja. Navrnite spremnik za tekućine smjeru kazaljke na satu. na pištolj u Spremnik za tekućine napunite materijalom za raspršivanje i zavrnite poklopac. Pištolj za raspršivanje boje uvijek od predmeta držite na jednakoj udaljenosti. Idealna udaljenost za raspršivanje je otprilike 15 cm. Pokusom ustanovite odgovarajuće postavke. Uređaj ne uključujte / isključujte iznad tretirane površine, nego započnite i završite postupak raspršivanja otprilike 10 cm izvan tretirane površine. Uključivanje: Za uključivanje pritisnite i držite pritisnutom aktivacijsku polugu. Isključivanje: Za završetak rada otpustite aktivacijsku polugu. HR 13
17 HR Podešavanje mlaza boje Uređaj raspolaže postavkama za okrugli mlaz i široki mlaz. Okrugli mlaz Podešavanje okruglog mlaza: Široki mlaz Okrugli mlaz koristite na primjer kod malih površina, kutova i bridova. Regulator satu. okrenite u smjeru kazaljke na Podešavanje širokog mlaza: Široki mlaz koristite okomito i vodoravno kod većih površina. Regulator okrenite u smjeru suprotnom od smjera kazaljke na satu. Okretanjem glavu mlaznice možete okomito i vodoravno bezstupanjski postaviti u željeni položaj. Reguliranje količine boje NAPOMENA Prednji vijak za fiksiranje služi za ograničavanje područja podešavanja vijka graničnika. Povećanje količine boje: Vijak graničnika okrećite u smjeru suprotnom od smjera kazaljke na satu. Smanjenje količine boje: Vijak graničnika na satu. okrećite u smjeru kazaljke Reguliranje količine zraka NAPOMENA Preporučuje se započeti s maksimalnom količinom zraka. U tu svrhu otvorite regulator količine zraka do maksimalne postavke na način opisan u nastavku pod Povećanje količine zraka. Povećanje količine zraka: NAPOMENA Povećanje količine zraka se u pravilu preporučuje kod pregrubog raspršivanja. Okrenite regulator količine zraka u smjeru suprotnom od smjera kazaljke na satu. Smanjenje količine zraka: NAPOMENA Smanjenje količine zraka se u pravilu preporučuje kod prejake maglice boje. Okrenite regulator količine zraka kazaljke na satu. u smjeru Održavanje i čišćenje UPOZORENJE! OPASNOST OD OZLJEDA! Prije održavanja prekinite napajanje uređaja komprimiranim zrakom. NAPOMENA Temeljito čišćenje nakon svake uporabe vrlo je bitno za sigurnost i rad. U protivnom, primjerice, može doći do začepljenja igle, i besprijekoran rad uređaja više nije zajamčen. Prilikom čišćenja nosite prikladne zaštitne rukavice. Ne koristite halogena otapala koja sadrže ugljikovodike, kao što su triklormetil, etilklorid itd., jer ova sredstva kemijski reagiraju s nekim materijalima u pištolju za raspršivanje boje. To može dovesti do opasnih reakcija. 14
18 POZOR! Pištolj za raspršivanje boje nikada potpuno ne uranjajte u otapalo. Nakon svake uporabe prskanjem propustite razrjeđivač (samo na otvorenom opasnost od eksplozije!) odnosno vodu kroz uređaj. Da biste očistili kućište, glavu mlaznice i otvore za raspršivanje smještene u njoj, koristite priloženu četku za čišćenje ili krpu. Nikada ne koristite benzin, otapala ili sredstva za čišćenje koja agresivno djeluju na plastiku. Vijak graničnika odvrnite u smjeru suprotnom od smjera kazaljke na satu i izvadite ga. Izvadite oprugu. Izvadite iglu pomoću kliješta (vidi sliku A). Iglu pažljivo očistite četkom (vidi sliku B). Vratite iglu u pištolj za raspršivanje boje. Postavite oprugu na kraj igle. Vijak graničnika zavrnite u smjeru kazaljke na satu i stegnite. Spremnik za tekućine skinite s pištolja odvrtanjem u smjeru suprotnom od smjera kazaljke na satu. Izvadite filtar na način prikazan na slici C i očistite ga četkom za čišćenje. Četkom očistite i unutrašnji navoj za tekućine (vidi sliku D). spremnika Filtar ponovo utaknite u pištolj (vidi sliku C) i spremnik za tekućine navrnite okrećući u smjeru kazaljke na satu. Za zaštitu od hrđe, nakon čišćenja kroz pištolj možete propustiti ulje za šivači stroj. Sve pokretne dijelove s vremena na vrijeme nauljite. Nakon čišćenja igle, navoj i brtvu treba lagano namazati mašću. Ne koristite maziva koja sadrže silikon. Uređaje na komprimirani zrak čuvajte samo u suhim prostorima. Zbrinjavanje Ambalaža se sastoji od materijala neškodljivih za okoliš. Možete je zbrinuti u mjesnim kontejnerima za recikliranje. O mogućnostima zbrinjavanja starih uređaja možete saznati u gradskom ili općinskom poglavarstvu. Ekološka prihvatljivost i zbrinjavanje materijala: Boje, lakovi... su poseban otpad kojeg morate zbrinuti na odgovarajući način. Pridržavajte se mjesnih propisa. Pridržavajte se napomena proizvođača. Kemikalije štetne za okoliš ne smiju dospjeti u tlo, podzemne ili nadzemne vode. Raspršivanje na granici voda ili na susjednim površinama (odvodnim područjima) stoga nije dopušteno. Prilikom kupnje boje, lakova... pripazite na njihovu ekološku prihvatljivost. HR 15
19 HR Jamstvo Za ovaj uređaj odobrava se jamstvo u trajanju od 3 godine od datuma kupnje. Uređaj je pažljivo proizveden i prije isporuke brižljivo provjeren. Molimo sačuvajte račun kao dokaz o kupnji. Molimo Vas da u slučaju jamstvenog zahtjeva nazovete telefonski broj nadležnog servisa. Samo na taj način možemo osigurati besplatno slanje robe. Pravo na jamstvo vrijedi samo za greške materijala i greške nastale prilikom proizvodnje, ali ne i za štete nastale prilikom transporta, potrošne dijelove ili uslijed oštećenja lomljivih dijelova, npr. prekidača ili baterija. Proizvod je namijenjen isključivo za privatnu, nekomercijalnu uporabu. Jamstvo prestaje vrijediti u slučaju zlouporabe, nepravilnog korištenja, primjene sile i zahvata na uređaju koje nije obavila za to ovlaštena podružnica servisa. Ovo jamstvo ne ograničava Vaša zakonska prava. Korištenje prava na jamstvo ne produžuje jamstveni rok. To vrijedi i za zamijenjene i popravljene dijelove. Štete i nedostatke koji eventualno postoje već prilikom kupnje treba javiti neposredno nakon raspakiranja, a najkasnije u roku od dva dana nakon datuma kupnje. Nakon isteka jamstvenog roka izvršeni popravci se naplaćuju. Servis UPOZORENJE! Uređaje na popravak predajte podružnici servisa ili stručnjaku električaru uz isključivu uporabu originalnih rezervnih dijelova. Na taj se način osigurava održanje sigurnosti uređaja. NAPOMENA Rezervni dijelovi koji nisu navedeni (npr. igla, opruga, spremnik za tekućine) mogu se naručiti preko našeg servisnog telefonskog centra. Servis Hrvatska Tel.: kompernass@lidl.hr IAN Uvoznik Lidl Hrvatska d.o.o. k.d., p.p Novi Zagreb Proizvođač: KOMPERNASS HANDELS GMBH BURGSTRASSE BOCHUM GERMANY 16
20 Prijevod originalne izjave o sukladnosti Mi, tvrtka KOMPERNASS HANDELS GMBH, osoba odgovorna za dokumentaciju: g. Semi Uguzlu, BURGSTR. 21, BOCHUM, NJEMAČKA, ovime izjavljujemo da ovaj proizvod zadovoljava sljedeće norme, normativne dokumente i direktive EU: Direktiva o strojevima (2006/42/EC) HR Primijenjene usklađene norme: EN 1953:2013 Oznaka tipa stroja: Pneumatski pištolj za štrcanje boje Godina proizvodnje: Serijski broj: IAN Bochum, Semi Uguzlu - Voditelj odjela kvalitete - Zadržavamo pravo na tehničke izmjene u svrhu daljnjeg razvoja proizvoda. Tehnički podaci Izjava o sukladnosti za ovaj proizvod dostupna je na internet stranici 17
21 18
22 Cuprins Introducere...20 Utilizarea conform destinaţiei Dotare Furnitura Date tehnice Indicaţii de siguranţă...21 Accesorii / aparate auxiliare originale Indicaţii de siguranţă pentru sistemele de pulverizare fină Punerea în funcţiune...23 Caracteristici HVLP Conectarea aparatului Pregătirea suprafeţei de pulverizare Pornirea/oprirea aparatului Reglarea jetului de vopsea Reglarea cantităţii de vopsea Reglarea cantităţii de aer Întreţinerea și curăţarea...24 Eliminarea...25 Garanţia...26 Service...26 Importator...26 Traducerea declaraţiei de conformitate originale...27 RO 19
23 RO PISTOL DE VOPSIT CU AER COMPRIMAT Introducere Vă felicităm pentru cumpărarea noului dvs. aparat. Aţi decis să alegeţi un produs de calitate superioară. Instrucţiunile de utilizare fac parte integrantă din acest produs. Acestea cuprind informaţii importante privind siguranţa, utilizarea şi eliminarea. Înainte de utilizarea produsului familiarizaţi-vă cu toate indicaţiile privind utilizarea şi siguranţa. Utilizaţi produsul numai în modul descris şi numai în scopurile menţionate. În cazul transmiterii produsului unei alte persoane, predaţi-i toate documentele aferente acestuia. Utilizarea conform destinaţiei Acest aparat cu acţionare pneumatică este destinat exclusiv aplicării / pulverizării vopselelor pe bază de solvenţi şi diluabile în apă, urilor, grundului, lacurilor transparente, lacurilor de finisare pentru autovehicule, baiţurilor, substanţelor de protecţie pentru lemn, produselor fitosanitare, uleiurilor şi substanţelor dezinfectante. Aparatul nu este adecvat pentru prelucrarea vopselelor de dispersie şi a celor pe bază de latex, leşiilor, materialelor de acoperire pe bază de acizi, materialelor de pulverizare granulare şi pe bază de particule şi nici a materialelor antipulverizare şi antipicurare. Orice altă utilizare sau modificare a aparatului este considerată a fi neconformă și atrage pericole considerabile de accidentare. Nu ne asumăm răspunderea pentru prejudiciile rezultate în urma unei utilizări care contravine destinaţiei. Aparatul este destinat doar utilizării în domeniul privat. Simbolurile de pe scula pneumatică: WARNING! Citiţi instrucţiunile de utilizare înainte de punerea în funcţiune. Purtaţi întotdeauna ochelari de protecţie. Purtaţi întotdeauna echipament de protecţie respiratorie. Purtaţi întotdeauna echipament de protecţie a auzului. Purtaţi întotdeauna mănuşi de protecţie. Dotare Aerisire Capac recipient de scurgere Recipient de scurgere Şurub limitator de cursă (reglarea cantităţii de vopsea) Regulator pentru jet rotund/lat Racord de aer comprimat Regulator pentru cantitatea de aer Declanșator Capul duzei Ac Arc Perie Filtru Filet intern şurub (recipient de scurgere) Furnitura 1 pistol de vopsit cu aer comprimat 1 recipient de scurgere 1 capac pentru recipientul de scurgere 1 perie de curăţare 1 filtru 1 exemplar instrucţiuni de utilizare Date tehnice Presiunea de lucru: max. 3 bari Dimensiunea duzei: diametrul 1,4 mm Recipient de scurgere: 500 ml Viscozitatea recomandată: DIN / sec. Valoarea emisiei de zgomot: Valoarea măsurată pentru zgomot determinată conform EN Nivelul evaluat al zgomotului la locul de activitate al utilizatorului este: Nivelul presiunii acustice: L pa = 72,1 db (A) Incertitudine: K pa = 2,5 db (A) 20
24 WARNING! Indicaţii de siguranţă AVERTIZARE! Citiţi toate indicaţiile de siguranţă și instrucţiunile. Nerespectarea indicaţiilor de siguranţă și a instrucţiunilor poate cauza electrocutare, incendiu și/sau răniri grave. Păstraţi toate indicaţiile de siguranţă și instrucţiunile pentru consultarea ulterioară! AVERTIZARE! FORŢE DE RECUL! În cazul presiunilor de lucru ridicate pot apărea forţe de recul, care în anumite condiţii pot duce la periclitări din cauza solicitării permanente. AVERTIZARE! PERICOL DE ASFIXIERE! Pericol de asfixiere la lucrările cu azot! Din acest motiv lucraţi numai în încăperi bine aerisite! AVERTIZARE! PERICOL DE RĂNIRE! Nu depăşiţi niciodată presiunea maximă admisă de lucru de 3 bari. Pentru reglarea presiunii de lucru folosiţi un reductor de presiune. PERICOL DE RĂNIRE! UTILIZARE ABUZIVĂ! Nu îndreptaţi aparatul către persoane şi / sau animale. PERICOL DE EXPLOZIE / INCENDIU! FUMA- TUL INTERZIS! Nu aprindeţi surse de scântei sau de foc deschis. AVERTIZARE! PERICOL DE RĂNIRE! Nu folosiţi niciodată ca sursă de energie oxigenul sau alte gaze inflamabile. AVERTIZARE! PERICOL DE RĂNIRE! Desfaceţi mai întâi furtunul de la sursa de aer comprimat și abia după aceea îndepărtaţi furtunul de alimentare de la aparat. Astfel evitaţi mişcarea necontrolată, respectiv reculul furtunului de alimentare. Pentru protecţia dvs. utilizaţi mijloace adecvate de protecţie corporală. Purtaţi echipament de protecţie respiratorie cu filtru de carbon activ şi ochelari de protecţie. Ţineţi copiii și alte persoane la distanţă în timpul utilizării aparatului. Dacă sunteţi distras, puteţi pierde controlul asupra aparatului. Înainte de lucrările de reparaţii și de punere în funcţiune, precum și în cazul întreruperii funcţionării deconectaţi aparatul de la sursa de aer comprimat. La desfacerea cuplajului furtunului, furtunul trebuie ţinut ferm cu mâna pentru a evita rănirea cauzată de reculul acestuia. Verificaţi să nu existe deteriorări. Verificaţi aparatul cu privire la eventualele deteriorări înainte de punerea în funcţiune. Dacă aparatul prezintă defecte, acesta nu trebuie pus în niciun caz în funcţiune. Nu îndoiţi furtunul aparatului. În caz contrar, acesta se poate deteriora. Respectaţi indicaţiile de siguranţă ale producătorului materialului de pulverizare. Fiţi mereu precaut, fiţi atent la ceea ce faceţi şi acţionaţi în mod raţional în timpul lucrului. Nu utilizaţi niciun aparat dacă sunteţi obosit sau dacă vă aflaţi sub influenţa drogurilor, alcoolului sau a medicamentelor. Nu îndepărtaţi plăcuţele de specificaţii, deoarece acestea sunt componente relevante pentru siguranţa aparatului. Dacă nu aveţi experienţă în manipularea aparatului, instruiţi-vă în ceea ce privește manipularea în siguranţă. RO 21
25 RO Accesorii / aparate auxiliare originale Utilizaţi numai accesoriile și aparatele auxiliare care sunt specificate în instrucţiunile de utilizare. Utilizarea altor accesorii decât cele recomandate în instrucţiunile de utilizare poate constitui pericol de rănire. Indicaţii de siguranţă pentru sistemele de pulverizare fină Păstraţi zona de lucru curată, bine iluminată şi fără recipiente de vopsea sau solvenţi, lavete şi alte materiale inflamabile. Pericol potenţial de autoaprindere. Menţineţi permanent la îndemână extinctoare / mijloace de stingere a incendiilor funcţionale. Asiguraţi o bună aerisire a zonei de pulverizare şi o alimentare suficientă cu aer curat în întreaga încăpere. Solvenţii inflamabili volatili creează un mediu exploziv. Nu pulverizaţi şi nu curăţaţi cu materiale având punctul de aprindere sub 21 C. Utilizaţi materiale pe bază de apă, hidrocarburi greu volatile sau alte materiale similare. Solvenţii inflamabili uşor volatili creează un mediu exploziv. Nu pulverizaţi în apropierea surselor de aprindere, precum scântei de electricitate statică, flăcări deschise, flăcări de aprindere, obiecte fierbinţi, motoare, ţigări şi scântei provenite de la conectarea şi deconectarea cablurilor electrice sau de la utilizarea comutatoarelor. Astfel de surse de scântei pot determina aprinderea zonei înconjurătoare. Nu pulverizaţi materiale despre care nu cunoaşteţi dacă sunt periculoase. Materialele necunoscute pot crea condiţii periculoase. În timpul pulverizării sau manipulării substanţelor chimice purtaţi echipament individual de protecţie suplimentar, precum mănuşi de protecţie şi mască de protecţie sau mască de protecţie respiratorie corespunzătoare. Utilizarea echipamentului de protecţie adecvat condiţiilor respective contribuie la reducerea expunerii la substanţele periculoase. Nu pulverizaţi asupra dvs., către alte persoane sau animale. Menţineţi mâinile şi celelalte părţi ale corpului departe de jetul de pulverizare. În cazul pătrunderii jetului de pulverizare în piele solicitaţi neîntârziat asistenţă medicală. Produsul pulverizat poate pătrunde în piele chiar şi prin mănuşă, putând ajunge în corp. Acest tip de penetrare nu trebuie tratat ca simplă tăietură. Un jet de înaltă presiune poate introduce substanţe toxice în corp, provocând răni grave. În cazul pătrunderii jetului în piele solicitaţi neîntârziat asistenţă medicală. Se vor avea în vedere pericolele generate de produsul pulverizat. Respectaţi marcajele de pe recipient sau informaţiile furnizate de producător, inclusiv cerinţa privind utilizarea unui echipament individual de protecţie. Instrucţiunile producătorului trebuie respectate în vederea reducerii riscului de incendiu, precum şi a celui de rănire cauzată de substanţele toxice, cancerigene etc. Nu pulverizaţi niciodată fără capul duzei montat. Utilizarea unui ajutaj special pentru duză cu cap adecvat al duzei reduce probabilitatea pătrunderii jetului de înaltă presiune în piele şi introducerii substanţelor toxice în corp. 22
26 Punerea în funcţiune Caracteristici HVLP Acest aparat este echipat cu sistem HVLP (High Volume Low Pressure - volum ridicat la presiune redusă). Sistemul permite realizarea unei aplicări ridicate a materialului (vopsea) în condiţii de consum redus. IMPORTANT: Nu depăşiţi presiunea maximă de lucru de 3 bari. Conectarea aparatului Exploatarea produsului este permisă numai cu aer comprimat curăţat, lipsit de condens și ulei și nu trebuie să depășească presiunea maximă de lucru de 3 bari de pe aparat. Pentru a putea regla presiunea aerului, sursa de aer comprimat trebuie să fie dotată cu un reductor de presiune (cu filtru). Pentru exploatarea acestui aparat sunt necesare un furtun flexibil de aer comprimat cu cuplaj rapid şi o sursă corespunzătoare de aer comprimat. Respectaţi indicaţiile de utilizare şi de siguranţă valabile pentru sursa de aer comprimat şi instrucţiunile speciale privind prepararea vopselei. INDICAŢIE Se va avea în vedere presiunea de lucru corectă. O presiune de lucru excesivă determină o pulverizare prea fină şi provoacă evaporarea prea rapidă a lichidului. Suprafeţele devin aspre şi dezvoltă caracteristici de aderenţă necorespunzătoare. Dacă, dimpotrivă, presiunea de lucru este prea redusă, vopseaua nu va fi pulverizată suficient. Consecinţa este reprezentată de suprafeţe ondulate şi formarea picăturilor. Racordaţi furtunul de aer comprimat cu cuplaj rapid la racordul de aer comprimat al aparatului. Blocarea are loc automat. Reglaţi o presiune de lucru de 3 bari la reductorul de presiune cu filtru de la sursa de aer comprimat. Pregătirea suprafeţei de pulverizare Acoperiţi complet şi temeinic zona înconjurătoare a suprafeţei de pulverizare. În caz contrar, suprafeţele neacoperite se pot murdări. Verificaţi ca suprafaţa de pulverizare să fie curată, uscată şi fără grăsime. Înăspriţi suprafeţele netede şi apoi îndepărtaţi praful provenit de la şlefuire. Pornirea/oprirea aparatului Instrucţiuni de lucru: Introduceţi filtrul în pistol (a se vedea figura C). În timpul operaţiunii deschideţi aerisirea. La diluare se va avea în vedere ca materialul de pulverizare şi diluantul să fie compatibile. În cazul utilizării unui diluant inadecvat este posibilă formarea de bulgări care pot înfunda pistolul. Înşurubaţi în sens orar recipientul de scurgere pe pistol. Umpleţi recipientul de scurgere cu material de pulverizare şi înşurubaţi capacul. Menţineţi întotdeauna pistolul de vopsit la o distanţă constantă faţă de obiect. Distanţa optimă de pulverizare este de cca 15 cm. Stabiliţi reglajele corecte prin intermediul unui test. Nu porniţi / nu opriţi aparatul deasupra suprafeţei de pulverizare, ci începeţi şi finalizaţi procesul de pulverizare la cca 10 cm în exteriorul suprafeţei. Pornirea: Pentru a porni aparatul apăsaţi declanşatorul şi menţineţi-l apăsat. Oprirea: Pentru a încheia utilizarea eliberaţi din nou declanşatorul. RO 23
27 RO Reglarea jetului de vopsea Aparatul dispune de reglaje pentru jet rotund şi jet lat. Jet rotund Reglarea jetului rotund: Jet lat Utilizaţi jetul rotund, de exemplu, pentru suprafeţe mici, colţuri şi muchii. Rotiţi regulatorul în sens orar. Reglarea jetului lat: Utilizaţi jetul lat vertical şi orizontal în cazul suprafeţelor mai mari. Rotiţi regulatorul în sens antiorar. Capul duzei poate fi reglat vertical şi orizontal, progresiv, în poziţia dorită. Reglarea cantităţii de vopsea INDICAŢIE Şurubul frontal de blocare serveşte la limitarea zonei de reglare a şurubului limitator de cursă. Mărirea cantităţii de vopsea: Rotiţi în sens antiorar şurubul limitator de cursă. Diminuarea cantităţii de vopsea: Rotiţi în sens orar şurubul limitator de cursă. Reglarea cantităţii de aer INDICAŢIE Pentru început se recomandă utilizarea cantităţii maxime de aer. În acest scop deschideţi regulatorul pentru cantitatea de aer conform următoarei descrieri din Mărirea cantităţii de aer până la reglajul maxim. Mărirea cantităţii de aer: INDICAŢIE Mărirea cantităţii de aer este în general oportună în cazul unei pulverizări prea grosiere. Rotiţi în sens antiorar regulatorul pentru cantitatea de aer. Diminuarea cantităţii de aer: INDICAŢIE Diminuarea cantităţii de aer este în general oportună în cazul ceţii de vopsea prea intense. Rotiţi în sens orar regulatorul pentru cantitatea de aer. Întreţinerea și curăţarea AVERTIZARE! PERICOL DE RĂNIRE! Înaintea lucrărilor de întreţinere deconectaţi aparatul de la reţeaua de aer comprimat. INDICAŢIE Curăţarea temeinică după fiecare utilizare constituie un aspect foarte important pentru siguranţă şi exploatare. În caz contrar este posibilă, de exemplu, înfundarea acului, iar funcţionarea impecabilă a aparatului nu va mai fi asigurată. În timpul lucrărilor de curăţare purtaţi mănuşi de protecţie adecvate. Nu utilizaţi solvenţi pe bază de hidrocarburi halogenate, precum triclormetil, clorură de etil etc., deoarece acestea provoacă reacţii chimice cu alte materiale ale pistolului de vopsit. Aceasta poate provoca reacţii periculoase. 24
28 ATENŢIE! Nu introduceţi niciodată complet pistolul de vopsit în solvenţi. După fiecare utilizare, aparatul se va curăţa prin pulverizarea de diluant (numai în aer liber pericol de explozie!), respectiv apă. Pentru curăţarea carcasei, capului duzei şi a orificiilor de pulverizare din interiorul acesteia utilizaţi numai peria de curăţare livrată sau o lavetă. Nu utilizaţi niciodată benzină, solvenţi sau agenţi de curăţare care atacă materialul plastic. Mai întâi desfaceţi şurubul limitator de cursă prin rotirea acestuia în sens antiorar. Scoateţi arcul. Scoateţi acul cu ajutorul unui cleşte (a se vedea figura A). Curăţaţi cu grijă acul (a se vedea figura B). Introduceţi acul cu ajutorul periei înapoi în pistolul de vopsit. Aşezaţi arcul pe capătul acului. Înfiletaţi la loc șurubul limitator de cursă rotirea acestuia în sens orar. Deşurubaţi recipientul de scurgere antiorar de la pistol. în sens prin Îndepărtaţi filtrul ca în figura C şi curăţaţi-l cu ajutorul periei de curăţare. Curăţaţi, de asemenea, filetul interior al şurubului recipientului de scurgere cu ajutorul periei de curăţare (a se vedea figura D). Introduceţi din nou filtrul în pistol (a se vedea figura C) şi înşurubaţi recipientul de scurgere în sens orar pe pistol. În vederea protejării împotriva ruginii, după curăţare, pulverizaţi cu ulei pentru maşini de cusut. La anumite intervale lubrifiaţi toate componentele mobile. După curăţarea acului, filetul şi garnitura trebuie prevăzute cu un strat subţire de grăsime. Nu utilizaţi lubrifianţi pe bază de silicon. Depozitaţi aparatele cu aer comprimat numai în încăperi uscate. Eliminarea Ambalajul este format din materiale ecologice. Acesta poate fi eliminat în recipientele locale de reciclare. Informaţii despre posibilităţile de eliminare a aparatului uzat pot fi obţinute de la administraţia locală. Compatibilitatea cu mediul şi eliminarea materialelor: Vopselele, lacurile etc. sunt deşeuri speciale care trebuie eliminate în mod corespunzător. Respectaţi reglementările locale. Respectaţi indicaţiile producătorului. Substanţele chimice dăunătoare pentru mediu nu trebuie să pătrundă în sol, apele subterane sau apele de suprafaţă. Din acest motiv sunt interzise operaţiunile de pulverizare pe malul apelor de suprafaţă sau în proximitatea acestora (bazinul hidrografic). La achiziţionarea vopselelor, lacurilor etc. se va avea în vedere compatibilitatea acestora cu mediul. RO 25
RETRACTABLE HOSE REEL
 RETRACTABLE HOSE REEL 30 METRE HOSE LENGTH MODEL NO. YWRHR30A OPERATING INSTRUCTIONS INTRODUCTION - MODEL NO. YWRHR30A This reel is made of high-quality materials and parts, driven and released by a spring,
Operator s Manual. Medium-Duty Electric Slicers ENGLISH. Item Model Description Drive Peak HP Voltage Amps Hz Plug
 Medium-Duty Electric Slicers 40950 40951 Item Model Description Drive Peak HP Voltage Amps Hz Plug 40950 SLM250/S 10 Knife Medium-Duty Slicer 1/3 2.5 Belt 120 60 5-15P 40951 SLM300P/S 12 Knife Medium-Duty
Contents. AFTER SALES SUPPORT / KB-8085
 Contents 02 Introduction 03 General Information and Safety Instructions 05 Assembly and Parts List 07 Getting Started 08 Other Useful Information 10 Warranty Card Introduction 1 2 Congratulations! You
Instructions for use, installation, and connection. Gas Built in Hob
 Instructions for use, installation, and connection Gas Built in Hob RB3311SGBS RB3312SGBS RB3311DGBS RB3311MGBS RB3311NGBS RB6313SGBST RB6323SGBST RB6314SGBS RB6313DGBST RB6313MGBST RB7312SGBS RB7313SGBST
SINGLE BURNER STOVE IMPORTANT OPERATING INSTRUCTIONS COOKING & STORAGE POSITION PARTS IDENTIFICATION
 SINGLE BURNER STOVE OPERATING INSTRUCTIONS PARTS IDENTIFICATION Electronic Lighter Ignites the burner. Liquid Guard Holds liquid overflow. Windshield Prevents flame from being extinguished by wind. Ensures
Romania Great Britain France Italia Polska
 Romania Numai pentru tarile membre UE Nu aruncati masinile electrice in gunoiul menajer! Conform directivei europene 2002/96/CE pentru masini electrice si electronice vechi corelata cu legislatia locala,
PAINT SPRAY SYSTEM PFS 280 A1
 PAINT SPRAY SYSTEM PFS 280 A1 PAINT SPRAY SYSTEM Operation and Safety Notes Translation of original operation manual SET ZA PRSKANJE BOJE Upute za posluživanje i za Vašu sigurnost Prijevod originalnih
Est A TRADITION OF EXCELLENCE INSTRUCTION BOOK.
 Est. 1887 A TRADITION OF EXCELLENCE INSTRUCTION BOOK www.wolseleygrooming.co.uk Stockshop (L.E.) Ltd., Lodge Trading Estate, Broadclyst, Exeter EX5 3BS Email: service@stockshop.co.uk Tel: 01392 460077
Noul sistem de sine de ghidaj pentru o precizie maxima!!!
 Noul sistem de sine de ghidaj pentru o precizie maxima!!! 1 Acestea sunt elementele care compun noul sistem FSN Sine de ghidaj Sina de ghidaj / cod comanda FSN 800 1600Z00005 FSN 1100 1600Z00006 FSN 1600
Romania Great Britain France Italia Polska
 Romania Numai pentru tarile membre UE Nu aruncati masinile electrice in gunoiul menajer! Conform directivei europene 2002/96/CE pentru masini electrice si electronice vechi corelata cu legislatia locala,
Urea/Adblue Hose Reel
 www.scintex.com.au sales@scintex.com.au Model: SHR3408 Urea/Adblue Hose Reel Product Manual Specifications Spring driven drum: for automatic rewind. Locking ratchet: to maintain the desired length of hose
The WoodGas Campstove By: Spenton LLC
 The WoodGas Campstove By: Instruction Manual IMPORTANT Please read this manual carefully before using this stove. Store this manual for future use. If you have any questions about the operation of this
Electric 2-STAGE SHARPENING FEATURES: system allows for safe, easy knife sharpening - Non-slip feet allows sharpener to stay in place while in use
 Electric FEATURES: - 2-Stage electric sharpening system allows for safe, easy knife sharpening - Non-slip feet allows sharpener to stay in place while in use 2-STAGE SHARPENING IMPORTANT SAFEGUARDS SAVE
SAFETY AND OPERATING MANUAL
 SAFETY AND OPERATING MANUAL General Safety Rules WARNING! Read all instructions. Failure to follow all instructions listed below may result in electric shock, fire and/ or serious injury. The term power
Camp Stove USER MANUAL PLEASE READ AND UNDERSTAND THIS MANUAL COMPLETELY BEFORE OPERATING THE CAMP STOVE
 Camp Stove USER MANUAL PLEASE READ AND UNDERSTAND THIS MANUAL COMPLETELY BEFORE OPERATING THE CAMP STOVE Adventure Kings Camp Stove 2 Safety Information: We only recommend the use of dry, seasoned timber
Gas Conversion Kits and Instructions
 Gas Conversion Kits and Instructions INSTALLATION FORM RGM 432/433-GC (Version D.1) Obsoletes Form RGM 432/433-GC (Version D) APPLIES TO: Model FT and Model SFT All gas conversion must be done by a qualified
Before using your stove for the first time, we would like to give you useful instructions and security advice for the correct use of our product.
 instruction manual & security advices for decoration fire places of BFT / 01.2007 Model: Brennkammer Vario We congratulate for buying your non-smoking-stove Introduction BFT decoration fire places guarantee
Apply for further information to the manufacturer, if you ve got additional questions after studying this manual.
 The given manual guide contains information about the design, operation principles, specifications and basic requirements providing accident-free operation and secure maintenance of the item Touristic
electric knife sharpener
 electric knife sharpener USER GUIDE Now that you have purchased a Kitchen Living product you can rest assured in the knowledge that as well as your year parts and labour guarantee you have the added peace
INSTRUCTIONS MANUAL CAST IRON STOVE
 INSTRUCTIONS MANUAL CAST IRON STOVE CA-SGB06 Warning: Use outdoors only Read the instructions before using the appliance and retain for future reference. 1 These instructions give some important information
LEGAL REQUIREMENTS FOR STORING AND TRANSPORTING FLAMMABLES AND CHEMICALS
 LEGAL REQUIREMENTS FOR STORING AND TRANSPORTING FLAMMABLES AND CHEMICALS SAFE STORAGE OF PETROL AND OTHER FLAMMABLE SUBSTANCES FIXED LOCATION Small quantities of dangerous goods can be found in most workplaces.
Installation and User s Manual 12 x 10 MOTORIZED AWNING
 12 x 10 MOTORIZED AWNING Installation and User s Manual 12 x 10 MOTORIZED AWNING 088-1763-0 Stop Please read and understand this manual before any assembly or use of this product. Before beginning assembly
Operator's Manual. Model: RY10MK-PRO MPN: RA-MLT Gallon Direct Fire Melter Kettle Burner Model with Adjustable Flame-Out Valve
 Operator's Manual Model: RY10MK-PRO MPN: RA-MLT-0009 10 Gallon Direct Fire Melter Kettle Burner Model with Adjustable Flame-Out Valve U.S. Patent No. 9,739,021 For Technical Support Please Visit www.rynoworx.com
USER MANUAL PLEASE READ AND UNDERSTAND THIS MANUAL COMPLETELY BEFORE USE.
 Adventure Kings Roof Top Tent USER MANUAL PLEASE READ AND UNDERSTAND THIS MANUAL COMPLETELY BEFORE USE. Warning Improper installation or use of your Roof Top Tent may result in serious injury or death.
SOUDATHERM SFI 600P. Revision date: 19/06/2015 Page 1 of 6
 Revision date: 19/06/2015 Page 1 of 6 Technical data: Basis Polyurethane Foam Consistency Liquid Curing system Moisture curing Skin formation (20 C and 60% R.H.)* 8 min Curing time (20 C and 60% R.H.)*
Motorized retractable awning
 Motorized retractable awning Model 95295 Set up And Operating Instructions Diagrams within this manual may not be drawn proportionally. Due to continuing improvements, actual product may differ slightly
Product instruction manual Ream Cutting Systems RE3943, RE3946, RE3947, RE3971, RE3952E
 Product instruction manual Ream Cutting Systems RE3943, RE3946, RE3947, RE3971, RE3952E The Trimfast Ream Cutters are reliable, high performance cutters that will give you the results you need quickly
TRAVEL-SMART AWNING SERIES »LYRA 4 « Family Tent. Model No. HW Document-No.: HW Issue: August Top Quality Camping
 TRAVEL-SMART AWNING SERIES»LYRA 4 «Family Tent Model No. HW-60136-1 Document-No.: HW-60136-1 Issue: August 2015 Top Quality Camping WELCOME Thank you for purchasing your Lyra 4. Please read these instructions
Assembly Instructions & User s Manual Academy USA Flag 10x10 Straight Canopy
 Assembly Instructions & User s Manual Academy USA Flag 10x10 Straight Canopy FSAAPT0301 Please keep this instruction manual for future reference Customer Service: (888) 922-2336, 7:00am to 12:00am Everyday
COOK & GRILL STOVE. Model ASSEMBLY AND OPERATING INSTRUCTIONS
 COOK & GRILL STOVE Model 43343 ASSEMBLY AND OPERATING INSTRUCTIONS Due to continuing improvements, actual product may differ slightly from the product described herein. 349 Mission Oaks Blvd., Camarillo,
Read all instructions and warnings before using this fireplace. WARNING
 Frame User Manual 1 Operating Manual Thank you for purchasing this Signi Fires product. Signi Fires is very safety conscious, we have taken every care in designing, manufacturing and assembling your Signi
30m Foot Pedal Hose Reel
 30m Foot Pedal Hose Reel MODEL NO. HRF-300 OPERATING INSTRUCTIONS 0609 SPECIFICATIONS - MODEL NO. HRF-300 Hose Length: 30m + 2 metres Hose Diameter: 12mm (1/2 ) Hose Material: PVC Working Pressure: 150psi
AUTO REWIND HOSE REEL USER MANUAL
 AUTO REWIND HOSE REEL USER MANUAL Models: US3025 IMPORTANT: READ BEFORE USE AND KEEP FOR FUTURE REFERENCE Welcome to trouble-free watering at its best! The Hoselink Auto Rewind Hose Reel is manufactured
3M PPS Series 2.0 Spray Cup System The next evolution of painting productivity
 3M PPS Series 2.0 Spray Cup System The next evolution of painting productivity Better. To keep it flowing. As a painter, you take great pride in your work. You don t have time to fool around with unproven
Professional Mandoline Manual. Model: 90757
 Professional Mandoline Manual Model: 90757 Introduction Your MIU France Composite Mandoline features a selection of blades with variable thickness adjustments which make it one of the most versatile kitchen
Standard Ignition 2014 The Coleman Company, Inc colemanaustralia.com.au IMPORTANT
 5461 Series INSTASTART Electronic Ignition Propane Stoves Instructions for use Standard Ignition 2014 The Coleman Company, Inc colemanaustralia.com.au * Model may vary from picture. Note: Propane tank
Lit Table Top Firepit Bio-Ethanol Fireplace. User Manual. Model: GF301650
 Lit Table Top Firepit Bio-Ethanol Fireplace User Manual Model: GF301650 1 Moda Flame Lit Table Top Firepit Bio-Ethanol Fireplace Included in delivery (Parts List): A. Fireplace body 1pc B. Glass 1pc C.
S E L E C T I O N. Abdominal Crunch. User manual
 and S E L E C T I O N T H E S T R E N G T H E V O L U T I O N User manual and and The identification plate of the and manufacturer, affixed along side the seat on the frame of the weight stack, gives the
EB300. Ethanol Burner. User s Manual Installation Instructions
 EB300 Ethanol Burner User s Manual Installation Instructions EB300 Burner Burner Lid User s Manual What s in the box: 1pc 1pc 1pc Installation Instructions EB300 - User s Manual The Ignis Ethanol Burner
Style # Laguna Propane Tank Cover Owner s Manual
 Style # 26100117 Laguna Propane Tank Cover Owner s Manual Warning: For outdoor use only DO NOT use for cooking DO NOT use under any overhead enclosure Manufactured as Model # 6561 in China for: Restoration
HARVIA IRON STOVE Instructions for installation and use
 HARVIA IRON STOVE EN Instructions for installation and use Harvia 10 08012014VTT Congratulations on a good choice of fireplace and thank you for your confidence in Harvia s products. Read these instructions
Meat Slicer INSTRUCTION MANUAL CAUTION! ONE YEAR LIMITED WARRANTY
 ONE YEAR LIMITED WARRANTY INSTRUCTION MANUAL The original registered owner of this product should contact SKYFOOD EQUIPMENT LLC at 305-868-16 for any warranty problems or service. SKYFOOD EQUIPMENT LLC
SMART BIO-ETHANOL ELECTRONIC BURNER
 SMART BIO-ETHANOL ELECTRONIC BURNER User s Manual What s in the box: Smart Burner Remote Control AC Adapter Filling Hose User s Manual 1pc 1pc 1pc 1pc 1pc Preparations Remove all packaging materials prior
Operating Instructions VETTER Medical Tents
 Emergency Pneumatics. Operating Instructions VETTER Medical Tents Article No. 87043403 Vetter GmbH I 09/17 I Changes and errors excepted. Vetter Medical Tents Contents 1. Important preliminary remarks...2
PATRIOT INSTRUCTION MANUAL SL300C 12 MEAT SLICER 1/2 HP
 INSTRUCTION MANUAL SL300C 12 MEAT SLICER 1/2 HP This manual contains important information regarding your Patriot unit. Please read this manual thoroughly prior to equipment set-up, operation and maintenance.
Sunjoy S-AW011-G Beauty-Mark Manual Retractable Awning -Green Strip Owner s Manual IMPORTANT
 Sunjoy S-AW011-G eauty-mark Manual Retractable Awning -Green Strip Owner s Manual IMPORTANT Thank you very much for choosing Sunjoy Group. Please take time to read these instructions thoroughly and follow
ORIGO 1500, 3000 ORIGO 6000, 6100, Alcohol stoves Operating manual Spirituskocher Bedienungsanleitung... 24
 C C _Origo_5 6.book Seite Freitag,. Dezember 8 : 5 EN Alcohol stoves Operating manual............... 8 DE Spirituskocher Bedienungsanleitung............ ORIGO FR ES Cuisinières à alcool Notice d utilisation..............
instruction manual & security advices for decoration fire places of BFT (habee-feuer) /
 /") instruction manual & security advices for decoration fire places of BFT (habee-feuer) / 01.2007 Model: Vario / Pyro / Pyros We congratulate for buying your non-smoking-stove Introduction Before using your
instruction manual & security advices for decoration fire places of BFT (habee-feuer) / 01.2007 Model: Vario / Pyro / Pyros We congratulate for buying your non-smoking-stove Introduction Before using your
Maintenance and care of the. German Red Clipper and its blades
 BLADE SYSTEM One of the reasons for the superior cutting power of the German Red Clipper is its unique blade system: The pressure on the top blade can be adjusted according to the type of coat. If the
» AQUILA 320(HIGH TOP) «
 «") PERFORMANCE SERIES» AQUILA 320(HIGH TOP) «Model No. :12020253200000 Document-No.: FC-90037 Issue: November 2015 Top Quality Camping WELCOME Thank you for purchasing your Westfield Aquila 320 awning.please
PERFORMANCE SERIES» AQUILA 320(HIGH TOP) «Model No. :12020253200000 Document-No.: FC-90037 Issue: November 2015 Top Quality Camping WELCOME Thank you for purchasing your Westfield Aquila 320 awning.please
IAN HAIR & BEARD TRIMMER SHBS 1000 B1 APARAT ZA ŠIŠANJE HAIR & BEARD TRIMMER BLOC DE LAME ACOPERITE CU TITAN ŞI CUŢITE DIN CERAMICĂ
 HAIR & BEARD TRIMMER SHBS 1000 B1 HAIR & BEARD TRIMMER Operating instructions BLOC DE LAME ACOPERITE CU TITAN ŞI CUŢITE DIN CERAMICĂ Instrucţiuni de utilizare ΚΟΥΡΕΥΤΙΚΗ ΜΗΧΑΝΗ ΓΙΑ ΜΑΛΛΙΑ ΚΑΙ ΓΕΝΙΑ Οδηүίες
9966 Series. Propane Stoves. Instructions for use. INSTASTART Electronic Ignition Standard Ignition. Camp Stove
 Propane Stoves Instructions for use INSTASTART Electronic Ignition Standard Ignition Camp Stove 2014 The Coleman Company, Inc. www.coleman.com 9966 Series * The griddles are only included for certain models.
Sportster II Dual Fuel Stove
 Sportster II Dual Fuel Stove Dual Fuel TM Stove Instructions for use 2017 The Coleman Company, Inc. www.coleman.com 533 Series IMPORTANT CONSUMER/USER: This instruction manual contains important information
» GEMINI 390 CARAVAN«
 TRAVEL-SMART AWNING SERIES» GEMINI 390 CARAVAN«Model No. 12010223900000 Document-No.: FC-90015-390 Issue:October 2015 Top Quality Camping WELCOME Thank you for purchasing your Westfield awning. Please
SHADING SYSTEMS WITH BACK PULL SYSTEM
 SHADING SYSTEMS WITH BACK PULL SYSTEM 800285_EN SHADING SYSTEMS WITH BACK PULL SYSTEM TABLE OF CONTENTS 1. BASIC INFORMATION...3 2. EXPLANATION OF THE NOTICES...3 3. VALIDITY...3 4. SAFETY...3 5. INTENDED
IMPORTANT NOTICE. Professional Mandoline Manual
 IMPORTANT NOTICE PLEASE DO NOT RETURN TO STORE. If you have any problems with this unit, contact Consumer Relations for service. PHONE: 206-605-0555 Please read operating instructions before using this
Advantage Plus TIM-3600 Series Reel
 Read the following precautions and instructions before you begin assembly or using. Failure to comply with these instructions could result in personal injury or property damage. Keep these instructions
Eco-Stove L.E. Hiking Eco-stove L.E. Plus Hiking/Camping Eco-Stove X.L. Camping Eco-Stove X.X.L. Backyard Grill and Survival. Instruction Manual
 Eco-Stove L.E. Hiking Eco-stove L.E. Plus Hiking/Camping Eco-Stove X.L. Camping Eco-Stove X.X.L. Backyard Grill and Survival Instruction Manual IMPORTANT Before using your new stove please be sure to read
Manufactured in New Zealand Metal Fab Industries Ltd PO Box Greenmount Auckland
 Manufactured in New Zealand Metal Fab Industries Ltd PO Box 58-473 Greenmount Auckland Www.metalfab.co.nz LOGAIRE STAINLESS STEEL BBQ 2,3 & 4 Burner Models IMPORTANT Please read all instructions before
Installation and Maintenance Manual
 Freestanding Gas Stove MODEL: PGS2005 GPEBB20R GPEBW20R Installation and Maintenance Manual Warning Maintenance products should be carried out by professional and technical personnel with relevant qualification,
ALPINE SLIDEOUT COVER
 INSTALLATION MANUAL ALPINE SLIDEOUT COVER RV Read this manual before installing or using this product. Failure to follow the instructions and safety precautions in this manual can result in personal injury
Fire's Edge Fire Pit/Fire Pit Inserts For (Automated) Model 100-A
 Model 100-A") Fire's Edge Fire Pit/Fire Pit Inserts For (Automated) Model 100-A OWNER S MANUAL / OPERATING AND MAINTENANCE INSTRUCTIONS For your safety: If you smell gas: 1. Shut off gas to the appliance 2. Extinguish
Fire's Edge Fire Pit/Fire Pit Inserts For (Automated) Model 100-A OWNER S MANUAL / OPERATING AND MAINTENANCE INSTRUCTIONS For your safety: If you smell gas: 1. Shut off gas to the appliance 2. Extinguish
Getting Started Guide
 Getting Started Guide Assembly Instructions User Guide Table Top Maintenance Warranty Information (800) 445-4559 www.designingfire.com Fax: 651-305-6347 @designingfire.com #253915-2528907 Installers: Please
Installation & User Manual EW5000 Outdoor Cooking Fire
 Installation & User Manual EW5000 Outdoor Cooking Fire IMPORTANT: Please read this manual before installing and using the ESCEA EW5000 Cooking fire. Failure to follow these instructions may lead to a possible
DIAMOND TECH INTERNATIONAL Innovations For Creativity DIAMOND LASER BAND SAW OPERATIONS MANUAL
 SPEEDSTER-XL INSTRUCTION MANUAL DIAMOND TECH INTERNATIONAL Innovations For Creativity SPEEDSTER-XL DIAMOND LASER BAND SAW OPERATIONS MANUAL SPEEDSTER-XL INSTRUCTION MANUAL - PAGE 1 Before You Begin Read
TC42 CHALET II BURNER KIT INSTALLATION INSTRUCTIONS
 INSTALLER: Leave this manual with the appliance. CONSUMER: Retain this manual for future reference. These instructions are supplementary to the Installation and Operating Instructions supplied with the
Camping Chef Folding Elite Camping Chef Folding Compact Camping Chef Folding
 Camping Chef Folding Elite Camping Chef Folding Compact Camping Chef Folding WARNING FAILURE TO FOLLOW ALL WARNINGS AND INSTRUCTIONS IN THIS MANUAL COULD LEAD TO PERSONAL INJURY, INCLUDING DEATH. RETAIN
IB 15/120. Nozzle case holder. Automatic residual ice discharge. Glass-fibre reinforced plastic dry ice container. Outstanding mobility
 IB 15/120 The Ice Blaster IB 15/120 is one of the most powerful dry ice blasting machines on the market. It impresses with its robustness, highly reliable technology and the best results in dry ice cleaning.
2008 Equalizer Industries, Inc. Revision 4/23/
 2008 Equalizer Industries, Inc. Revision 4/23/2018 www.equalizer.com All Equalizer tools are warranted for one year to be free of factory defects. Warranty does not apply to abuse, misuse, or normal wear
Retractable Hose Reel
 Retractable Hose Reel installation and Operation Please read before use We recommend keeping these instructions for future reference Hose Reel must be mounted before use Keep the hose retracted when not
INSTANT GARAGE MODEL NO: CIG81224 ASSEMBLY INSTRUCTIONS PART NO: ORIGINAL INSTRUCTIONS
 INSTANT GARAGE MODEL NO: CIG81224 PART NO: 3503578 ASSEMBLY INSTRUCTIONS ORIGINAL INSTRUCTIONS GC1117 INTRODUCTION Thank you for purchasing this CLARKE Instant Garage. When erected, the CIG81224 garage
PATRIOT INSTRUCTION MANUAL SL300ES, 300ES MEAT SLICER
 PATRIOT INSTRUCTION MANUAL SL300ES, 300ES-12 12 MEAT SLICER This manual contains important information regarding your unit. Please read this manual thoroughly prior to equipment set-up, operation and maintenance.
30M AUTOMATIC HOSE REEL Professional Series INSTRUCTION MANUAL
 30M AUTOMATIC HOSE REEL Professional Series INSTRUCTION MANUAL 1. BEFORE USE Please read these instructions carefully Do not attempt to open the cover. Only specialized personnel who have been trained
12FT. x 12FT. Pop-Up Straight Leg Canopy. Owner s Manual
 12FT. x 12FT. Pop-Up Straight Leg Canopy Owner s Manual s WARNING: Read carefully and understand all ASSEMBLY AND OPERATION INSTRUCTIONS before operating. Failure to follow the safety rules and other basic
OWNER S MANUAL. Item #14103
 TRI-BALL HITCH WITH CLEVIS OWNER S MANUAL WARNING: Read carefully and understand all INSTRUCTIONS before operating. Failure to follow the safety rules and other basic safety precautions may result in serious
2 Burner ASSEMBLY MANUAL
 REVOLUTIONTM 2 Burner Black STEEL EDITION ASSEMBLY MANUAL 85-3139-2 (G36301) Propane Limited 5-Year Warranty Read and save manual for future reference. Assemble your grill immediately. Missing or damaged
Hose Reel Series L701/G701
 Hose Reel Series L70/G70.0 WARNING: Read carefully and understand all INSTRUCTIONS before operating. Failure to follow the safety rules and other basic safety precautions may result in serious personal
User Manual. 110 Cup (55 Cup Raw) Rice Cooker. Model: 177GRCLP, 177GRCNAT 10/2017. Please read and keep these instructions. Indoor use only.
 Rice Cooker. Model: 177GRCLP, 177GRCNAT 10/2017. Please read and keep these instructions. Indoor use only.") 110 Cup (55 Cup Raw) Rice Cooker Model: 177GRCLP, 177GRCNAT 10/2017 Please read and keep these instructions. Indoor use only. www.avantcoequipment.com 1 NOTE: Save these instructions for future reference.
110 Cup (55 Cup Raw) Rice Cooker Model: 177GRCLP, 177GRCNAT 10/2017 Please read and keep these instructions. Indoor use only. www.avantcoequipment.com 1 NOTE: Save these instructions for future reference.
TC36 CHALET II BURNER KIT INSTALLATION INSTRUCTIONS
 INSTALLER: Leave this manual with the appliance. CONSUMER: Retain this manual for future reference. These instructions are supplementary to the Installation and Operating Instructions supplied with the
VERTICAL AWNINGS _EN VERTICAL AWNINGS INSTRUCTIONS FOR USE INSTRUCTIONS FOR USE
 VERTICAL AWNINGS 800284_EN VERTICAL AWNINGS TABLE OF CONTENTS. Page 1. BASIC INFORMATION...2 2. EXPLANATION OF THE NOTICES...2 3. VALIDITY...2 4. SAFETY...3 5. INTENDED USE...3 6. PRODUCT INFORMATION...3
accidents which arise due to non-observance of these instructions and the safety information herein. CAUTION:
 AUTO REWIND HOSE REEL Model: 7640 CALIFORNIA PROPOSITION 65 WARNING: You can create dust when you cut, sand, drill or grind materials such as wood, paint, metal, concrete, cement, or other masonry. This
Saw Blade Lube Systems
 Environmentally Friendly Lubrication Saw Blade Lube Systems Cutting Edge Technology Saw Blade Lube Systems Cutting Edge Technology Cutting Edge Technology Unist saw blade lubrication systems deliver all
GLM300 Semi-auto Slicer
 Frequency: Before each days use Division: Location: User: Supervisor: Preceda Code: Article Number:
CJENIK APLIKACIJE CERAMIC PRO PROIZVODA STAKLO PLASTIKA AUTO LAK KOŽA I TEKSTIL ALU FELGE SVJETLA
 KOŽA I TEKSTIL ALU FELGE CJENIK APLIKACIJE CERAMIC PRO PROIZVODA Radovi prije aplikacije: Prije nanošenja Ceramic Pro premaza površina vozila na koju se nanosi mora bi dovedena u korektno stanje. Proces
MK3000. Operating and Calibration Instructions
 MK3000 Operating and Calibration Instructions CONTENT 1. INTRODUCTION 3 1.1. GENERAL INFORMATION. 3 1.2. WORKING PRINCIPLE. 3 1.3. SECTION THROUGH CUTTER.. 4 1.4. SPECIFICATIONS.. 5 2. INSTRUCTIONS FOR
1. INTRODUCTION GENERAL INFORMATION WORKING PRINCIPLE CUTTING SECTION SPECIFICATIONS INSTRUCTIONS FOR USE 5
 MK2000 User Guide What s in this guide 1. INTRODUCTION 3 1.1. GENERAL INFORMATION. 3 1.2. WORKING PRINCIPLE. 3 1.3. CUTTING SECTION.. 4 1.4. SPECIFICATIONS.. 5 2. INSTRUCTIONS FOR USE 5 2.1. UNPACKING
Operating Instructions
 Operating Instructions SD13035 OLP SD13050 OMP SD14005 OVP SD13050 OLP SD13000 OMP FSD13035 OLP SD13000 OLP SD13035 OVP FSD13050 OLP SD14035 OLP SD13050 OVP FSD13000 OLP SD14050 OLP SD13000 OVP FSD14035
Leica CE/ Leica CN. Knife holder
 Leica CE/ Leica CN Knife holder Instruction Manual Leica knife holder CE/ knife holder CN V2.2 English 08/2005 Always keep this manual near the instrument. Read carefully prior to operating the knife holders.
TANK MONITOR MODEL # (12V DC) (24V DC) (32V DC) OPERATION AND INSTALLATION INSTRUCTIONS
 (24V DC) (32V DC) OPERATION AND INSTALLATION INSTRUCTIONS") TANK MONITOR MODEL # 1510012 (12V DC) - 1510024 (24V DC) - 1510032 (32V DC) OPERATION AND INSTALLATION INSTRUCTIONS WARNING: Raritan Engineering Company,Inc.recommends that a qualified person install this
TANK MONITOR MODEL # 1510012 (12V DC) - 1510024 (24V DC) - 1510032 (32V DC) OPERATION AND INSTALLATION INSTRUCTIONS WARNING: Raritan Engineering Company,Inc.recommends that a qualified person install this
Safety instructions and warnings Package contents and parts Tool requirements Product features... 5
 Door Awning : PA Series Owner s Manual For safety reasons, please carefully read and understand all written instructions and warnings in this manual prior to assembling or installing this product. Table
JARVIS. Model 70 Airsnip Air Powered Scissors
 Air Powered Scissors EQUIPMENT SELECTION... Ordering No. Airsnip Model 70... 4019009 Air Filter/Regulator/Lubricator.. 3022003 Balancer... 1350084 Power--Pak (250 PSI)... 4026016 TABLE OF CONTENTS... Page
AUTO REWIND HOSE REEL WITH 50 FOOT HOSE. Model 46320
 AUTO REWIND HOSE REEL WITH 50 FOOT HOSE Model 46320 ASSEMBLY AND OPERATING INSTRUCTIONS 3491 Mission Oaks Blvd., Camarillo, CA 93011 Visit our Web site at http://www.harborfreight.com Copyright 2001 by
HANG GLIDER (RECHARGEABLE)
") HANG GLIDER (RECHARGEABLE) 91192 ASSEMBLY AND OPERATING INSTRUCTIONS 3491 Mission Oaks Blvd., Camarillo, CA 93011 Visit our Web site at http://www.harborfreight.com IMPORTANT: If damage is caused due to
HANG GLIDER (RECHARGEABLE) 91192 ASSEMBLY AND OPERATING INSTRUCTIONS 3491 Mission Oaks Blvd., Camarillo, CA 93011 Visit our Web site at http://www.harborfreight.com IMPORTANT: If damage is caused due to
OWNER S MANUAL L-OF079PST-1
 OWNER S MANUAL L-OF079PST-1 WARNING: This outdoor fireplace is intended for outdoor use only. Do not use on wooden decks. This outdoor fireplace is intended to burn wood logs only. Do not burn coal, leaves,
Operator s Manual. Wedgemaster 606N 808N 808SG ENGLISH
 ENGLISH Wedgemaster 606N 808N 808SG Thank you for purchasing this Vollrath Food Processing Equipment. Before operating the equipment, read and familiarize yourself with the following operating and safety
IN THE EVENT OF CHIMNEY FIRE, EVACUATE THE PROPERTY AND CALL THE EMERGENCY SERVICES.
 EKOL INSET 8 INSTALLATION AND OPERATING INSTRUCTIONS INTRODUCTION. SAFETY Safety is the most important consideration when using and installing your stove. If not installed and used correctly, a house fire
INSTALLATION AND OPERATIONS GUIDE FOR GRAND CANYON GAS LOG FIRE PIT SERIES ONLY
 INSTALLATION AND OPERATIONS GUIDE FOR GRAND CANYON GAS LOG FIRE PIT SERIES ONLY Installation and service must be provided by a qualified installer, service agency or gas supplier Grand Canyon Gas Logs,
INSTALLATION & OPERATING INSTRUCTIONS FOR. FIREPLACE GAS LOGS Model Numbers: MO18NG, MO24NG, SH18NG, SH24NG, CSO30NG
 INSTALLATION & OPERATING INSTRUCTIONS FOR FIREPLACE GAS LOGS Model Numbers: MO18NG, MO24NG, SH18NG, SH24NG, CSO30NG Applicable for use with all styles and sizes of Dual Burner Natural Gas Log Sets. Note:
Therme storage water heater. Table of contents. Symbols used. Symbols used Symbol indicates a possible hazard. Installation instructions
 Therme storage water heater Table of contents Symbols used... 8 Installation instructions Water supply... 9 Choice of location... 9 Installation of the Therme... 9 Fitting the draining and venting valve...
Ultraflow Filter Housing Conversion Kit
 Ultraflow Filter Housing Conversion Kit Operating instructions Page 2 Converting instructions Page 9 To be kept in the vehicle! Comfort on the move Ultraflow Filter Housing Conversion Kit Introduction