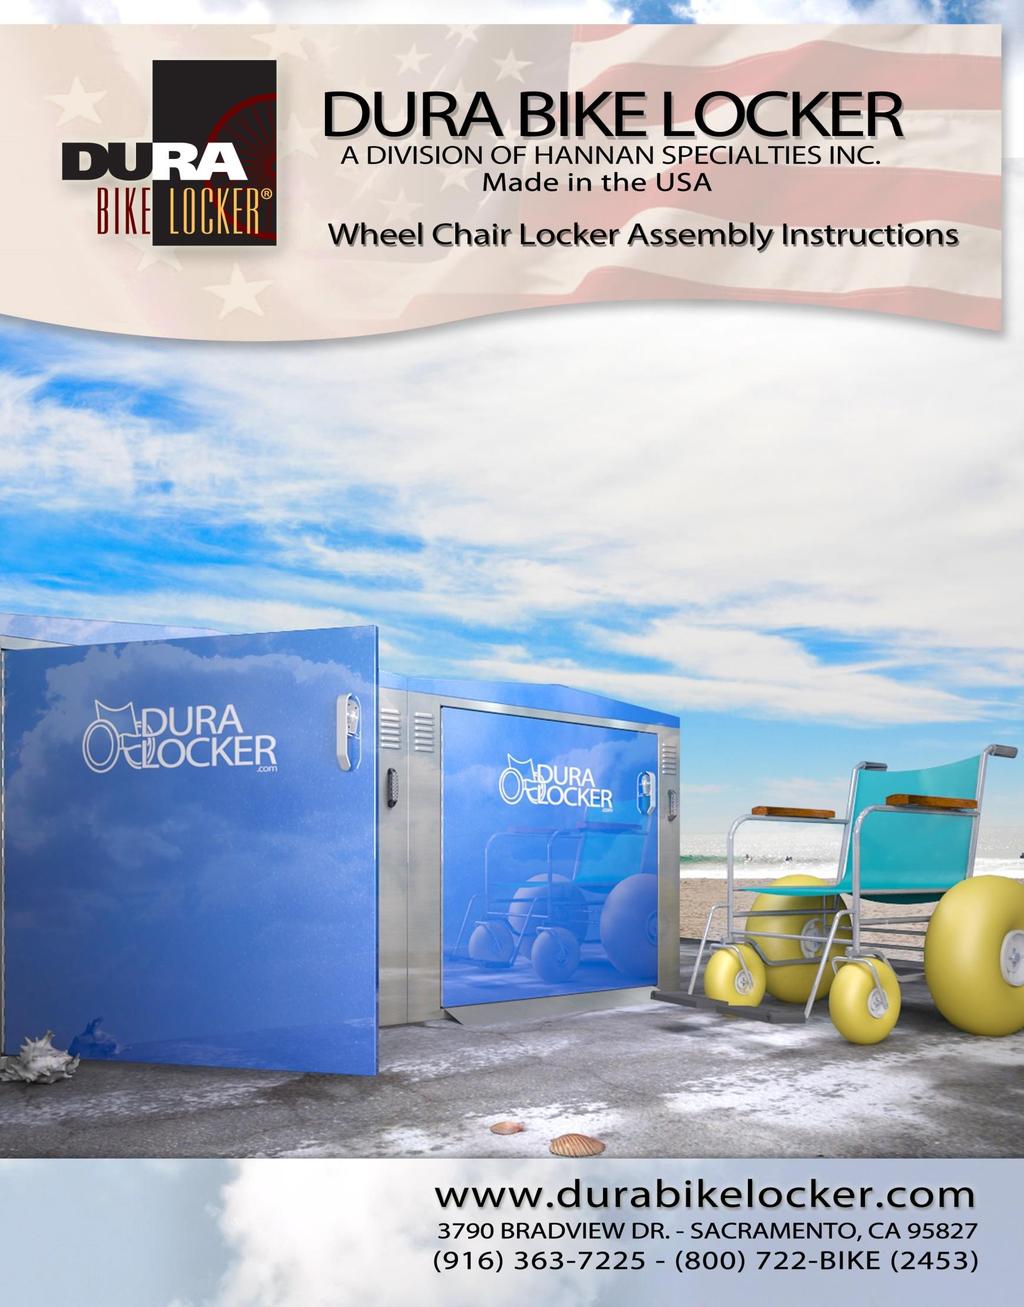
DURA WHEEL CHAIR LOCKER ASSEMBLY INSTRUCTIONS
|
|
|
- David Baldwin Page
- 5 years ago
- Views:
Transcription
1


2 DURA WHEEL CHAIR LOCKER ASSEMBLY INSTRUCTIONS 1. Locate a Frame and Door: Start by locating a frame and door. 2. Front Frame: Now stand up the frame and door in the desired assembly area. 3. Exterior Wall: Next locate an exterior wall. Attach the wall to the frame using (5) pan head screws insuring the wall is flush with the frame.
 pan head screws.")

 pan head screws.")
3 4. Back Panel: The back panel should be installed next, stand it up and position it on the other end of the wall and attached it using (5) pan head screws. You should now have a frame, wall, and a back panel standing ready for the next wall panel. 5. Final Wall: Locate the other exterior wall. Position the wall between the frame and back panel you have already setup. Now secure the wall to the frame using (5) pan head screws. Next secure the wall to the back panel using (5) pan head screws. 6. Roof Gables: The roof gables can now be installed, these are positioned over the frame and back panel. Once in place attach them using (00) pan head screws, (00) for each gable.
 pan head screws, (0) for each wall, (0) for the frame, and (0) for the back panel. 8.")
4 7. Roof Panels: The roof panels should be installed next. Lift each panel over the frame, back panel, and walls you have assembled in the previous steps. Now from inside the locker, attach the frame, back panel, and walls to the top using (00) pan head screws, (0) for each wall, (0) for the frame, and (0) for the back panel. 8. Silicone: Now that the main body of the locker is assembled it is time to apply silicone to the seam at the peak of the roof. 9. Ridge Cap: The locker ridge cap can now be installed (this ensures that the locker will remain waterproof). Gently place the ridge cap over the peak of the roof where you just applied silicone. Ensure the ridge cap is properly aligned then slowly apply pressure to the cap to spread the silicone.


5 10. Padlock Handle: Next the Padlock Handle can be installed. Put the shaft of the padlock handle through the punch in the door and secure the handle using (4) one-way security screws and (4) nylock nuts. 11. Upper Lock Bar Prep.: Now the CAM and lock bars can be installed. The upper lock bar must be inserted into the guide at the top of the door before the CAM can be installed. 12. Lock CAM: The CAM slides onto the padlock handle shaft after a nylon washer (.75 OD x.50 ID x.06 THK), insure the orientation of the CAM is correct otherwise the unit won t lock properly. Next secure the CAM using a zinc washer (.438 ID x 1 OD x.083 THK) and cotter pin (bend the legs of the cotter pin once inserted to keep it snug).
 to the CAM using (1) pan head screw")
, and (1) nylock nut. 14.")
 pan head screws 06 THK, these get sandwiched between the CAM")
6 13. Upper Lock Bar: The lock bars can be attached at this point. Link the upper lock bar you slid into the door (step 12) to the CAM using (1) pan head screw (#10-24 x 1 zinc plated), (1) nylon washer (.5 OD x.266 ID x.06 THK, this get sandwiched between the CAM and lock bar), and (1) nylock nut. 14. Lower Lock Bar: Now install the lower lock bar by sliding it through the guide on the bottom of the door then link it to the CAM using (1) pan head screws (#10-24 x 1 zinc plated), (1) nylon washer (.5 OD x.266 ID x.06 THK, these get sandwiched between the CAM and lock bar), and (1) nylock nut.

 redheads. a. Anchors are placed in four corners of the locker. b. Line up a Hammer Drill with a 3/8 bit suitable for concrete and drill a hole through the frame into the concrete.")
7 15. Support Handle: The support handle can be installed on the exterior of the locker frame using the provided screws and nylock nuts. 16. Finishing: Now that the lockers are completely assembled ensure all screws are tight and all panels are flush. If anchoring is desired continue to the next step, otherwise enjoy your new Dura Wheel Chair Lockers! 17. Anchoring: The locker can be anchored to the concrete using the provided (4) redheads. a. Anchors are placed in four corners of the locker. b. Line up a Hammer Drill with a 3/8 bit suitable for concrete and drill a hole through the frame into the concrete.

.")
8 c. Next the frame can be anchored to the ground, ensure the redhead is straight not crooked when inserting it through the frame into the hole you drilled. Using a hammer, pound the redhead into the ground (make sure you already have the nut on your redhead before you begin hammering as they tend to mushroom where struck). Be careful not to strike the locker, once the redhead is secure tighten the nut to anchor the locker in place (do not over tighten as it could bend the frame and damage the locker). END
HUNTCO SITE FURNISHINGS. Double Bike Locker Assembly Instructions HUNTCO SITE FURNISHINGS
 Double Bike Locker Assembly Instructions Includes instructions for both handle styles. Padlock Handle with U Lock Box and Keyed Pop Out T Handle SITE FURNISHINGS SITE FURNISHINGS and architectural site
INSTALLATION INSTRUCTIONS
 INSTALLATION INSTRUCTIONS KR54, KR1654, & KR4954 Keyed Removable Mullion NOT FOR USE ON ELECTRIC OR FIRE RATED MULLIONS. This kit includes the following parts: (Not to scale) WARNING Remove key, reinstall,
* * 4023 KR. Step 1 Prepare the Keyed Removable Unit. Not for use on electric or fire rated removable mullions
 condition. *64009-00* 64009-00 Keyed Removable Mullions 403 KR Installation Instructions Not for use on electric or fire rated removable mullions This kit includes the following parts: (Not to scale) 5/6
* * KR54-F, KR9854 & KR9954 Installation Instructions. Read All Warnings Before Starting Installation! Index:
 *941061-00* 941061-00 Keyed Removable Mullion KR54-F, KR9854 & KR9954 Installation Instructions CLASSIFIED CLASSIFIED C Read All Warnings Before Starting Installation! Index: General Information ----------------
Assembly TOOLS REQUIRED: 17mm and 14mm or equivalent wrenches.
 Instructions for 3 Trimmer Rack, 3TR* *Patents Pending Assembly TOOLS REQUIRED: 17mm and mm or equivalent wrenches. 15 26 26 16 15 16 Attach the lower mounting brackets to the Trimmer Rack poles as shown
AND LOAD CANOPY RACK SPECIFICATIONS
 8MAY15 INSTRUCTIONS for the LOCK AND LOAD CANOPY RACK SPECIFICATIONS and SAFE LOADING REQUIREMENTS The Lock and Load ladder carrier for Truck Caps is a rack designed to mount to the top of a pickup truck
INSTALLATION INSTRUCTIONS AND OWNER'S MANUAL AWNINGS. For trailers & motor homes with straight sides TOOLS REQUIRED
 AWNINGS INSTALLATION INSTRUCTIONS AND OWNER'S MANUAL For trailers & motor homes with straight sides TOOLS REQUIRED 1/4" electric drill Ratchet handle kit 3/8" & 7/16" socket No. 1 and No. 2 screwdriver
Otter Pro XT Cabin Installation and Set-Up Instructions
 Otter Pro XT Cabin Installation and Set-Up Instructions Otter Pro XT Cabin Fits Medium Otter Pro and Otter II Sled Only Parts Identification and Check List MODEL NUMBERS: Complete Pkg Pro XT Thermal Cabin
Operating Instructions
 A) ORIENTATION View capsule filling video online at www.profiller.com Cam Lever 1. Place Caps Tray onto Filler with Position I and II markings in front. Check that Cam Lever is set to 3 o clock. 2. Pour
Primrose Awnings - Standard Manual Instructions
 Primrose Awnings - Standard Manual Instructions Contents Warning 1.5m - 3.0m Awnings 4 x Expansion bolts (2 per bracket)** 2 x brackets 1 x Awning 1 x Winder handle 3.5m - 4m Awnings 6 x Expansion bolts
Cabinet Mount Assist Lift n Lock Instructions
 Cabinet Mount Assist Lift n Lock Instructions PART LIST 2 @ Gas Cylinder 1 @ Lock Bar 2 @ Rubber Sleeve (preset) 4 @ Stopper Pin (2pcs preset) 4 @ Saddle Block 8 @ 19mm Black PVC Cap 5 @ 14mm Black PVC
Otter Pro X-Over Lodge Installation and Set-Up Instructions
 Otter Pro X-Over Lodge Installation and Set-Up Instructions Otter Pro X-Over Lodge Fits Magnum Otter II & Pro Sled Only Parts Identification and Check List MODEL NUMBERS: Complete Pkg Pro X-Over Lodge
KAWNEER 1786 RIM EXIT DEVICE
 FEBRUARY, 2015 1 DOOR STILE Device C L 40" 41-9/32" Cylinder C L Bottom of door RIM EXIT DEVICE LOCATION DOGGING KEY EXIT DEVICE FILLER PLATE CYLINDER & CYLINDER RING HOUSING COVER CYLINDER INSTALLATION
COOPER FREESTANDING TUB FAUCET INSTALLATION
 SKU(s): 940972 COOPER FREESTANDING TUB FAUCET INSTALLATION BEFORE YOU BEGIN We recommend consulting a professional if you are unfamiliar with installing plumbing fixtures. Signature Hardware accepts no
Tarp Return. Questions? Contact Customer Or Parts Diagrams see Parts and Diagrams section on web at
 Roll Rite, LLC and its entire staff would like to not only Thank You but congratulate you on your purchase of one of what we feel to be the finest line of tarping systems in the industry. Tarp Return RR
Utility Trailer Loadbar Kit Model: MPG493 TopTier - Assembly Instructions
 TopTier Utility Trailer Loadbar Kit Model: MPG493 TopTier - Assembly Instructions Take a few moments and read through these instructions to familiarize yourself with the step by step assembly process before
Solera Classic Awning OEM INSTALLATION MANUAL
 Solera Classic Awning OEM INSTALLATION MANUAL TABLE OF CONTENTS System and Safety Information 2 Preparation 3 Resources Required 3 Installation 3 Installing the Awning Rail (If Necessary) 3 Assembling
IMPORTANT OWNER-OPERATOR INSTALLATION INSTRUCTIONS. Part # A7006
 IMPORTANT OWNER-OPERATOR INSTALLATION INSTRUCTIONS Part # A7006 Parts List Wobble Stopper Body Wobble Stopper Shaft Camper Bracket Lower Bracket Assembly Upper Bracket Upper Bracket Clamp 3/8 SAE Flat
Contents. Awnings USA - Full Protective Hood Manual Instructions ft 11" - 11ft 6" Awnings
 Awnings USA - Full Protective Hood Manual Instructions Contents Warning We recommend that two or more people are required to lift the awning into place. 4ft 11" - 11ft 6" Awnings 8 x Expansion bolts **
POP-UP TENT CANOPY INSTALLATION & REMOVAL
 POP-UP TENT CANOPY INSTALLATION & REMOVAL SETUP INSTRUCTIONS THANK YOU FOR YOUR PURCHASE! If you have questions about installation, maintenance, or take down, please call us at (800)426-9496. Our goal
Thanks for shopping with Improvements! 10 Solar Lighted Gazebo Item #531753
 Thanks for shopping with Improvements! 10 Solar Lighted Gazebo Item #531753 Parts List: A. Frame Qty: 1 B. Canopy Qty: 1 C. Stake Qty: 8 D. Brace Qty: 4 E. Cap Qty: 1 F. Battery Qty: 2 G. Rope Qty: 4 H.
ASSEMBLY & CARE INSTRUCTIONS
 ASSEMBLY & CARE INSTRUCTIONS 7 x TRAILER TENT SERIES 3 9 Part No. FT3711 - on road FT3923 - off road OPTIONAL SUNROOM Wall and floor kit Part No. FT3723 - on road FT39 - off road OPTIONAL SPARE ROOM Roof,
Item #: BTOT Assembly Instructions
 Item #: BTOT Assembly Instructions For our most current instructions, to request missing, lost or broken parts, or for any other Customer Service issues, please visit our website at www.walkeredison.com
Structural Mullion System
 Structural Mullion System Installation Instructions DNA Part Number 10300085 This system is designed to allow for larger window combinations. It is not intended to replace structural members in a building.
ASSEMBLY & CARE INSTRUCTIONS. 7 x4 TRAILER TENT SERIES 4 9. OPTIONAL SUNROOM Wall and floor kit. OPTIONAL SPARE ROOM Roof, wall and floor kit
 ASSEMBLY & CARE INSTRUCTIONS 7 x TRAILER TENT SERIES 9 Part No. TM709 OPTIONAL SUNROOM Wall and floor kit Part No. TM723 OPTIONAL SPARE ROOM Roof, wall and floor kit Part No. TM76 Please keep these instructions
LEG KIT. Pizza Oven OWNER S MANUAL. For 6000 Series Portable Ovens
 Pizza Oven LEG KIT For 6000 Series Portable Ovens OWNER S MANUAL IMPORTANT: This instruction manual contains important information necessary for the proper assembly and safe use of the appliance. Read
Tall Cabinet Drawer Keyless Double Lock Installation [ xx]
![Tall Cabinet Drawer Keyless Double Lock Installation [ xx]](/thumbs/74/70709392.jpg "Tall Cabinet Drawer Keyless Double Lock Installation [ xx]") Tall Cabinet Drawer Keyless Double Lock Installation [002-97-xx] Note This install can be used for any Tall Cabinet Double Drawer Keyless Lock installation. The assembly process will be the same. The will
Tall Cabinet Drawer Keyless Double Lock Installation [002-97-xx] Note This install can be used for any Tall Cabinet Double Drawer Keyless Lock installation. The assembly process will be the same. The will
CHANGING YOUR LANDSCAPE SINCE 1945 OWNER S MANUAL. Tow Hitch Replacement Kit For Rough Cut Trailcutters. Starting Serial # L
 CHANGING YOUR LANDSCAPE SINCE 1945 OWNER S MANUAL Tow Hitch Replacement Kit For Rough Cut Trailcutters 21100 Starting Serial # L118-023001 Tools Required: Wrench/Socket Qty. Size (1) 1-1/8 (1) 1-1/16 (2)
Otter XT Cabin Installation and Set-Up Instructions
 Otter XT Cabin Installation and Set-Up Instructions Otter XT Cabin Fits Medium Otter Wild Sled Only Parts Identification and Check List MODEL NUMBERS: Complete Pkg Otter XT Cabin 200962 2 1 PARTS LIST
Assembly Instructions
 Universal Table/Desk for All Sizes of Panel Wall Beds Assembly Instructions ** 5 YEAR WARRANTY ** Designed to Exceed International ISO 9002 Standards for Residential Specifications - Patent Pending - Exploded
Vinyl French Door Assembly Instructions
 Vinyl French Door Assembly Instructions SERIES FD 5455/5555 Para instrucciones en español, visite: http://bit.ly/pgtassemblyinstructions FD 5455 / 5555 Parts List ITEM 1 FD 5455/5555 PARTS LIST FRAME HEAD
INSTRUCTION SHEET DETHATCHER KIT. STS-422LX LPSTS-42JD Assembly Installation Operation Repair Parts L-1660-D. Visit us on the web!
 INSTRUCTION SHEET DETHATCHER KIT MODEL: DK-422LX FOR USE WITH SWEEPER MODEL: STS-422LX LPSTS-42JD Assembly Installation Operation Repair Parts For use with Riders and Lawn/Garden Tractors For the latest
Use steel clip angle as a drill template and drill through mullion. Install bolts with bolt heads on the masonry side of the jamb mullion.
 Additional 200xpt and 250xpt installation instructions are shown on page 11. STICK METHOD ERECTION (refer to figures 1 and 2) Step 1 Establish all control lines and grades. Step 2 Attach steel intermediate
Solera Classic Awning
 Solera Classic Awning OWNER'S MANUAL Page 1 Table of Contents System and Safety Information 2 Operation 3 Extending the Awning 3 Optional Car Port Position 3 Retracting the Awning 3 Fabric Replacement
DO NOT USE WITH CROSSBAR SPREAD LESS THAN 24.
 TM Please read all instructions carefully before assembly, installation and/or use of this product. DO NOT USE WITH CROSSBAR SPREAD LESS THAN 24. WARNING: Do not exceed the weight limit of your vehicle
STOP BOX SCRAPER/GRADER BLADE. Owner's Manual. Model No Safety Assembly Operation Maintenance Parts
 Owner's Manual STOP BOX SCRAPER/GRADER BLADE Model No. 486.242411 DO NOT RETURN TO STORE For Missing Parts or Assembly Questions Call 1-866-576-8388 CAUTION: Before using this product, read this manual
PR-429BF-600M. Bell 429 Blade Fold Kit Operations Manual
 Table of Contents Table of Contents... 1 Record of Revisions... 2 References... 3 Introduction... 4 Contact Information... 4 Prerequisites... 5 First Time Use... 6 Blade Clamp Placement... 6 Blade Clamp
250 SERIES 1" STRUCTURAL TUBE MULLION ASSEMBLY INSTRUCTIONS
 2014 Pella Corporation Part Number: V985711 250 SERIES 1" STRUCTURAL TUBE MULLION ASSEMBLY INSTRUCTIONS Be sure to thoroughly read and understand all the steps before beginning the mullion assembly process.
Vanagon Ladder Kit Assembly & Installation Instructions
 Rocky Mountain Westy Vanagon Ladder Kit Assembly & Installation Instructions Introduction Thank you for purchasing the Rocky Mountain Westy Vanagon Ladder Kit. We pride ourselves in the products we develop
HEXAGON PAVILION SETUP INSTRUCTIONS
 SETUP INSTRUCTIONS THANK YOU FOR YOUR PURCHASE! If you have questions about installation, maintenance, or take down, please call us at (800)426-9496. Our goal is that you are completely satisfied with
HANDLE AND WHEEL KIT INSTALLATION
 HANDLE AND WHEEL KIT INSTALLATION Select EB and EM Series Generators Honda Power Equipment Your generator is equipped with a wheel kit and folding handle kit for easy transport and convenient storage.
INSTRUCTION MANUAL ALEKO RETRACTABLE AWNING
 INSTRUCTION MANUAL for ALEKO RETRACTABLE AWNING www.alekoproducts.com FAILURE TO FOLLOW THESE INSTRUCTIONS MAY RESULT IN PERSONAL INJURY! 1 Important Safety Precautions WARNING NOTE: FOR PERSONAL SAFETY,
FLUSH MOUNT ALUMINUM DOOR DETAIL (LH SWING)
") FLUSH MOUNT ALUMINUM DETAIL (LH SWING) 'D' CLEAR DESCRIPTION 'A' 'B' 'C' 'D' 'E' FLUSH MOUNT 36" ALUMINUM 36" 4 42-1/ 33-3/8" 38-1/8" FLUSH MOUNT 45" ALUMINUM 45" 51" 51-1/ 42-3/8" 47-1/8" NOTES: TWO PIECES
FLUSH MOUNT ALUMINUM DETAIL (LH SWING) 'D' CLEAR DESCRIPTION 'A' 'B' 'C' 'D' 'E' FLUSH MOUNT 36" ALUMINUM 36" 4 42-1/ 33-3/8" 38-1/8" FLUSH MOUNT 45" ALUMINUM 45" 51" 51-1/ 42-3/8" 47-1/8" NOTES: TWO PIECES
Instructional Booklet
 Instructional Booklet 936-894-3292 Thank you for choosing The Bathmaster! You are on your way to creating an unmatched bathing experience both for you and the lucky animal. The Bathmaster is designed to
, & Series Nested Hardware
 RECORD THIS INFORMATION FOR FUTURE REFERENCE BEFORE INSTALLING THE UNIT: Model Number Serial Number Date Purchased Place of Purchase USA SERVICE OFFICE Dometic Corp. 509 So. Poplar St. LaGrange, IN 46761
Installation Instructions for the Rolltec Adalia X3M Extenda Awning
 Installation Instructions for the Rolltec Adalia X3M Extenda Awning Questions? Call Rolltec at 1-800-667-0474 General Tool Requirements Table of Contents Available installation brackets Side dimensions
RETRACTABLE AWNING w/ OPTIONAL HOOD ASSEMBLY INSTRUCTIONS
 Contact us @ (800)851-0865 RETRACTABLE AWNING w/ OPTIONAL HOOD ASSEMBLY INSTRUCTIONS Congratulations on your purchase of a new retractable awning. With proper installation this awning will provide years
4A1-114/114KR & 4A1-2 MANUAL TENSIONERS
 M L. C O O N AL TO 4A1-114/114KR & 4A1-2 W W W.T R AD IT IO MANUAL TENSIONERS READ THESE INSTRUCTIONS CAREFULLY. FAILURE TO FOLLOW THESE INSTRUCTIONS CAN RESULT IN SEVERE PERSONAL INJURY. GENERAL SAFETY
Primrose Awnings - Full Cassette Manual & Electric Instructions
 Primrose Awnings - Full Cassette Manual & Electric Instructions Contents Warning 2.0m - 3.5m Awnings 8 x Expansion bolts ** 2 x brackets 1 x Awning 1 x Winder 4.0m - 5.0m Awnings 12 x Expansion bolts **
42" SNOW BLADE. Owner's Manual. Model No Safety Assembly Operation Maintenance Parts
 Owner's Manual 42" SNOW BLADE Model No. 486.24443 CAUTION: Before using this product, read this manual and follow all Safety Rules and Operating Instructions. Safety Assembly Operation Maintenance Parts
OPERATOR INSTRUCTION MANUAL INCLUDING REPAIR PARTS FOR MODULAR GENERAL PURPOSE TENT SYSTEM (MGPTS) TYPE I
 TYPE I") OPERATOR INSTRUCTION MANUAL INCLUDING REPAIR PARTS FOR MODULAR GENERAL PURPOSE TENT SYSTEM (MGPTS) TYPE I Johnson Outdoors Gear, Inc. Eureka! branded tent products 625 Conklin Road Binghamton, NY 13903
OPERATOR INSTRUCTION MANUAL INCLUDING REPAIR PARTS FOR MODULAR GENERAL PURPOSE TENT SYSTEM (MGPTS) TYPE I Johnson Outdoors Gear, Inc. Eureka! branded tent products 625 Conklin Road Binghamton, NY 13903
INSTALLATION GUIDELINES
 IMPORTANT: To ensure this product is installed properly, you must read and follow these guidelines. The owner/user of this product must keep this information for future reference. This product must be
Auto Rewind Hose Reel 10M / 20M / 30M Models
 Auto Rewind Hose Reel 10M / 20M / 30M Models Instruction Manual 10M / 20M / 30M Auto Rewind Hose Reel Installation, Hose Replacement and Troubleshooting Guide Product Codes: 1110H / 1120H / 1130H Models
Installation Instructions for the Rolltec Physique XL Awning
 Installation Instructions for the Rolltec Physique XL Awning Questions? Call Rolltec at 1-800-667-0474 General Tool Requirements Table of Contents Available installation brackets Side dimensions of various
Installation Guide: Round Trampoline
 Trampolines & trampoline parts designed to survive in the harsh Oz climate. www.oztrampolines.com.au Installation Guide: Round Trampoline Safety Tips Here at Oz Trampolines we are passionate about your
FREEDOM BUTTON KIT INSTALLATION GUIDE STEP 1
 FREEDOM BUTTON KIT INSTALLATION GUIDE Installation of the Freedom Button kit is very simple and similar to the installation of a standard rear takedown pin and bolt catch latch. Before installing your
TITAN Fuel Tanks. INSTALLATION INSTRUCTIONS G e n e r a t i o n V
 TITAN pt. no.: 02 0000 0128 Important: Please read these instructions carefully and completely before starting the installation. TITAN Fuel Tanks INSTALLATION INSTRUCTIONS G e n e r a t i o n V Extended
PRODUCT INFORMATION MANUAL SECTION: 17 METAL LOUVRE AWNINGS METAL LOUVRE AWNINGS
 METAL LOUVRE AWNINGS Sizes & Limitations Metal Louvre Awnings TRINIDAD TRINIDAD SUNGUARD FIXED ADJUSTABLE Maximum Width Unlimited 5000mm Unlimited Minimum Width 500mm 500mm 500mm Maximum Drop 4000mm 2500mm
Shut off combine and remove key before installing the hopper extension. Make sure the combine is on a level surface. Engage parking brake.
 ASSEMBLY INSTRUCTIONS CASE IH 5088, 6088/7088, 7010/8010 & 7120/8120/9120 Series NEW HOLLAND CR STD Series Combines (Large) big top 26301(service only), 29976 (service only), 53408, 53543 & 54274 The Crary
JOINING MULLION (DIRECT MULL) ASSEMBLY INSTRUCTIONS FOR 3-WAY OR 4-WAY JOINTS FOR IMPERVIA AWNING, CASEMENT AND LARGE AWNING
 ASSEMBLY INSTRUCTIONS FOR 3-WAY OR 4-WAY JOINTS FOR IMPERVIA AWNING, CASEMENT AND LARGE AWNING") 2014 Pella Corporation JOINING MULLION (DIRECT MULL) ASSEMBLY INSTRUCTIONS FOR 3-WAY OR 4-WAY JOINTS FOR IMPERVIA AWNING, CASEMENT AND LARGE AWNING For Additional Mullion Assembly Information; Visit www.installpella.com/mullions,
2014 Pella Corporation JOINING MULLION (DIRECT MULL) ASSEMBLY INSTRUCTIONS FOR 3-WAY OR 4-WAY JOINTS FOR IMPERVIA AWNING, CASEMENT AND LARGE AWNING For Additional Mullion Assembly Information; Visit www.installpella.com/mullions,
HARD DOOR UPGRADE KIT
 RV Accessories OWNER'S MANUAL HARD DOOR UPGRADE KIT FOR ADD-A-ROOM & BREEZEWAY SCREEN ROOMS THIS MANUAL SUPPLEMENTS THE ADD-A-ROOM INSTRUCTIONS TABLE OF CONTENTS First Time Assembly... 2 Assembling the
Solera Universal Hardware
 Solera Universal Hardware Solera 12V Power wning Solera Universal Hardware Solera Hybrid wning Table of Contents Introduction 2 System Information 2 dditional Information Sources 2 Safety Information 2
Solera Power Awning OEM INSTALLATION MANUAL
 Solera Power Awning OEM INSTALLATION MANUAL TABLE OF CONTENTS System Information 2 Safety 2 Prior To Installation 2 Resources Required 2 Awning Rail Installation (If Needed) 3 Installation 3 Awning Installation
ADDED PROTECTION FOR SLIDE-OUT ROOMS. Installation. Introduction... 2 Product Overview...2 Component Checklist...3
 CAREFREE SIDEOUT KOVER II RV Installation ADDED PROTECTION FOR SLIDE-OUT ROOMS TABLE OF CONTENTS SOKII Shown with Full Case Option Introduction... 2 Product Overview...2 Component Checklist...3 Installation...
ROOF-TOP SAFARI TENT. ASSEMBLY & CARE INSTRUCTIONS Part No ENSURE YOU READ AND UNDERSTAND THESE INSTRUCTIONS PRIOR TO INSTALLATION
 ROOF-TOP SAFARI TENT ASSEMBLY & CARE INSTRUCTIONS Part No. 933101 ENSURE YOU READ AND UNDERSTAND THESE INSTRUCTIONS PRIOR TO INSTALLATION CONTENTS Parts List...2 Drawing & Tools You Will Need...2 Tent
EEZI - AWN series 1000 / 2000 Awning bracket
 EEZI - AWN series 1000 / 2000 Awning bracket RRAC063 INSTALL TIME: 15 mins IMPORTANT WARNING! IT IS CRITICAL THAT ALL FRONT RUNNER PRODUCTS BE PROPERLY AND SECURELY ASSEMBLED AND ATTACHED TO YOUR VEHICLE.
Assembly instructions for Eurotramp trampolines Series: Ultimate, Grand Master Exclusiv, Grand Master, Master
 Assembly instructions for Eurotramp trampolines Series: Ultimate, Grand Master Exclusiv, Grand Master, Master 1. Assembly instructions 2. Attaching the plastic coated steel cables on the Ultimate frame
FLEX KEY ASSEMBLY. ..._ o RAFTER ARM TUBE MAIN ARM TUBE CAP NUT CLAW HINGE
 ZIP DEE Inc. 96 Crossen Ave. Elk Grove Village, IL 60007(847)437-0980 (800)338-2378 HEAD CASTING AWNING RAIL FLEX KEY ASSEMBLY..._ o GM1 Installation Instruction GMC Motorhome RAFTER ARM TUBE MAIN ARM
Assembly Manual. OLM Retractable Canopy for 12X16 Breeze Pergola by Outdoor Living Today. Revision 7 May 12th /2015
 Assembly Manual OLM Retractable Canopy for 12X16 Breeze Pergola by Outdoor Living Today Revision 7 May 12th /2015 Care and Maintenance - Do not leave canopy extended during heavy snow storms or any extreme
Assembly Manual. OLM Retractable Canopy for 12X20 Breeze Pergola by Outdoor Living Today. Revision #11 October 5, 2017
 Assembly Manual OLM Retractable Canopy for 12X20 Breeze Pergola by Outdoor Living Today Revision #11 October 5, 2017 Care and Maintenance - Canopy should be removed in winter to reduce the chance of collapse
Assembly Instructions MDM Products Party Tent
 Assembly Instructions MDM Products Party Tent Congratulations! Congratulations on your purchase of a MDM Products Party Tent Shelter by MDM Products LLC. With proper installation, use, and maintenance,
SteadiCam Parts List*
 SteadiCam Parts List* A. 1 Bogen 3232 Monopod Swivel Tilt Head B. 1 1/2 internal to 1/2 external brass bushing flare adapter (part 9402249 at osh.com¹) C. 2 3/8 internal to 1/2 external brass bushing flare
W/ MAGNETIC TAPE ON FACE CENTER W/ MAGNETIC TAPE ON FACE CENTER W/ STEEL TAPE ON FACE BOTTOM L3-1 W/ STEEL TAPE ON FACE BOTTOM
 6 4 WITH CE 4 HALF UPRIGHT -1 1 & 5mm Hex key Tool Place vertical extrusion and lock horizontal extrusions by using 5mm hex key tool. W/ MAGNETIC TAPE W/ MAGNETIC TAPE / -2 /-1 HALF UPRIGHT Place horizontal
SHOWER CONVERSION KIT WITH HAND SHOWER
 SHOWER CONVERSION KIT WITH HAND SHOWER BEFORE YOU BEGIN We recommend consulting a professional if you are unfamiliar with installing plumbing fixtures. Signature Hardware accepts no liability for any damage
USER MANUAL FLEXI Tent&Trailer Comfort
 USER MANUAL FLEXI Tent&Trailer Comfort CONGRETULATIONS! By choosing a Combi-Camp tenttrailer, you have made a choice for quality and sustainablilty. We hope you will have lots of careless holidays with
DeZURIK AM-SERIES MANUAL GEAR ACTUATOR USED ON BUTTERFLY VALVES
 AM-SERIES MANUAL GEAR ACTUATOR USED ON BUTTERFLY VALVES Instruction D10501 January 2015 Instructions These instructions provide information about AM-Series Manual Actuators used on Butterfly Valves. They
Assembly. Step 3. Attach the safety bracket (7) to the Pivot ARM (6).
 to the Pivot ARM (6).") Assembly Step 1. A. Stand the base of the machine by separating the U-frames (1,2). Pull the Front and Rear U-Frames (1,2) as far apart from each other as possible. Then push down on the middle of the
Assembly Step 1. A. Stand the base of the machine by separating the U-frames (1,2). Pull the Front and Rear U-Frames (1,2) as far apart from each other as possible. Then push down on the middle of the
Core Systems Installation Instructions
 185-3017 185-3018 185-3517 607-0149 WLH 09/17/18 TABLE OF CONTENTS ***Assembly*** Roller Tube Assembly Roller Tube Assembly... Standard Application Attaching Tarp to Roller Tube - Standard... Installing
WARNING USING AND CARING. for use in extreme or varied soil conditions. For optional sand pegs Oztent recomends use of a Bluescrew Oztent Edition.
 OWNER S MANUAL WARNING Never use any fuel-burning products (stoves, lanterns, heaters, etc.) inside or within proximity of this tent. Use of fuel-burning products inside or within proximity of this tent
Factory Style Bow Kit
 Installation Instructions Factory Style Bow Kit Vehicle Application: Jeep Wrangler Unlimited 2004 2006 Part Number: 55003 www.bestop.com - We re here to help! Visit our web site and click on Ask a Question.
INSTALLATION INSTRUCTIONS
 INSTALLATION INSTRUCTIONS Pictures in this manual are shown with the optional visual display indicator installed on the filter. BLUE FLAME & BLUE FLAME II MAXX LP FILTER KIT (423-375-001A) SHIVVERS SHIVVERS
INSTANT GARAGE MODEL NO: CIG81224 ASSEMBLY INSTRUCTIONS PART NO: ORIGINAL INSTRUCTIONS
 INSTANT GARAGE MODEL NO: CIG81224 PART NO: 3503578 ASSEMBLY INSTRUCTIONS ORIGINAL INSTRUCTIONS GC1117 INTRODUCTION Thank you for purchasing this CLARKE Instant Garage. When erected, the CIG81224 garage
INSTALLATION INSTRUCTIONS for folding arm awnings
 Custom made Awnings and Blinds Item No 0757 INSTALLATION INSTRUCTIONS for folding arm awnings IMPORTANT INFORMATION BEFORE INSTALLING YOUR Updated 08/09/15 AN AWNING INSTALLATION IS A HOME IMPROVEMENT
INSTALLATION INSTRUCTIONS FOR BALCO, INC. FLOOR MATS FM2R-(A, C, D) W/O FRAME 4V
 W/O FRAME 4V") 2626 South Sheridan PO Box 17249 Wichita, Kansas 67217 Phone: (316) 945-9328 Fax: (316) 945-0789 INSTALLATION INSTRUCTIONS FOR BALCO, INC. FLOOR MATS FM2R-(A, C, D) W/O FRAME 4V 2012, Balco, Inc. INSTALLATION
2626 South Sheridan PO Box 17249 Wichita, Kansas 67217 Phone: (316) 945-9328 Fax: (316) 945-0789 INSTALLATION INSTRUCTIONS FOR BALCO, INC. FLOOR MATS FM2R-(A, C, D) W/O FRAME 4V 2012, Balco, Inc. INSTALLATION
Assembly Manual. OLM Retractable Canopy for 10X12 Breeze Pergola by Outdoor Living Today. Revision 13 October 3rd /2017
 Assembly Manual OLM Retractable Canopy for 10X12 Breeze Pergola by Outdoor Living Today Revision 13 October 3rd /2017 Care and Maintenance - Canopy should be removed in winter to reduce the chance of collapse
READ ME FIRST! IMPORTANT WARNING! ENG. Roof top tent
 Roof top tent ENG TENT031 220 min READ ME FIRST! Thank you for purchasing a Front Runner Roof Top Tent. Before you start, take a moment to familiarize yourself with these Fitting Instructions and the components
RAFTER VI. Installation and Operation CAREFREE WITH AUTOMATIC AWNING SUPPORT. RV Accessory PRODUCT OVERVIEW
 CAREFREE RAFTER VI RV Accessory WITH AUTOMATIC AWNING SUPPORT Installation and Operation PRODUCT OVERVIEW The gives the awning user the ability to easily tighten the center fabric when the awning is extended.
4812 HEAVY BAG STAND OWNER S MANUAL
 48 HEAVY BAG STAND OWNER S MANUAL Note:Warning Labels Everlast Worldwide, 00 Hwy DD, Moberly, MO 65270 Customer Service 800.821.7930 14 C4 48 HEAVY BAG STAND OWNER S MANUAL CONGRATULATIONS! YOU HAVE JUST
Ridgeline (A) Installation Instructions
 Installation Instructions") Ridgeline (A) Installation Instructions Please read instructions thoroughly before starting installation **Remove all contents of the Softopper carefully to protect from scratches.** Windows scratch easily!
Ridgeline (A) Installation Instructions Please read instructions thoroughly before starting installation **Remove all contents of the Softopper carefully to protect from scratches.** Windows scratch easily!
SPIRIT FX, FIESTA AND SIMPLICITY AWNINGS. Printed From
 RV INSTALLATION MANUAL MANUALLY OPERATED PATIO AWNING SPIRIT FX, FIESTA AND SIMPLICITY AWNINGS These instructions apply to all models listed. Details and procedures unique to a specific model are labeled
Item # BJ2PC With 8 Leg Frame, Cover, and Enclosure Kit with Windows Size: 10 8 Wide x 20 Long (Side Height 6 8 ) (Center Peak Height 9 9 )
 (Center Peak Height 9 9 )") Item # BJ2PC With 8 Leg Frame, Cover, and Enclosure Kit with Windows Size: 10 8 Wide x 20 Long (Side Height 6 8 ) (Center Peak Height 9 9 ) Powell & Powell Supply Company, L.L.C. Manufactured by: 1730
Item # BJ2PC With 8 Leg Frame, Cover, and Enclosure Kit with Windows Size: 10 8 Wide x 20 Long (Side Height 6 8 ) (Center Peak Height 9 9 ) Powell & Powell Supply Company, L.L.C. Manufactured by: 1730
Door Bushing Replacement & Latch Adjustment Monaco Group Coaches
 Door Bushing Replacement & Latch Adjustment Monaco Group Coaches Contents Door Latch Adjustment & Repair... 1 Symptoms:... 1 Replacing the bushing VS. Adjusting the latch rods.... 1 How the bushing works....
Tank. Part B, Section 1. This section covers the following unit configurations. Pump Piston Pump (E or G)
") Part B, ection Model Voltage This section covers the following unit configurations. 3400V All Pump Piston Pump (E or G) Manifold Control 4-Port (A) Vista tandard (V) Vista Pattern (PC) Vista Temperature
Part B, ection Model Voltage This section covers the following unit configurations. 3400V All Pump Piston Pump (E or G) Manifold Control 4-Port (A) Vista tandard (V) Vista Pattern (PC) Vista Temperature
FEATHER-LITE ROOF TOP TENT SET-UP GUIDE
 FEATHER-LITE ROOF TOP TENT SET-UP GUIDE TENT031 INSTALL TIME: 30 minutes 0 GET ORGANIZED you will need: D Your Tent D The Ladder (in a separate box) D A Power Drill w/ Phillips screw bit D A solid, scratch
Solera Power Awning w/ LED Lights OEM INSTALLATION MANUAL
 Solera Power wning w/ LED Lights OEM INSTLLTION MNUL TBLE OF CONTENTS Safety 2 Prior to Installation 2 Resources Required 2 wning Installation 3 wning Rail Installation (If Needed) 3 wning Support rm Installation
VALORE SEVEN. Serial Number. Pacific) Version No.:V
 Version No.:V") VALORE SEVEN Version No.:V.206222 Serial Number Pacific) 7 9 8 " 5 8 " " 7 2 8 " 26 2 " 7 8 " 9" 2 8 " 2 8 " (H) 26.9" x (W) 8.26" x (D) 8.85" Hand shower hose: 59.05" Weight: Net: 0 lbs /Gross: 2 lbs
VALORE SEVEN Version No.:V.206222 Serial Number Pacific) 7 9 8 " 5 8 " " 7 2 8 " 26 2 " 7 8 " 9" 2 8 " 2 8 " (H) 26.9" x (W) 8.26" x (D) 8.85" Hand shower hose: 59.05" Weight: Net: 0 lbs /Gross: 2 lbs
Notes, Parts List & Drawings
 Biomass Chopper/Cutter Notes, Parts List & Drawings Page 1 of 16 The Easy BioChop biomass chopper/cutter was designed to cut both wet and dry biomass and to accomplish a number of goals. The objectives
American Classic Rear Terrain Hub Bearing Change, Cassette Body Swap and Overhaul Instructions.
 12 x 142mm Thru Axle Retrofit Page 1 IDENTIFY YOUR TERRAIN HUB To identify, see the non-drive side of the hub (side without the cassette). Terrain hubs are in Terrain, Terrain Tubeless, and TCX Trekking
Color Light Streams Lighted Bubbler Spillway Pot (CLSDLP) Installation Manual
 Installation Manual") Color Light Streams Lighted Bubbler Spillway Pot (CLSDLP) Installation Manual 27.75 23.75 25.50 20.75 Specifications: 8-13 GPM 12-14 VAC only (Class 2 transformer required) 3W max. 100 ft. cord, conduit
Color Light Streams Lighted Bubbler Spillway Pot (CLSDLP) Installation Manual 27.75 23.75 25.50 20.75 Specifications: 8-13 GPM 12-14 VAC only (Class 2 transformer required) 3W max. 100 ft. cord, conduit
Product Description of Klozit Sliding Glass Door Closing and Latching System
 Product Description of Klozit Sliding Glass Door Closing and Latching System KLOZIT Door Closers: The Klozit sliding glass door closer is based upon a gas spring, similar to those found in car hatchbacks.