Repairs Disposal Technical details... 37
|
|
|
- Joel Bryant
- 6 years ago
- Views:
Transcription
1 Manual Edition 1 / 04_2014

2 Edition 1 / 04_2014
3 Contents Thank you for flying ADVANCE....6 About ADVANCE The PROGRESS Welcome on board! Outstanding PROGRESS 2 features... 8 More important details Safety advice General advice about paragliding Preparing the product Delivery Delivery package Airbag Harness adjustment Installing the reserve Setting up the Rucksack Mode Use in practice Reversing technique Flying General Ground handling Takeoff and landing Using the speed system Flying with a foot stirrup Flying with ballast Use for teaching Use with gliders of other manufacturers Winching Acro flying Tandem flying Takeoff preparation Care, repairs and checks Care Airbag care Check
4 Repairs Disposal Technical details Technical details Materials used Certification Service...39 ADVANCE website Warranty Parts Harness Front view Side view Rucksack Side view

5 5
6 Thank you for flying ADVANCE Congratulations and many thanks for choosing a PROGRESS 2, an ADVANCE quality product. We hope that it will bring you many rewarding hours in the air. This owner s handbook is an important component of this flying equipment. In it you will find instructions and important advice about safety, care and maintenance; so we suggest that you read it carefully before your first flight with this product. The latest version of this handbook and updated information can be found on Any new safety-related advice about the product will also be published there. If you have a query or problem please go to the retailer, or contact ADVANCE directly. Now we wish you a lot of pleasure with your PROGRESS 2 and «happy landings»; every time. Team ADVANCE 6
7 About ADVANCE ADVANCE is one of the worldwide leading paraglider manufacturers, based in Switzerland. Since its founding in 1988 the company has always followed its own ideas and concepts, in both development and production. The results are well-finished products with distinctive character and qualities. Behind the brand is a team of specialists who share a passion for, and confidence in the ADVANCE products they create. At home in the air themselves, they bring valuable personal experience and commitment to the working processes. Comprehensive supervision of the production process and control of working practices at ADVANCE s own factory in Vietnam guarantees a high quality of workmanship. A many-year relationship with cloth and line manufacturers ensures that ADVANCE knowhow flows directly into the development of new materials. ADVANCE put great value on after-sales customer care, and a worldwide service network has been built up to this end. New knowledge is constantly gained by an on-going exchange of experience with customers, which finds its way into new ADVANCE products thus completing the «Circle of Service». 7
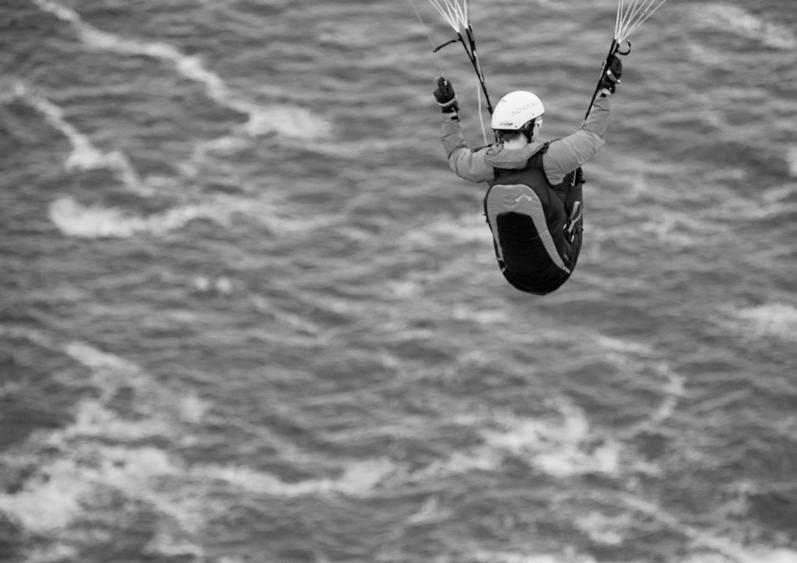
8 The PROGRESS 2 Welcome on board! The PROGRESS 2 is a very light and comfortable reversible harness with a built-in reserve system and an airbag protector. The no-seatboard inside-out harness weighs 3.5 kg (M size); unique for its type! Unique also because (at present!) the PROGRESS 2 is the only reversible harness on the market with integrated reserve and top scoring protection. Its perfectly positioned carabiners give the PROGRESS 2 a comfortable and quiet feeling in flight conveying safety. This harness is best suitable for classic recreational pilots, Hikers & Flyers and travellers. As a rucksack it has a volume of 75 Ltr. Outstanding PROGRESS 2 features Seat surface that conforms perfectly to body shape Exceptional standing, takeoff and handling comfort because there is no seatboard, and the reserve is on the back Easy to slide in and out in flight Air-filled back compartment for added protection Streamlined elegant look Top protector scores Generous and reassuring protector volume; the protector does not compete with the reserve for space. 8
9 More important details Harness mode The harness has the reliable and familiar two-buckle combined chest and leg strap system (called Safe-T-System). Failure-resistant 15 mm strap system with easy adjust buckles Adjustable sitting angle Reserve shoulder suspension Drink tube openings and holding loops on the shoulder straps Ball bearing pulleys for the speed system comfortable to use Rucksack mode Removable waist strap Various attachment features and pockets on the rucksack Adjustable sized, stowable helmet net Closable pocket on the waist strap Bungee chord on the back for holding clothing Drink tube holders on the shoulder straps Ergonomically shaped back support and shoulder straps Hand loops on the shoulder straps for relaxed hiking Rucksack compression system Stowable hiking stick and ice axe holders ADVANCE Look: classy, clear and simple 9
10 Safety advice Like all commercially available reserves paraglider harnesses are not at all suitable for freefall use because of their design features. The reserve parachute and its connections to the harness are not constructed for an abrupt opening. Every pilot bears exclusive responsibility for all risk encountered when carrying out paragliding, including resulting injury and/or death. Neither the manufacturer nor the seller of the equipment can guarantee the safety of the pilot or be held responsible for it. All adjustments to the harness should be carried out before flight. Correct set-up of the harness plays an important part in ensuring satisfactory function, safety and comfort in flight. The PROGRESS 2 is exclusively to be used for paraglider flying. General advice about paragliding To take part in the sport of paragliding appropriate training and well-founded knowledge of the equipment are needed, as are the necessary insurance and licensing. A pilot has to be able to correctly assess the weather conditions before flight. His abilities must be good enough to manage the demands of the paraglider that is to be used. When carrying out paragliding the pilot must also take responsibility for his care of the natural world and the landscape. Other essential items include the wearing of an adequate helmet, suitable shoes and clothing, and the carriage of an emergency parachute (reserve). Equipment must be checked for damage and its airworthiness confirmed before every flight. A pre-takeoff check must always be carried out. 10
11 Preparing the product Delivery Before delivery every ADVANCE product has to be checked by the authorised dealer for completeness of the delivery package and basic settings. A fully completed warranty form ensures that deficiencies in the product, attributable to the manufacturer, are covered by the ADVANCE warranty (see Warranty in the section Service ). Delivery package The PROGRESS 2 delivery package contains: Airbag The airbag is part of the harness and needs no special assembly. It absorbs energy in the event of a crash and damps the impact. The risk of a back or pelvic injury is significantly reduced. The whole back compartment also fills with air in flight. The airbag conforms to the LTF 91/09 certification requirements. Reversible harness 2 Alias carabiners Reserve V-connection and a reserve handle connected to its four flap inner container Compressbag PROGRESS 2 Getting started booklet optional extra: Foot stirrup (incorporating a speed system) 11
12 Harness adjustment To make personal adjustments to the PROGRESS 2 it should be hung up by its carabiners. The pilot sits in it and fastens the two buckles for the chest/leg straps. The shoulder, back and seat setting buckles are enclosed in neoprene and light neoprene covers, and allow continuous adjustment, so that even the sitting position can be quickly and simply changed in flight. The development team have established standard settings and these are marked on the shoulder and back straps by white sewing. Pictures in this handbook show the different adjusting possibilities. The entire adjustment system of the PROGRESS 2 can be altered in the air as well as on the ground. ADVANCE recommend that before the first flight you take a keen interest in setting up the harness. In any case the first trial flight should be made in quiet weather conditions. Setting the back straps The relatively high-mounted back straps at the sides provide good back support, and take pressure off the shoulders. The adjustment system allows for quick and straightforward back position changes during flight. Tip: For easy-running adjustments take the load off the buckles by sitting up. Pulled in back straps make you sit up. Completely loosened back straps put the pilot in quite a reclined position. ADVANCE recommend the standard setting. Seat strap setting The seat strap is adjusted to individual requirements because the seating area adapts itself precisely to the body shape. Pulling in the straps raises the seat surface, resulting in a flatter seat angle. Completely releasing the seat straps makes it easier to get into the harness after takeoff. Adjusting the shoulder straps The PROGRESS 2 shoulder straps can be adjusted to suit the pilot s height and desired sitting position. The adjusters are at shoulder level and can be set to any position. An ideal setting for the flying position leaves a gap of about 2 cm between shoulders and strap. Info: Ideally adjusted shoulder straps are quite loose in flight and do not apply pressure on the shoulders, but are still able to provide comfortable support when required. 12

13 Setting the leg strap interconnect The wider the distance between the individual leg supporting surfaces the more agile is the sitting position and the more effective will be weight steering. A narrow setting delivers a more quiet and damped flying feeling. This can be adjusted during flight as the pilot prefers. Info: The widest interconnect setting will provide the highest PROGRESS 2 comfort for takeoff, landing and ground handling. Mini chest strap adjustment The mini chest strap keeps the shoulder straps in the best position for takeoff and landing. The appropriate width can be set as required. If you prefer not to use the mini chest strap it can be unlooped and removed. 13

14 Fitting the speed system From the risers the speed lines run through the rear pulleys, outside the straps and down through the forward pulleys, then out through the slots in the light neoprene and finally through the D rings at the front of the seat shell. Then they are knotted to the speedbar so that, with simulated riser connections and lines tensioned the speedbar hangs somewhere between 10 and 20 cms below the front of the harness (depending on pilot leg length and preference). The PROGRESS 2 has bungee holdbacks for the speedbar. This makes sure that, when not required, the speedbar stays close to the seat shell and will not interfere with a reserve throwing. The sewn-in bungee holdback lines are led through the same D-rings as the speed lines and tied as short as feasible to the speedbar but not under permanent load. After an initial check in flight, or in the hung-up harness, fine adjustment should be made at the speedbar knots or the Brummel hooks. Caution: The speed system is correctly adjusted when the whole accelerate range of the wing can be used. It is essential to make sure that the lines are not adjusted too short, which would permanently accelerate the wing in flight. 14
15 Fitting the optional foot stirrup: The black loops at the ends of the stirrup support lines attach to the small tapes loops below the carabiners with small quicklinks (Maillons Rapides). The bungee holdbacks from the harness go through the D rings at the front of the seat shell, and should be tied to the small loops halfway down the stirrup lines as short as practical, but not under permanent tension. A speed loop accelerate system is supplied with the foot stirrup. ADVANCE recommend that only this speed system is used when flying with the foot stirrup. A split ring connects the speed loop to the footrest so that the loop can always be conveniently picked up by a foot while flying with the foot stirrup. Cockpit attachment A cockpit can be supported from the small tape loops below the chest strap, or from the main carabiners. 15
16 16
17 Installing the reserve General advice Every reserve/harness combination has its own character. To be sure that the system will work reliably it is essential that both pilot and packer thoroughly familiarise themselves with the components - how the parts go together, and every detail of their functioning. This is especially important if any item is new, or a similar replacement be it reserve, harness or other related item. Suitable reserves Reserve compartment volume In general, comparatively bulky old-style reserves are more difficult to release from modern, compact harnesses, especially under high g loading. Certified volume ranges for the PROGRESS 2 are a function of harness size, as follows: S harness - 3 to 6.5 Litres. M harness - 3 to 7 Litres. L harness - 3 to 7.5 Litres. The following formula can be used to calculate a very approximate reserve volume: Reserve Wt in Kgs x 2.7 = Volume in litres. But volume calculated from weight may not be reliable. Depending on technique and packing style it still possible that a reserve of apparently permissible volume if calculated by this formula cannot be released without problem. In every case a compatibility test must be carried out to decide whether any particular combination of reserve and harness will work properly. Caution: A newly folded reserve can take up 30% more volume than expected. ADVANCE therefore strongly recommend that a compatibility test is carried out after every reserve repack. Steerable reserves A steerable reserve can be connected directly to the coloured support points under the shoulder covers using two similar maillons rapides of a combined minimum safe load of 2400 dan. Its risers are led along the side channel into the reserve compartment. The unused harness V-connection can be led through the opening in the back compartment and stowed away between harness and rucksack. This type of reserve also needs a compatibility test to decide that the chosen Rogallo works with the PROGRESS 2. Caution: Steerable reserves tend to take up more volume. Info: Quick-Out carabiners can be used with the PROGRESS 2. 17
18 Fitting the reserve into the PROGRESS 2 The PROGRESS 2 reserve compartment is behind the airbag, in the small of the pilot s back. The V-connector runs in its own channel along the side of the harness. Caution: Fitting the reserve should be done by a qualified person your safety may depend on it. Inner container with attached reserve handle The reserve handle forms part of the four flap inner container, so designed that the release force acts evenly along the whole width of the inner container. This minimises the chance of the inner container turning sideways and getting stuck, or tangling in the reserve lines. It also makes a perfect throw more likely. The supplied reserve handle/four flap inner container combination is a part of the harness and conforms to the latest LTF certification requirements. Only the original reserve handle with connected four flap inner container may be used. 18


19 Packing the reserve in the inner container Fold your reserve to the width and depth of the supplied inner container; the PROGRESS 2 calls for a long and narrow folded shape. Put the lines on the opposite side to the reserve handle. Close the inner container flaps in the indicated order (1-3). 19


20 20 Tip: You can reduce the size of the inner container (for small reserves) using its elastic gathering lines.

21 Connecting the V-connection and reserve bridle A Maillon of minimum safe load 2400 dan should be used to connect the harness V-connection with the reserve bridle. These two webbing loops should be stabilised in position on the Maillon, ideally with rubber O rings, to prevent them slipping out of position during a genuine reserve throw. A webbing loop to loop connection is only permitted if done by the harness manufacturer or a trained and qualified person. If this is not done correctly the webbing loops can slip against each other when highly tensioned, heat, melt and fail. The result may well be fatal. Caution: Do not use sticky tape instead of rubber O rings for stabilising the Maillon connections. 21


22 Putting the inner container in the reserve compartment Lay the V-connection, then the lines, on the bottom of the compartment, followed by the inner container. NOTE that the closing line loop and closure flaps should face downwards (towards the ground away from the pilot), and that the reserve handle connection is not twisted. Caution: If the reserve has been repacked but does not conform to the shape of the inner container it must be repacked and folded in the same shape and size as this container. 22
23 Closing the reserve compartment After putting the reserve into its compartment push the reserve handle into its neoprene pocket, and lead the yellow cables out through the gaps at the pocket corners. The V-connection from harness to reserve runs in its channel along the side of the harness. This is closed by a zip fastener. A second zip fastener closes the other end of the reserve compartment. These special zips are designed to fail and pull open when the reserve is pulled out. They are both closed with the following technique:- To close each zip fastener take the zip-puller from its garage and run it carefully (wrong direction) along the open track to the starting end (under the reserve handle). The zip fastener can then be easily closed in the normal way, and the zip-puller left in its zipper garage at the end of its track. Lead the two bootlace loops through their metal eyelets and secure with the yellow cables. The reserve compartment is designed to put the necessary load on the loops and yellow cables. Guide the ends of the yellow cables into their buttonholes. The magnet in the reserve handle connection should have found its opposite number on the neoprene pocket. The connection will then lie flat against the harness, minimising the risk of an unintended reserve release. To ensure a correct release the clean running of the yellow cables should be checked on a regular basis. Caution: Never connect the inner container to the reserve. Caution: Until the bootlace loops are secured by the yellow cables the zips can be pulled apart by excess tension in the compartment sides. Make sure that the zips stay closed until the following step is complete: 23

24 Compatibility check Correct stowing of the reserve must be confirmed by a test release. To do this the pilot sits strapped in the harness, which hangs up by its carabiners. In the normal flying position he must be able to release the reserve without problem, in accordance with the manufacturer s specifications. Here it must be confirmed that the force required does not exceed 7 dan. If in doubt about this do not hesitate to contact a qualified person or an authorised ADVANCE dealer. Caution: Before every flight check that the reserve handle is in its proper position and that the yellow cables are correctly stowed. Tip: We recommend that you briefly take hold of the reserve handle during every flight, so that its position can be remembered. Take the right hand directly downwards from the armpit, and it will automatically find the handle. 24
25 25
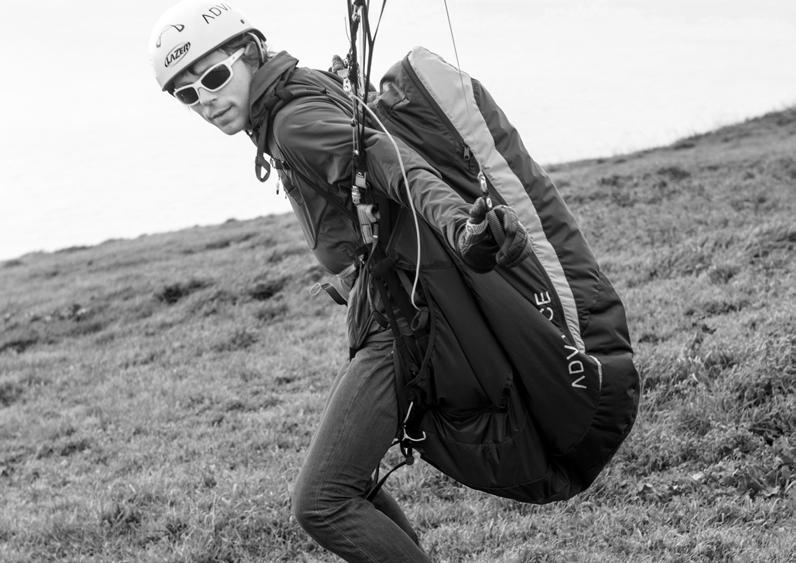
26 Setting up the Rucksack Mode The PROGRESS 2 rucksack function is designed to hold a paraglider, helmet and some clothes. Its compact nature and geometry make it very comfortable to carry. 1. Adjusting the waist strap The fastened waist strap of a packed rucksack should sit directly over the hip bones. The channel in the strap helps you to find this position. Pull in the waist strap so that it feels secure and comfortable. When correctly adjusted most of the rucksack weight will be carried on the waist strap and hips. 2. Shoulder strap adjustment Pull these in until you can just feel them but not too tight. The low shoulder strap attachment points accommodate different upper body lengths. Correctly adjusted shoulder straps sit on the shoulders, but do not apply strong pressure. Use in practice Packing the rucksack The PROGRESS 2 is delivered with a COMPRESSBAG a compression bag so that the paraglider can be efficiently packed in the rucksack. The COMPRESSBAG replaces the usual inner bag and is ideal for the PROGRESS 2. Compact stowing makes a rucksack much more comfortable to carry. Pack your folded paraglider in the conically shaped COMPRESSBAG. After closing the side zips you can squash the air out of the bag, and reduce the glider volume considerably. This will leave enough room in the rucksack for clothes and instruments. Packing tip: Put the glider in the top end of the rucksack and pull the side flaps in to hold the glider. The zip will be easier to close. When both zips are zipped to the top push the glider down and stand the bag up. There is enough room for instruments and clothes in the PROGRESS 2. The helmet can either go inside or be carried outside in the removable net. Side stowages, pockets on the back and the waist strap, and the multifunction criss-cross bungee on the back can all be used for other things. The side pockets can each hold a 1.5 Ltr plastic bottle. The two lower side pockets can 26
27 be reached while walking. The PROGRESS 2 rucksack also has loops on the back for collapsible walking/ski poles and an ice axe. Compression straps on the sides can be used to finally shrink the rucksack for compact and easy carrying. Caution: Never drag the PROGRESS 2 over the ground. Do not pack sharp or pointed objects inside the rucksack, in the side pockets, or in the back compartment. The fabric could be damaged. Packing the back of the harness before flight This back compartment is also your rucksack so, without the glider, there s plenty of room inside. Packing it carefully, however, significantly improves flying comfort. Oddly-shaped and hard objects can be felt through the back wall, and could shorten an otherwise carefree flight. You can pack hiking poles points up in the back compartment; but, in general, do not have it too full or tight. The back of the harness cannot inflate if this compartment is overstuffed. Tip: To save space don t carry drinks in plastic bottles or food in plastic containers; Zipbags or food bars are better. These take up no space when used. Drink systems (e.g. Camelbak) work both in flight and when walking: and both PROGRESS 2 modes have means of routeing a drink tube from inside the back compartment to elastic loops on the shoulder straps. Reversing technique Always be careful to fully open the zip before turning the product inside out! Changing it into a rucksack is like folding a glider: the neater the lines go into the wing the easier it is to fold. The harness has a protector, straps and seat surfaces. Lie them all into the centre: then it will be easier for it to become a rucksack. Make sure that the airbag bracing wires lie flat, and do not get kinked when you pack the rucksack. Tip: ADVANCE recommend rubber point covers for hiking poles. These prevent you annoying others with persistent click-clacking on the road, and they protect the back pocket when the sticks are stowed. 27
28 28

29 29
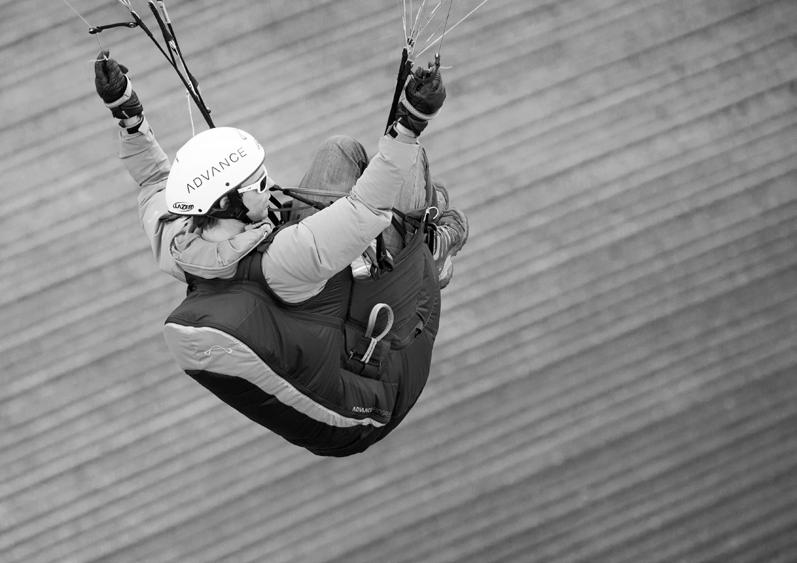
30 Flying General The PROGRESS 2 should principally be flown sitting in a upright position. This gives the best view in the air. The PROGRESS 2 has plenty of trump cards to play. Weight is distributed evenly over the adaptable seat surface, from thighs to shoulder blades. This does away with pressure points, circulation continues unimpeded, and the mind remains alert during long flights. The feedback damping of the PROGRESS 2 can be easily adjusted in flight using the leg strap interconnect. For students and in turbulence we recommend more feedback damping interconnect pulled in. Of course, this remains a matter of pilot preference. Ground handling Light weight and the ability to freely stand upright makes ground handling much less taxing with the PROGRESS 2. The leg straps (leg loops) and the small-of-the-back reserve position provide maximum freedom of movement; so full concentration can be given to the mastery of a lively glider. Tip: Leg loops open for ground handling (see section Adjusting leg strap interconnect ) Takeoff and landing PROGRESS 2 floating shoulder straps allow you to stand upright. Both takeoff and landing turn out to be very comfortable movement is quite unencumbered, and those useful big takeoff steps are quite possible. Loosened seat straps make it easy to slip back into the harness after lift off. To take up the landing position just straighten the back and push the pelvis forward. You re already in the correct upright position. 30
31 Using the speed system The helpful bungee holdback keeps the speedbar under the front of the seat always ready to reach. Pushing the speed lines will alter the sitting position. The upper body leans back, and the shoulder straps become tensioned. The sitting surface becomes flatter and provides support. Caution: Always use the speed system bungee holdback. This means that you can easily (and quickly) reach the speedbar. Caution: Connect the speed system to the wing for every flight. Dangling speed lines can interfere with a reserve throwing. Flying with a foot stirrup ADVANCE recommend that you fly with the optional PROGRESS 2 foot stirrup, designed to go with this harness. The high anchoring point provides maximum comfort. Your legs are supported effortlessly, and you can enjoy long flights. The bungee connection to the front of the seat, and the reserve position, prevent hang ups or tangles with the reserve. When flying with the foot stirrup you should only use the ADVANCE speed loop intended to go with it. Flying with ballast The PROGRESS 2 was not designed with ballast in mind, and does not have a special compartment for it. If you wish to increase your in-flight weight by carrying water the two loops below the chest straps are possible attachment points. Info: If you hang a bag of water from these loops the flying behaviour of a glider can be altered and the agility of the harness reduced. Use for teaching The PROGRESS 2 is perfect for paraglider school students. A comfortable upright stance for takeoff; easy sliding back after liftoff; a comfortable and familiar sitting position in flight; damped harness behaviour in flight, and quick sliding upright before landing everything you need for relaxed and attentive students. 31
32 Use with gliders of other manufacturers The harness can be used with any paraglider there is no restriction. Winching ADVANCE harnesses are suitable for winch launches. For the PROGRESS 2 tow links must only be attached to the main carabiners by quicklinks. If there is doubt about how to do this ask the winch driver or someone authorised by the manufacturer. Takeoff preparation Do the following checks before every takeoff: 1. Harness and helmet done up, reserve OK? 2./3. Lines free and canopy open? 4. Wind direction and strength OK? 5. Airspace and field of view open? Acro flying The geometry and strength of the PROGRESS 2 make it entirely suitable for acro manoeuvres. However, the harness is only arranged for a single reserve. ADVANCE recommend a tworeserve harness for acro. Tandem flying The PROGRESS 2 can be used for a tandem passenger. 32
33 33
34 Care, repairs and checks Care Weight minimisation was a priority when it came to the choice of materials. The harness was designed for high loadings, but not for extreme physical punishment. The lifespan depends very much on the care of the user. We recommend that signs of wear or damaged seams and webbing are always investigated and, where necessary, individual components of the harness be replaced. In particular, suspected defects should be taken to an authorised service centre for rectification, without delay. Caution: Do not modify your harness, and never fly with a harness whose straps and webbing parts are damaged in any way. It is recommended that a harness has a complete inspection regularly. This must entail a check of the condition of seams and webbings as well as of the functioning of closure buckles. This recommendation also includes the regular airing and repacking of the reserve. If the reserve has been thrown in an emergency, the harness should be inspected by the manufacturer or an authorised service centre. Ultraviolet light, temperatures below -20 C and above +60 C, dampness, seawater, aggressive cleaning agents, improper storage and mechanical stress (dragging on the ground) accelerate the ageing process. The lifespan of your harness can be significantly prolonged if the following points are observed: Allow a wet or damp harness to dry in the shade at room temperature. Always repack the reserve. A harness in contact with seawater should be thoroughly rinsed with fresh water. Always repack the reserve. Only clean a harness with fresh water, and neutral soap if necessary never with solvents. Inspect the connection lines between harness and reserve after every airborne reserve opening. Have the harness inspected by a qualified person after any high loading (e.g. heavy crash landing or failed takeoff). Regularly check the harness for defective seams and webbing. Above all check the reserve V-connection and the seams at the carabiner supports. 34
35 Do not expose the harness to large temperature changes, and make sure it gets enough air circulation to prevent condensation. Do not leave the harness in the sun (UV light) for longer than necessary. To ensure reliable and fast opening most reserve manufacturers recommend a reserve inspection and repack every 6 months. If the reserve gets wet, damp or very hot it must be repacked without delay. We emphatically recommend that a trained and qualified person be allowed to repack your reserve. In addition ADVANCE strongly recommend that you regularly check the reserve handle yellow cables in their bootlace loops. Make sure they slide easily. Airbag care The airbag does not need special attention, but it should be checked for possible damage after a crash. If damage is found it must be sent for repair or replacement. The harness must not be stored near aggressive substances or exposed to high temperatures for any length of time. Check All your equipment must undergo a check every 24 months. With intensive use (> 150 flying hours/month) an annual check is required. A check involves a visual assessment of fabric, straps and connections, the most important sewing and the main carabiners. All parts will be inspected for tears, kinks, damaged seams, general damage and evidence of serious abuse. Finally the overall condition of the harness will be judged and recorded on the service record in the owners handbook. More information about the check can be found under «Service» in the handbook, or at 35
36 Repairs Fundamentally you may not carry out harness repairs yourself. Sewing of the various seams has been done with utmost precision. Only the manufacturer or an authorised service centre may carry out repairs, with original materials. Disposal Protection of the environment is an important feature in the choice of materials and the production of an ADVANCE product. We use exclusively non-hazardous materials and compounds that have undergone long-term quality and environmental impact assessments. When your harness has eventually come to the end of its useful life please remove all the metal parts and dispose of the rest of it at a suitable waste incineration plant. 36
37 Technical details Technical details PROGRESS 2 S M L Seatin height cm Seating width cm N/A * N/A * N/A * Seatboard depth cm N/A * N/A * N/A * Carabiner height cm ca. 43 * ca. 46 * ca.48 * Carabiner distance cm Weight kg Rucksack volume ltr Load test Airbag certification LTF 91/09 DIN EN 1651, 120 kg * Not Applicable. The harness seat shell automatically conforms to the pilot s body shape. The seat surface width and the carabiner height find their own values. Chest and leg strap lengths cannot be adjusted, so carabiner distance is fixed. 37
38 Materials used We routinely check and test the many raw materials available to us. Like all ADVANCE products the PROGRESS 2 has been created and manufactured using the latest knowledge and techniques. We have chosen the materials used very carefully, taking into account the strictest quality demands. Harness: Outer fabric: Nylon Oxford Ripstop 210D. Ripstop 70D, Cordura 210 Inner fabric: Nylon Oxford 210D, Ripstop 70D, LNT-6078 Main webbing: Polyester 25mm, 1500kg Airbag: Held in shape by 3mm internal plastic cables Reserve connection lines: Dyneema 10mm 2320kg Rucksack: Outer fabric: Nylon Ripstop 210D, LNT-6078 Base fabric: Cordura 210D Certification The PROGRESS 2 was tested and certified in accordance with DIN EN-Norm 1651 at 120 kg supported weight. The airbag has LTF certification. Leg, chest and shoulder straps: Polyamid 15mm, 1000kg Two buckle closure system: Alu-Leichtschnalle Austri-Alpin 38
39 Service ADVANCE Service Centres ADVANCE runs two company-owned service centres which carry out checks and repairs of any kind. These centres based in Switzerland and France are official DHV approved maintenance operations soundly based on many years experience and comprehensive product-specific expertise. The worldwide ADVANCE service network comprises further authorised service centres which provide the same level of service. All workshops use exclusively ADVANCE original materials. All the information about checks and repairs and relevant addresses can be found on download the check application form as a PDF prior to sending your equipment in to ADVANCE. find an answer to a smouldering question from the FAQs (frequently asked questions). sign up for the ADVANCE Newsletter, and get regular s about new developments and products. It s worth making a regular visit to the ADVANCE homepage because the range of services is constantly developed. ADVANCE website On you can find detailed information about ADVANCE and their products as well as helpful addresses which you can contact with questions. Among other things on the website you can complete the online warranty card up to 10 days after purchase, and enjoy the comprehensive advantages of the ADVANCE warranty. find out new, safety-relevant knowledge about ADVANCE products. 39
40 Warranty To benefit from the comprehensive ADVANCE warranty please fill in the appropriate form within 10 days of purchase. This form is available on the website under «Warranty». As part of the ADVANCE warranty we undertake to rectify any defects in our products that are attributable to manufacturing faults. To make a claim on the warranty you must notify ADVANCE immediately on discovering the defect, and send the defective product in for inspection. The manufacturer will then decide how a possible manufacturing fault is to be rectified (repair, replacement of parts, or of the product). This warranty is valid for 3 years from the date of purchase of the product. The ADVANCE warranty does not cover any other claim. In particular it does not cover damage caused by careless or incorrect use of a product (e.g. inadequate maintenance, unsuitable storage, overloading, exposure to extreme temperatures etc.). The same applies to damage attributable to an accident or normal wear and tear. 40

41 41

42 Parts Harness Front view Shoulder straps 2 Chest strap 3 Main suspension points 4 Two-buckle clip-in system 5 Leg straps 6 Leg straps outside 7 Seat strap 8 Main strap 9 Back strap 10 Speed system pulleys 11 Cockpit attachment loops 12 Holdback for the speed bar

43 13 Side view 13 Velcro for Solario 14 Cover for the reserve system 15 Reserve parachute handle 16 Spacious back compartment 17 Side pockets


44 Rucksack 6 Side view 1 Shoulder straps 2 Removable waist strap 3 Upper side pockets 4 Lower side pockets 5 Compression system 6 Adjustable, stowable helmet net 7 Fastening tape 8 Hiking stick and ice axe holder 9 Bungee chord

45 Pictures: Thomas Ulrich, visualimpact.ch / Location: Azores Islands 45
46 advance thun ag uttigengstrasse 87 ch 3600 thun fon fax
User manual SUCCESS3 Edition 1 / 03_2013
 SUCCESS 3 User manual Edition 1 / 03_2013 Edition 1 / 03_2013 Contents... 4... 5... 6 Welcome on board... 6 Outstanding features of the SUCCESS 3... 6 Important details... 7... 8 General advice about paragliding...
english User manual Edition 1 / 10_2016
 english User manual Edition 1 / 10_2016 Welcome to ADVANCE Many thanks for choosing the STRAPLESS, an ADVANCE high-quality ultralight product. We wish you plenty of fun and many enjoyable hours in the
english Getting started
 english Getting started Welcome to ADVANCE Many thanks for choosing ADVANCE. We are one of the world s leading paraglider manufacturers and are based in Switzerland. Since 1988 we have consistently followed
Getting started. english
 Getting started english Welcome to ADVANCE Many thanks for deciding on ADVANCE. We are one of the world s leading paraglider manufacturers based in Switzerland. Since 1988 we have consistently followed
english Getting started
 english Getting started Welcome to ADVANCE Our sincere thanks that you have decided on ADVANCE. As a worldwide leading paraglider manufacturer based in Switzerland we have been following our own ideas
Thank you for flying SKY PARAGLIDERS products
 English 2010 Index TWIN - description... 5 Main advantages... 6 Sizes and accesories... 7 Before your first take off... 8 Adjustment... 9 Rescue assembly... 10 Speed system length adjustment... 16 Production
PEAK 1 GENERAL INFORMATION 1.1 THE CONCEPT 1.2 SAFETY 1.3 THE SPEED SYSTEM 2 THE EMERGENCY PARACHUTE 2.1 EMERGENCY PARACHUTE ASSEMBLY
 PEAK 1 GENERAL INFORMATION 1.1 THE CONCEPT 1.2 SAFETY 1.3 THE SPEED SYSTEM 2 THE EMERGENCY PARACHUTE 2.1 EMERGENCY PARACHUTE ASSEMBLY 3 ADJUSTING YOUR PEAK 3.1 ADJUSTING THE SITTING POSITION 3.2 ADJUSTING
Contents. Introduction Technical description Adjusting your Goya The alternative methods of emergency parachute connection ...
 GOYA Contents Introduction... 3 Technical description... 3 Adjusting your Goya... 4 The alternative methods of emergency parachute connection... 6 Speed systém... 10 Towing... 10 Tandem flying... 10 Harness
Happy Reserve System. PILOT'S MANUAL Thank you for taking the time to read this booklet. Happy 1
 Happy Reserve System PILOT'S MANUAL Thank you for taking the time to read this booklet. Happy 1 CONTENTS 1. Introduction 2. Pre flight 3. Care and maintenance 4. Storage 5. Drying and airing 6. Cleaning
OWNERS MANUAL PACKING INSTRUCTIONS PARAGLIDER EMERGENCY SYSTEM B-SAFE 120 L
 1 of 8 OWNERS MANUAL PACKING INSTRUCTIONS PARAGLIDER EMERGENCY SYSTEM B-SAFE 120 L INDEX (1) GENERAL DESCRIPTION (2) FITTING THE SYSTEM TO THE HARNESS - Standard Harnesses - Comfort/Integral Harnesses
APCO Aviation Setting Future Standards. Version (rev 1.01)
") Version 1.02 2018 11 19 01 23 (rev 1.01) APCO Aviation Setting Future Standards Factory: 7, Chalamish Street - Industrial Park - Caesarea 38900 ISRAEL Tel: +972 4 6273727 Fax +972 4 6273728 2 CONTENTS:
Version 1.02 2018 11 19 01 23 (rev 1.01) APCO Aviation Setting Future Standards Factory: 7, Chalamish Street - Industrial Park - Caesarea 38900 ISRAEL Tel: +972 4 6273727 Fax +972 4 6273728 2 CONTENTS:
DOWN MANUAL. Aeros Ltd. St. Post-Volinskaya, 5 Kiev, UKRAINE
 DOWN HG & PG rescue parachute system MANUAL Aeros Ltd. St. Post-Volinskaya, 5 Kiev, 03061 UKRAINE Tel. +(380 44) 455 41 20 Fax. +(380 44) 455 41 16 E-mail: aerosint@aerosint.kiev.ua http://www.aeros.com.ua
There are a number of types (e.g. general purpose, lightweight mountain, competition harness) available and the first things to think about are:
 available and the first things to think about are:") A buyer s guide to choosing a paragliding harness By Judith Mole Published in Skywings, October 2008 This article is about the issues to think about when choosing a new harness. There are a lot of different
A buyer s guide to choosing a paragliding harness By Judith Mole Published in Skywings, October 2008 This article is about the issues to think about when choosing a new harness. There are a lot of different
Please read this manual carefully before your first flight.
 Low hangpoint PPG harness User manual Please read this manual carefully before your first flight. Congratulations! Thank you for choosing the Powerseat Comfort harness. We have done our best to present
Issue: December 2016 / Update # 1: January 2018 OPERATING MANUAL. CutAway
 OPERATING MANUAL CutAway Dear Customers, Thank you for choosing AVA Sport equipment! The CutAway is the harness that raises whole new standards safety in paragliding. regarding "3 is always better than
OPERATING MANUAL Series
 OPERATING MANUAL 2015 Series Dear Customers, Thank you for choosing AVA Sport equipment! The Acro Base is the harness that raises whole new standards regarding safety in paragliding. Integrating the usual
Rescue Parachute User Manual
 Rescue Parachute User Manual Sky Paragliders, a.s. Kadlčákova 1466 739 11 Frýdlant nad Ostravicí CONTENT CHAPTER I. Technical Specification of Rescue Parachute SKY DRIVE 1) Intended Use 2) Technical-Tactical
Krisis Rogallo 130 Reserve Parachute Owner s Manual
 Krisis Rogallo 130 Reserve Parachute Owner s Manual VERSION 1.0 VALID FROM: 2010 REVISION: 07.04.2011 Kortel Design 1096, avenue André Lasquin 74700 Sallanches France Telephone: + 33(0)9 50 10 73 27 Fax:
TUAREG. Owner s manual. Onika Paraglider. Technical description: Harness Tuareg. page 1
 Owner s 05.05.2012 manual Harness Tuareg With the Tuareg you got one of the most comfortable and most functional harnesses, which is available on the market at present. We thank you for the confidence,
Introduction Safety notice Attaching a rescue system A Fixing a paraglider Attaching a winch...
 CONTENTS Introduction...... 2 1. Safety notice..... 3 2. Attaching a rescue system.......... 4 3. A Fixing a paraglider....... 7 4. Attaching a winch......... 8 5. How to adjust a harness......... 8 6.
ch 3600 thun uttigenstrasse 87 advance thun ag Getting Started English
 advance thun ag uttigenstrasse 87 ch 3600 thun +41 33 225 70 10 www.advance.ch info@advance.ch support@advance.ch Getting Started English Welcome to ADVANCE Our sincere thanks that you have decided on
ch 3600 thun uttigenstrasse advance thun ag Getting Started English
 advance thun ag uttigenstrasse 87 ch 3600 thun +41 33 225 70 10 www.advance.ch info@advance.ch support@advance.ch Getting Started English Welcome to ADVANCE Our sincere thanks that you have decided on
User s manual. English version SUPAIR-VLD PARC ALTAÏS 34 RUE ADRASTÉE ANNECY CHAVANOD FRANCE
 User s manual SUPAIR manufactures its products in Europe. The majo rity of the components used come from Europe. English version SUPAIR-VLD PARC ALTAÏS 34 RUE ADRASTÉE 74650 ANNECY CHAVANOD FRANCE 45 54.024
Contents. Introduction 3 Description 4 Deploying 6 Packing 8 Mounting 12 Maintenance 13 Inspection 14 Guarantee 15 Closing 16
 1 Contents Introduction 3 Description 4 Deploying 6 Packing 8 Mounting 12 Maintenance 13 Inspection 14 Guarantee 15 Closing 16 2 Paragliders with Personality OOPS Owner s Manual Reserve Parachute Introduction
Ultra CROSS 75, 100, 125, 150, 210. Owner s manual Rescue system. Fly market GmbH & Co. KG Am Schönebach 3 D Eisenberg.
 Fassung 1.5 vom 20.04.2017 Owner s manual Rescue system Ultra CROSS 75, 100, 125, 150, 210 manufactured by Fly market GmbH & Co. KG Am Schönebach 3 D-87637 Eisenberg Tel.: +49-8364-9833-0 Fax: +49-8364-9833-33
Please read this manual before flying with the VOYAGER PLUS for the first time.
 Please read this manual before flying with the VOYAGER PLUS for the first time. THANK YOU! We would like to thank you for having chosen one of our products, and we invite you to read this important document,
Please read this manual carefully before your first flight.
 Light harness with a footrest User manual Please read this manual carefully before your first flight. Congratulations Thank you for choosing the Funky harness. We have done our best to present you with
Please read this manual before flying with the VOYAGER for the first time.
 Please read this manual before flying with the VOYAGER for the first time. THANK YOU! We would like to thank you for having chosen one of our products, and we invite you to read this important document,
Please read this manual carefully before first flight.
 Light harness with a footrest User manual Please read this manual carefully before first flight. Congratulations Thank you for choosing the Jazz harness. We have done our best to present you with a highest
Genie II Owner s Manual. Please read this manual before flying with the Genie II for the first time.
 Genie II Owner s Manual Please read this manual before flying with the Genie II for the first time. Thank You Thank you for choosing the Genie II harness. We are confident that this harness will provide
APCO Aviation Setting Future Standards. Revision 2.1 Date:
 Revision 2.1 Date: 30.12.2013 APCO Aviation Setting Future Standards Factory: 7, Chalamish Street - Industrial Park - Caesarea 38900 ISRAEL Tel: +972 4 6273727 Fax +972 4 6273728 1. Introduction 3 2. Harness
Owner s Manual Please read this manual before flying with the Genie Race 2 for the first time.
 Owner s Manual Please read this manual before flying with the Genie Race 2 for the first time. Rev.2.0, 21/06/2011 Gin Gliders Inc. 285-1 Galdam-Ri, Mohyun-Myun, Yongin-City, Kyunggi-Do, Korea www.gingliders.com,
CONTENTS Thank You Warning Your Oxygen 2+ Preparation Fitting Adjustments Features Use and Maintenance Technical Specifications
 Pilots Manual CONTENTS Thank You 01 Warning 02 Your Oxygen 2+ 03 Overview 04 Preparation 05 Protection 05 Seat plate 06 Speed System 07 Reserve Parachute Installation 08 Fitting 12 Adjustments 14 Shoulder
independence gliders for real pilots Owner s manual Version 1.3 /
 independence gliders for real pilots www.independence-world.com Owner s manual Version 1.3 / 16.03.2009 Rescue system Piccolo EVO Annular EVO 20 Annular EVO 22 Annular EVO 24 Annular EVO Tandem Annular
HAVEN PARAGLIDING HARNESS
 HAVEN PARAGLIDING HARNESS Please read this manual before flying with the Haven for the first time. Version 1.1 Stand 1.10.2014 Contents MAC PARA COMMUNITY...2 Thank You...3 Safety Notice...3 Introducing
4.2 Assembly Instructions
 4.2 Assembly Instructions 4.2.1 Assembly of Reserve Canopy. Assembly of Reserve Canopy using Rapide Links. After inspecting the Parachute and the Wings Harness/Container System, hang or lay the parachute
PACKING INSTRUCTIONS for the Strong Enterprises. Military Tandem Tether Bundle MTTB. Canopy Part No
 PACKING INSTRUCTIONS for the Strong Enterprises Military Tandem Tether Bundle MTTB Canopy Part No. 420709 Manual No. 510055 REV: B May 2004 Parachuting is a hazardous activity that can result in serious
APEX CLIMB 2 OVERVIEW APEX CLIMB 25
 OVERVIEW Congratulations on your purchase of a SALEWA Pack. We want to besure that you understand and utilize your new SALEWA pack in the best way. Following you will find a description of all functions
Section 4.0 Rigger Information
 Section 4.0 Rigger Information page 28 Parachute Assembly Inspection Form! Note: Count all Tools Before Starting Assembly Qty: A Harness and Container manufacturer: model: date of manufacture: serial no:
pilot manual v1.2 04/2016
 1 pilot manual v1.2 04/2016 Intermediate lite airbag harness 3 Contents Thank you...5 Warning...6 About Gin Gliders...7 Introducing the Gingo Airlite...8 Specifications...9 Before you fly...13 Flying with
independence gliders for real pilots Owner s manual version Rescue system Evo CROSS 100 Evo CROSS 120 Evo CROSS 160
 independence gliders for real pilots www.independence-world.com Owner s manual version 1.1-06.06.2012 Rescue system Evo CROSS 100 Evo CROSS 120 Evo CROSS 160 Fly market GmbH & Co. KG Am Schönebach 3 D-87637
Travel Pod Xpress Instructions & care manual
 Travel Pod Xpress Instructions & care manual Kampa UK Limited Witham, CM8 3EU mcl/kampa/2013 12 CARE WELCOME Thank you for purchasing your Kampa awning. Please read these instructions carefully before
v /2017 G-LITE Rescue Parachute Manual Please read this manual prior to installing the GIN rescue parachute into your harness
 v.1.0 07/2017 EN G-LITE Rescue Parachute Manual Please read this manual prior to installing the GIN rescue parachute into your harness Thank You 2 Thank for choosing Gin Gliders. We are confident you ll
RANDONEE 36 RANDONEE 30
 OVERVIEW Congratulations on your purchase of a SALEWA Pack. We want to besure that you understand and utilize your new SALEWA pack in the best way. Following you will find a description of all functions
Performance Designs, Inc.
 Performance Designs, Inc. POWERED PARACHUTE CANOPY USER/OWNER MANUAL Performance Designs, Inc. 1300 International Speedway Blvd DeLand, Florida USA 32724 (386) 738-2224 Fax: (386) 734-8297 MAN-0022 rev
USER MANUAL CONTENTS. Please read this carefully before doing anything with your new container system
 USER MANUAL CONGRATULATIONS ON YOUR PURCHASE OF A SQUIRREL CRUX ( PRODUCT ). BY PURCHASING THIS PRODUCT, YOU ACKNOWLEDGE THAT ENGAGING IN SKY-DIVING, BASE JUMPING, PARACHUTING, AND WINGSUITING IS AN INHERENTLY
MANUAL. This manual is copyrighted. Partial reproduction is allowed only after prior approval by ICARO paragliders, all other rights are reserved.
 Page 1 en MANUAL This manual is copyrighted. Partial reproduction is allowed only after prior approval by ICARO paragliders, all other rights are reserved. Version 1.0/2015 Page 2 Verification of Checks
PEUTEREY 40 PEUTEREY 30
 OVERVIEW Congratulations on your purchase of a SALEWA Pack. We want to besure that you understand and utilize your new SALEWA pack in the best way. Following you will find a description of all functions
Please read this manual before flying with the X-OVER 3 for the first time.
 Please read this manual before flying with the X-OVER 3 for the first time. THANK YOU! We would like to thank you for having chosen one of our products, and we invite you to read this important document,
Please read this manual before flying with the VELVET 2 and VELVET 2 AIRBAG for the first time.
 Please read this manual before flying with the VELVET 2 and VELVET 2 AIRBAG for the first time. THANK YOU! We would like to thank you for having chosen one of our products, and we invite you to read this
Squeeze ballistic protection and carry system -17 MANUAL
 Squeeze ballistic protection and carry system -17 MANUAL The Snigel system CLOTHING Our garments have good freedom of movement, ventilation and give good protection. They are designed to work with the
Installation Guide: Round Trampoline
 Trampolines & trampoline parts designed to survive in the harsh Oz climate. www.oztrampolines.com.au Installation Guide: Round Trampoline Safety Tips Here at Oz Trampolines we are passionate about your
Page 1 MANUAL. Version 3.0/2015
 Page 1 en MANUAL Version 3.0/2015 Page 2 Verification of Checks and repairs ENERGY CROSS Serial number:. First check by ICARO / date:.. Name/ Stamp Check (C) Repair (R) Which repair/ Check? Check valid
PACKING INSTRUCTIONS. for the Strong Enterprises. Military Tandem Tether Bundle MTTB. Canopy. Part No Manual No REV: A May 2001
 PACKING INSTRUCTIONS for the Strong Enterprises Military Tandem Tether Bundle MTTB Canopy Part No. 420709 Manual No. 510055 REV: A May 2001 STRONG ENTERPRISES 11236 SATELLITE BLVD. ORLANDO, FL 32837 Tel
pilot manual v1.2, 05/2015
 pilot manual v1.2, 05/2015 Tandem Pilot Contents Thank you... 5 Warning 6 About Gin Gliders 7 Introducing the Fuse Pilot 8 Before you fly 13 Flying with the Fuse Pilot 25 Maintenance and repairs 28 Final
OVERVIEW ULTRA TRAIN ULTRA TRAIN 18
 BACKPACK MANUAL OVERVIEW ULTRA TRAIN ULTRA TRAIN 18 Congratulations on your purchase of a SALEWA Pack. We want to be sure that you understand and utilize your new SALEWA pack in the best way. Following
General Canopy Folding and Packing Instructions for H-X Series Personnel Parachute Canopies. Manufactured by Butler Parachute Systems, Inc.
 General Canopy Folding and Packing Instructions for H-X Series Personnel Parachute Canopies Manufactured by Butler Parachute Systems, Inc. Issued 24 July 1998 This set of instructions is for the routine
User manual. v1.0-11/2017
 EN User manual v1.0-11/2017 1 Introducing the Yeti Xtrem 2 The Yeti Xtrem features the latest in lightweight design. It is ideal for hike n fly, para-alpinism, speedflying, travel, soaring or simply to
User s manual. English version SUPAIR-VLD PARC ALTAÏS 34 RUE ADRASTÉE ANNECY CHAVANOD FRANCE N / E
 User s manual English version SUPAIR-VLD PARC ALTAÏS 4 RUE ADRASTÉE 74650 ANNECY CHAVANOD FRANCE 45 54.04 N / 06 04.75 E RCS 87956790 Revision Indice: A Thank you for your choice of a ALTIRANDO². We are
BACKPACKS FREE RIDER 16 FREE RIDER 18. Helmet Fixation. Removable Protector. Open the velcro pocket at the backpanel and take out the protector.
 Removable Protector Open the velcro pocket at the backpanel and take out the protector. Seperate Use: You can wear the protector seperately under your clothes. For full protection without the backpack,
GEAR GUIDE CABELA S SET NUMBER:
 WEST WIND DOME TENT GEAR GUIDE CABELA S SET NUMBER: 58-0518 WESTWIND 4 PLEASE READ THIS MANUAL IN ITS ENTIRETY PRIOR TO USING THIS PRODUCT. VISIT WWW.CABELAS.COM OR CALL 1-800-237-4444 FOR ASSISTANCE.
OVERVIEW GUIDE GUIDE 45 / GUIDE 35
 BACKPACK MANUAL OVERVIEW GUIDE GUIDE 45 / GUIDE 35 Congratulations on your purchase of a SALEWA Pack. We want to be sure that you understand and utilize your new SALEWA pack in the best way. Following
OVERVIEW PEUTEREY PEUTEREY 40 / PEUTEREY 30
 BACKPACK MANUAL OVERVIEW PEUTEREY PEUTEREY 40 / PEUTEREY 30 Congratulations on your purchase of a SALEWA Pack. We want to be sure that you understand and utilize your new SALEWA pack in the best way. Following
User s manual. English version SUPAIR-VLD PARC ALTAÏS 34 RUE ADRASTÉE ANNECY CHAVANOD FRANCE N / E
 User s manual English version SUPAIR-VLD PARC ALTAÏS 34 RUE ADRASTÉE 74650 ANNECY CHAVANOD FRANCE 45 54.04 N / 06 04.75 E RCS 387956790 Revision Indice: 10/0/015 Thank you for your choice of a ALTIRANDO.
BOAT COVER USER GUIDE BOAT ACCESSORIES
 BOAT COVER USER GUIDE BOAT ACCESSORIES Boat Cover Warranty Details The product is guaranteed to be free from defects in workmanship and parts for a period of 36 months from the date of purchase. Defects
V-series reserve manual
 V-series reserve manual Ver 1.2/May 2015. Dear customer, Thank you for purchasing a AIR VUISA quality product. We are a growing family of professionals with the aim of producing high quality products for
Gradient Golden3. Paramotor appendix
 Gradient Golden3 Paramotor appendix INTRODUCTION After using all sizes of the Golden3 for a whole season, the Gradient Team reached the conclusion that the wing is a very good first choice multipurpose
USER MANUAL CONTENTS. Please read this carefully before doing anything with your new container system
 CONTENTS USER MANUAL CONGRATULATIONS ON YOUR PURCHASE OF A SQUIRREL CRUX 3R ( PRODUCT ). BY PURCHASING THIS PRODUCT, YOU ACKNOWLEDGE THAT ENGAGING IN SKYDIVING, BASE JUMPING, PARACHUTING, AND WINGSUITING
Please read this manual carefully before your first flight.
 Light harness with a pod User s manual Please read this manual carefully before your first flight. Congratulations! Thank you for choosing the Techno harness. We have done our best to present you with
ALPTREK 50+5 ALPTREK 45+5
 OVERVIEW Congratulations on your purchase of a SALEWA Pack. We want to besure that you understand and utilize your new SALEWA pack in the best way. Following you will find a description of all functions
SUPAIR-VLD PARC ALTAÏS 34 RUE ADRASTÉE ANNECY CHAVANOD FRANCE. User s manual N / E. Revision Indice: EN
 User s manual SUPAIR-VLD PARC ALTAÏS 34 RUE ADRASTÉE 74650 ANNECY CHAVANOD FRANCE 45 54.024 N / 06 04.725 E Revision Indice: 20120314 EN Thank you for your choice of a Supair DELIGHT. We are proud to join
User s manual. English version SUPAIR-VLD PARC ALTAÏS 34 RUE ADRASTÉE ANNECY CHAVANOD FRANCE
 User s manual SUPAIR manufactures its products in Europe. The majority of the components used come from Europe. English version SUPAIR-VLD PARC ALTAÏS 34 RUE ADRASTÉE 74650 ANNECY CHAVANOD FRANCE 45 54.024
THANK YOU! SAFETY NOTE
 THANK YOU! We would like to thank you for having chosen one of our products, and we invite you to read this important document, the User Manual for the harness. Please pay special attention to the two
OVERVIEW ALPTREK ALPTREK 40+5 / ALPTREK 35+5
 BACKPACK MANUAL OVERVIEW ALPTREK ALPTREK 40+5 / ALPTREK 35+5 Congratulations on your purchase of a SALEWA Pack. We want to be sure that you understand and utilize your new SALEWA pack in the best way.
Congratulations! WARNING! READ USER MANUAL FIRST! USE AT YOUR OWN RISK!
 Congratulations! You just became the owner of the EXIT cutaway harness! We are sure that you will have ton s of fun using this product! Enjoy but use responsible and with care! WARNING! READ USER MANUAL
COPPER RIVER CABIN TENT
 COPPER RIVER CABIN TENT GEAR GUIDE CABELA S SET NUMBER: 58-2735 PLEASE READ THIS MANUAL IN ITS ENTIRETY PRIOR TO USING THIS PRODUCT. VISIT WWW.CABELAS.COM OR CALL FOR ASSISTANCE 1-800-237-4444. SAVE THESE
Manufactured in our state of the art factory in China
 IMPORTANT We strongly suggest setting up your new tent before going camping to insure that all parts are present and to familiarize yourself with the tents assembly. This will have a great effect on how
Happy flights and safe landings, The Flow Paragliders team. 2 P a g e. Paragliders
 Thank you for choosing the Flow rescue system, AURA. AURA is a pulled down apex conical emergency parachute designed for paragliding use only. AURA represents the maximum in safety, functionality and quality.
OVERVIEW LITE TRAIN LITE TRAIN 14 BP
 BACKPACK MANUAL OVERVIEW LITE TRAIN LITE TRAIN 14 BP Congratulations on your purchase of a SALEWA Pack. We want to be sure that you understand and utilize your new SALEWA pack in the best way. Following
PRODUCT PRESENTATION R-BUS. The great traveller
 The great traveller APPROACH The R-Bus is Niviuk s first PPG tandem wing suitable for heavy trike use but it can also be used for standard equipment and PPG tandem flights: Robust structure, up to 500
MANUAL. Fly & more Handels GmbH, ICARO Paragliders. LITE 105/120 Lightweight Rescue systems
 MANUAL Fly & more Handels GmbH, ICARO Paragliders LITE 105/120 Lightweight Rescue systems Version: 1.2 E, 09.05.2012 Page 1 Congratulations on buying a new LITE 105/120 lightweight rescue system and welcome
User s Guide. Please read carefully this manual before using your equipment for the first time. Copyright by Opale-Paramodels 2013 EN Page 1 sur 1
 User s Guide Please read carefully this manual before using your equipment for the first time. Page 1 sur 1 Thanks for having chosen an Opale-Parmodels product. We truly believe this radio-controlled paraglider
User s Manual Trampoline 8
 User s Manual Trampoline 8 Model! WARNING Read all precautions and instructions in this manual before using this equipment. Save this manual for future reference. Maximum user weight 17 lbs. ASSEMBLY IMPORTANT
Users manual Thanks to read this manual before use.
 Users manual Thanks to read this manual before use. Page 1 on 11 Thanks for having chosen an Opale-Parmodels product. We truly believe this radio-controlled paraglider is going to give you hours of enjoyment
USER MANUAL V 2.4 EN 1
 USER MANUAL V 2.4 EN 1 INTRODUCTION Thank you for choosing the SQR reserve system. We are confident that you will be pleased with it in every respect. You can find a downloadable copy of the current version
INSTINCT ALASKAN TENTS
 INSTINCT ALASKAN TENTS GEAR GUIDE CABELA S SET NUMBER: 58-2656, 58-1600, 58-2658 PLEASE READ THIS MANUAL IN ITS ENTIRETY PRIOR TO USING THIS PRODUCT. VISIT WWW.CABELAS.COM OR CALL 1-800-237-4444 FOR ASSISTANCE.
» AQUILA 320(HIGH TOP) «
 «") PERFORMANCE SERIES» AQUILA 320(HIGH TOP) «Model No. :12020253200000 Document-No.: FC-90037 Issue: November 2015 Top Quality Camping WELCOME Thank you for purchasing your Westfield Aquila 320 awning.please
PERFORMANCE SERIES» AQUILA 320(HIGH TOP) «Model No. :12020253200000 Document-No.: FC-90037 Issue: November 2015 Top Quality Camping WELCOME Thank you for purchasing your Westfield Aquila 320 awning.please
User s manual. English version SUPAIR-VLD PARC ALTAÏS 34 RUE ADRASTÉE ANNECY CHAVANOD FRANCE N / E
 User s manual English version SUPAIR-VLD PARC ALTAÏS 34 RUE ADRASTÉE 74650 ANNECY CHAVANOD FRANCE 45 54.024 N / 06 04.725 E RCS 387956790 Revision Indice Thank you for your choice of a WALIBI². We are
CONTENTS. v1.0 May 2017
 Pilots Manual CONTENTS Thank You 01 Warning 02 Your Ozium 2 03 Sizing 04 Pod options 04 Preparation 06 Underseat Mousse 06 Speed System 07 Reserve Parachute Installation 08 Fitting 12 Adjustments 14 Shoulder
PACKING & USER INSTRUCTIONS
 PACKING & USER INSTRUCTIONS PRESERVE V MODEL FFE-H2090(-) P.O. BOX 1419, LAKE ELSINORE, CA 92531 951-245-1734 http://www.freeflightent.com !! DISCLAIMER - NO WARRANTY!! BECAUSE OF THE UNAVOIDABLE DANGER
PRODUCT SPECIFICATION
 PRODUCT SPECIFICATION Brand C.K Magma Product Range Premium storage and PPE Catalogue number Date 22/04/2013 Range Description A range of tool carrying equipment designed to offer the complete solution
Please read this manual carefully before your first flight.
 Light harness with a pod User Manual Please read this manual carefully before your first flight. Congratulations Thank you for choosing the Soul harness. We have done our best to present you with highest
10 X 20 X 8 Dome Canopy
 10 X 20 X 8 Dome Canopy Warning Keep all flame and heat sources away from this tent fabric. Refer to labels for flamability specification. It is not fire proof. The tent fabric will burn if left in continuous
Butler Personnel Parachutes
 Butler Personnel Parachutes Chest Pack Emergency Parachute System Assembly and Packing Instructions Use this manual with: General Folding and Packing Instructions for the HX & Lopo Series Canopies General
ALP TRAINER 25 2 OVERVIEW ALP TRAINER 25
 OVERVIEW Congratulations on your purchase of a SALEWA Pack. We want to besure that you understand and utilize your new SALEWA pack in the best way. Following you will find a description of all functions
INSTANT GARAGE MODEL NO: CIG81224 ASSEMBLY INSTRUCTIONS PART NO: ORIGINAL INSTRUCTIONS
 INSTANT GARAGE MODEL NO: CIG81224 PART NO: 3503578 ASSEMBLY INSTRUCTIONS ORIGINAL INSTRUCTIONS GC1117 INTRODUCTION Thank you for purchasing this CLARKE Instant Garage. When erected, the CIG81224 garage
Assembly instructions for Eurotramp trampolines Series: Ultimate, Grand Master Exclusiv, Grand Master, Master
 Assembly instructions for Eurotramp trampolines Series: Ultimate, Grand Master Exclusiv, Grand Master, Master 1. Assembly instructions 2. Attaching the plastic coated steel cables on the Ultimate frame
This manual is copyrighted. Partial reproduction is allowed only after prior approval by ICARO paragliders, all other rights are reserved.
 This manual is copyrighted. Partial reproduction is allowed only after prior approval by ICARO paragliders, all other rights are reserved. Page 2 Verification of Checks and repairs LOXIA Serial number:.
rescue parachute MINIPLANE SNIP
 rescue parachute MINIPLANE SNIP Snip L: A proportionally shaped, double surface rescue chute, with forward speed, partially steerable. It has extremely fast opening characteristics thanks to its low weight,
You have just purchased a sophisticated product. We place great importance on the workmanship and the high quality of the materials used.
 Dear SWING customer, You have just purchased a sophisticated product. We place great importance on the workmanship and the high quality of the materials used. If you have any questions which are not answered