Snapshot of Adventure
|
|
|
- Moris Brown
- 5 years ago
- Views:
Transcription

1 REQUIREMENT 2E Under the direction of your parent, guardian, or religious or spiritual leader, do an act of service for someone in your family, neighborhood, or community. Talk about your service with your family and your Webelos den leader. Tell your family, den, or den leader how it related to doing your duty to God. An important part of duty to God is helping other people. When there is a natural disaster like a hurricane, faith groups are among the first on the scene. If you look around your town or nearby cities, you will probably see schools, colleges, or hospitals that were founded by faith groups. Your faith group may support people who travel to other countries to help people who are in need. But acts of service don t have to be big. As part of your duty to God, you can do them every day. Talk with your religious leader, and pick an act of service you will do. Afterward, talk with your family, den, or den leader about how it made you feel.
2
3
4
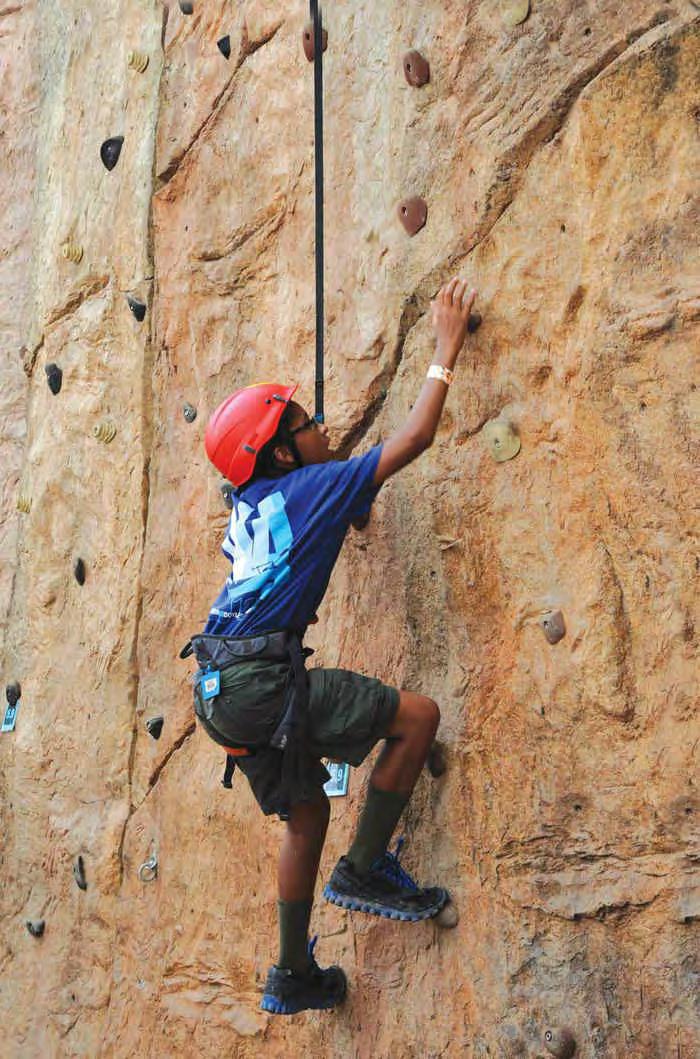
5 Snapshot of Adventure The Scouting Adventure is all about what happens when you leave your Webelos den and become a Boy Scout. In this adventure, you ll learn about things like the Scout slogan and the patrol method. You ll find out about merit badges and ranks, and then you ll visit a Boy Scout troop meeting. Best of all, you ll go along with a Boy Scout troop on one of their outdoor activities. By the time you finish this adventure, you ll be ready for the new adventures that await you in Boy Scouting.
6 REQUIREMENT

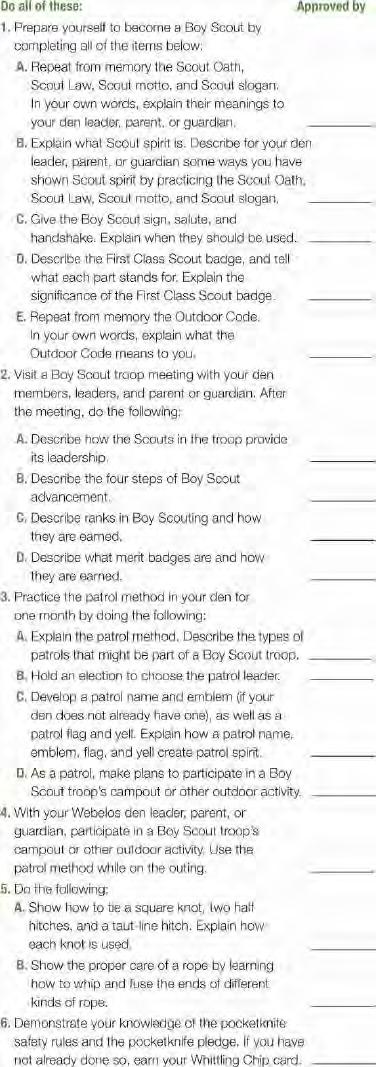
7 REQUIREMENT 1 Prepare yourself to become a Boy Scout by completing all of the items below: A. Repeat from memory the Scout Oath, Scout Law, Scout motto, and Scout slogan. In your own words, explain their meanings to your den leader, parent, or guardian. B. Explain what Scout spirit is. Describe for your den leader, parent, or guardian some ways you have shown Scout spirit by practicing the Scout Oath, Scout Law, Scout motto, and Scout slogan. C. Give the Boy Scout sign, salute, and handshake. Explain when they should be used. D. Describe the First Class Scout badge, and tell what each part stands for. Explain the significance of the First Class Scout badge. E. Repeat from memory the Outdoor Code. In your own words, explain what the Outdoor Code means to you. Scout Oath On my honor I will do my best To do my duty to God and my country and to obey the Scout Law; To help other people at all times; To keep myself physically strong, mentally awake, and morally straight. If you ve been in Cub Scouting very long, you have heard the Scout Oath. As a Boy Scout, however, it becomes more of a big deal. Have you ever made a cross my heart promise? The Scout Oath is sort of like that, but it s a lot more serious. When you become a Boy Scout, you promise to live by the Scout Oath. And if you re like most Boy Scouts, you ll keep living by the Scout Oath for the rest of your life. But what do the words really mean?

8 On my honor I will do my best. Your honor is your reputation, what you are deep inside. When you promise on your honor to do something, you re putting your whole self into that promise. But you don t have to be perfect; you just have to do your best. To do my duty to God and my country and to obey the Scout Law. As a Boy Scout, your first job is to serve your Creator in the ways your parents and faith leaders have taught you. Next comes your country. Countless men and women have worked and fought and even died to make the United States a great country; you can help make it even greater. Like our country, Scouting has some rules to follow. Those rules are found in the Scout Law, which every Scout promises to obey. To help other people at all times. You can make the world a better place by helping people in need. That means big things like working on service projects and little things like reaching out to classmates at school who are having trouble. To keep myself physically strong, mentally awake, and morally straight. You can t do your duty and help other people if you aren t taking care of yourself. You stay physically strong when you exercise, eat right, and avoid things that can damage your body. You stay mentally awake when you study and learn and ask questions. You stay morally straight when you are honest in your actions, clean in your thoughts and speech, and faithful in your religious duties.

9 A Scout is loyal. When you say the Scout Oath, you make a promise to be loyal to your country and the people who are important to you.
10 Scout Law A Scout is trustworthy, loyal, helpful, friendly, courteous, kind, obedient, cheerful, thrifty, brave, clean, and reverent. Some groups have thick books of rules you have to follow. Scouting is different. The most important rules you need to follow are found in the Scout Law, which is so short that you can memorize it. Trustworthy. A Scout tells the truth. He is honest, and he keeps his promises. People can depend on him. Loyal. A Scout is true to his family, friends, Scout leaders, school, and country. Helpful. A Scout cares about other people. He happily helps others without expecting a reward. Friendly. A Scout is a friend to all and a brother to every other Scout. He offers friendship to people of all races and nations, and he respects people even if their beliefs and customs are different from his. Courteous. A Scout is polite to everyone regardless of their age or position. He knows that using good manners makes it easier for people to get along. Kind. A Scout knows there is strength in being gentle. He treats others the way he would like to be treated. He does not harm or kill any living thing without reason. Obedient. A Scout follows the rules of his family, school, and troop. He obeys the laws of his community and country. If he thinks a rule or law is unfair, he tries to have it changed in an orderly manner instead of disobeying it. Cheerful. A Scout looks on the bright side of life. He cheerfully does tasks that come his way. He tries to make other people happy. Thrifty. A Scout works to pay his way and to help others. He saves for the future and uses time and property carefully. He protects and conserves natural resources. Brave. A Scout can face danger even if he is afraid. He has the courage to stand for what he thinks is right even if others laugh at him or threaten him. Clean. A Scout keeps his body and mind fit. He chooses friends who live by high standards. He keeps his home and community clean. Reverent. A Scout is reverent toward God. He is faithful in his religious duties. He respects the beliefs of others. Scout Motto Be prepared. What s a motto? It s a short phrase that describes a person or a group s guiding principle. The Scout motto is Be prepared. Somebody once asked Robert Baden-Powell, the founder of Scouting, exactly what Scouts should be

 Scout Spirit Scout spirit is an attitude that sets Scouts apart from other people. It s hard to define Scout spirit, but it s easy to see it in action.")
11 prepared for. Why, for any old thing! B-P said. That s the idea behind the Scout motto. It means you re ready to do your duty as a Scout at any time. Scout Slogan Do a Good Turn Daily. What s a slogan? It s a short statement of a goal you want to reach. The Scout slogan is Do a Good Turn Daily. A Good Turn is an act of kindness, something you do to help another person. It doesn t have to be big, but it should be something beyond what s expected of you. (Doing your chores doesn t count as a Good Turn. Doing your little brother s chores does.) Scout Spirit Scout spirit is an attitude that sets Scouts apart from other people. It s hard to define Scout spirit, but it s easy to see it in action. When you live by the Scout Oath, Scout Law, Scout motto, and Scout slogan every day, you are showing Scout spirit.


12 Scout Sign The Scout sign is a universal symbol of Scouts. To make it, hold up the three middle fingers of your right hand, and cover the nail of your little finger with your thumb. Hold your elbow at a right angle. And stand up straight; you re a Scout! The Scout sign is used to get people s attention. When you see a leader holding up the Scout sign, get quiet and hold up the Scout sign, too. Pretty soon, everybody in the room will do the same. Scout Salute The Scout salute is used to salute the United States flag. You can also use it to salute other Scouts and leaders. To make the salute, form the Scout sign with your right hand, then bring your hand up, palm down, so your forefinger touches the brim of your hat or the tip of your right eyebrow.
13 If you are not in uniform, salute the flag by placing your right hand over your heart. Scout Handshake Unlike most people, Scouts shake hands with their left hands. The left hand is closer to the heart, so the Scout handshake symbolizes friendship. It s a special handshake shared by millions of Scouts around the world. According to a story Baden-Powell told, some warriors he met in Africa shook with their left hands. To do that, they had to put down their shields, thus showing trust in the people they were greeting. The First Class Scout Badge The Scout badge is an important symbol of the Boy Scouts of America. Scouts in other countries have their own badges that look similar. Fleur-de-lis. The basic shape of the Scout badge is the fleur-de-lis (the French word for an iris flower). Its center point is shaped like the north arrow on an old compass. The three main parts, like the three raised fingers of the Scout sign, stand for the three parts of the Scout Oath: duty to God and country, duty to others, and duty to self. Eagle and shield. The Scout badge includes the emblem of the United States of America, representing freedom and a Scout s willingness to defend that freedom. Two stars. The two stars symbolize truth and knowledge. They also represent Scouting s outdoor adventures. Scroll. The scroll at the bottom displays the Scout motto. The ends are turned up like a smile as a reminder that Scouts smile as they do their duty. Knot. The knot below the scroll is a reminder to do a Good Turn daily.

14 The Outdoor Code As an American, I will do my best to Be clean in my outdoor manners, Be careful with fire, Be considerate in the outdoors, and Be conservation-minded.

15 The Scout Law talks about how you should live as a Scout at all times. The Outdoor Code explains how you should live in the outdoors. Being clean in your outdoor manners means taking care of the places you camp and hike and cleaning up after those who make a mess. Being careful with fire means preventing forest fires. Being considerate in the outdoors means respecting the plants, animals, and humans you encounter in the woods. Being conservation-minded means not wasting natural resources. As a Scout, you have a special responsibility to take care of the natural areas you enjoy. By living by the Outdoor Code, you can help make sure future Scouts can enjoy nature just as much as you do. The Camper adventure tells you more about how to take care of the environment.

16 REQUIREMENT 2 Visit a Boy Scout troop meeting with your den members, leaders, and parent or guardian. After the meeting, do the following: A. Describe how the Scouts in the troop provide its leadership. B. Describe the four steps of Boy Scout advancement. C. Describe ranks in Boy Scouting and how they are earned. D. Describe what merit badges are and how they are earned. As part of this adventure, you will visit a Boy Scout troop meeting. You might even visit the meetings of more than one troop so you can see how they are different and which one you want to join. The troop you visit may be chartered to the same organization as your Cub Scout pack and may even meet right down the hall from your den. If so, you ll see a lot of familiar faces. But you may visit a troop in a different part of town where you don t know anybody. That can be a little scary, but don t worry. Some of the Scouts you ll meet were Webelos Scouts not long ago. Inside a Troop Meeting Troop meetings are a lot different from the den and pack meetings you re used to attending, so you may not know exactly what s going on at first. In fact, you may not even think the Boy Scouts know what s going on! They really do, however. So what is going on? Here s what a typical troop meeting looks like: First, the senior patrol leader he s the top elected leader calls the troop to order using the Scout sign. One of the patrols they re sort of like dens leads a flag ceremony, and everybody recites the Pledge of Allegiance or Scout Oath and Scout Law.

17 Next, one of the older Scouts (or maybe an adult leader) teaches the group a skill like how to navigate using a compass. After the Scouts practice that skill for a while, they break up into patrols. One patrol might work on advancement requirements, another might decorate its patrol flag, and a third might make plans for an upcoming patrol hike. During this time (and really during the whole meeting) individual Scouts may be running around working on advancement, doing their troop jobs, or meeting with the Scoutmaster. After the patrol meetings, everybody comes back together to play a game. This may be a game just for fun, or it may give the Scouts a chance to practice the skill they learned earlier. For example, they might navigate a compass course out in the parking lot. Finally, the whole troop gets back together for the closing ceremony. The senior patrol leader makes a few announcements. The Scoutmaster gives some words of wisdom called a Scoutmaster s Minute. The patrol that led the flag ceremony retrieves the colors. And just like that, the meeting s over. A Scout is obedient. One way you can show obedience is by paying attention to your patrol leader and senior patrol leader. If things are going well, about the only time an adult says anything during a troop meeting is when the Scoutmaster gives the Scoutmaster s Minute. Other than that, the meeting is run by the Scouts themselves. The same thing is true for hikes, campouts, service projects, and everything else. Adult leaders are there, of course, but they re more like coaches. The Scoutmaster and assistant Scoutmasters train the youth leaders and then stand on the sidelines watching them in action.
18 Who Runs the Troop? You can identify the youth leaders by the badges of office they wear on their left sleeves. Adult leaders also wear badges of office. When you visit a troop meeting, look for these leaders: Senior patrol leader: leads the troop Assistant senior patrol leader: supports the senior patrol leader Troop guide: helps a patrol of young Scouts, much like a den chief helps a Cub Scout den Quartermaster: takes care of the troop s equipment Scribe: takes care of the troop s records Instructor: teaches skills Patrol leader: leads a patrol Assistant patrol leader: assists the patrol leader Scoutmaster: coaches the senior patrol leader and other youth leaders Assistant Scoutmaster: supports the Scoutmaster

19 If you get a chance at the troop meeting, ask some youth and adult leaders what they do. Be on the lookout for other badges of office, and find out about those leadership roles, too. How Boy Scout Advancement Works

20 There are four steps of advancement in Boy Scouting: You learn. You learn. You are tested. You are reviewed. You are recognized. Learning and practicing skills that lead to advancement happens all the time in a Boy Scout troop. All the skills you need to learn are outlined in the Boy Scout Handbook, so you can start learning them on your own. You can also learn new skills at every troop meeting, working on your own or with your patrol, and you can practice those skills daily and on every outing. You are tested. Once you feel you have learned an advancement requirement, you must demonstrate to a leader that you have mastered that skill. That leader might be an assistant Scoutmaster, the troop guide assigned to your patrol, the instructor, or even your patrol leader. After testing you, that leader signs off on the requirement in your book.

21 When you get your copy of the Boy Scout Handbook, it will be your personal record of your advancement. It is your responsibility to ask for and obtain the necessary signoffs when you are tested and to keep your handbook in good shape. If there is ever any question about your achieving a requirement, your handbook is the official record. So don t lose it! THE SCOUTMASTER CONFERENCE One requirement for every Boy Scout rank is the Scoutmaster conference. During this visit with your Scoutmaster, you talk about your progress in Scouting and how things are going at home and at school. The Scoutmaster can help you set goals for your next rank and answer any questions you have about Scouting. If you re having problems, the Scoutmaster can help you figure out how to solve them. You can ask for a Scoutmaster conference any time you want one, and your Scoutmaster will make every effort to schedule it as soon as possible after your request maybe right then! You are reviewed. After you have completed all the requirements for a rank (described on page 194), you go before a board of review. This is a group of adults from the troop committee who talk with you about what you ve learned and double-check that you ve done all the requirements, but not re-test you. They will ask you how you are enjoying Scouting and what the troop can do to help you get more out of the program. They might even give you tips about completing the next rank. You are recognized. Now comes the fun part. Not long after you pass the board of review, you will receive your rank patch, which you can wear on the left pocket of your Boy Scout uniform shirt. Many troops will provide it to you the next week. Later, you ll be recognized again at a troop court of honor. This is a special awards ceremony the troop holds every three or four months. It s a big deal; parents, grandparents, brothers, sisters, and troop members attend.


22 Ranks The first rank you ll earn as a Boy Scout is the Scout rank, which you earn by completing the Boy Scout joining requirements. As you complete this adventure, you will be learning all of the requirements for earning your Scout rank. After earning the Scout rank, you work through six other ranks: Tenderfoot, Second Class, First Class, Star, Life, and Eagle Scout. Only about five in every 100 Scouts become Eagle Scouts, so it s a really big deal! To become an Eagle Scout, you have to:

23 Master basic skills in camping, first aid, nature study, and more Earn 21 merit badges Serve your troop as a leader Serve your community through service projects, including a big one you plan and lead yourself That s a lot of work, but you have your whole time as a Boy Scout to complete it. Many adults look back at earning their Eagle and realize that it set them on a path for success in life. You may find a lifelong hobby or career from your work toward earning your Eagle Scout Award. In Cub Scouting, you ve worked on most of your advancement requirements together as a den. In Boy Scouting, you work at your own pace, especially after the first year. Some Scouts earn the Eagle Scout Award earlier than others, but it must be earned by the Scout s 18th birthday. The choice is yours. Merit Badges Merit badges are awards you can earn as a Boy Scout for learning about a specific topic. There are more than 130 different merit badges, but most Scouts earn maybe 20 or 30. Once you become a First Class Scout, you must earn merit badges to advance in rank.

24 Here are some examples: Scout skills merit badges: Camping, First Aid, Hiking Sports merit badges: Cycling, Skiing, Whitewater Hobby merit badges: Chess, Game Design, Geocaching Career merit badges: Fire Safety, Medicine, Programming Personal growth merit badges: Personal Fitness, Personal Management, Scholarship Citizenship merit badges: Citizenship in the World, Crime Prevention, Sustainability To earn a merit badge, you meet with an adult expert in the field and work through a set of requirements. Depending on the badge, you might get to tour a factory, fly in an airplane, or go on an adventure. Along the way, you might discover a hobby or career you can pursue for your whole life. To advance in rank beyond First Class, you have to earn a certain number of merit badges. For the Eagle Scout rank, you must earn a total of 21 merit badges: 13 from a list of Eagle-required merit badges and nine that you choose yourself. Some Scouts actually earn all the merit badges! Merit badges are worn on a merit badge sash, which is worn on special occasions. REQUIREMENT 3 Practice the patrol method in your den for one month by doing the following: A. Explain the patrol method. Describe the types of patrols that might be part of a Boy Scout troop. B. Hold an election to choose the patrol leader. C. Develop a patrol name and emblem (if your den does not already have one), as well as a patrol flag and yell. Explain how a patrol name, emblem, flag, and yell create patrol spirit. D. As a patrol, make plans to participate in a Boy Scout troop s campout or other outdoor activity.

25 Your patrol is the basic team you will work with as a Boy Scout. Your patrol will work together, cook together, camp and hike together, and celebrate successes together. In fact, many patrols stay together from the time they join Boy Scouting until the members get too old to be in the troop any longer. Your patrol will select its own name, make its own flag, come up with its own yell, and elect its own leader. That leader, the patrol leader, represents the patrol to a group called the patrol leaders council (PLC). This is the group that plans the troop meetings and outings. If your patrol wants to learn about geocaching, for example, your patrol leader will take that idea to the PLC, which will vote on it. Your patrol can also plan its own activities. Sometimes, these will be part of a bigger troop outing, like a day hike during a weekend campout. Sometimes, they will be just for your patrol. A well-functioning patrol is what makes a Boy Scout troop work. PATROL SPIRIT Patrol spirit is the glue that holds the patrol together and keeps it going. Your patrol will develop spirit as you enjoy experiences together. Your name, flag, and yell help give your patrol a unique identify. Patrol name. Every patrol needs a good name, one that really describes what the patrol is all about. If your members like to swim, you might become the Sharks. If you re all into science fiction, you might become the Alien Patrol. Patrol flag. Your flag is your trademark. It shows your patrol name, emblem, troop number, and the names of your members. As you win competitions, you can hang ribbons from it as reminders of your accomplishments. Patrol yell. Your yell lets other patrols know you ve arrived. It should be short and snappy and reflect your patrols goals. Some patrols also have a patrol song. It s easy to make one up if you use a melody that everyone already knows.
26

27 Types of Patrols A Boy Scout troop can have different kinds of patrols, depending on how it s organized. Some troops will have one of each kind of patrol; some troops will have several. New-Scout Patrol A new-scout patrol is for Scouts who have just joined the troop. An older Scout called a troop guide works with the Scouts. An assistant Scoutmaster supports the troop guide. Scouts usually stay in a new-scout patrol for their first year in the troop or until they reach First Class rank, whichever comes first. Sometimes, a new-scout patrol will stay together as a traditional patrol for the rest of their time in Scouting. Traditional Patrol A traditional patrol includes Scouts who have similar interests and abilities and who like to spend time together. If the troop has new-scout patrols, members of traditional patrols will usually be at least First Class in rank. REQUIREMENT 4 With your Webelos den leader, parent, or guardian, participate in a Boy Scout troop s campout or other outdoor activity. Use the patrol method while on the outing. The real fun of Boy Scouting happens when the troop leaves its meeting place and heads out there. For this requirement, your den gets to tag along and participate in a troop s activity. During the activity, think about these questions: How did the Boy Scouts in charge of the activity show leadership?

28 How did the activity help the Boy Scouts who participated advance in rank? What was the most fun thing you did? When you visit the members of a troop, ask what some of their favorite campouts were. Most have probably been to summer camp, and some may have gone on a high-adventure trip. When you see one of the patches or logos shown here on an older Scout s uniform, you ll know he s been on a very special trip. Ask him about it! REQUIREMENT 5 Do the following: A. Show how to tie a square knot, two half hitches, and a taut-line hitch. Explain how each knot is used. B. Show the proper care of a rope by learning how to whip and fuse the ends of different kinds of rope. Square Knot The square knot has many uses, from securing packages and the sails of ships to tying the ends of bandages. It is called a joining knot because it joins together two ropes and because it is the knot you learn when you become a Boy Scout. You may also recognize it as part of the World Crest badge that you already wear on your uniform. 1. Hold a rope end in each hand. 2. Pass the right end over and under the rope in your left hand. 3. Pass the rope end now in your left hand over and under the one now in your right hand. 4. Pull the knot snug. Remember right over left, left over right. If you go right over left and then right over left again, you ll end up with a granny knot, which is not very secure.

29 Two Half Hitches A hitch is a knot that ties a rope to something. Use two half hitches when you want to tie a rope (called a guy line) to a tent or dining fly. The knot will slide down easily to secure the rope. 1. Pass the end of the rope through the grommet or around the post. 2. Bring the end over and under the body of the rope (known as the standing part), then back through


30 the loop that has formed. This makes a half hitch. 3. Take the end around the standing part a second time, and tie another half hitch. 4. Pull the knot snug. Taut-Line Hitch A taut-line hitch is similar to two half hitches, but it creates a loop that doesn t slide. Use it to attach the guy line on your tent or dining fly to a stake in the ground. You can easily adjust it to tighten the rope. (Taut is another word for tight.) 1. Pass the end of the rope around the tent stake. 2. Bring the end under and over the standing part of the line to form a loop, then twice through the loop. 3. Again bring the rope end under, over, and through a loop, but this time farther up the standing part. 4. Work any slack out of the knot. 5. Slide the hitch to tighten or loosen the rope. Whipping and Fusing Rope As you use rope, the ends can become frayed. To make the ends more durable, you can whip them if the rope is made of natural fibers like sisal, or fuse them if they are made out of synthetic material like nylon.


31 Whipping Rope Cut off the part of the rope that is already unraveled. Cut a piece of strong string, dental floss, or thin twine at least 8 to 10 inches long. Make a bight, or loop, and place it on one end of the rope. Wrap the string tightly around the rope several times. When the whipping is as wide as the rope is thick, slip the end through the loop. Then pull both string ends hard, and cut them off. Fusing Rope Rope and cord made from plastic or nylon will melt when exposed to high heat. Cut away the frayed part of the rope. Then, working in a well-ventilated area, hold each end a few inches above a lighted match or candle to melt and fuse the strands together. Melted rope is hot and sticky, so don t touch the end until it is completely cool. REQUIREMENT 6 Demonstrate your knowledge of the pocketknife safety rules and the pocketknife pledge. If you have not already done so, earn your Whittling Chip card. A pocketknife is a useful tool to take along on Scout outings. Like any tool, you must follow certain safety rules. Otherwise, you can damage your pocketknife and hurt yourself or other people. The Whittling Chip The Whittling Chip is a special card that gives you permission to use a pocketknife.


32 You can earn it by doing these things: 1. Know the safety rules for handling a knife. 2. Show that you know how to take care of and use a pocketknife. 3. Make a carving with a pocketknife. Work with your den leader or other adult when doing this. 4. Read, understand, and promise to abide by the Knives Are Not Toys guidelines. 5. Read, understand, and promise to abide by the Pocketknife Pledge. Later, when you become a Boy Scout, you can earn the Totin Chip. It is similar to the Whittling Chip, but it also gives you permission to use axes and saws. Safety Rules A knife is a tool, not a toy. Know how to sharpen a knife. A sharp knife is safer because it is less likely to slip and cut you. Keep the blade clean. Never carry an open pocketknife.
33 When you are not using your knife, close it and put it away. Keep your knife dry. When you are using the cutting blade, do not try to make big shavings or chips. Easy does it. Make a safety circle: Before you pick up your knife to use it, stretch your arm out and turn in a circle. If you can t touch anyone else, it is safe to use your knife. Knives Are Not Toys Close the blade with the palm of your hand. Never use a knife on something that will dull or break it. Be careful that you do not cut yourself or any person nearby. Never use a knife to strip the bark from a tree. Do not carve your initials into anything that does not belong to you. POCKETKNIFE PLEDGE In return for the privilege of carrying a pocketknife to designated Cub Scout functions, I agree to the following: I will treat my pocketknife with the respect due a useful tool. I will always close my pocketknife and put it away when not in use. I will not use my pocketknife when it might injure someone near me. I promise never to throw my pocketknife for any reason. I will use my pocketknife in a safe manner at all times. Signature
34 Webelos and Arrow of Light Elective Adventures

35
36
37 Snapshot of Adventure Science is all about asking questions like What is it? How does it work? and How did it come to be that way? In Adventures in Science, you will discover how scientists answer those questions and what we can learn as we try to answer our own questions. Best of all, you ll get to do what real scientists do: design and perform experiments. Along the way, you ll learn about physics, chemistry, astronomy, plant science, and more. So grab your notebook, and let s get started!
38 REQUIREMENT

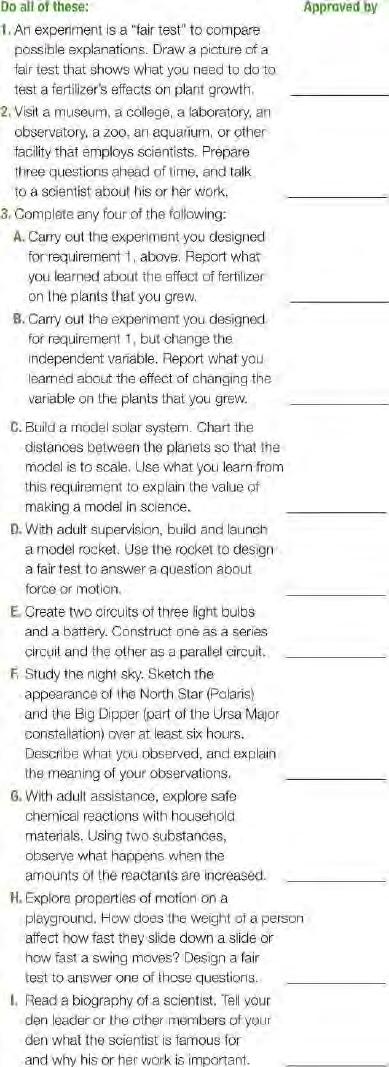
39 REQUIREMENT 1 An experiment is a fair test to compare possible explanations. Draw a picture of a fair test that shows what you need to do to test a fertilizer s effects on plant growth. Imagine that you re a medical researcher who wants to test three new medicines to see which one helps people who have a cold feel better. If you gave a sick person all three medicines and he got well, how would you know which medicine worked? You wouldn t! But what if you started with three sick people and gave each one a different medicine? Then you would know which medicine (or medicines) worked. When a scientist asks a question, he or she comes up with a fair test to answer that question. This is called an experiment. An experiment is designed to rule out possible explanations and, as much as possible, test only a single explanation. In an experiment, scientists look at three things: What they will change called the independent variable What they will keep the same called the control variable, or control What difference they are looking for called the dependent variable In the medicine experiment, the independent variable is which medicine each person takes. The control is the fact that each person has a cold. The dependent variable is whether or not each person gets well. For this requirement, you will draw a picture of an experiment to test fertilizers. First, think about what independent variables, controls, and dependent variables your experiment would use. A scientist might start by creating a chart like the one below to help figure out what the important parts of the experiment could be. One of the biggest challenges in creating a fair test is to figure out what to keep the same, what to change, and how to find out if a meaningful result occurs. Measuring the Impact of Fertilizer


40 What would you add to the list of controls? What are some other ways to see whether the fertilizer made a difference? Measuring how tall the plant grows might not be the only dependent variable you could test for. Draw a picture of your own fair test to compare fertilizers and label your drawing with all the variables that you would want to keep track of in your experiment. You might draw this as a comic strip to show the steps in your test and the changes over time. REQUIREMENT 2 Visit a museum, a college, a laboratory, an observatory, a zoo, an aquarium, or other facility that employs scientists. Prepare three questions ahead of time, and talk to a scientist about his or her work. Scientists work in many different places. When you visit a scientist in one of those places, you can better understand what he or she does and the tools he or she uses every day. Just like you plan your investigations, you should plan your visit to a scientist. What would you like to learn? Write down your questions in your field notebook ahead of time.


41 Before your visit, try to guess how the scientist might answer your questions. Afterward, see how his or her answers compare with your guesses. REQUIREMENT 3 Complete any four of the following:

42 REQUIREMENT 3A Carry out the experiment you designed for requirement 1, above. Report what you learned about the effect of fertilizer on the plants that you grew. An important part of designing a fair test is deciding ahead of time what you expect the result to be. For your fair test, that means making a prediction about how the fertilizer will influence the way the plant grows. Write your prediction in your field notebook, and then carry out the experiment. After the experiment ends, compare your prediction with what you actually observed. Did the plant grow as tall as you predicted? Did the plants grow in ways that you were not able to predict? How can you explain this result? Draw a picture of what happened, and make a note in your field notebook about what you would like to do to learn more. REQUIREMENT 3B Carry out the experiment you designed for requirement 1, but change the independent variable. Report what you learned about the effect of changing the variable on the plants that you grew. There are lots of different ways to carry out an investigation using the same materials and variables. Here are some other independent variables you could test in the plant experiment: Potting soil vs. sand

43 Six hours of light per day vs. 24 hours of light per day Colored light vs. white light Fresh water vs. salty water 100 ml of water per day vs. 1,000 ml of water per day Design another fair test and write down what you predict will happen. Remember to use only one independent variable in your experiment. Now, carry out the new experiment. What did you find out? Did the result match your prediction? If not, how was it different? Draw a picture of what happened, and make a note in your field notebook about what you would like to do to learn more. The more you carry out experiments like this, the more you will learn about the subject you are studying. For example, over time you might learn that a combination of factors say, fertilizer plus plenty of sunlight helps plants grow better than fertilizer alone. Or you might learn that a certain fertilizer works better on flowers than on vegetables. Scientists also like to repeat the same experiments over and over. They even publish the details of their experiments so other scientists can reproduce them. Getting the same results many times proves that the results are accurate and not caused by some random event, like worms in the soil affecting plant growth. REQUIREMENT 3C Build a model solar system. Chart the distances between the planets so that the model is to scale. Use what you learn from this requirement to explain the value of making a model in science. Our solar system is really, really big. It takes Earth one year to travel around the sun, but it takes Neptune, which is way out at the edge of the solar system, 165 years. Light travels at a speed of 238,000 miles every second, but it takes light from the sun more than seven minutes to reach Earth, which is 93 million miles away. Yes, the solar system is huge! For this requirement, your challenge is to build a model solar system that has the same scale as the actual solar system. In other words, the relative distances between the planets in your model will be the same as they are between the real planets.

44 This chart shows each planet s approximate distance from the sun, along with scale distances in both inches and centimeters. It also shows Proxima Centauri, the nearest star to the sun. To get started, make a series of signs, one for the sun and one for each planet. Label the signs and add pictures if you want to. Write on the planet signs how far away from the sun each one is. Now, decide whether you will use inches or centimeters in your model. An inch is more than twice as long as a centimeter, so the scale model in inches would be larger than the scale model in centimeters. Will the sun and all of the planets fit in your home if you make the model in inches? What if you make it in centimeters? Get out a ruler and test your prediction. Unless you live in an aircraft hangar, the model organized in inches won t fit in your home. The distance from the sun to Neptune is more than 230 feet that s two-thirds of a football field! You will need to make your model solar system outside.

45 Use a measuring tape and an open space to lay out your model solar system. A school yard or a park would be a good spot if you have permission to build your model there. You will need a friend to help you lay out your solar system. In fact, this would be a fun project to do with your whole den. Every Webelos Scout could pick a planet and make his own sign. In your field notebook, write down answers to these questions: What is the value of making a model for things that are so big, such as the solar system? How can models be useful in science? REQUIREMENT 3D With adult supervision, build and launch a model rocket. Use the rocket to design a fair test to answer a question about force or motion. Building a model rocket is a great project to do with your den or with an adult. Rockets are lots of fun, and they are also a great tool for investigating ideas related to force and movement. As you did earlier, use the chart below to help you design a fair test to answer some questions about force and motion. Add anything else to this list that you believe is important.


46 Testing the Effect of Weight on a Rocket s Flight Part of being a scientist is being creative. Your rocket may fly hundreds of feet into the air. How can you measure how high it flies? Talk with friends in your den or your adult partner about how to measure the rocket s maximum height. You might want to explore some other properties of a model rocket. Can you launch a raw egg and return it uncracked to the earth? Can you consistently predict where the rocket will land? What other experiments could you come up with to extend your knowledge of force and motion? REQUIREMENT 3E Create two circuits of three light bulbs and a battery. Construct one as a series circuit and the other as a parallel circuit. How long does a battery last? If you ve been on a campout and had a flashlight that didn t light up, you know that battery life can be a big problem. In this investigation, you will explore possible connections between the way an electrical circuit is put together and how long a battery will last. An electrical circuit is like a big circle. The electricity comes out of the power source (the battery in this case), goes through the output device (the bulbs in this case), and cycles back to the power source. If you break the circuit, the electricity stops flowing.


47 When you have more than one output device, you can create two types of circuits: series and parallel. In a series circuit, the electricity goes through each of the output devices in turn. In a parallel circuit, the electricity follows separate paths through each output device. The pictures on this page show the difference. Here is a chart of possible variables and controls. Add anything else to this list that you believe is important. Measuring Battery Life in Different Circuit Types To carry out this investigation, you will need flashlight bulbs, wire, several batteries, and a watch to time the life of the battery. Set up one series circuit and one parallel circuit using a battery and three bulbs. You can find bases for bulbs and batteries at some hardware and technology stores; your science teacher may also have some materials that you can borrow. The bases are handy to use, but you can simply fasten the wires to the batteries and bulbs with electrical or duct tape.

48 One of the challenges of this test is to figure out when the light bulbs go out. That will be your evidence that there is no longer enough energy in the battery to light the bulb. You will need to think creatively about how to measure when the light goes out. After your investigation, think about these questions: In which circuit did the battery last longer? Is there a connection between the type of circuit and how long the battery works? What other differences do you observe? Is there a connection between the brightness of the bulbs and the way the circuit is hooked up? What other questions can you ask about the circuits you built? If you end up with more questions in your field notebook than when you started, you are on track to being a talented scientist. More questions lead to more future adventures in science! REQUIREMENT 3F Study the night sky. Sketch the appearance of the North Star (Polaris) and the Big Dipper (part of the Ursa Major constellation) over at least six hours. Describe what you observed and explain the meaning of your observations. Making observations of the world around you is an important part of science. The things you observe help you form important questions and start to make predictions. Your predictions, whether or not they are correct, are important steps in helping you explain why things happen the way they do. The stars and constellations of the northern hemisphere can help you understand changes in the night sky. For this investigation, sketch the appearance of the North Star and the Big Dipper, which is part of the Ursa Major constellation, over at least six hours. You will want to do this on a clear weekend night,

49 when you can stay up late with your family s permission. (This would be a great activity to do on a Webelos den campout.) As early in the evening as possible, make a sketch of the night sky. Draw it as precisely as you can, so that you can see which way the pointer stars on the side of the Big Dipper are oriented. Return in three hours and make another sketch. Try to be precise as before, so that you can accurately record any motion that you observe. Return three hours later and record what you see. You might have to wake yourself up or get your parent to help. Again, make your sketch as accurate as possible. Compare your three sketches and think about these questions: What are some ways to explain what you observed? Which is the best explanation: that the earth is moving or that the stars are moving? How long will it take for the Big Dipper to return to where it was when you first recorded it? How could you use what you observed to tell time? What are the advantages and disadvantages of a star clock that uses a constellation?

50 REQUIREMENT 3G With adult assistance, explore safe chemical reactions with household materials. Using two substances, observe what happens when the amounts of the reactants are increased. Chemical changes are an important area in the science of chemistry. When some substances are combined, they create a new substance that is different from the ones you started with. Sometimes, chemical reactions create changes in color or temperature or produce gases.

51 Some chemical combinations, such as those involving household cleaners, can cause dangerous reactions. Check with a parent or guardian and consult a chemistry book before trying any experiments with household chemicals. One choice for this investigation is to combine two simple chemicals from your family s kitchen in a zip-top bag: baking soda and vinegar. Both have chemical formulas that can be used to describe them. Baking soda is called sodium bicarbonate (NaHCO 3 ); vinegar is a weak acid called acetic acid (C 2 H 4 O 2 ). When baking soda and vinegar are combined, a chemical reaction takes place and a gas is produced. Your challenge is to see if there are any patterns in how much gas is produced when baking soda and vinegar are combined in different proportions. For this and all other chemistry experiments, you should wear eye protection. Measuring the Gas Produced in a Chemical Reaction Here are the factors to consider in your investigation. Add anything else to this list that you believe is important. Think about these questions as you design your investigation: How can you combine the baking soda and vinegar in such a way that you capture all the gas that is produced? How can you accurately measure how much gas is produced? How can you make sure the bag you mix the chemicals in doesn t contain anything else that could affect the experiment? Can you use what you learned to make a prediction for how much a bag will expand with different combinations of baking soda and vinegar? If so, make a prediction and see how close your prediction comes to the actual expanded size of the bag.

52 REQUIREMENT 3H Explore properties of motion on a playground. How does the weight of a person affect how fast they slide down a slide or how fast a swing moves? Design a fair test to answer one of those questions. Does a heavier person slide faster? Does a lighter person swing faster? These are questions that you can answer using playground equipment and some friends or family members who weigh different amounts. Here are some factors to consider if you choose the slide investigation. Add anything else to this list that you believe is important. Measuring the Effect of Weight on Slide Time

53 Set up an experiment where you time how fast different people go down a slide. Decide when and where to start your timer. What timer will you use? Smartphones and digital watches usually have a stopwatch function. Consider these things as you plan your investigation: Before you do the investigation, create a chart to write down your data. This will help you think through the project in advance and ensure you record everything you need to make a good decision. Have everyone go down the slide several times and figure out an average for each person. Sitting on a towel can ensure that everyone touches the slide with the same kind of fabric. (If one person wore jeans and another wore slick pants, that would affect the results.) You could also use waxed paper from your kitchen. Be careful! Have a spotter at the bottom of the slide to keep people from hitting the ground. After your investigation, think about these questions: What did you learn? Did the weight of the person on the slide have a big effect on how fast he or she moved down the slide? Was there a pattern? Write down your conclusions in your field notebook. If you can think of better ways to do the experiment or if new questions come up, be sure to record them in your notebook as well. Here are some factors to consider if you choose the swing investigation. Add anything else to this list that you believe is important. Measuring the Effect of Weight on Swing Time

54 Consider these things as you plan your investigation: Before you do the investigation, create a chart to write down your data. This will help you think through the project in advance and ensure you record everything you need to make a good decision. Have everyone repeat the swing several times and figure out an average for each person. How do you make sure that everyone starts from the same point? How can you make sure everyone swings the same way? Because you are measuring the time for a swing, it will affect your findings if a person pumps his or her legs. Decide when and where to start your timer. What timer will you use? Smartphones and digital watches usually have a stopwatch function. After your investigation, think about these questions: What did you learn? Did the weight of the person on the swing have a big effect on the time for a single swing? Was there a pattern?


55 Write down your conclusions in your field notebook. If you can think of better ways to do the experiment or if new questions come up, be sure to record them in your notebook as well. A Scout is cheerful. When a science investigation doesn t work out as planned, focus on what you did learn and what you can try next. REQUIREMENT 3I Read a biography of a scientist. Tell your den leader or the other members of your den what the scientist is famous for and why his or her work is important. Reading stories about scientists and what they have accomplished can be inspiring. It may even start you on the road to your own great scientific adventures!


56 Here are some scientists you could learn about: Albert Einstein, physicist Galileo Galilei, astronomer George Washington Carver, botanist


57 Benjamin Franklin, researcher in many fields Marie Curie, physicist and chemist Paul Siple, weather researcher (and Eagle Scout)
 E.O.")
")

58 Peter Agre, biologist (and Eagle Scout) E.O. Wilson, biologist (and Eagle Scout) Guion S. Bluford Jr., astronaut (and Eagle Scout)


59 Luis W. Alvarez, physicist Lee Berger, archaeologist (and Eagle Scout) Michael Manyak, expedition medicine pioneer (and Eagle Scout)
60 Who Will Be the Scientists of Tomorrow? One day, you could become a NESA World Explorer. The National Eagle Scout Association started the program to reward Eagle Scouts who aspire to be explorers and field scientists. The Scouts who are chosen head off to the learning experience of a lifetime. Here are some recent Eagle Scout Explorers: Alex Overman Eagle Scout Argonaut C.B. Wren Eagle Scout Argonaut Tristan Bullard Eagle Scout Astronomer Alex Houston Antarctic Sustainability Eagle Scout
61
62

63 Snapshot of Adventure Swimming and boating are great exercise and a whole lot of fun. They re also the only way you can explore the 70 percent of the earth that is covered in water. In this adventure, you ll discover how to enjoy swimming and boating safely and how to respond to water emergencies. You ll also learn some skills that will help you have even more exciting adventures after you become a Boy Scout. So grab your swim trunks and your buddy tag, and let s hit the water!
64 REQUIREMENT

65 REQUIREMENT 1 State the safety precautions you need to take before doing any water activity. While swimming and boating are lots of fun, they do require you to follow safety rules and to be alert for danger. In Scouting, we have two sets of rules we follow to be safe in and on the water: Safe Swim Defense and Safety Afloat. The adults who lead aquatic activities must be trained in these rules. Discuss the rules with your leader or a parent or guardian, and explain how you will follow safety guidelines. A Scout is obedient. During any water activity, follow the rules so everyone can be safe and have fun in the water. Safe Swim Defense

66 Safe Swim Defense covers these eight points: 1. Supervision. A trained adult leads all swimming activities. 2. Physical Fitness. All participants submit a complete health history before swimming. 3. Safe Swim Area. Swimming only takes place in an area that is safe. 4. Lifeguards. At least two lifeguards and one rescuer for every 10 participants are on duty. 5. Lookout. Besides the lifeguards, someone monitors the swimmers at all times. 6. Ability Groups. All participants are classified as swimmers, beginners, or nonswimmers and stay in designated areas. 7. Buddy System. Each participant has a buddy. Buddies stay together, look out for each other, and get help if one of them needs assistance or goes missing. 8. Discipline. All participants know, understand, and follow the rules for the activity. Everyone obeys the activity s leader.


67 THE BUDDY SYSTEM One of the most important ways you can ensure a safe swim is to follow the buddy system. You will be paired with another Scout and should always stay with him. Keep an eye on him, and call for help if he needs it. Always check into and out of the swimming area together. Every 10 minutes or so, the lookout will call for a buddy check. As quickly as possible, get to your buddy and raise his hand. See if you can be the first buddy pair to do this! The buddy system is also a good idea when you are hiking, cooking, or doing any other activity! Safety Afloat Safety Afloat is similar to Safe Swim Defense, but it applies to boating. It covers these nine points: 1. Supervision. A trained adult leads all boating activities. In Cub Scouting, there must be one trained adult for every five participants. 2. Physical Fitness. All participants submit a complete health history before boating. 3. Swimming Ability. As a Cub Scout, you may participate in boating on lakes and ponds. If you are not classified as a swimmer, you may operate a rowboat or pedal boat with a buddy who is a swimmer or ride in a canoe or other paddle craft with an adult who is a swimmer.

68 4. Life Jackets. All participants must wear properly fitted U.S. Coast Guard-approved life jackets at all times. 5. Buddy System. Each participant has a buddy. Buddies stay together, look out for each other, and get help if one of them needs assistance or goes missing. 6. Know Your Boat. All participants must know how to safely operate the water craft they are using. 7. Planning. The adults in charge of the activity make plans for the activity, including checking the weather and being prepared if an emergency arises or equipment malfunctions. 8. Equipment. All watercraft are suitable for the activity. Life jackets and paddles are sized to the participants. Emergency equipment is ready for use. 9. Discipline. All participants know, understand, and follow the rules for the activity. Everyone obeys the activity s leader. REQUIREMENT 2 Recognize the purpose and the three classifications of swimming ability groups in Scouting. Just about anyone can have fun in the water, even people who can t swim. But it wouldn t be very smart for kids who can t swim to get into water over their heads, would it? To keep everybody safe in the water, Scouting puts everybody (both Scouts and adults) into three ability groups: Those who can swim well are called swimmers. They can go into water up to 12 feet deep. Those who can swim a little are called beginners. They can go into water where they can stand up to just over their heads. Those who can t swim yet are called nonswimmers. They can go into water up to chest-deep. In swimming pools and lakes at Scout camps, ropes or piers separate the swimmer, beginner, and nonswimmer areas so everybody knows where they can swim and play safely.

69 BUDDY TAGS After you take your swim test, you will receive a buddy tag with your name on it. If you are a swimmer, the red and blue parts will be colored in. If you are a beginner, the red part will be colored in. If you are a nonswimmer, nothing will be colored in until you learn some skills and become a beginner or swimmer! REQUIREMENT 3 Discuss the importance of learning the skills you need to know before going boating. Before you start boating, there are some important things you should know: Always put on a life jacket before getting into the boat. Life jackets are required for all boating activities in Scouting. Step into the center of the boat when boarding or changing seats, and always stay low. Some boats, like canoes, can easily tip over if you are not careful. Balance your load. Divide weight evenly from side to side and from the bow (front) to the stern (back). Don t overload a boat. In a rowboat, one person per seat is a good rule. If your boat tips over or fills with water, hang on. Even a boat filled with water can still float. You can kick the boat to shore or drift in. Watch the weather, and stay on shore if there s bad weather nearby. If you re on the water and the weather gets bad, head for shore immediately. If you re caught on the water in bad weather, seat your passengers on the floor of the boat. Have everyone sit as low as possible. Head your boat into the waves. Sharp turns are dangerous, so take it easy. Keep a lookout for other boaters and for swimmers.

70 Rowing Strokes When you row, you actually face the back of the boat. (Your buddy can help you steer.) Hold the oar handles firmly with your knuckles up and wrists and arms straight. Bend forward a little bit. Each stroke has four parts: Catch. Lower the oar blades edgewise into the water behind you, not too deep. Pull. Lean backward, pulling on the oars and bending your arms until your elbows come in against your ribs. Feather. Lift the oars slightly out of the water, and turn your knuckles up toward your face so the blades are flat above the water s surface. Recover. Bend forward, and straighten your wrists and arms, ready to begin another stroke.

71
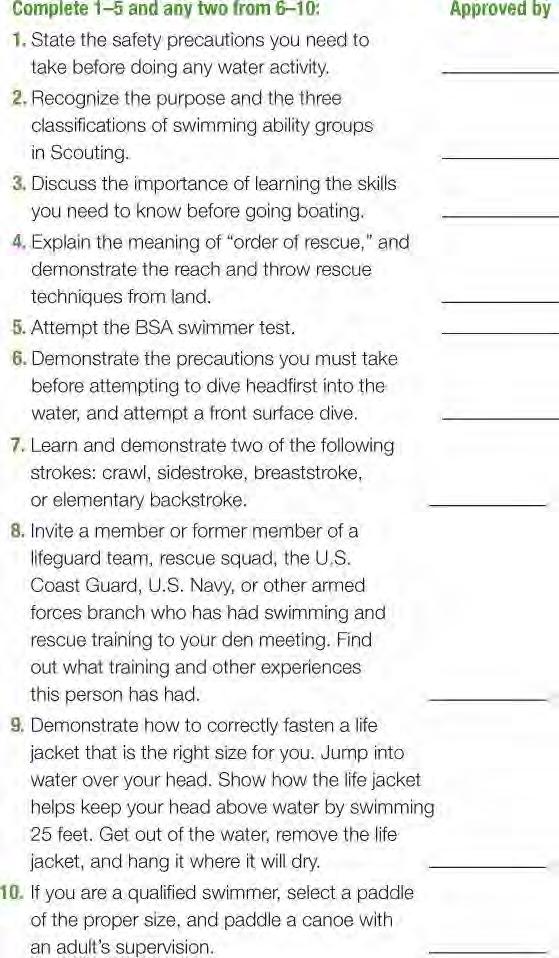
72 To do the backstroke, push on the oars instead of pulling. To turn, pull on one oar while you push on the other. Canoeing Strokes With canoeing, both people in the canoe paddle, usually on opposite sides and stroking at the same time. The person in the back steers and gives direction. The person in the front adds power and helps the canoe go straight. Hold the paddle firmly with both hands one hand on the top of the handle and the other hand just above the throat (where the paddle starts to get wide). Bend forward a little, and let your upper body rotate as you paddle. The forward stroke has four parts: Catch. Lower the paddle blade edgewise into the water in front of you, not too deep. Power. Pull backward to your hip, keeping the paddle straight up and down. Feather. Lift the paddle slightly out of the water with the blade flat above the water s surface. Recover. Rotate the paddle forward, and straighten your wrists and arms, ready to begin another stroke.
73


74 To do the backstroke, push on the paddle instead of pulling. Use sweeps to turn a canoe. Reach out with the paddle and move it in a quarter circle, either forward or backward. Or use draw and pry strokes, pulling or pushing the paddle straight toward or away from the canoe. REQUIREMENT 4 Explain the meaning of order of rescue, and demonstrate the reach and throw rescue techniques from land. If a swimmer or boater gets in trouble, trained rescuers know how to perform a rescue. To be as effective as possible and to protect themselves from becoming secondary victims, rescuers follow the order of rescue, doing the following actions in order: Reach for the victim with whatever is available a hand or foot, a tree branch, a canoe paddle, or a towel. Pools and waterfront areas usually have reach poles at least 10 feet long. Throw or toss a line, buoy, or floating object (like a kickboard or even a drink cooler) to the victim to provide support. If the object is tied to a rope, the rescuer can pull the victim to safety. A trained rescuer can easily toss a ring buoy 25 feet or more. Row means to use a boat (usually a rowboat) to go to the victim. The rescuer can then reach the victim and have him or her hold onto the back of the boat while the rescuer rows to safety. A rowing rescue should only be made by a trained rescuer who can handle a boat and is wearing a life jacket.

75 Go with support means to swim to the victim with a float, life jacket, or other support device. This is the most dangerous type of rescue and should only be attempted by a trained rescuer. As a Webelos Scout, you are not expected to do the rescue work of a trained adult. However, you can perform a reach or throw rescue from shore or from a dock even if you don t know how to swim. If someone falls in the water and no one else is around, you could save the person s life! If you see someone in danger, first call for help from an adult. If no adult is present, you can try a reach or throw rescue. For this requirement, practice reach and throw rescues. You could do this in a pool or lake, but you could also do it on shore. Here are some tips to make your rescues more effective: Reach rescues Lie down on the shore or pier so you are more stable and are closer to the victim s level. Be sure to anchor yourself so you don t get pulled into the water. You could hold onto a ladder or post or have a friend stand behind you and hold onto you. If you are using a reach pole, sweep it under the victim s arm from the side rather than poking at the victim straight on. Throw rescues Don t throw a ring buoy or float directly at your victim; you don t want to bonk him or her on the head! If the object you re throwing is attached to a rope, throw it past the victim so the line falls across his or her shoulder. You can then reel it in so it s easy to grasp. If you are throwing a rope (whether it s attached to an object or not), tie one end loosely around your wrist with a bowline so you won t accidently let it go.

76 In any water rescue, never put yourself in danger or at risk. If reaching and throwing don t work, get help! REQUIREMENT 5 Attempt the BSA swimmer test. If you are a swimmer, you will have more fun in the water and be safer, too. You will also be able to participate in more boating activities, like canoeing, kayaking, motorboating, and whitewater, when you become a Boy Scout. To become a swimmer, you must pass this test: Jump feetfirst into water that s over your head in depth. Level off and swim 100 yards in one swim (without stops and including at least one sharp turn). The first 75 yards must be done in a strong manner using one or more of the following strokes: sidestroke, breaststroke, trudgen, or crawl; the last 25 yards must be done using an easy resting backstroke. After completing the swim, rest by floating.

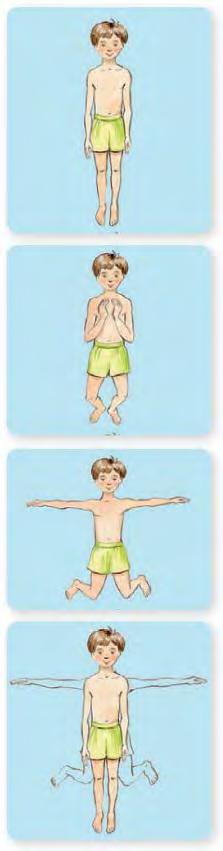
77 REQUIREMENT 6 Demonstrate the precautions you must take before attempting to dive headfirst into the water, and attempt a front surface dive. Diving is a fun way to go deep underwater so you can explore the bottom of a lake or pool. It s also an important skill for trained rescuers. However, diving can be dangerous if you don t know how deep the water is or what s beneath a cloudy surface. Always ask the lifeguard or adult in charge of a swimming activity whether it s OK to dive. Never dive in places where it s not allowed, including the shallow end of a pool. A front surface dive is a dive that starts when you re already in the water. Here s how to do this dive: Float face down with your arms out ahead of you. Sweep your arms back toward your hips. At the same time, bend forward sharply at the hips. Aim the top part of your body toward the bottom of the pool or lake.


78 Turn your palms down, and push them toward the bottom. Raise your legs above the surface as high as you can. Your head will now be pointing downward, and the weight of your legs above the water will drive you down. While you re underwater, try swimming a few strokes before you return to the surface. REQUIREMENT 7 Learn and demonstrate two of the following strokes: crawl, sidestroke, breaststroke, or elementary backstroke.

79 There are many different swimming strokes you can use. Some help you go very fast but also require a lot of energy. Others are so easy and relaxing that you could use them to swim a whole mile. Here are four strokes you should know: Crawl Float face down in the water with your arms and legs stretched out. Move your legs up and down. Press down on the water with the top of your foot. This is called a flutter kick. While still kicking, pull downward with your left arm. Breathe out through your nose and mouth while your face is in the water. As your left-arm stroke ends, begin a stroke with your right arm. Raise your face by turning your head to the right so you can breathe in through your mouth.

80 Reach ahead again with your right arm. At the end of the right-arm stroke, begin a new one with the left arm. Turn your face under water again to breathe out. Keep repeating the arm and leg motions, making them as smooth and even as possible. Sidestroke Lie on your side with one ear in the water. Stretch your bottom arm out ahead of you. Your top arm is at your side, along your leg. Start with your feet together, and then bend your knees, pulling your heels toward your hips. Cup your reaching hand a little. Sweep it down in front of your chest. Move your feet apart by moving your top leg forward and your bottom leg backward.
81 Notice the hand and arm movement. As your lower hand sweeps water toward your feet, your upper hand moves toward your chest. They nearly meet. When your legs are as far apart as possible, snap them together quickly the way you close a pair of scissors. Your upper hand sweeps water toward your feet. Your lower hand reaches out ahead of you, returning to its starting position. Stop your feet as they come together. Repeat the arm and leg movements.

82
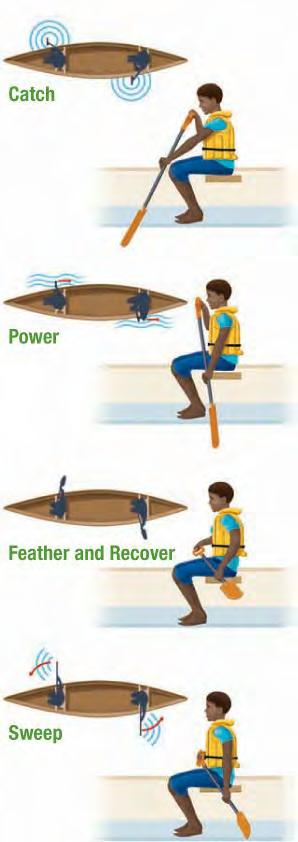
83 Breaststroke Float face down in the water with your arms and legs stretched out. Spread your arms out so they are diagonal from your body. Your elbows should be straight, and your palms should be facing slightly out. Pull your elbows toward your sides and then bring your hands together in front of your chest as if you re trying to scoop the water toward you. Quickly push your hands back to where they started. (Your hands should trace the shape of an upside-down heart.) As you start the arm stroke, bend your knees so your heels are close to your hips and your ankles are spread out. Make a quick circular motion outward and backward until your legs are fully extended. Just before you push your hands forward and your legs backward, lift your head and upper chest out of the water and take a breath. Glide for a second or two; then repeat the arm and leg movements.
84
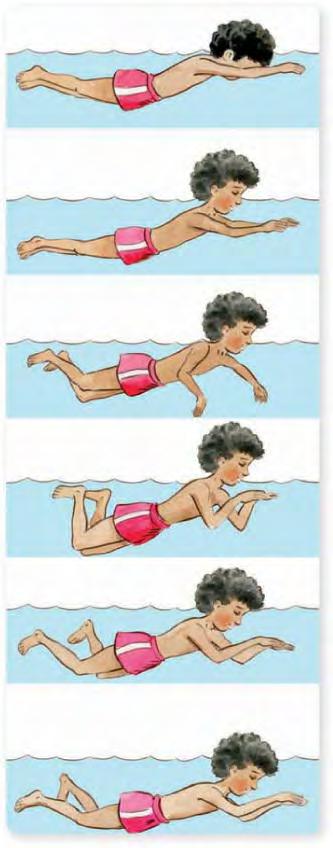
85 Elementary Backstroke Start by floating on your back, arms at your sides. Bring your cupped hands up over your chest to your shoulders. At the same time, drop your heels downward. They should be beneath your knees. Turn your toes outward and swing your feet outward in a circular motion without stopping. At the same time, reach your arms straight out. Then sweep them down to your sides as your legs come together in a straight-out position, with toes pointed. The arm pull and leg kick happen at the same time. You should end up the same way you were at the start, and then glide before the next stroke.
86

87 REQUIREMENT 8 Invite a member or former member of a lifeguard team, rescue squad, the U.S. Coast Guard, U.S. Navy, or other armed forces branch who has had swimming and rescue training to your den meeting. Find out what training and other experiences this person has had. Communities near large bodies of water have rescue squads that help swimmers or boaters who get into trouble. Rescue capabilities are also very important in the U.S. Coast Guard and U.S. Navy, America s maritime military services. In fact, the Coast Guard conducts dozens of search and rescue missions every day and saves thousands of people every year. Members of these groups undergo extensive training on rescuing people while keeping themselves safe. Depending on where they serve, they often have specialized training in swift-water rescue and extraction by helicopter. Your den leader can help you find a current or former member of a rescue squad or the military who has rescue training. When this person visits your den meeting, ask about his or her training and what sorts of rescues he or she has been involved with. Who knows? You might be inspired to join a rescue crew yourself when you get older. REQUIREMENT 9 Demonstrate how to correctly fasten a life jacket that is the right size for you. Jump into water over your head. Show how the life jacket helps keep your head above water by swimming 25 feet. Get out of the water, remove the life jacket, and hang it where it will dry. When you go boating, one of your most important pieces of equipment is a life jacket. In fact, life jackets were not worn in more than 80 percent of fatal boating accidents. A life jacket is designed to help you float if you fall in the water. The life jackets you are likely to find at Scout camp (Type II and Type III) will also help keep you in a face-up position.

88 For a life jacket to save your life, it must be the right size and must be worn snugly. If a friend can pull your life jacket over your head by tugging on the tops of the arm openings, it s too big, too loose, or both. In an emergency, there s no time to grab your life jacket and put it on, so don t stow it under your seat. Everyone who is engaged in Scout boating activities must wear a properly fitted U.S. Coast Guard approved life jacket at all times. REQUIREMENT 10 If you are a qualified swimmer, select a paddle of the proper size, and paddle a canoe with an adult s supervision. Canoeing is one of the most fun activities you can do on the water. As a Webelos Scout, you can paddle around lakes at district and council activities. Later, as a Boy Scout, you might get to canoe down rivers or explore the Boundary Waters Canoe Area Wilderness, part of the Northern Tier High Adventure program.

89 You ll have a lot more fun canoeing if your paddle is the right size. A good rule of thumb is to stand up and hold the paddle in front of you with the blade on the ground. If the grip is between your chin and your eyes, the paddle is probably about the right size. If the grip is only midway up your chest or is over your head, try another paddle.
90
91
92 Snapshot of Adventure Art is a powerful way to capture a moment in time, an idea, or an emotion. It s a lot of fun, too. You get to work with all sorts of gooey and gloppy materials, and you never have to worry about getting the right answer because everybody s art is different. Whether you re into drawing, painting, sculpture, computer illustration, or photography, you ll find something to love on this adventure.

93 REQUIREMENT


94 REQUIREMENT 1 Visit an art museum, gallery, or exhibit. Discuss with an adult the art you saw. What did you like? Art is everywhere! You might find posters, drawings, photographs, sculptures, and copies of famous paintings around your home, at school, on television, on the Internet, and at stores you visit. Many works of art have been turned into T-shirts, umbrellas, and greeting cards. But to really enjoy and appreciate art, it helps to visit places that are designed just for displaying it. An art museum, of course, is a museum that focuses on art. In a museum, works of art will be grouped by artist, theme, or when they were created; and signs will help you understand what you re seeing. An art gallery is similar to a museum except that the art is for sale. An art exhibit takes art out of the museum or


95 gallery into a place like a library or school so that more people can enjoy it. One thing you ll discover is that artists have produced very different styles of art at different times in history. Here are some styles you may encounter: Abstract art uses color and shape to express emotion. You won t see subjects that you can recognize, but you may be able to sense what the artist was feeling when he or she created the art. Expressionistic art also expresses feeling. Here, the subjects are recognizable, but certain features are emphasized, like the scariness of a thunderstorm. Impressionist art is designed to show the artist s first impressions of looking at the subject. Impressionist paintings often show outdoor scenes and focus on how light and color appear. Pop art uses everyday objects and bright colors to communicate ideas. Some pop art looks like comic strips or collages.


96 Realist art is designed to accurately record what the subject looks like almost like taking a photograph. Realism was more popular before photography was invented because there was no other way to record how something looked. Surrealist art is often based on dreams or nightmares. The subjects may look recognizable, but something about them will be strange sometimes very strange! REQUIREMENT 2 Create two self-portraits using two different techniques, such as drawing, painting, printmaking, sculpture, and computer illustration. A self-portrait is a reflection of you not just what you look like in a mirror but who you are, what you enjoy doing, what your favorite colors are, and how you think. For this requirement, think about some things that define you, and then create self-portraits using two different techniques. Ask yourself: How was the process different for each technique?

97 Which technique did you enjoy most? What parts were challenging? What parts of yourself did you capture best in the portrait? REQUIREMENT 3 Do two of the following: REQUIREMENT 3A Draw or paint an original picture outdoors, using the art materials of your choice. Drawing and painting are common ways to create art. You may have started drawing as soon as you could hold a crayon. Picking Your Subject To create a picture for this requirement, start by deciding what you want your picture to depict. Will it be your house? A scene in a nearby park? The playground at your school? (Be sure not to pick something like a dog that won t sit still!) Decide where your picture will begin and end. Hold your hands up to form a frame, and move them around until you ve enclosed just the parts of the scene you want to capture. Picking Your Materials


98 You can create your picture using several different materials: Pencil Ink (black and other colors) Crayon Marker (fine or broad-tipped) Paint With pencil and ink, a fairly smooth paper gives you clean lines. With crayons and markers, you can use either smooth or rougher-textured paper for different effects. Paint is a little harder to use, but it lets you create a huge variety of effects. Here are some good choices for paint that cleans up with soap and water: Watercolor paint comes as a set in a box. To use watercolor, you dab it with a wet brush. Watercolor paint won t hide a color you ve already painted, but it lets the white of the paper show through, adding light to the color. You can paint on drawing paper or special watercolor paper.

99 Tempera paint (poster color) is liquid and dries quickly. It comes in small bottles or large squeeze bottles. Use it on manila paper or heavy white drawing paper. With tempera and acrylic paint, you can paint over areas you want to change. Acrylic paint comes in large squeeze bottles or in tubes. Use acrylic paint on canvas board or heavy paper. A Scout is thrifty. Some art supplies can be expensive, so look for alternatives. Save more costly supplies for den projects, where the costs can be shared. For painting, you will need some other supplies: Brushes. Inexpensive brushes with synthetic bristles will work for tempera and acrylic paint. (For acrylic, you must have synthetic bristles because the paint will ruin natural-hair bristles.) Watercolor brushes are softer, and camel hair is the least expensive. It s helpful to have two sizes of brushes one for larger areas and one for detail. A mixing palette or tray. You can use a large plastic lid from a food container for tube acrylics. For tempera, school acrylics, and watercolor, which are runny, use several jar lids, or buy an inexpensive plastic paint tray with wells for colors.

100 A palette knife. You will need this flexible mixing tool if you are using tube acrylics. For other paints, mix colors with your brush. A sturdy water container. You will need to rinse paint from brushes before switching colors. Be sure to change the water often. A sponge. Use this to press excess water from your brush before dipping it in paint. Cleanup supplies. You ll need a rag for spills and soap and water to wash your brushes and other tools when you re done. Paint can be messy! Work at a table with a washable surface, or cover the table with layers of newspaper to protect it. When you stop working, promptly wash your brushes and tools with soap and water. Store brushes with the bristles up in a jar, can, or mug. Mixing Paint A fun thing about painting is mixing paints to create different colors. From just a few basic colors, you can create just about any color for your paintings. Look at the color wheel on this page. The primary colors are red, yellow, and blue. The secondary colors are orange, green, and violet. You can mix equal amounts of yellow and blue (primary colors) to make green (a secondary color). If you add more yellow, you will get a yellow-green; if you add more blue, you will get a blue-green.

101 To make a color lighter, add a small amount of white. To make it darker, add a little black. If you re not sure about a color you ve mixed, try it first on a piece of scrap paper. The more you paint, the more you ll learn about mixing colors. Art supply stores sell paints in many colors. After working with the primary colors, you may decide to buy a few other colors to see what they are like. Experiment! You can use a brush in many different ways. A wet brush makes a different pattern than a mostly dry brush. If you lay the brush flat, it will leave brush marks on your paper or canvas. If you touch just the tip to the paper, it will leave dots. You can also use tools other than brushes. A sponge dipped in paint adds texture. A string dragged through paint and pressed down on the paper or canvas leaves a line. Crumpled paper dipped in paper makes interesting patterns.

102 You can even mix different materials. For example, you could use crayons for the lines of a drawing and then brush on watercolor paint in some areas. REQUIREMENT 3B Use clay to sculpt a simple form. When you have a piece of clay in your hands, what happens? You squeeze it, twist it, pull it, roll it, and shape it. And before you know it, you are sculpting! What will you make? It could be the figure of a person or just his head and neck. It could be an animal or a fantastic creature no one has ever seen before. You could even sculpt your own design for a futuristic car. You decide.

103 Materials You can sculpt with several different materials: Tools Plasteline, a commercial modeling clay, is oily and plastic (which means you can shape it). It never dries out and is easy to work at room temperature. Plasteline costs more than natural clay, but you can save money in the long run because you can use it again and again. Natural clay comes from the earth. It can be worked easily when it s damp and is good for detail work. As it dries, it becomes stiffer. Because it does dry out, it must be kept covered when you are not working it; cover with a wet cloth or plastic bag. If the clay dries out too soon, you can soak it and knead it until it becomes soft again. Self-hardening clay is a prepared clay. It costs more than natural clay. It is easily worked as long as it is kept wet and soft. Once it dries, it becomes very hard and cannot be softened for reuse. Your best tools for working clay are your fingers, but sometimes other tools can come in handy. Try these: Dull kitchen knife for cutting clay Tongue depressor or craft stick for detail work and smoothing Homemade modeling tool


104 MODELING TOOL Make a modeling tool with a wooden dowel for a handle. Shape a hairpin or paper clip and attach it to the dowel by wrapping with thread. Coat the thread with model cement and let it dry. Making a Clay Animal A fun project to make is an animal like a dog or an elephant (or an animal that only exists in your mind). Here s how: 1. Find or sketch the animal you want to create. 2. Tear off a piece of clay and work it into the shape of the animal s body. Don t worry about making it perfect at this point. 3. Tear off small pieces of clay to form the legs. Work them into shape. Widen the ends to form feet. Again, your pieces don t have to be perfect yet.


105 4. Score the ends of the legs and the body where the parts will connect. To score the clay, make grooves with a knife or a toothpick dipped in water. This will help the parts stick together. 5. Attach the legs one at a time. Use your thumb or modeling tool to smooth the clay between the legs and the body. Check to see if the animal will stand on its own; if not, adjust the legs or widen the feet. 6. Repeat steps 3 through 5 to create the head and tail. 7. Repeat steps 3 through 5 to add ears and a nose or trunk to the head. 8. Adjust the sculpture so it looks the way you want it to. As you work, refer to your picture to make sure the animal s proportions are right. Keep working the clay until you re happy with the result.


106 9. With your knife or a needle, create the eyes, mouth, fur, and other features. If you are using clay that dries out, you will need to hollow out your animal s body so it doesn t crack. Turn the animal over, and use your modeling tool to remove much of the clay inside. Then, close the hole and smooth it over. REQUIREMENT 3C Create an object using clay that can be fired, baked in the oven, or airdried. In addition to using store-bought clay, you can create your own modeling clay. Ingredients: 4 cups of flour 1½ cups salt 2 tablespoons vegetable oil 1 cup warm water Food coloring (optional)

107 Directions: 1. Combine the flour and salt in a bowl. 2. Combine the oil and water in a second bowl. Add a few drops of food coloring if you want to make colored clay. 3. Stir the dry ingredients into the liquid ingredients. 4. Put the modeling clay on a floured surface. Knead until smooth. This clay will last a long time if you store it in an airtight container in the refrigerator. Once you ve made your creation, bake it at 200 degrees for 30 to 45 minutes or until it sounds hollow when you tap on it. After your sculpture cools, you can paint it and then cover it with clear shellac to protect it. REQUIREMENT 3D Create a freestanding sculpture or mobile using wood, metal, papiermâché, or found or recycled objects. Sculptures and mobiles are a fun way to put a lot of small objects together to make a work of art. You can use all sorts of objects you find around your house or make out of simple materials.

108 Freestanding Sculpture To make a freestanding sculpture, start by collecting odds and ends you d like to combine. These might include scrap items, things you ve saved, and things no one wants. Ideas include buttons, cloth, yarn, spools, craft sticks, toothpicks, bits of wood, string, plastic utensils, wire, chenille stems, old keys, bottle caps, egg cartons, pine cones, sticks, and seashells. Next, create a good base for your sculpture. This could be a flat piece of wood, a lump of clay that you mold into shape, or a piece of floral foam. If you use wood, have an adult help you drill holes the right size for any sticks or wires you want to use as the sculpture s supports. Finally, start building. Experiment with the placement of objects. Then, when you like how they look, tie or glue them into place. Mobile A mobile (MO-beel) is a hanging sculpture. It has many lightweight objects hanging from arms that move in the slightest breeze. To make a mobile, think of a design, create the parts, and balance them as you put your mobile together. What will your mobile represent? It could be about your favorite sport. It could have butterflies or imaginary insects flying from it. It could show stars, planets, and spaceships. It could include curious shapes that no one can identify. You get to decide. Draw a simple plan so you know how many hanging objects to make. They can be different sizes, but you will need to hang them so the mobile is balanced. Create the objects for your mobile out of cardboard, foil, thin wood, or any lightweight material. Make a hole in the top of each one and attach a piece of string, heavy thread, or thin, flexible wire to it. To make sure you put the hole in the right spot, which is called the balance point, first push a pin through the top of the object and hold the object by the pin so it can swing freely. If the object hangs crookedly, move the pin. Keep doing this until you find the balance point.


109 Now, make the arms for your mobile. Put on safety glasses to protect your eyes. Using wire cutters, cut pieces of coat hanger wire, one per object. They can range from 12 to 24 inches in length. Straighten each piece by hammering it or pressing it into a vise. Then, bend it into a smooth, gentle arc. With pliers, bend up about one-half inch from each end, making a right angle. Follow these steps to put your mobile together, starting from the bottom up: 1. Hang an object on each end of one wire arm. 2. Tie a thread or string to the center of the wire arm and slide it until the two objects balance. Make a loop at the other end of this thread. With flexible wire, make a small ring through this loop. 3. Slip the ring you just made over the end of a second wire arm. Fasten another object to the other end of this second wire. 4. Find the balance point of the second arm as you did for the first one by attaching a thread and sliding it. Again, make a thread loop at the other end of the thread, and add a wire ring to it.


110 5. Add the other wire arms and objects to the mobile. You may decide to move objects and rebalance arms. When you re happy with your mobile, bend the ends of the wire arms over to keep the objects in place. 6. Hang the mobile from the ceiling using fishing line or string.

111 REQUIREMENT 3E Make a display of origami or kirigami projects. Have you ever made a paper airplane? Have you ever made a snowflake by folding a piece of paper, snipping the sides with scissors, and then opening it up again? Then you have experienced the Japanese art forms called origami and kirigami. Origami is the art of folding paper to create sculptures. Kirigami is similar to origami but also involves cutting and gluing the paper. For this requirement, make several origami or kirigami projects such as the ones shown below and on the next page. Your parent, guardian, or den leader can help you find additional patterns on the Internet. ORIGAMI SAMURAI HELMET

112 KIRIGAMI STAR

113 REQUIREMENT 3F Use a computer illustration or painting program to create a work of art. Just about every computer comes with an illustration or painting program. You can also find drawing apps for smartphones and tablets.

114 Most of these programs include tools that mimic what artists have been doing for thousands of years. You ll find a paint brush tool to paint shapes, a paint bucket tool to fill a space with color, and an eraser tool to undo mistakes. Some programs also include fun features: brushes that paint in patterns or tools that can create rainbows of color. For this requirement, use a computer to create a work of art. You could start from scratch or modify a photo you ve taken. The choice is yours! REQUIREMENT 3G Create an original logo or design. Transfer the design onto a T-shirt, hat, or other object. Think about your favorite restaurant or sports team. Can you picture its logo in your head? What about your favorite computer program or smartphone app? Can you draw its icon from memory? Logos, icons, and other designs are important symbols of the products, places, or organizations they represent. That s why they are protected by trademark laws and can only be used with permission of their owners. For this requirement, create your own logo or design. It can represent you, your family, your Webelos den, or anything else you choose. Make it as eye-catching as possible, much like the logos and icons you see every day. Once you ve created your design, transfer it to a T-shirt, hat, or other object. One good way to do that is with iron-on transfer paper and an ink-jet printer. Simply print your computer image on the special paper and then have an adult help you iron it onto a T-shirt. You could also use silk screening, stenciling, or another method, if you prefer.

115 REQUIREMENT 3H Using a camera or other electronic device, take at least 10 photos of your family, a pet, or scenery. Use photo-editing software to crop, lighten or darken, and change some of the photos. Have you ever wondered why the photos you see in books and magazines look better than your family snapshots? One reason is that professional photographers use cameras that can be adjusted and have had a lot of practice! Another reason is that they use photo-editing software to improve the pictures they take. You can do the same thing. Most computers include simple photo-editing software, and photo-editing apps are available for smartphones and tablets. Here are some common tools to look for: Crop tool. This tool lets you remove parts of the photo you don t want. Brightness tool. This tool lets you make the overall photo lighter or darker. Contrast tool. This tool lets you separately adjust the difference between your photo s light and dark areas. Red-eye reduction tool. This tool fixes a problem where the camera flash makes a subject s eyes look bright red. Effects tools and filters. These tools add all sorts of special effects to your photo. Different tools can give your photo vibrant colors, make it look like a photo from a long time ago, or add a picture frame around it.

116 For this requirement, take at least 10 photos and change them using photo-editing software. Be sure to edit copies of your original photos in case you don t like the changes you make. REQUIREMENT 3I Create a comic strip with original characters. Include at least four panels to tell a story centered on one of the points of the Scout Law. Characters can be hand-drawn or computer-generated. Comic strips are a great way to tell stories. With just a few pictures and a little dialog, you can communicate a surprising amount of information and many ideas. For this requirement, create some original characters, and think of a story that involves one of the points of the Scout Law. Decide how to divide your story into panels, then create those panels on paper or on a computer.

117 REQUIREMENT 4 Choose one of the following methods to show your artwork: REQUIREMENT 4A Create a hard-copy or digital portfolio of your projects. Share it with your family and members of your den or pack. REQUIREMENT 4B Display your artwork in a pack, school, or community art show. Once you ve created some works of art, you will undoubtedly want to share them with other people. You can do that in many ways: You can create a hard-copy portfolio by taking photos of your creations and putting them in a

118 binder. You can create a digital portfolio by using software to turn photos of your creations into a slideshow or website. You can create an exhibit, similar to those you visited for requirement 1, at your school or at a pack meeting. You can enter pieces of art in a community art show or contest. As people look at your creations, watch their reactions, and ask them what they like and don t like. You can use their feedback to make even better works of art in the future.

119
120
121 Snapshot of Adventure Everyone has differences, and everyone faces challenges. That s what makes us human. In this adventure, you will learn about the challenges other people face by looking at the world through their eyes. The more you understand, the more helpful you can be and the more you can show your friends how to be nice to everyone, including people who are different. After all, we are all different in one way or another!
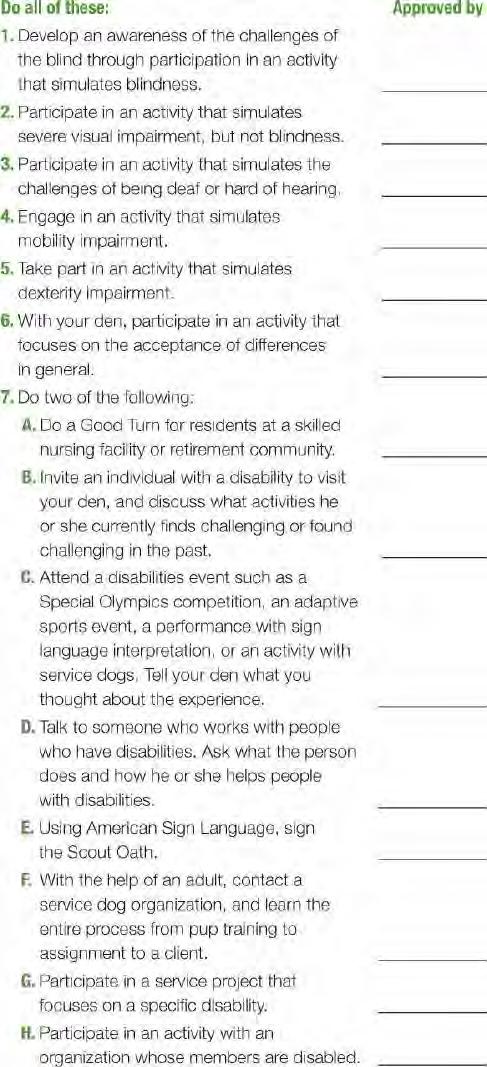
122 REQUIREMENT

123 REQUIREMENT 1 Develop an awareness of the challenges of the blind through participation in an activity that simulates blindness. Vision is the ability to see with your eyes. Blindness is a lack of vision. Some people are totally blind, meaning they can t see anything at all. Others have partial blindness. They might see things as vague shadows, for example, or not be able to see at all after dark. People who are totally blind must use their other senses to make up for their lack of vision. When a blind person crosses a street, he can t look and listen for cars like other people can; instead, he can only listen, which means he must listen very carefully. He also can t see the walk signs that sighted people rely on. That s why some communities have talking walk signs.

124 Many blind people use service dogs or canes to help them get around. They read books in Braille, which is a system that uses raised dots on the page to stand for letters, and they rely on computers that read Web pages out loud. They also rely on sighted friends to help them out from time to time, especially in unfamiliar surroundings. You can simulate what it s like to be blind by putting on a blindfold and walking around your home. (Have a friend or family member serve as a spotter so you don t hurt yourself.) Try this activity: Walk to your kitchen, fix a snack, sit down at the table, and eat. Were you successful? That s something blind people do every day. With your den or family, reflect on what you learned and how this activity made you feel. REQUIREMENT 2 Participate in an activity that simulates severe visual impairment, but not blindness. Sometimes vision can be corrected with glasses or contact lenses. If you don t wear glasses or contact lenses yourself, you surely know people who do. A good way to simulate partial blindness is to smear a thin layer of petroleum jelly on an old pair of safety glasses. You will be able to see through the glasses, but not very well. With the glasses on, try to put together a jigsaw puzzle or read the words on this page. With your den or family, reflect on what you learned and how this activity made you feel.

125 REQUIREMENT 3 Participate in an activity that simulates the challenges of being deaf or hard of hearing. Like visual impairments, there are many degrees of hearing loss. Some people are totally deaf, meaning they can t hear anything. Others have trouble understanding what someone is saying when there is a lot of background noise. Some people are born deaf. Others lose all or part of their hearing as they age. In fact, everyone loses the ability to hear very high-pitched sounds when they get older. As a Webelos Scout, you can hear some sounds that your parents and den leader can t hear at all! There are many ways to address hearing loss. Hearing aids are a great tool for people who have some hearing. These devices go in or behind the ear and make sounds louder or easier to hear.

126 Some deaf people learn to read lips. Others use sign language, which is a language that is spoken with the hands, not the mouth. Sign language uses the shape, placement, and movement of the hands, as well as facial expressions and body movement, to convey meaning. Just as there are many different spoken languages, there are many different sign languages. American Sign Language is used mostly in the United States and Canada. A good way to experience what it s like to be deaf is to watch television with the sound turned off (or with the sound turned low and a radio blaring nearby). Watch a favorite show that you ve seen before and try to read the lips of the actors. Can you follow the story? What happens when you can t see an actor s lips? With your den or family, reflect on what you learned and how this activity made you feel. REQUIREMENT 4 Engage in an activity that simulates mobility impairment. Mobility impairment means a reduced ability to get around on your legs. Some people are born with a mobility impairment because of conditions like spina bifida. Others lose the ability to walk due to age, illness, or accidents. Someone who breaks a leg and has to wear a cast for a few months has a temporary mobility impairment. Like other disabilities, there are ways to compensate for mobility impairments. Many people use crutches, walkers, or wheelchairs to get around. People who have lost parts of their legs might even have prosthetic replacements that let them run, jump, and play sports.
?")
127 A big obstacle for many people with mobility impairments is accessibility in homes and businesses. If you used a wheelchair, would you be able to get from the street to your bedroom? Are the doors in your home wide enough for a wheelchair to go through (at least 32 inches wide)? If you are able to borrow a wheelchair or crutches, you can simulate a mobility impairment by trying to maneuver around your home or school. Or you could immobilize one of your legs by tying a long stick or splint to it both above and below your knee. See what it s like to walk when you can t bend your leg. With your den or family, reflect on what you learned and how this activity made you feel. REQUIREMENT 5 Take part in an activity that simulates dexterity impairment. Dexterity refers to the ability to use your hands and fingers to do everything from getting dressed to playing a musical instrument to shooting a basketball. Someone who breaks a finger or develops a condition like arthritis may find activities like fastening buttons or tying shoes a challenge. To see what it s like to have a dexterity impairment, try to get dressed while wearing a pair of thick winter gloves. For an even harder challenge, tape a couple of the glove s fingers together. With your den or family, reflect on what you learned and how this activity made you feel.

128 REQUIREMENT 6 With your den, participate in an activity that focuses on the acceptance of differences in general. We are all different. Some of us wear glasses. Some of us have freckles or dimples. Some of us are really good at math or reading or sports, while others of us struggle in those areas. Some people have disabilities that others can see, while other people might have disabilities that can t be seen. Those disabilities are often called invisible disabilities.

129 Learning about differences helps us understand each other. For this requirement do an activity with your den that focuses on accepting differences. Ask your den leader about the One Potato, My Potato game; it might be just what you are looking for. How did what you learned in requirements 1 5 help you understand differences among people? With your den or family, reflect on what you learned and how this activity made you feel. REQUIREMENT 7A Do a Good Turn for residents at a skilled nursing facility or retirement community. Some people who live in skilled nursing facilities and retirement communities have disabilities like you have learned about in this adventure. And all of them are different from you because they are the age of your grandparents or great-grandparents. With the help of your parent or den leader, find a skilled nursing facility or retirement community and do a Good Turn there. If possible, spend some time with the residents. Ask them what life was like when they were your age. You may even find someone who was a Webelos Scout like you!


130 REQUIREMENT 7B Invite an individual with a disability to visit your den, and discuss what activities he or she currently finds challenging or found challenging in the past. It s one thing to ride in a wheelchair for 10 or 15 minutes. It s another thing entirely to use a wheelchair all day every day. Talk with someone who has a physical impairment and find out about the challenges he or she faces and the challenges he or she has overcome.


131 REQUIREMENT 7C Attend a disabilities event such as a Special Olympics competition, an adaptive sports event, a performance with sign language interpretation, or an activity with service dogs. Tell your den what you thought about the experience. There are many organizations that work to make life easier and more fun for people with disabilities. Attend an event or activity sponsored by one of those organizations, and tell your den what you learned. Don t be surprised if you forget about the disabilities involved and get caught up in the action. That s exactly what you should do: focus on people, not their disabilities! REQUIREMENT 7D Talk to someone who works with people who have disabilities. Ask what the person does and how he or she helps people with disabilities. All sorts of people work with those who have disabilities. Some have disabilities themselves; others just want to make the world a better place for everyone. Learn more about one of those people and what he or she does.

132 REQUIREMENT 7E Using American Sign Language, sign the Scout Oath. American Sign Language is a completely separate language. You have to learn it just like you might learn Spanish or Chinese. To get an idea of what it s like, learn the Scout Oath in American Sign Language.
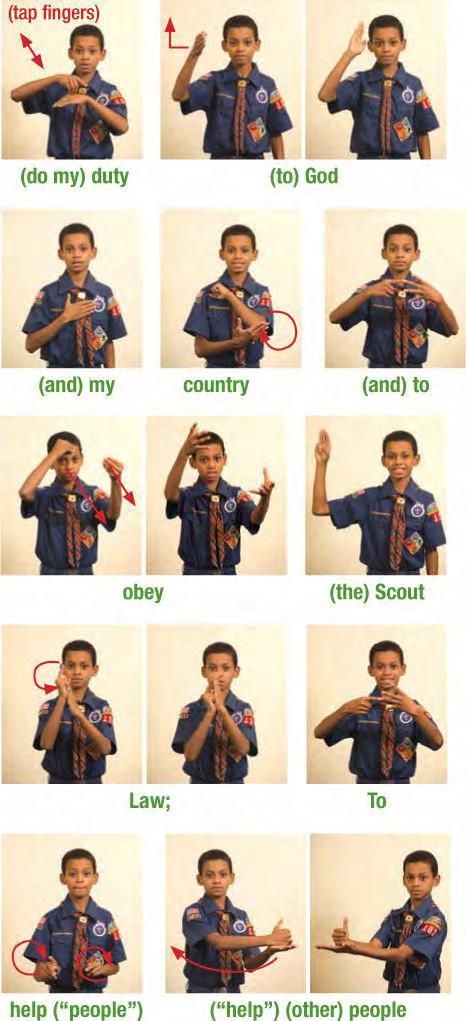
133
134

135 NOTE: Did you notice that some English words are not signed in American Sign Language? American Sign language is a conceptual language, which means that not every word of spoken English is signed. Some words are also signed in a different order. For example, the phrase help other people at all times can be signed as people, help, always.

136 REQUIREMENT 7F With the help of an adult, contact a service dog organization, and learn the entire process from pup training to assignment to a client. Did you know that many families just like yours help train service dogs? Find an organization that provides service dogs, and learn about the training process. REQUIREMENT 7G Participate in a service project that focuses on a specific disability. Organizations for people with disabilities always need help. Find an organization that focuses on a specific disability, and ask what you can do to help it or the people it serves.

137 REQUIREMENT 7H Participate in an activity with an organization whose members are disabled. For this requirement, find an organization for people with disabilities and participate in one of its activities. Here are some ideas: Serve as a ball boy at a Special Olympics softball game. Attend a holiday party at a group home for people with developmental disabilities. Go on a campout with a pack of Cub Scouts who have special needs. Participate in a field trip with residents of a skilled nursing facility. A Scout is friendly. Offer a smile to others at the event you might make a new friend!
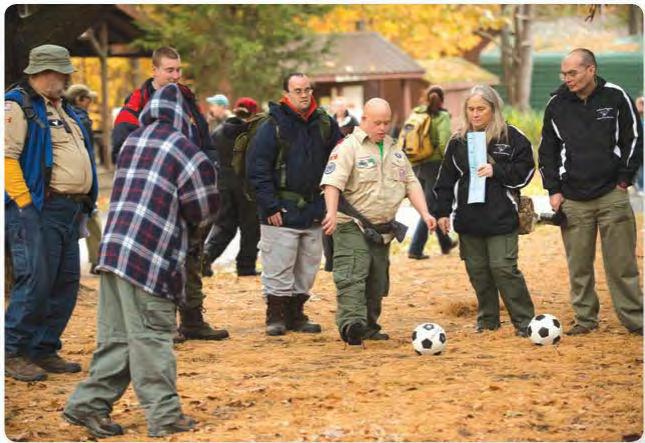
138
139
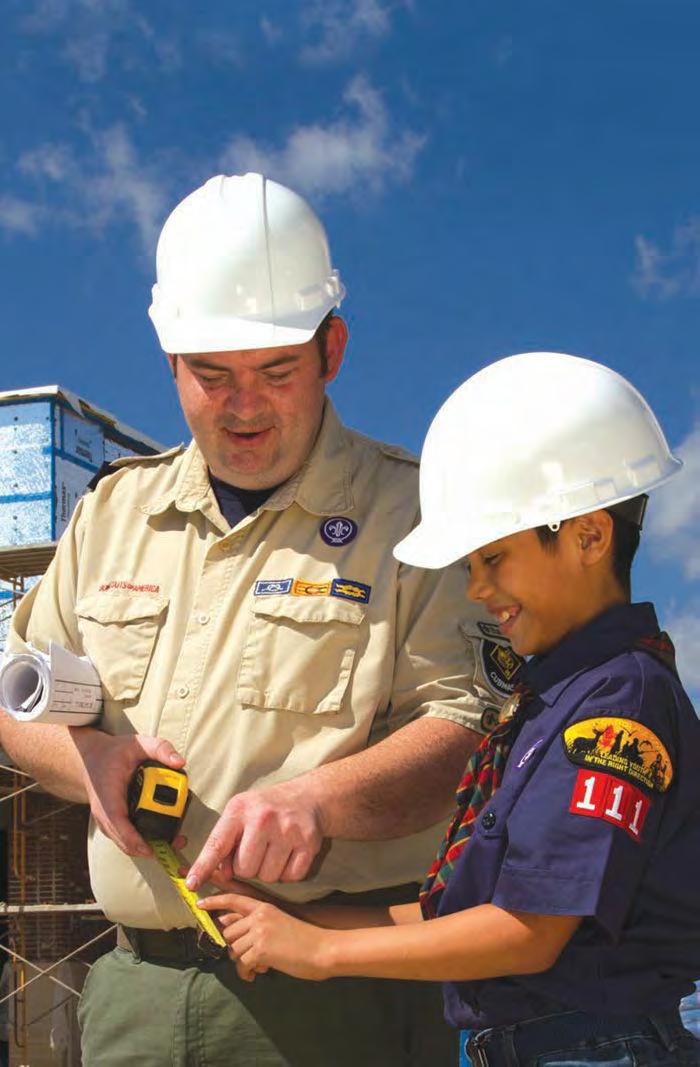
140

141 Snapshot of Adventure If you visit a lumber store, you ll see rows and rows of all sorts of wood: boards, dowel rods, sheets of plywood, cedar shingles, and more. With some tools and time, a skilled craftsman can turn that wood into toys, bookcases, or even an entire house. You won t build a house in this adventure, but you will build a smaller carpentry project. You ll also learn about the tools you could one day use to build just about anything you can dream up. So grab your tool belt, and let s get started.
142 REQUIREMENTS

143 The Boy Scouts of America does not authorize Webelos Scouts to use power tools as part of the Webelos program. REQUIREMENT 1 Learn about some basic tools and the proper use of each tool. Learn about and understand the need for safety when you work with tools. When you are building something, it is important to have the right tools. Imagine trying to cut a board in half with a pocketknife or pound in a nail with a rock. You might get the job done, but it would take a long time and you could easily hurt yourself. With the right tools, those jobs are much easier and safer to do. Basic Tools and Their Uses Skilled tradesmen, including carpenters, plumbers, electricians, and bricklayers, use tools that are designed for their specific trade. For carpenters, those tools include hammers, saws, screwdrivers, and more. Hammer: A hammer drives and pulls nails. A common hammer weighs 12 to 16 ounces and has a curved claw for pulling nails. Screwdrivers: Screwdrivers drive screws into wood. You ll probably need small, medium, and large screwdrivers for both slotted screws, which have straight slots on their heads, and Phillips screws, which have X-shaped slots.


144 Allen wrenches: Some screws have six-sided holes on top. To drive one of those screws, you need an L- shaped metal tool called an Allen wrench. Allen wrenches come in various sizes, and you have to use exactly the right size. Hardware stores sell Allen wrenches separately and in a tool that looks like a jackknife. Chisel: A chisel looks somewhat like a flathead screwdriver. It has a sharper tip, however, and is used for shaving away small amounts of wood. To use it, you hold it against the wood and hit the end of the handle with a mallet. Awl: An awl is a tool used for making small holes in wood and leather. It has a wooden handle and a thin, sharp metal point.


145 Pliers: Pliers are versatile tools that let you grip and twist things, bend and snip wire, and do other tasks that require strength. Pliers come in many types, including needle-nose pliers, standard/slip-joint pliers, locking pliers, and wire-cutter pliers. It s useful to have several sizes and types in your toolbox. Hand saw: When you need to cut a board in half, a 14-inch rough-cut handsaw is handy to have. It will certainly do for cutting smaller pieces of wood. Since it fits into your toolbox, it will always be close at hand. Coping saw: When you want to make detailed or curved cuts in wood, plastic, or foam, you will need a coping saw.
 Sandpaper comes in various grit sizes.")


146 Sanding block: A sanding block is a tool that you attach sandpaper to. (You can also use soft foam sanding blocks that allow you to sand curved or contoured objects.) Sandpaper comes in various grit sizes. The smaller the number, the coarser the sandpaper. You might use 50-grit sandpaper to shape a piece of wood and then 150-grit sandpaper to smooth the wood before you paint it. File: A file is a metal tool used for making wood or metal smooth. It can also be used to sharpen metal blades and tools. Rasp: A rasp is a metal tool with a rough surface that is used to shape or remove excess material from wood or metal. Tape measure: A tape measure lets you accurately measure pieces of wood up to several feet long. A 12- or 16-foot retractable tape measure will handle most jobs around the house. Most retract automatically and
 cuts. A 6-inch quick square will handle most small jobs.")

147 have a locking mechanism to keep the tape from recoiling (rolling up inside the case) until you want it to. Carpenter s square: A carpenter s square helps you make perpendicular (right-angle) cuts. A 6-inch quick square will handle most small jobs. Level: When you need to hang something, such as a picture, a level helps you make sure it doesn t tilt to one side. For most small jobs, a 9-inch torpedo level works fine. Clamp: A clamp is used to hold pieces of wood together firmly for cutting or gluing. C clamps are common and come in many sizes. You will also find clamps that look somewhat like giant (and really strong) clothespins. Vise: A vise does much the same job as a wood clamp. The main difference is that it is mounted to a

148 workbench. Toolbox or tool bag: Whether you have a few tools or a few dozen, it s important to keep them all together. A good place to store them is in a latching toolbox or tool bag that you can carry to wherever you are working. Taking Care of Your Tools Your tools will last longer if you take care of them. Here are some things you can do: When you are done working, wipe off your tools with a rag. You might also apply a little machine oil to prevent rusting. Dry your tools if they get wet. Use tools only for their intended purpose. For example, don t use a screwdriver as a chisel or pry bar. Put your tools back in your toolbox or tool bag when you are done with each one. That way, you won t lose your tools, and they won t be in your way as you continue working. Tool Safety You already know that certain tools, such as saws, can be dangerous, but you can actually hurt yourself with any tool if you aren t careful. One way to keep yourself safe is to use protective gear. Here s some important gear to use: Hand protection: Wear gloves when handling lumber, carrying boxes of nails, and using saws. Even with gloves on, always know where all your fingers are when you are cutting and hammering.


149 Head protection: Always wear a hardhat when you are working in an area that may have falling items or debris. Ear protection: Your hearing can be damaged very easily. Be certain to wear good quality ear protection when you are in an area that may have construction noise. Eye protection: Safety glasses are a must on every project. If you wear prescription glasses, you can get safety glasses that fit over your glasses or you can buy side shields that slip onto the earpiece of your glasses. Safety glasses prevent debris and dust from entering your eyes. Foot protection: Wear good quality leather shoes with thick soles, if possible. This type of shoe will protect your foot if something falls on it and will prevent a puncture if you step on a nail. Never wear sandals, flip-flops, or open-toed shoes when working with tools.
 or by tying a bandanna or neckerchief around the lower part of your face.")

150 Lung protection: Cutting, drilling, and especially sanding create small dust particles that can irritate your lungs if you breathe them in. You can protect yourself by wearing a dust mask (preferred) or by tying a bandanna or neckerchief around the lower part of your face. How you use and care for your tools is also important: Tools that cut such as saws, knives, and shears should be kept sharp. If they are dull, you will have to use too much force, and they may slip and cut you. Keep your hands away from saw teeth and knife blades so that if the tool slips, you won t get hurt. When using a saw, make sure that the item you are cutting is held securely. If it slips while you are cutting it, you could accidentally cut yourself. Be careful when you are hammering. If you miss the nail head, you don t want to hit your thumb. Ouch! Practice using your tools with an adult partner until you know how to handle them well. Practicing good safety skills with hand tools as a Webelos Scout will help prepare you for the greater challenge of using power tools when you are a Boy Scout.

151 REQUIREMENT 2 With the guidance of your Webelos den leader, parent, or guardian, select a carpentry project and build it. REQUIREMENT 3 List the tools that you use safely as you build your project; create a list of materials needed to build your project. REQUIREMENT 4 Put a checkmark next to the tools on your list that you used for the first time. The best way to learn how to use tools is to actually use them on a project. For this requirement, pick a carpentry project and build it. When you are finished, update the list on the next page to include all the tools you used. Put a checkmark next to those that you used safely and those that you used for the first time. MY TOOL LIST

152 The next few pages show three projects you can build. You can find many more ideas in books or, with your parent s help, on the Internet. Your Webelos den leader can give you some ideas, too. You can also try making your own plans. Think about what you want to make, and then draw a simple picture of each separate piece, as well as of the completed project. Decide how big the pieces should be and write the dimensions on your drawing. Review your drawing with an adult to be certain your measuring is
 Your parent or den leader can help you find the materials you need.")
153 accurate, then go to work! Building a project can sometimes be expensive. If possible, reuse wood from construction sites or previous projects. (Be sure to get an adult s permission before visiting a construction site.) Your parent or den leader can help you find the materials you need. Step Stool Materials: A piece of wood that is 12 inches wide and 36 inches long, cut from a 1-inch 12-inch board or ¾- inch plywood Finishing nails Wood putty Sandpaper Rag Paint or stain Paintbrush Measure carefully so you don t waste any of the wood. Always remember to measure twice and cut once!
154 Instructions: 1. Cut a piece of wood 18 inches long for the top of the stool. 2. Cut two 8-inch 8-inch pieces for the legs. Clamp the two leg pieces together, and mark where you will cut the notches shown in the picture. 3. Saw the notches out while the legs are clamped together. This will make the legs exactly the same. 4. Cut two ¾-inch 2-inch 14-inch pieces for the side braces. 5. Using finishing nails, nail the legs to the top piece 2 inches from each end. Measure carefully before you drive the nails to be sure they go into the legs. 6. Countersink each nail. To do this, place another nail on top of the nail you ve already driven, then tap it with your hammer until the first nail is completely below the surface of the wood. Fill the nail holes with wood putty. 7. Nail the side braces to the legs. Fit them just under the top of the stool and inside the legs. The braces will keep your stool stable. Countersink the nails, and fill the nail holes with putty. 8. Sand the stool all over. Use a damp rag to clean any grit from the stool before applying the finish. 9. Stain the stool to match other furniture, or paint it any color you like. Paper Towel Holder Materials: Round or square base Dowel rod that measures 1 ¼ inches in diameter Screw Felt or pieces of cork, if desired Glue Decorative piece for the top of the dowel rod, if desired Paint or stain Paintbrush

155 Instructions: 1. Cut the dowel rod to 14 inches. 2. Sand the dowel rod and base. 3. Using a measuring tape, find and mark the exact center of the base on both the top and the bottom. 4. Stand the dowel rod up and place the base on top of it. Make sure the dowel rod is in the center of the base. 5. Drive a screw through the center mark on the base into the dowel rod. This will be easier to do if an adult first drills a pilot hole with a power drill. (A pilot hole is a hole that is smaller than the screw.) 6. If desired, glue a decorative knob on the top of the dowel rod. Look for a knob that has a hole the same circumference as your dowel rod so it will slide onto the end. 7. If desired, glue a square of felt or pieces of cork to the bottom of the towel holder. This will protect the countertop and keep the towel holder from sliding. 8. Paint or stain the towel holder as desired. Wall Shelf Materials: 8-inch piece of 1-inch x 4-inch board 6-inch piece of 1-inch x 4-inch board

156 Glue Finishing nails 1-inch angle brackets, screws, and wall anchors Paint or stain Paintbrush Instructions: 1. Using a protractor or a cooking pot as a guide, draw a half-circle on the 8-inch board. Make the shelf by carefully cutting along the line with a coping saw. 2. Draw a diagonal line on the 6-inch board. Make the brace by carefully cutting along the line with a coping saw. 3. Sand all the edges smooth. 4. Paint or stain the shelf and brace as desired. 5. Use glue and finishing nails to attach the brace to the bottom of the shelf. 6. Screw angle brackets to the bottom of the shelf at the back edge. With an adult s help, use wall fasteners to attach your shelf to the wall. (You will need hollow-wall anchors to attach the shelf securely to wallboard.)


157 REQUIREMENT 5 Learn about a construction career. With your Webelos den leader, parent, or guardian, visit a construction site and interview someone working in a construction career. A construction site is an exciting place to visit. You ll see workers moving all over the place, carrying

158 materials, using tools, and reading blueprints. The work may look disorganized, but it s all carefully planned. Every construction project starts with a set of blueprints that shows exactly how all the pieces should go together and in what order. First, workers lay the foundation, frame the building, and add the roof and walls. Electrical wiring and plumbing come next, along with doors, windows, and light fixtures. Near the end of the process, workers add siding, cabinetry, wallboard, paint, and floor coverings. Once the building has been inspected, it s ready to be occupied. Some of the workers on a construction site do a lot of different jobs, including framing the building, putting in doors and windows, and hanging cabinets. Others handle specialized jobs such as roofing or plumbing. Construction workers use their hands, but they also use their brains. A lot of measuring is involved, and good math skills are a must. Teamwork is also very important. Construction workers have to cooperate with other people who do the same thing as them, as well as other teams that are part of the construction process. Look for examples of teamwork when you visit a construction site.

159 When you interview a construction worker, ask questions like these: What parts of the building do you work on? How did you acquire the skills you use? Did you go to trade school, learn on the job, or both? What s your favorite part of working in construction? What s the most fun building project you ve ever worked on?
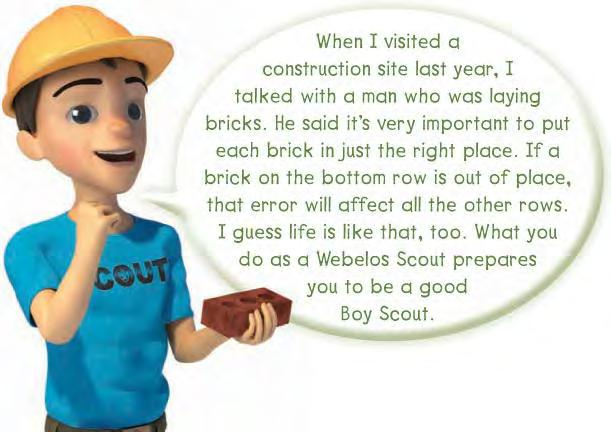
160
161
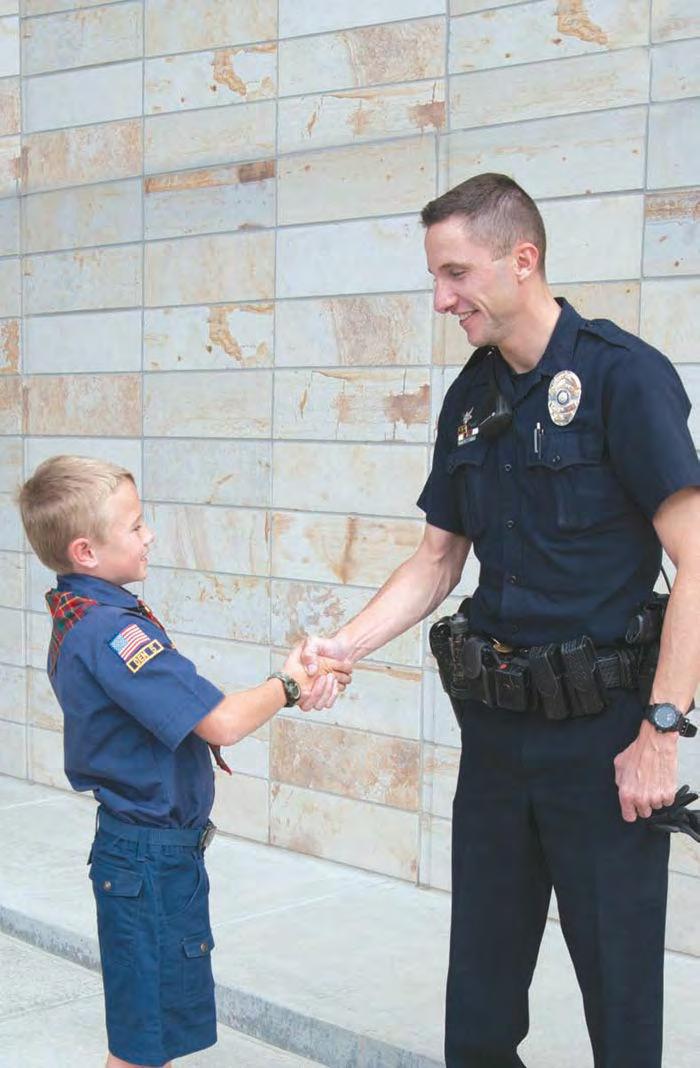
162
163 Snapshot of Adventure Heroes are all around us, sometimes in uniform and sometimes in disguise. The Build My Own Hero adventure lets you discover what it means to be a hero. You ll learn about heroes in your community and other parts of the world and find out how you can be a hero, too! REQUIREMENT


164 REQUIREMENT 1 Discover what it means to be a hero. Invite a local hero to meet with your den. A hero is a person who does extra-special things to help other people. Some people do heroic things as part of their jobs, such as soldiers and police officers. Other people do heroic things because they know how to act in an emergency, such as Scouts or American Red Cross volunteers. Some heroes are famous and win awards for their service. Other people are known as heroes only to the people they helped. Talk with your den about people who live in your community who are heroes because of their jobs. Invite one of them to come to a den meeting and share his or her story with you. If a hero cannot attend a den meeting, you may go meet with him or her and later share what you learned with your den.

165 INVITING GUESTS TO YOUR DEN MEETING When you call to invite a guest, be sure to give your name, and clearly explain what you are asking for. Tell the guest when and where your den meets and how much time he or she should take. Leave your phone number in case your guest has questions later. Follow up your call with an or postcard reminder. On the day of the meeting, arrange to meet your guest at the front door, and guide him or her to your meeting room. After the visit, send your guest a thank-you note from the den. Before you meet with your hero, decide on a list of questions you will ask. It s a good idea to ask how the 12 points of the Scout Law relate to the hero s job and the decisions he or she must make each day.

166 REQUIREMENT 2 Identify how citizens can be heroes in their communities. Many heroes surround you in your everyday life. Think about family members, friends, a teacher, someone from your place of worship, your bus driver, and others.

167 EVERYDAY HEROISM Here are the kinds of things you might see: Your teacher worked late at night to plan a school event. Your mom or dad tutored at a youth center. Your family helped at a food bank. Your neighbor picked up litter after a community picnic. Your grandparent volunteered at a local homeless shelter. Your friend shared her lunch with a student who forgot his. Your bus driver stopped older kids from picking on a younger kid. Choose three of these people, and observe their activities for one week. Record what you see in a notebook. At the end of the week, review your notes, and identify the many small things people do every day that make them heroes. A Scout is brave. Think about the ways people can be brave every day, such as by standing up for someone or doing what is right. REQUIREMENT 3 Recognize a hero in your community by presenting him or her with a My Hero Award. When you do something nice for someone else, you like to be thanked. Heroes do too! They aren t trying to earn awards or recognition, but they still like it when someone says thank you.

168 For this requirement, create a hero award and present it to a hero in your community maybe even the hero who visits your den. Here s how: Decide on three or four rules for selecting your hero. Should it be someone who is a hero because of his or her job, or should it be someone who did something heroic outside his job? Should it be someone who helped your den or who helped your whole community? Should it be someone well known in your community or someone only a few people know? Select the hero you want to recognize. If you can t decide on just one person, it s OK to give more than one award. Decide what the award will look like. Will it be a certificate or a trophy? Will it be a leather thong with beads or a small woodworking item? Contact your recipient and present the award. You could present it at a den or pack meeting, or you could go to the hero s workplace. If the hero is part of a faith community or a service club, perhaps you could present it in front of that group. REQUIREMENT 4 Learn about a real-life hero from another part of the world who has helped make the world a better place. Just as we have heroes in our everyday life, many people around the world contribute their time and efforts to making our world a better place. With the help of the Internet (with an adult s permission), the local or school library, a teacher, or your den leader or parent, learn about someone in another part of the world who is a real-life hero. Find out:

169 Who the hero is What the hero did When the hero did this Where the hero did this Why the hero did this How the hero did this Share what you learned at a den meeting. You could tell the hero s story, make a poster, or even create a video about the hero. Nelson Mandela was a hero from South Africa. He was honored by Scouts in his country. REQUIREMENT 5 Learn about a Scout hero. Thanks to their special training, many Scouts become heroes. In Boys Life magazine or on the Boys Life website, read about a Scout who earned an award for heroism or special service. The Scouts in Action feature is a great place to start. Talk with your den about the story you read. Discuss how you might have acted in a similar situation.
170
 Presented to Scouts and adult leaders who demonstrate heroism by saving or attempting to save a life at considerable risk to self.")
171 SCOUTING HEROISM AWARDS Honor Medal With Crossed Palms: Presented to Scouts and adult leaders who demonstrate heroism by saving or attempting to save a life at extreme risk to self. Honor Medal: (at right) Presented to Scouts and adult leaders who demonstrate heroism by saving or attempting to save a life at considerable risk to self. Medal of Merit: Presented to Scouts and adult leaders who perform rare and exceptional acts of service. National Certificate of Merit: Presented to Scouts and adult leaders who perform acts of service deserving of special national recognition. REQUIREMENT 6 Create your own superhero. Everybody loves superheroes! You ve probably watched movies about superheroes or read about them in comic books or graphic novels. Now it s your turn to create your own.

172 Make a drawing of your superhero, and decide what special powers he or she has. Talk about how your superhero achieved those powers and how he or she uses them to help people. You might want to write a story or create a comic strip that uses your superhero as the main character. (If you create a comic strip, you could model it after the Scouts in Action feature in Boys Life.) How many points of the Scout Law do you see within your story? How does your superhero compare with the real-life heroes you learned about in this adventure?
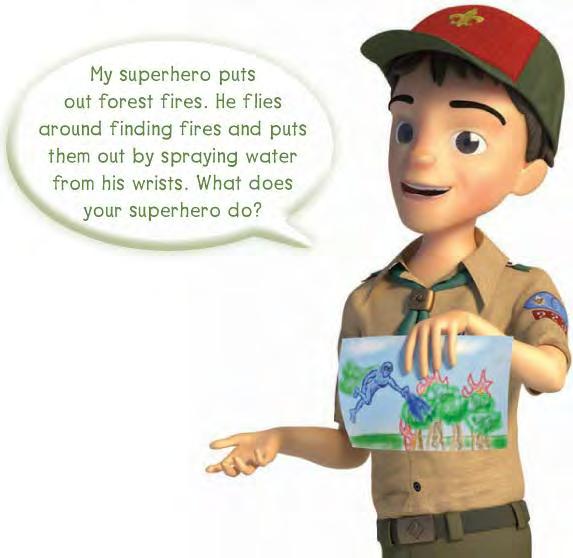
173

174
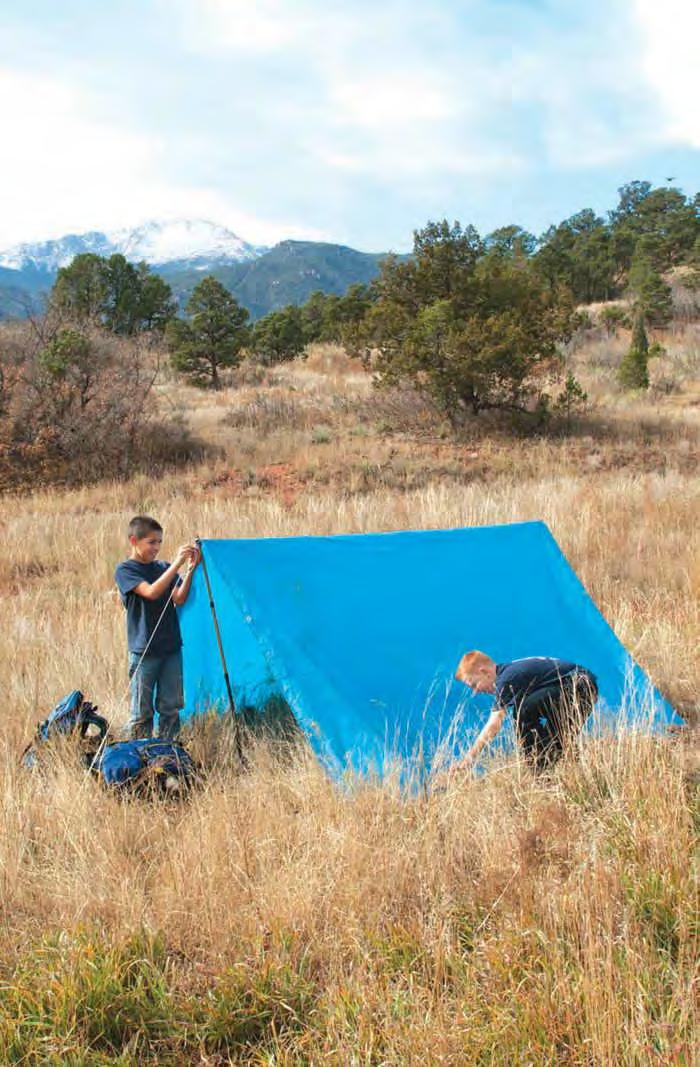
175
176 Snapshot of Adventure Lost on a desert island! Separated from your group in the middle of a jungle! Trapped on the side of a cliff that you can t climb! What do you do? How can you survive? To survive in the wilderness, you need to learn survival skills long before you have to use them. This adventure will help you learn some of these important skills in case you ever get lost. Learning these skills will make you a better Scout and increase your chances of survival in an emergency. REQUIREMENT
177
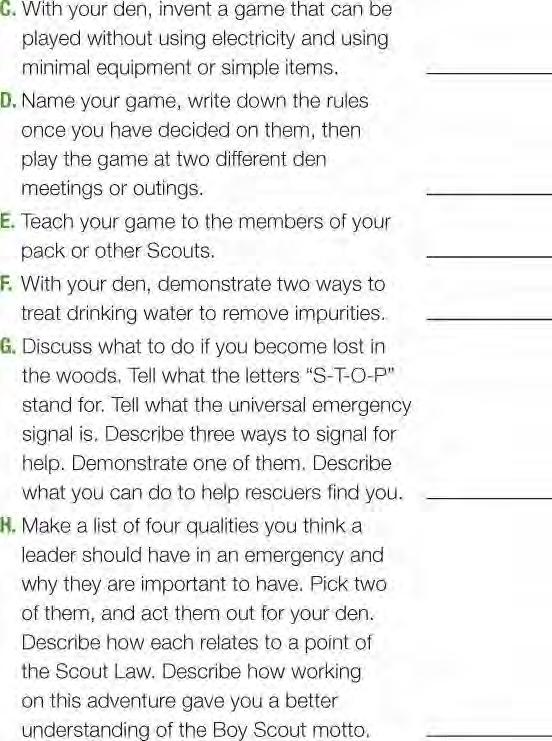
178

179 REQUIREMENT 1 Do two of these: REQUIREMENT 1A With the help of an adult, demonstrate one way to light a fire without using matches. In an emergency, a fire can keep you warm. It can let you cook food so you don t go hungry. And it can help rescuers find you if you are lost. As a Webelos Scout, you have probably learned how to start a fire using matches. In an emergency, you might need to start a fire without matches. Yes, you can do it! Lighting a fire without matches is a special skill. As with all special skills, you must use it carefully and responsibly. Live up to the trust your leader is giving you by only using this skill in a safe environment under the supervision of an adult. For any kind of fire, you need these materials close at hand: Tinder is fine, dry material that will burst into flame at the touch of a match. Pine needles, the inner bark of dead branches, weed fluff, dry grasses, and slivers shaved with a knife from a dry stick are all good sources of tinder. Gather a double handful.


180 Kindling is material that will burn with a little help. Twigs no thicker than a pencil are best and the drier, the better. Gather an armload. Fuel is dead or downed wood no bigger than your wrist that will keep your fire burning. Keep it dry and away from your fire until you need it. To start a fire without matches, your tinder must be extra fine and dry. The inner bark of dead branches will work if you shred it. So will an old bird s nest. If you plan ahead, you can carry some dryer lint with you in a plastic bag. Once you ve gathered your material, you have to generate enough heat to make your very fine tinder burn. Three ways to do that are by using a magnifying glass, using flint and steel, and using friction. Magnifying Glass

 and a piece of steel.")
181 The sun is very powerful. With a curved lens like a magnifying glass, you can focus the sun s rays to produce a very small point of heat. Here s how. Protect your tinder from any breezes. Focus the light directly on your tinder and watch for smoke. Once you see it, gently blow on the ember to get the fire to spread to more of your tinder. As the fire spreads, add some kindling and then fuel to sustain the fire. Flint and Steel Another way to create sparks is by striking one hard object against another. You could use a rock and a knife blade, but the best thing to use is a special flint-and-steel set. This set includes a piece of flint (a kind of very hard rock) and a piece of steel. Strike the flint sharply against the steel to produce brief sparks. Direct your sparks down into your tinder. Watch for smoke and gently blow on your ember so it will spread. Add kindling and fuel as the fire builds. Friction Friction is the energy created when you rub things together. (Rub your hand on your pants leg for 10 seconds or so, and you will feel heat. That heat came from friction.)
 Bow Fire board Slide a leaf or piece of bark under one of the holes in the fire board.")
182 A fire-by-friction set uses friction to create burning embers, which you can use to ignite your tinder. The kit includes these pieces: Head board Spindle (pointed at the top, rounded at the bottom) Bow Fire board Slide a leaf or piece of bark under one of the holes in the fire board. Put the bottom of the spindle in that hole and the head board on top of the spindle. Loop the bow string around the spindle, then tighten it. Move the bow back and forth to turn the spindle. Make slow, steady strokes for about 20 seconds; then go faster. Soon, embers should fall from the hole in the fire board onto the leaf or bark. Blow gently on the embers to keep them burning, then move the leaf or bark away from the fire board and add tinder to it. Once the tinder lights, gradually add kindling and then fuel. Whichever method you use, it is important to be ready with all the materials you need close at hand. You may not have time to go find more, so gather more than you think you need. REQUIREMENT 1B On a campout with your den or family, cook two different recipes that do not require pots and pans. If your chartered organization does not permit Cub Scout camping, you may substitute a family campout or a daylong outdoor activity with your den or pack. If you know what you are doing, you can cook just about anything in the woods that you can cook at home. In fact, you can cook many things without pots and pans. That means less cleanup and more time for fun. Here are some easy recipes that produce great-tasting food. Ask your den leader for more ideas. Enjoy! Bacon and Eggs in a Bag

183 Ingredients (for one Scout): 2 thick slices of bacon 1 egg 1 brown paper lunch bag 1 stick Cut both slices of bacon in two. Lay the slices in the bottom of the bag to cover the paper as much as possible. Crack the egg onto the bacon. Roll the top of the bag down three times. Push the stick through the folded portion so that the bag is hanging from the stick. Hold the stick over a bed of coals for about 10 to 15 minutes. The bacon grease will protect the bag and help cook your meal. Eating undercooked eggs and meat can make you sick. Ask an adult to help you determine when your food is fully cooked. Campfire Cake in an Orange Shell Ingredients (for six Scouts): 6 large oranges 18 oz. box of cake mix (plus required ingredients) Water Heavy-duty aluminum foil

184 Cut the oranges in half, and remove the fruit with a spoon. Be careful not to puncture the rind. Prepare the cake mix in a zippered plastic bag, following the instructions on the box. Fill each orange shell half full of cake mix. Replace the top, and wrap in foil. Bake in hot coals or on a grill for about 20 minutes, turning often. The cake will bake in the orange shell. Mud Burgers Ingredients: 1 potato per Scout Ground beef Chopped onion Salt and pepper Cut the potato in half, and scoop out most of the insides. Mix the ground beef and onion together, and season the mixture with salt and pepper to taste. Put the beef mixture inside the potato, and close the potato up. Coat the potato with thick mud, and place it in the coals. Cook for about an hour. You can eat the cooked meat and potato, but dispose of the mud-covered skin unless you really like mud pies! Be sure to clean up any food scraps or other trash and dispose of them properly. REQUIREMENT 1C Using tree limbs or branches that have already fallen or been cut, build a shelter that will protect you overnight. If you get lost in the woods, shelter is very important. It protects you from the sun, wind, and rain, and it helps your body stay at a comfortable temperature. But saving energy is also important if you are lost. If you use up most of your energy running around building a shelter, you ll have less energy for keeping warm at night. You ll have to decide how much shelter you can build with the materials at hand. You ll want a shelter that will do the job but that also takes as little energy as possible to set up.


185 KEEPING COOL (OR WARM) Your body s core is your temperature regulator. It does all it can to keep you cool in hot weather and warm in cold weather. If you get too hot, you may suffer from heat exhaustion or heatstroke. If you get too cold, hypothermia can set in. When your body temperature changes more than a few degrees from normal, you can have a hard time thinking or functioning well. In extreme cases, heatstroke and hypothermia can lead to unconsciousness and even death. You may have some items in your backpack that can make your shelter even better. A tarp or plastic sheet over the top of your shelter can help keep wind and rain out. A sleeping bag or pad can insulate the floor.

186 In order to be found, you need to be seen, so make sure your shelter is visible from as far away as possible. Many survival kits include an emergency blanket, which is a lightweight blanket made of shiny gold or silver material that can be easily seen from an airplane. When you are finished with your shelter, put the materials you used back where you got them. Remember that a Scout leaves an area better than he found it. If you have a trash bag, you can turn it into an emergency poncho by cutting holes for your head and arms. Wear it while you re building your shelter, then put it over the top of the shelter to block the wind and rain. Try not to work up a sweat, which will cool you down. Do your best to maintain a constant body temperature while you are working. REQUIREMENT 2 Do all of these: REQUIREMENT 2A Learn what items should be in an outdoor survival kit that you can carry in a small bag or box in a daypack. Assemble your own small survival kit, and explain to your den leader why the items you chose are important for survival. If you were trapped in your home, you would have a lot of things on hand that could help you survive, such as extra food and clothing. If you were lost in the woods, you would only have the things in your backpack and things you could find around you. The Scout motto is Be Prepared. You can be prepared by making a survival kit and carrying it with you on outings. Of course, you can t take everything from your house in your backpack, so you have to plan carefully. What should you take?


187 It s a good idea to start with the Scout Basic Essentials*: First-aid kit Extra clothing Rain gear Pocketknife (if you ve earned your Whittling Chip) Flashlight Trail food Sun protection Map and compass Scouts should have these items with them whenever they are camping or hiking. *Matches and fire starters. A fire can keep you warm and attract the attention of rescuers. As a Boy Scout, you can earn your Firem n Chit to be allowed to carry matches. Here are some other helpful items: Duct tape. Wrap a length around a plastic water bottle or a pencil. Signal mirror. A metal signal mirror can be slipped into your first aid kit or side pocket of your pack. Keep it in a case or a sock to protect it and keep it shiny. Thin wire. A few feet can come in handy for many uses.


188 Garbage bag. A large, heavy-duty bag, preferably brightly colored, can be used as a shelter, poncho, or firewood cover. Fishing line and hooks. 50 feet of fishing line can come in handy for repairs and, of course, for fishing. Choosing which items to stock in a survival kit will depend a lot on where you will be traveling. If you re in a hot, desert-like area, fishhooks might not be very useful. If you are traveling in the winter, you might include things that can keep you warm, such as hand warmers. What would you take for a day hike on an easy trail? How about a hike through a dense forest? REQUIREMENT 2B Show you can live off the grid by minimizing your use of electricity for one week. Keep a log of what you did. Discuss with your den members how you adjusted to this lifestyle. As Americans, we use a lot of electricity and other forms of energy. Sometimes, it seems we can t take a walk around the neighborhood without using energy. We check the weather forecast on a website, grab an LED flashlight, track our route on a GPS unit, and carry along a personal music player to listen to our favorite songs or a camera or smartphone to take pictures. Then, when we get home, we soak up some airconditioning and grab a cold drink from the refrigerator. In a survival situation, you won t be able to use devices like these that rely on energy. For example, if

189 the power in your house went out because of a storm, you might have to use candles for light and blankets to keep you warm. You would have to find other ways to entertain yourself and get important information like the weather forecast. To get an idea what this would be like, avoid using any electronic devices for a week (except those you need for schoolwork or personal safety). That includes computers, tablets, telephones, televisions, video games, and anything else with a plug or batteries. Keep a log of what you did. Discuss with your den members how you adjusted to this lifestyle.
190

191 REQUIREMENT 2C With your den, invent a game that can be played without using electricity and using minimal equipment or simple items. REQUIREMENT 2D Name your game, write down the rules once you have decided on them, then play the game at two different den meetings or outings. REQUIREMENT 2E Teach your game to the members of your pack or other Scouts. Imagine that you have a pair of hiking socks, a tree branch, some bandannas, a bell, and a water bottle. What kind of game could you create with those objects or other simple items? What would be the object of the game? Would the game be played between teams or individuals? What would the rules be? Use your imagination to come up with some different, exciting rules for your game. Some possible rules might include things like: Everyone has to hop on one leg when Red! is yelled by someone holding a bandanna. The opposing team has to roll over twice if your team gets all the bandannas. Name your game, write down the rules, then play the game at two different den meetings. Once you are happy with the game s rules, teach it to another group of Scouts. Have fun!

192 OUR DEN GAME Name of our game: Some of our best rules: REQUIREMENT 2F With your den, demonstrate two ways to treat drinking water to remove impurities. Clean, healthy drinking water is very important for life. While humans can live for several days without food, water is a more critical need to keep our bodies running properly.

193 But water can also make you sick if it has not been treated to remove bacteria and other microorganisms. The water you drink at home and school has probably been treated and tested to make sure it is safe. That s not true of water that comes from lakes, streams, and wells. You should always treat any water that does not come from a reliable source. If you ve ever watched a movie about the Old West, you may have seen cowboys stop near a river, dip their hands in, and scoop up a big drink of refreshing water. What you probably didn t see is how drinking that water upset their stomachs later. It s better to be safe than sorry and sick! Three ways to make water safe for drinking are boiling it, treating it, and filtering it. Boiling Boiling water is probably the easiest and least expensive method of water purification. Bringing water to a rolling boil for a full 10 minutes will kill most microorganisms. (A rolling boil means the top of the water is moving around in the pan.) If the water is muddy, filter it through a bandanna first. That won t remove any microorganisms, but it will make the water look better when you boil it. Chemical Treatment Water treatment tablets are sold in small bottles and packets and are relatively inexpensive. To treat water, follow the instructions on the packaging. Most treatment tablets call for you to drop one or two tablets into a quart of water and then wait 30 minutes before drinking it. If you are treating water in a water bottle, loosen the lid slightly and slosh some treated water around on the threads of the lid.

194 Treatment tablets can lose their strength over time, so be sure to check the expiration date on the bottle. Use only fresh tablets. Filtering Water treatment filters made for hikers are quick and easy to use. They pump water through filter pores that are small enough to strain out bacteria and parasites. Filtering is the most expensive way to treat water, but it is also the most effective for all types of contaminants. Carefully follow the instructions that come with the filter. A filter can become clogged if the water has a lot of dirt or sand in it, so you may want to strain the water through a bandanna before filtering it. After you ve tried two different types of treatment, taste the water. Which water tastes better? Which method was easier to use? REQUIREMENT 2G Discuss what to do if you become lost in the woods. Tell what the letters S-T-O-P stand for. Tell what the universal emergency signal is. Describe three ways to signal for help. Demonstrate one of them. Describe what you can do to help rescuers find you. A very important part of survival is getting found. You can help rescuers find you by doing certain things. STOP First, remember to STOP: S (Stop): Stay put. The worst thing you can do when you re lost is panic and leave your current location. Take a deep breath, calm yourself, and sit down. Drink some water, or eat a little food. If you re
: Look around. Listen for other Scouts. Check your supplies and the area around you for things that can help you survive. P (Plan): Finally, make a plan for dealing with your situation.")
195 cold, put on your jacket. T (Think): Once you ve calmed down, think about your situation. Think about how you got where you are. You may discover that you re not as lost as you thought. O (Observe): Look around. Listen for other Scouts. Check your supplies and the area around you for things that can help you survive. P (Plan): Finally, make a plan for dealing with your situation. If you are absolutely sure you know the way back to your group, follow it carefully. Mark your way with broken branches or piles of stones so you can come back to your starting point if you need to. If you don t know the way back to your group, stay where you are. Decide what your priorities are, and take care of them one at a time. Signaling In a movie or TV show, you may have seen someone write Help! in the sand on a beach. That s a good idea if you re on a beach. Here are some signaling methods that will work everywhere: Whistle. A whistle can be heard much farther away than your voice. Blow three times in a row and keep repeating. Signal mirror. A signal mirror can reflect the sun s rays and draw the attention of low-flying aircraft. Some signal mirrors have a hole in them to let you see that you are aiming in the right direction.

196 Bright colors. You can also attract attention by spreading brightly colored materials like tarps or emergency blankets in an open area. Fire. A large fire will attract attention at night. During the day, a smoky fire will do the same thing. Live vegetation, moss, and green leaves make a fire smoky. Be sure you build your fire in a safe place so it doesn t spread. The universal emergency signal is anything that appears in a series of three. That could be three whistle blasts, three fires, or three large Xs formed with logs in an open field. Don t practice signaling techniques in a place where other people might be concerned you are really in trouble, and don t practice building a fire without adult supervision. REQUIREMENT 2H Make a list of four qualities you think a leader should have in an emergency and why they are important to have. Pick two of them, and act them out for your den. Describe how each relates to a point of the Scout Law. Describe how working on this adventure gave you a better understanding of the Boy Scout motto. Leaders have many skills, and most of them are useful in emergencies. For example, a leader knows how to listen to other group members ideas and give everyone a chance to speak. This example is one way a Scout is courteous.
197 Write down the qualities you think a leader should have in an emergency. Develop a skit that shows Scouts demonstrating those qualities and being leaders.

198 BADEN-POWELL AT MAFEKING Before he invented Scouting, Robert Baden-Powell was a soldier in the British Army. In 1899, he was in charge of the town of Mafeking in South Africa when enemy troops besieged it. For the next 217 days, he kept the town safe, even though he had only one-fourth as many troops as the enemy. He moved guns around the town to make it appear his troops were better armed than they were, he enlisted boys to serve as messengers, and he even arranged theatrical performances and sporting events to improve morale. The town survived the siege, and Baden-Powell became a national hero.
199
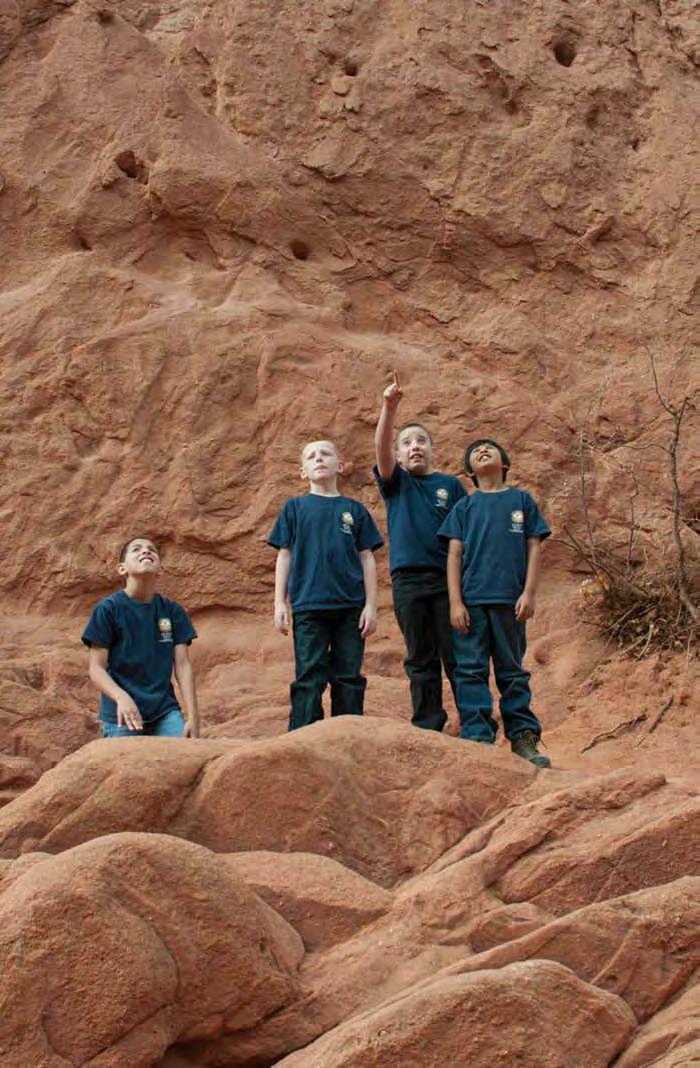
200

201 Snapshot of Adventure Rocks and minerals are more than just things that lie in the ground. Yes, they help form our planet, but people also use them to create things that make our lives easier. In this adventure, you ll dig into the world of rocks and minerals and discover some surprises about the science of geology like how the ground beneath your feet is constantly on the move. REQUIREMENT
202
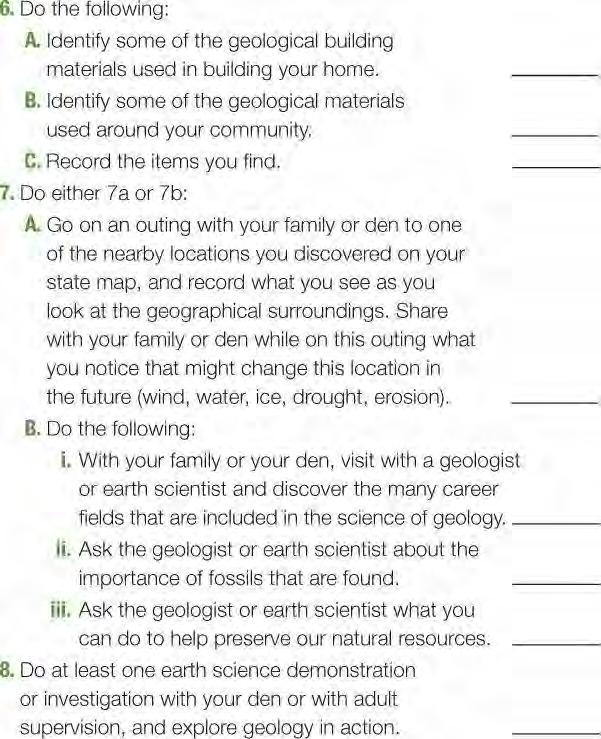
203

204

205 REQUIREMENT 1A Explain the meaning of the word geology. REQUIREMENT 1B Explain why this kind of science is an important part of your world. REQUIREMENT 1C Share with your family or den what you learned about the meaning of geology. Geology is the study of the earth, including the materials it is made of, the structure of those materials, and the processes that act on them. An important part of geology is studying how the earth changes over time. While the earth might not seem to change much, it is actually always changing. Wind and rain wear down mountains, earthquakes shake the ground, and volcanoes spew melted rock into the air. Even the continents are moving. North America is actually moving to the west-southwest about an inch a year! Horseshoe Bend, Arizona A geologist is a scientist who studies the earth. Some geologists study how the earth was formed and how it changes. Other geologists study earthquakes and volcanoes and try to reduce the damage they cause by learning how to predict them. Still others work to improve our lives by using rocks and minerals to supply many of the things we use every day. Petroleum geologists study the earth s natural resources of oil and gas. Engineering geologists and structural geologists work on building projects. Hydrogeologists work with our water resources. Environmental geologists study the effects we humans have on our planet Earth. What type of geologist would you like to be? REQUIREMENT 2 Look for different kinds of rocks or minerals while on a rock hunt with your family or your den. Everywhere you look there are rocks and minerals. They are part of your world every day. Some rocks

206 are small pebbles, and some are gigantic mountains. Your own backyard and neighborhood are good places to begin collecting rocks. Think about how these rocks were formed and how they ended up where you found them. Collecting Specimens One way to begin a collection of geologic specimens is to visit a business that sells building stone or makes gravestones. These businesses might have small scraps of marble, granite, sandstone, limestone, pumice, shale, or slate they will give you. A nearby science museum might also have rock specimens for sale. You can also go on a field trip. If possible, go with a rock hound, a collector who knows a lot about rocks. A rock hound will know which rocks contain useful materials. Look for minerals in gravel or sand pits, road cuts, diggings, mountains, hills, and stream banks. Keep your rock samples small. Small ones are easier to carry and easier to care for. Safety is very important when on a rock hunt. Always have an adult with you. Stay away from dangerous areas like cliffs, quarries, mines, and mine dump heaps. Be careful when climbing on rocks. And watch out for snakes. They may live under rocks, so always poke around a rock with a long stick before reaching under it. Collecting rocks is not allowed in national parks and in many state parks. Ask permission before you collect anywhere. If you aren t permitted to collect rock samples, take pictures of your findings to use in a display.

207 Geologist s Equipment Written or verbal permission to collect rocks Safety glasses to protect your eyes A pocket magnifier for seeing things up close A geologist s hammer for pulling rocks out of hillsides and breaking them open A cold chisel, half an inch to 1 inch wide, for chipping stone with a hammer and for digging things loose Clear plastic food storage bags; write the number of the rock sample on paper and slip it into the bag with the rock sample A small notebook and pencil for recording where and when you found a sample; number each sample in the notebook Heavy gloves for rough work A small day pack for carrying equipment and rocks Your Collection You can display your rock collection by putting your rocks in egg cartons, or you can make dividers for shoeboxes. On each rock specimen, paint a spot of quick-drying white enamel. When it is dry, write a number on the spot with a dark felt-tip pen. For each specimen, keep a card with that number. The card is where you will record what the specimen is and where and when you found it.

208 REQUIREMENT 3A Identify the rocks you saw on your rock hunt. Use the information in your handbook to determine which types of rocks you have collected. REQUIREMENT 3B With a magnifying glass, take a closer look at your collection. Determine any differences between your specimens. REQUIREMENT 3C Share what you see with your family or den. Using a guide to rocks and minerals, identify what you have collected or taken pictures of. With a magnifying glass, take a closer look at your collection. Do you see anything different when looking up close? Share what you see with your family or den. Geologists use the following tests to identify minerals. Color test: Scratch the specimen on a plate of unglazed porcelain or the back of a piece of tile. The color that appears helps to identify it. Luster test: How does the specimen look when light is reflected from it? Is it shiny, dull, or greasy? Cleavage test: How does it split or break up? Does it turn into powder or split in layers? If it breaks into crystals, how many sides does a crystal have? Chemical test: Does it contain limestone? If a drop of vinegar bubbles on it, the answer is yes. Hardness test: How hard is it? See the hardness scale in requirement 4.
 or lava (molten rock that comes out of a volcano).")

209 Kinds of Rocks All rocks belong to one of the three main groups that make up the Earth s crust. They are igneous, sedimentary, and metamorphic rocks. Igneous Rock Igneous rock is any rock made by cooling magma (hot, molten material that flows under the Earth s surface) or lava (molten rock that comes out of a volcano). Examples of igneous rock include basalt, granite, and obsidian. Igneous Rocks Sedimentary Rock Sediment is gravel, sand, clay, or soil that settles and hardens out of water in riverbeds, ponds, lakes, and oceans. Sediment may contain shells and skeletons. Sedimentary rock is formed in layers, like a giant cake, after sediment has been under great pressure for millions of years. If the sediment was originally sand, it becomes sandstone. Clay turns into shale. Shells and skeletons make limestone. Small pebbles and sand form conglomerate. Sedimentary Rocks
 The change is caused by intense heat and great pressure deep in the earth. Under these conditions, sedimentary limestone becomes marble. Sedimentary sandstone turns into quartzite.")
, are easy to see and collect. Others, like iron and zinc, are found in rocks. They must be removed from the rock by a process called smelting or refining.")
210 Metamorphic Rock Metamorphic rock has been through a process much like baking. (Meta means changed, and morphic means form.) The change is caused by intense heat and great pressure deep in the earth. Under these conditions, sedimentary limestone becomes marble. Sedimentary sandstone turns into quartzite. Igneous granite changes into gneiss (pronounced nice ). Metamorphic Rocks Useful Minerals The Earth contains many useful minerals. Some, like silica (sand), are easy to see and collect. Others, like iron and zinc, are found in rocks. They must be removed from the rock by a process called smelting or refining. There are three categories of useful minerals: metals, nonmetallic minerals, and fuels. Examples of Minerals


211 Crystals A crystal is a group of atoms that come together in a certain way to form a molecule. Each kind of crystal has special and unique characteristics and shapes. For example, sugar crystals are oval-shaped and slanted at the ends, while salt crystals are in the shape of little cubes. Crystals can be used in many ways: for eating, like sugar and salt, or as jewelry! Diamonds, rubies, sapphires, and emeralds are all different kinds of crystals, formed by different elements and atoms.

212 The Weathering and Erosion of Rocks Weathering is what happens when rocks and minerals break apart because of water, ice, wind, heat, or cold. Erosion is what happens when the pieces caused by weathering are carried away. Weathering and erosion are important parts of geology. Ice Erosion Ice is another strong force that causes large amounts of physical erosion. In mountainous locations in the world, the rock and soil are commonly frozen together. Ice grows in the cracks of the rocks and pushes the rock particles apart. When the water melts and freezes again, it moves the particles away from each other and the process repeats itself. When water flows down a hillside, it can cause erosion similar to wrinkles in the soil. Glaciers, which are huge pieces of ice, move slowly down a mountain with the force of gravity. The weight of the glacier presses into the ground, forcing it apart and separating rocks. During the movement of glaciers, some of the ice also melts and refreezes as it moves, continuing to pick up rock pieces, dragging them across other rocks in the glacier s path, and breaking them into even smaller pieces. Wind Erosion The movement of the wind erodes and creates different landforms. Wind is an invisible force that includes small pieces of rocks and minerals. This kind of erosion is not very strong because it takes a lot of energy to transport sand and dust. This type of erosion is known for smoothing the earth around us. Every time there is wind, the erosion impact can break off smaller pieces of larger rock. Sometimes the little rock pieces break into even smaller pieces. These smaller pieces can stay where the wind carries them until water washes them to another location, waiting for wind erosion to carry them away again.


213 Water Erosion Have you ever noticed that rocks in riverbeds and on lake and ocean shores are small and smooth? That s because of water erosion. Water causes a great deal of physical erosion. When rain falls heavily, flooding can happen, changing everything that the fast-moving waters carry with it. Rushing water can also cause mudslides. The force of the rushing water causes sharp edges of rocks to knock loose, which creates smoothness. Water erosion has caused geological landforms such as canyons and rivers. The Grand Canyon, which is a mile deep and 277 miles long, was formed by water erosion. Fossils You may find fossils while you are looking for rock specimens. A fossil is a trace of animal or plant life from millions of years ago that has hardened in rock. A fossil may be a print of a shell or the skeleton of a fish or bird. It may be a dinosaur s track or a leaf or flower print.

214 Would you believe that fossils from the sea can be found in a desert? It s true! This means that the spot where they were found was once an ocean floor. Certain plants and animals live in hot climates, but their fossils have been found in cold countries. This means that these areas were not always cold. Wind and water erosion have changed the earth s landscape and helped to move fossils and other geological items over time. Fossils have even been discovered on top of mountains. Sedimentary rock usually contains fossils. Geologists study the rock layer in which the fossils were found. Then they can tell when the country was warm and for how long. Fossils show us what plants and trees lived millions of years ago and where. They show the changes that have happened through the years. You probably can find fossils in your own neighborhood. Look in diggings, road cuts, or stream banks wherever cuts have been made through layers of sedimentary rock. REQUIREMENT 4A With your family or den, make a mineral test kit, and test rocks according to the Mohs scale of mineral hardness. REQUIREMENT 4B Record the results in your handbook. A long time ago, a geologist named Friedrich Mohs figured out that you can test the hardness of rocks and minerals by seeing whether they can scratch other materials or whether other materials can scratch them. He created a scale that gives different rocks and minerals hardness values from 1 to 10. Mohs Hardness Scale

215 Many experienced rock collectors carry a mineral testing kit on their rock-hunting trips to test hardness and other mineral characteristics. Knowing the hardness of a mineral will not always tell you its identity, but it will help rule out some possibilities. You can buy a mineral testing kit, but it s more fun to make one yourself using materials you can find around the house or buy cheaply. Here s what you need: Penny Small piece of glass Piece of unglazed tile File or pocket knife Small bottle of vinegar Eyedropper Rocks


216 Here s how to use your kit: Step 1. Scratch the tile with your rock to determine the streak of the mineral. The streak is the color of the resulting powder. It s usually a more consistent color than the apparent color of the mineral. You can refer to a mineral identification chart to find out what minerals have this streak. Step 2. Use the eyedropper to put a drop of vinegar on the mineral. If the vinegar fizzes, that means the mineral contains calcium carbonate. Step 3. Test the hardness of the mineral by trying to scratch it, in order, with your fingernail, the penny, and the file or knife. Then, try to scratch the file or knife and the glass with the mineral. Refer to the chart to determine the mineral s hardness. For example, if you can scratch the mineral with your fingernail, it measures 1 or 2 on the scale. If the mineral can scratch the file or knife, it measures at least 7 on the scale. Hardness tests


217 REQUIREMENT 5 With your family or den, identify on a road map of your state some geological features in your area. Geological features are all around us. Mountains, plains, lakes, rivers, swamps, and caves are just some of the natural features that may be found near where you live. And there may be man-made features like dams, quarries, mines, canals, and channelized streams. Mark some of those features on a map of your area. Try to imagine what forces created them. Imagine going back in time to see how those features were created. While you re exploring the past, see if you can discover how your area has changed over thousands and even millions of years. (A good place to start is a local science or natural history museum.)

218 You may discover things like this: During the Devonian Period (408 million to 360 million years ago), a shallow sea covered much of eastern North America from New York through Kentucky to Texas. The Colorado River has been forming the Grand Canyon for the past 17 million years. During the Wisconsin Glacial Episode (85,000 to 11,000 years ago), glaciers covered Canada, New England, the Upper Midwest, and parts of Idaho, Montana, and Washington. In the 20th century, the U.S. government built dams on many rivers to control flooding and generate hydroelectric power. One of the most famous, the Hoover Dam, impounds Lake Meade in Nevada and Arizona. REQUIREMENT 6A Identify some of the geological building materials used in building your home. REQUIREMENT 6B Identify some of the geological materials used around your community. REQUIREMENT 6C Record the items you find. Although your home may be made mostly of wood products, plenty of geological building materials


219 went into it as well. The chart shows some common geological materials used in construction. Can you add others? The Lincoln Memorial is made of marble. Geological Materials in Construction Here are a few places to look for some types of rocks in the city: Granite. This strong igneous rock is used often in city buildings. Look for it on the outside of buildings. It can be gray, pink, or a deeper rose color. It has a speckled pattern. The darkest flecks are mica crystals, and the glasslike areas are quartz crystals. You can find both rough and polished granite in buildings. Sandstone. In eastern cities, many older homes called brownstones were built of brick and then covered with brown sandstone blocks. Slate. This metamorphic rock, changed by heat and pressure, was once clay. It can be split into slabs. You might find an old sidewalk made of gray slate. Chalkboards in schools used to be made of smooth black slate. Some roofs are made of slate.


220 The Washington National Cathedral is made of limestone. Marble. Look for marble in the lobbies of office buildings and banks. A streaky, swirling pattern of mixed color and a smooth, shiny surface will be the main clues. Marble comes in many different colors. The main color might be black, gray, green, pink, or white. You can find marble in museums and parks, too. Pure white marble is often used for sculptures, statues, and monuments. REQUIREMENT 7 Do either 7a or 7b: REQUIREMENT 7A Go on an outing with your family or den to one of the nearby locations you discovered on your state map, and record what you see as you look at the geographical surroundings. Share with your family or den while on this outing what you notice that might change this location in the future (wind, water, ice, drought, erosion).

221 REQUIREMENT 7B Do the following: i. With your family or your den, visit with a geologist or earth scientist and discover the many career fields that are included in the science of geology. ii. Ask the geologist or earth scientist about the importance of fossils that are found. iii. Ask the geologist or earth scientist what you can do to help preserve our natural resources. Taking a Geological Field Trip Natural forces like wind, water, and earthquakes helped create the geological features you see around where you live. And those and other forces continue to change the environment. Visit one of the locations you discovered in requirement 5. Try to imagine how the location could change in the future and what forces might cause those changes. Tell your family or den what you discovered.
222 My state Geological features found in my state I visited Geological forces that may change this location in the future Visiting With a Geologist One of the best ways to learn about geology is to meet with a geologist. At your meeting, ask questions like these: What field of geology do you work in? What other kinds of geologists do you work with? What education is required to be a geologist? How can Webelos Scouts help preserve our natural resources? REQUIREMENT 8 Do at least one earth science demonstration or investigation with your den or with adult supervision, and explore geology in action. Geologists learn important facts by conducting experiments. You can do the same thing by conducting demonstrations and investigations like these.

223 Be sure to wear safety glasses when conducting any science investigations. Sedimentary Layer Simulation Use this simulation to learn how sedimentary layers are formed and what they look like. Materials: Shoebox Aluminum foil String Sand Pebbles Powdered clay Cement Safety glasses Plaster of paris Shells Water Line the box with aluminum foil and tie string around the sides so the box won t break or bulge when you fill it. Fill the box halfway with water. Put in a half-inch-deep mixture of sand and cement and let it settle. Then put in half-inch layers of plaster of paris and clay. Let each layer settle. Mix pebbles and shells with a small amount of cement and make a layer of each. When the box is filled, let the rock harden for a few days. Cut away the box and you ll have a fair approximation of sedimentary layers. Crystal Garden

224 Materials: 6 tablespoons of water 1 tablespoon of ammonia 6 tablespoons of laundry bluing 6 teaspoons of salt 6 pieces of charcoal (the kind used for outdoor cooking) Mix the water, ammonia, bluing, and salt in a bowl. Put the charcoal in a pie pan. Pour the liquid over the pieces of charcoal. Put the pie pan in a warm place where the water will evaporate quickly. When the water has evaporated, a garden of crystals will have grown. Impact of Water Investigation Materials: Sedimentary rocks (like limestone or sandstone) Igneous rocks (like granite or pumice) Metamorphic rocks (like marble or slate) Water bottles Water Put each kind of rock in a separate water bottle. Label each bottle with the rock type. Fill each bottle about half full with water (enough water so the rocks are covered). Freeze the bottles in a freezer, then take them out and let them thaw. Repeat the freezing/thawing process four or five more times. Take out the rocks and observe which rocks were damaged the most.
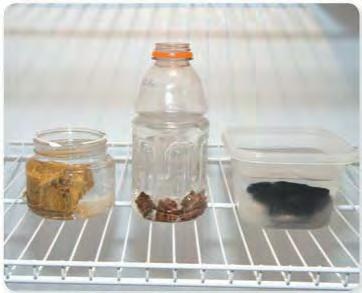
225
226
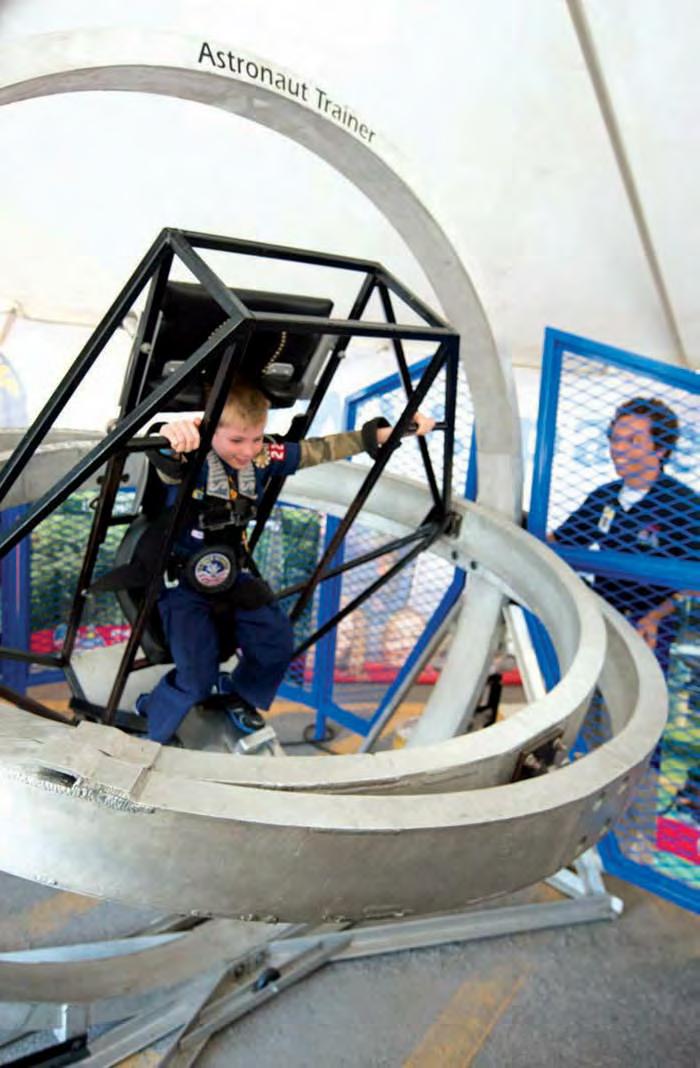
227
228 Snapshot of Adventure Lots of people have great ideas: flying to the moon, tunneling under rivers, building robots that walk and talk, making triple-loop rollercoasters. Engineers turn those ideas into reality. They use science, math, and creative thinking to improve people s lives. In this adventure, you will learn what engineers do. Even better, you will do some engineering projects of your own. So put on your thinking cap, and get ready to think like an engineer!
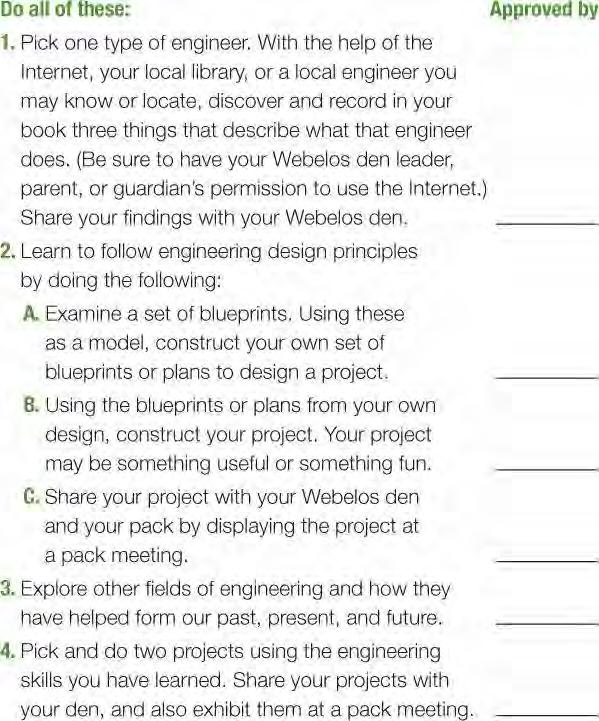
229 REQUIREMENT


230 REQUIREMENT 1 Pick one type of engineer. With the help of the Internet, your local library, or a local engineer you may know or locate, discover and record in your book three things that describe what that engineer does. (Be sure to have your Webelos den leader, parent, or guardian s permission to use the Internet.) Share your findings with your Webelos den. Engineers design everything from tiny materials you can only see through a microscope to spacecraft powerful enough to escape the earth s gravity. Most engineers work in an area (called a discipline) that focuses on a specific type of project. There are dozens of different disciplines and subdisciplines. Here are a few types of engineers whose work we can see and use every day: Chemical engineer: uses principles of chemistry to turn raw materials into products such as medicine, plastic, and fuel Civil engineer: designs projects such as roads, bridges, tunnels, and buildings Electrical engineer: uses electrical and electronic principles to create everything from power transmission systems to computers Mechanical engineer: designs mechanical products such as engines, bicycles, and the parts and materials that go into them

231 Structural engineer: makes sure structures can support weight and resist forces like earthquakes and wind Aerospace engineer: designs aircraft, spacecraft, and satellites Computer engineer: designs computer hardware and software Engineers from different disciplines work together on many projects. For example, if you were building a spaceship, you would need aerospace engineers, computer engineers, electrical engineers, mechanical engineers, and several other types of engineers that aren t listed here. Choose one type of engineer, and learn more about what he or she does. Write what you learned on this page. My Engineer My engineer is a engineer. Two places where this engineer may work: Three activities this engineer does as part of his or her job: Two school subjects you need to study to become an engineer: Share your findings with your Webelos den. You could tell your story by drawing a picture of this sort of engineer at work, making a video, or doing some other form of presentation.
Dunes Moraine District Webelos Adventure Day 2017 September 22-24, 2017 Camp Topenebe Michigan City, Indiana Updated: February 17, 2017
 Dunes Moraine District Webelos Adventure Day 2017 September 22-24, 2017 Camp Topenebe Michigan City, Indiana Updated: February 17, 2017 Purpose: Provide Webelos with the opportunity to Work on adventure
Dunes Moraine District Webelos Adventure Day 2017 September 22-24, 2017 Camp Topenebee Michigan City, Indiana Updated: April 12, 2017
 Dunes Moraine District Webelos Adventure Day 2017 September 22-24, 2017 Camp Topenebee Michigan City, Indiana Updated: April 12, 2017 Purpose: Provide Webelos with the opportunity to Work on adventure
Whittling Chip Requirements
 Whittling Chip Requirements Bear Scouts may earn the privilege of carrying a pocketknife to Cub Scout functions when required and asked to do so. The objective of this award is to make scouts aware that:
Scouting Adventure. 4 Den Meetings to complete. Required For
 Required For 4 Den Meetings to complete Preparation for: Scout Rank 1a-1e, 2(all), 3(all), 4(all) & 5 Scouting Adventure Takeaways Demonstrating the patrol method Helping ease the transition from Webelos
Cub Scout Den Meeting Outline
 Cub Scout Den Meeting Outline Month: May Week: 1 Point of the Scout Law: Friendly Before the Meeting Gathering Opening Activity Game Business items/take home Closing After the meeting Tiger Wolf Bear Webelos
CBD 2014 Spring Camporee. Backpacking Merit Badge Course Description and Bring With List
 Backpacking Merit Badge Course Description and Bring With List This course is intended for scouts ages 13 or older who want an introduction to backpacking. It is good preparation for an upcoming first
WHITTLING CHIP CLASS I. Session 1
 WHITTLING CHIP CLASS I. Session 1 A. Overview 1. Review today s session. 2. Review the next two sessions. B. Whittling Chip card 1. Show Whittling Chip card and pass it around. 2. Explain what the card
A must read for each Webelo coming over to Troop 112
 A must read for each Webelo coming over to Troop 112 Welcome Webelos to Troop 112. What an exciting time for all of us as you join us to embark on many great experiences together. With all of the excitement
Pack 277 Whittling Chip Class November 2013
 Pack 277 Whittling Chip Class November 2013 Supplies Needed This booklet for each Scout s Parents Ivory soap (1 per scout, plus extras) Table cloth to collect soap chips Popsicle sticks (1 per scout, plus
Boy Scouts of America Troop 42
 Boy Scouts of America Troop 42 New Fairfield, CT New Scout Orientation Program Program Calendar Week Date 1 February 3, 2015 2 February 10, 2015 3 February 17, 2015 4 MBC February 24, 2015 5 March 3, 2015
GUIDELINES FOR SCOUTMASTER CONFERENCES
 GUIDELINES FOR SCOUTMASTER CONFERENCES TROOP 313 Bel Air MD Scout must be in Class A uniform. (Exceptions: New scout within first 6 months, parental notification of uniform replacement difficulties and
Webelos Woods Weekend September 25-27, 2015 BSA Camp Gustin Chariots Of The Fire
 Webelos Woods Weekend September 25-27, 2015 BSA Camp Gustin Chariots Of The Fire Webelos! Are you excited to become a Boy Scout? Do you want to get a jump on some Boy Scout skills, meet the troops in your
Passport 2005 Klondike Derby
 Passport 2005 Klondike Derby Saturday January 22 nd, 2005 BSA Westchester-Putnam Council Mohican / Manitoga District F.D.R. State Park Station Instructions Maximum score per station is 10 Points. Scouts
wilderness survival scouting outcomes advancement opportunities 105
 Wilderness Survival Early man practiced wilderness survival because he had to. We practice it today because it is a challenge and because even today we might confront a situation requiring knowledge of
Eagle Scout Court of Honor to recognize Scouts
 Boy Scouts of America Troop 98 - Whitpain Township, Pennsylvania Eagle Scout Court of Honor to recognize Scouts Derrick Kuklinski Tim Giddings Jake Pogorzelski Jonathan O'Donnell Nate Truitt Alex Sanfilippo
York District Fall Camporee Path to Advancement
 York District Fall Camporee 2014 Path to Advancement Afternoon Program The afternoon of the Fall Camporee will consist of two programs. One of which is a Life to Eagle program that is designed for seasoned
Skills Session: Woods Tools Knife, Camp Saw, and Axe
 Skills Session: Woods Tools Knife, Camp Saw, and Axe Time Frame: 1 Hour Materials: Resources: Goals: There should be one each of the following items for every two participants: Knife Axe Camp Saw Sharpening
2017 Cub Adventure Camp Achievements Archery and BB shooting Wolf Call of the Wild Council Fire Paws on the Path Running With the Pack
 Archery and BB shooting sports awards Levels 1 for all ranks Wolf Call of the Wild 1. Attend one of the following: D. Resident camp 3. Do the following: a. Recite the Outdoor Code with your leader. b.
Outdoor Skills Patch Program
 Overview The is a progressive, six-level program to help Girl Scout Daisies through Ambassadors learn and become proficient in outdoor skills. Through this patch program, girls explore leadership, build
Troop 888 Baton Rouge, LA
 Troop 888 Baton Rouge, LA Agenda Introductions Purpose & Focus of Boy Scouts Troop History Organization Membership Adult Participation Advancement Meetings & Activities Communications/Website Next Steps
TROOP 22 TOTIN' CHIP REQUIREMENTS
 TROOP 22 TOTIN' CHIP REQUIREMENTS References: Boy Scout Handbook, 11th Ed. pp. 77-85 and 218-219; Boy Scout Handbook, 10th Ed. pp. 63-76 (superior to 11th Ed. but still deficient); Boy Scout Handbook,
Camp Roosevelt February 22-24, 2019 The High Adventure Chill Out is a chance to join in one of the oldest traditions in Boy Scout history.
 Camp Roosevelt February 22-24, 2019 The High Adventure Chill Out is a chance to join in one of the oldest traditions in Boy Scout history. It's a wonderful opportunity for units to come together as a Council
Order of the Arrow National Spirit of Adventure Crossover Ceremony
 Order of the Arrow National Spirit of Adventure Crossover Ceremony Purpose This crossover is designed to have a powerful inspirational effect, not only on the Webelos Scouts participating in it, but on
Second Class Personal Growth Agreement Conference
 Second Class Personal Growth Agreement Conference Scout: Age: years months School Grade I have been in Scouts for months, including months as a Tenderfoot Scout. SCOUT SPIRIT: As a Tenderfoot, I have continued
BSA TROOP 189 SCOUT 101 CAMPOUT EVENT GUIDEBOOK APRIL 2013 TURKEY RUN GROUP CAMPGROUND PRINCE WILLIAM FOREST PARK
 BSA TROOP 189 SCOUT 101 CAMPOUT EVENT GUIDEBOOK 13-14 APRIL 2013 TURKEY RUN GROUP CAMPGROUND PRINCE WILLIAM FOREST PARK Saturday, April 13 th Schedule of Events 0800 Cadre meeting @ Turkey Run Education
WEBELOS WOODS Oct. 2-4, 2009 Double V Scout Ranch
 WEBELOS WOODS Oct. 2-4, 2009 Double V Scout Ranch Information Packet Welcome To Webelos Woods! On behalf of the staff and committee of Webelos Woods I would like to invite you and your units to this year
2018 Tyee District Camporee
 2018 Tyee District Camporee May 4th-5th 2018 Cascade Park Arlington, Washington Welcome to the Camporee Welcome back to the Tyee District Camporee. It has been a lot of years since we have had a district
MARTIN SCOUT RANCH PATROLYMPICS BLUE MOUNTAIN COUNCIL SPRING CAMPOREE 2018 RANDALL MARTIN SCOUT RANCH. April 20, 21,
 MARTIN SCOUT RANCH PATROLYMPICS BLUE MOUNTAIN COUNCIL SPRING CAMPOREE 2018 RANDALL MARTIN SCOUT RANCH April 20, 21, 22 2018. Camporee begins Friday night with a Campfire. Events begin on Saturday 9:00
2016 Wright Brothers District Midwest Outdoor Experience Camporee
 2016 Wright Brothers District Midwest Outdoor Experience Camporee Leaders & Adult Guide Eastwood MetroPark 1385 Harshman Road Dayton, OH 45431 Event Leaders: Jim Wuebker - (937) 654-6611 cell Charlotte
Fall Camporee Crossroads of America Council Pioneer District October, 2018
 Crossroads of America Council Pioneer District Fall Camporee 2018 26-28 October, 2018 Ransburg Scout Reservation 7599 Waldrip Creek Road Bloomington, IN 47401 Ok guys, I have been racking my brain trying
Leave No Trace Patrol Game
 The Crean Award: Discovery: The Environment Endurance: Develop Teamwork Patrol Activity Leave No Trace Patrol Game Terra Nova: Environment Polar: Patrol Activity The Activity: Objective: To run a series
Totin Chip Lesson Plan
 Totin Chip Lesson Plan Introduction: The Totin Chit card is granted to Scouts who have demonstrated the proper procedures for handling a knife, campsaw, and ax. These are commonly referred to a woods tools.
Camp Long Lake Troop 16. Scoutmaster: Keith Henderson
 Camp Long Lake 2016 Troop 16 Scoutmaster: Keith Henderson Introduction: Meet Keith Henderson, Troop 16 Camp Long Lake Scoutmaster. Parent Attendance at Camp: There are a limited number of adult spots available.
2016 Washington, D.C. Spring Camporee
 2016 Washington, D.C. Spring Camporee Official Event Information Packet Washington, D.C. District, BSA 2016 Washington, D.C. Spring Camporee Theme: First Aid and Emergency Preparedness: Throughout the
OCTOBER 19-21, 2018 CAMP GENEVA FRUITLAND PARK, FL
 OCTOBER 19-21, 2018 CAMP GENEVA FRUITLAND PARK, FL FOR INFORMATION CALL: ROB PARISH (352) 267-2953 sctldr143@aol.com ROBERT HOLIDAY (352) 504-6018 rholiday@holidayairfl.com Mac GRIFFITH (386) 506-1853
WEBELOS WINTER CAMP AND BALOO LEADER S GUIDE. Louisiana Purchase Council, Pioneer District
 WEBELOS WINTER CAMP AND BALOO LEADER S GUIDE Louisiana Purchase Council, Pioneer District Webelos Winter Camp and BALOO Leader s Guide PURPOSE The purpose of Webelos Winter Camp is to expose both first
Toqua District 2016 Webelos Rush November 4 th -6 th, 2016
 Toqua District 2016 Webelos Rush November 4 th -6 th, 2016 Dear Scouts & Scouters, The Toqua District is very proud to continue what was a very successful even in 2015, Webelos Rush. We would like to take
Fire Use And Safety Rules From The Boy Scout
 Fire Use And Safety Rules From The Boy Scout Handbook The Boy Scouts of America is pleased to provide this booklet it might be the contains exercises, based on a set of personal safety rules, that will
Kindergarten-2nd. July 4-5, Joseph. Genesis 37-48; Jeremiah 29:11. God wants our obedience.
 Kindergarten-2nd July 4-5, 2015 Joseph Genesis 37-48; Jeremiah 29:11 God wants our obedience. Connect Time (15 minutes): Five minutes after the service begins, split kids into groups and begin their activity.
THE CASE FOR CAMPFIRES
 Vol. 7, No. 9 THE CASE FOR CAMPFIRES In this Issue: Tinder for the Fire Kindling the Blaze Fueling the Flame Chips of Responsibility CYBERCHIPS It was a dark and stormy night, begins a classic Scouting
Second Class Rank Workbook
 Workbook This Workbook can help you organize your thoughts as you prepare to meet with your Scout Leader. You still must satisfy your Scout Leader that you can demonstrate each skill and have learned the
Troop 23 Scout Skills Review (Revised )
") Troop 23 Scout Skills Review (Revised 10-27-11) This Skills Review is to be done by the 1 st Class and Life Scout candidate with an Eagle Scout adult leader, before the Scout s 1 st Class and Life Scout
Troop 23 Scout Skills Review (Revised 10-27-11) This Skills Review is to be done by the 1 st Class and Life Scout candidate with an Eagle Scout adult leader, before the Scout s 1 st Class and Life Scout
Camping Merit Badge Workbook
 Merit Badge Workbook This workbook can help you but you still need to read the merit badge pamphlet. This Workbook can help you organize your thoughts as you prepare to meet with your merit badge counselor.
Cub Scout Den Meeting Outline
 Cub Scout Den Meeting Outline Month: April Week: 2 Point of the Scout Law: Thrifty Before the Meeting Gathering Opening Discussion Activity Business items/take home Closing After the meeting Tiger Wolf
2015 STSR Winter Camp Leader s Guide
 2015 STSR Winter Camp Leader s Guide - 1 - Dear Leaders, Thank you for considering STSR Winter Camp as part of your scouting program. We have strived to assemble a quality program of merit badge offerings.
Adult Leader Position Specific Training Record
 Boy Scouts of America Daniel Webster Council Adult Leader Position Specific Training Record Course #: S11 Unit #: Course Title: Introduction to Outdoor Leader Skills Adult Leader Trained: Adult Trainer:
Backpacking Merit Badge Workbook
 Merit Badge Workbook This workbook can help you but you still need to read the merit badge pamphlet. The work space provided for each requirement should be used by the Scout to make notes for discussing
PARENT S GUIDE 2016 Cub Scout Day Camp Robidoux District St. Joseph, MO
 PARENT S GUIDE 2016 Cub Scout Day Camp Robidoux District St. Joseph, MO CAMP DIRECTOR: Brandi Lopez PROGRAM DIRECTOR: Christy Crouse Crafts Director: Krysta Parmenter Activities Director: Kevin McDermott
Second Class Requirements Workbook
 1a. Demonstrate (describe) how a compass works how to orient a map Explain what map symbols mean 1b. Using a compass a map together, take a 5-mile hike (or 10 miles by bike) approved by your adult leader
Troop 55 Totin Chip Training Outline Supplies Needed:
 Troop 55 Totin Chip Training Outline Supplies Needed: Boy Scout Handbook Training Outline Totin Chip Cards Pocketknife (each scout should bring) Toothpicks & Tissue Honing Oil Sharpening Stone/Whetstone
Event Details. When Friday, January 16th -18 th Check-in: Begins Friday, January 16 th at 17h00 Check-out: Sunday, January 18 th at 09h00
 Hello and welcome! Thank you for your interest in leaving not a trace and attending Maketewa District s 2015 Klondike Derby. The event will be hosted by Troop 150, for their twelfth year. We hope that
Manatee District CUB SCOUT DAY CAMP
 Manatee District CUB SCOUT DAY CAMP June 5 9, 2017 Camp Flying Eagle 16009 Upper Manatee River Rd. Bradenton, 34212 Parents Guide 1. Welcome and Introduction Welcome! Thank you for registering your son
2017 Camp Card Leader s Guide
 2017 Camp Card Leader s Guide 60 Wellington Road, Milford, Connecticut 06461 203-876-6868 * www.ctyankee.org Page 1 of 7 Your Scouts can earn their week at a Connecticut Yankee Council Camp this summer.
Final Plan 03/14/2017. Dunes Moraine District Spring Camporee 2017 April 28-30, 2017 Sunset Hill County Park Valparaiso, IN Update 03/14/17
 Dunes Moraine District Spring Camporee 2017 April 28-30, 2017 Sunset Hill County Park Valparaiso, IN Update 03/14/17 Pioneering Camporee Provide an opportunity for Scouts to: 1. 1st Class Lashing 2. Earn
Webelos Woods. Welcome to Cape Fear Council s 2nd Annual Webelos Woods.
 Webelos Woods Welcome to Cape Fear Council s 2nd Annual Webelos Woods. Webelos Woods is the first opportunity for Webelos Scouts to learn what Boy Scouting is all about by using the patrol method in a
Spring is here! Even if the weather's still chilly where you live, setting off on a Scout hike is a terrific way to launch into the season.
 In this Issue: A Tale of a Trail The Buzz on Bees Knots of Achievement Quiz Vol. 3, No. 4 Early Spring Edition Spring is here! Even if the weather's still chilly where you live, setting off on a Scout
SEARCH AND RESCUE Fall Camporee October Beaumont Scout Reservation - Lane Area. Campmaster: Max Wild Campmaster Adviser: Tom Coscia
 SEARCH AND RESCUE 2018 Fall Camporee October 19 21 Beaumont Scout Reservation - Lane Area Campmaster: Max Wild Campmaster Adviser: Tom Coscia Welcome Everyone! My name is Max Wild and I will be serving
SCOUTING. Because without OUTING it would just be SC
 SCOUTING Because without OUTING it would just be SC Camping Merit Badge Camping is one of the best-known methods of the Scouting movement. When he founded the Scouting movement in the early 1900s, Robert
Webelos Woods. Welcome to Cape Fear Council s Inaugural Webelos Woods.
 Webelos Woods Welcome to Cape Fear Council s Inaugural Webelos Woods. Webelos Woods is the first opportunity for 4th-grade and 5th-grade Webelos Scouts to learn what Boy Scouting is all about. It is a
Purpose: To develop children s understanding of Camp Fire and begin to establish a cohesive group.
 Camp Fire Our Group Project All levels of Starflight and Adventure Trail to Family and Community. Purpose: To develop children s understanding of Camp Fire and begin to establish a cohesive group. Meeting
Measurements, Weight and Pictures Please read all of this, will take you 5 minutes. : )
") Measurements, Weight and Pictures Please read all of this, will take you 5 minutes. : ) Below is the information for how you submit your measurements to track your progress and your pictures for the 6-week
Measurements, Weight and Pictures Please read all of this, will take you 5 minutes. : ) Below is the information for how you submit your measurements to track your progress and your pictures for the 6-week
Whittling Chip Course
 Whittling Chip Course This Whittling Chip course is designed to be taught over two classes, lasting approximately 1 hour each. The length of the course may vary depending on how many Scouts are in the
Sequoia Council Boy Scouts of America 2018 Leader s Guide 0
 2018 Leader s Guide 0 Overview This event will feature competitive/cooperative events, exhibits, awards, a Survival themed movie, adult training opportunities, and plenty of scout spirit! We want units
ALLEGHENY HIGHLANDS COUNCIL COUNCIL INVITATION TO ADVENTURE SKILLOREE 2009 May CAMP MERZ Mayville N.Y.
 ALLEGHENY HIGHLANDS COUNCIL COUNCIL INVITATION TO ADVENTURE SKILLOREE 2009 May 15-17 CAMP MERZ Mayville N.Y. We are starting off the New Year right with some terrific events this year. So to challenge
First Ever Cherokee District Klondike Derby January 18-20, 2008 Scoutland
 First Ever Cherokee District Klondike Derby January 18-20, 2008 Scoutland What is a Klondike Derby? It is a Boy Scout Winter Skills and Camping event, held every winter in the snow. Usually it involves
Greetings! You Have Been Called Out. Your Ordeal. The Three Ordeal Weekends
 Greetings! By Receipt of this mail, you or your son or daughter was recently elected for induction into the Boy Scout s National Honor Society (The Order of the Arrow)! Congratulations for being selected
2016 Council Camporee. Leaders Guide
 2016 Council Camporee Leaders Guide Dear Leaders: Rio Grande Council Boy Scouts of America The annual Rio Grande Council Camporee will be held April 22-24 at Camp Perry. Congratulations to last year s
2017 Inali District Klondike Derby Camp Chic-a-gama at Spring Lake Macomb, IL. January 27-29, Illowa Council Boy Scouts of America
 2017 Inali District Klondike Derby Camp Chic-a-gama at Spring Lake Macomb, IL January 27-29, 2016 Illowa Council Boy Scouts of America Klondike Rules There are many new events this year so brush up on
WEBELOS SCOUT KLONDIKE DERBY 2018
 Fourteen Annual WEBELOS SCOUT KLONDIKE DERBY 2018 Dare To Challenge! Shelter Rock District Theodore Roosevelt Council, BSA January 27, 2018 Shelter Rock District KLONDIKE DERBY Muttontown Preserve Muttontown,
WILL YOU SURVIVE??? LEADER S GUIDE BOOK
 WILDERNESS SURVIVAL BOY SCOUT CAMPOREE APRIL 27-29, 2018 WILL YOU SURVIVE??? LEADER S GUIDE BOOK EMERGENCY NUMBERS Camp Director - Fred Hassman (812)202-0838 Program Director - Adam White (812)618-8234
Ride Smart! Bicycle Safety Presentation Manual
 Ride Smart! Bicycle Safety Presentation Manual Kits for Kids: Ride Smart! Program Script This program has been developed by the Injury Prevention Program at Northwestern Medicine for use by teachers, student
2018 Council Camporee Leaders Guide
 2018 Council Camporee Leaders Guide Rio Grande Council Boy Scouts of America Dear Leaders: The annual Rio Grande Council Camporee will be held on April 20th -22nd, 2018 at Camp Perry. This years camporee
Scout s Name: Counselor s Name: Counselor s Ph #:
 CAMPING MERIT BADGE WORKSHEET This worksheet is not required but is designed to help you with this merit badge. Requirements revised: 2OO6, Worksheet updated: 2006. Scout s Name: Date: Counselor s Name:
4-H Camp Counselor Handbook
 4-H Camp Counselor Handbook St. Francois, Ste. Genevieve & Washington Counties Counselors (Counselor Coordinators, Counselors and Assistant Counselors) Camp life as a Counselor offers you a unique opportunity
10. LEVEL 1 (9- to 11-year-olds) What equipment is needed for a one-day hike? What additional equipment is needed for an overnight trip? Is it better
 What equipment is needed for a one-day hike? What additional equipment is needed for an overnight trip? Is it better") Camping PROJECT PLANNING GUIDE OBJECTIVES OF THE 4-H CAMPING PROJECT 1. To learn about North Carolina 4-H camps. 2. To deve10p campcraft skills. 3. To learn to plan a camping trip for a group. 4. To aid
Camping PROJECT PLANNING GUIDE OBJECTIVES OF THE 4-H CAMPING PROJECT 1. To learn about North Carolina 4-H camps. 2. To deve10p campcraft skills. 3. To learn to plan a camping trip for a group. 4. To aid
Troop Pioneering Camp out. Westmoreland State Park. Montross, VA
 Troop 349 2012 Pioneering Camp out Westmoreland State Park Montross, VA March 16-18, 2012 Deadline for permission slip & payment: Tues, Mar 13 1 Westmoreland State Park lies within Westmoreland County,
River Trails District
 River Trails District 2014 Fall Camporee Do You Have What it Takes to challenge your Scout Leaders? to challenge your Scouts? to be the elite Scout? This Camporee will include participation by adults as
BLUE MOUNTAIN COUNCIL RATTLESNAKE RIDGE AND WHITE BLUFFS DISTRICT SPRING CAMPOREE 2015 RANDALL MARTIN SCOUT RANCH April 24 th, 25 th and 26th 2015.
 BLUE MOUNTAIN COUNCIL RATTLESNAKE RIDGE AND WHITE BLUFFS DISTRICT SPRING CAMPOREE 2015 RANDALL MARTIN SCOUT RANCH April 24 th, 25 th and 26th 2015. Information Booklet Camping begins Friday night with
Spring 2015 Camp-O-Ree
 High Altitude & Frontier Districts Spring 2015 Camp-O-Ree Welcome to the Spring 2015 Mountain Biking Camp-O-Ree. We encourage everyone to attend. Bring your mountain bike if you have one! When: Friday,
To register, go to:
 Strong River District Akela/Cub Campout Super Special Events October 11-13 Camp Details Fantastic Four-est Design Contest - Each Pack should decorate the entrance to their campsite using the Super Hero
SAVE THE DATE FOR THE 2013 BLACK RIVER DISTRICT KLONDIKE DERBY! At Camp Akelaland, Trexler Scout Reservation in Effort, Pennsylvania
 SAVE THE DATE FOR THE 2013 BLACK RIVER DISTRICT KLONDIKE DERBY! At Camp Akelaland, Trexler Scout Reservation in Effort, Pennsylvania SCHEDULE (SUBJECT TO CHANGE): January 25-27, 2013 Winter Camping at
Chesapeake Bay District WebeloRee
 Chesapeake Bay District 2015 WebeloRee Leader's Guide October 9-11, 2015 at Rappahannock Community College South Campus 1 1. Purpose. This document provides the necessary information required for a successful
This rebate is only available as a pack, not individual registrations.
 Great Southwest Council Boy Scouts of America Day Camp is an outdoor experience where Cub Scouts partcipate in individual and team sports, games, crafts, explore nature and work on required adventures
Barry Pond, Event Chairman Mike Souza, Council Activities Chair
 Great time for Scouts to practice their skills and prepare for cold weather camping. Klondike Sled Race Snow Fort Building Contest 22 Range Dutch Oven Cook Off Youth & Adult Cribbage Tournament. Barry
Summer Camp 2014 Overview
 GENERAL INFORMATION ABOUT CAMP Drop off your scout by 1:00pm Sunday June 15 th at Camp in full Class-A uniform with all his gear. As you enter Woodruff, continue on the main road and the drop off site
Title ID Number Sequence and Duration. Age Level Essential Question Learning Objectives
 Title ID Number Sequence and Duration Age Level Essential Question Learning Objectives Lesson Activity Design a Roller Coaster (2 sessions, 60-80 minutes) HS-S-C3 Session 1: Background and Planning Lead
William Henry Harrison District KLONDIKE DERBY Leader s Guide January 22-24, 2016 Camp Friedlander 581 Ibold Rd, Loveland, OH 45140
 William Henry Harrison District KLONDIKE DERBY Leader s Guide January 22-24, 2016 Camp Friedlander 581 Ibold Rd, Loveland, OH 45140 What is a Klondike Derby? Many years ago, men raced across the Alaskan
2014 STSR Winter Camp Leader s Guide
 2014 STSR Winter Camp Leader s Guide - 1 - Dear Leaders, Thank you for considering STSR Winter Camp as part of your scouting program. We have strived to assemble a quality program of merit badge offerings.
INTERNATIONAL CHILD PASSENGER SAFETY AWARENESS CLASS. June 2018
 INTERNATIONAL CHILD PASSENGER SAFETY AWARENESS CLASS June 2018 1 Welcome Thank you for coming. Introduce yourself and tell us why you are here. What you learn today will prepare you to: Explain how car
Webelos to Boy Scouts. Get ready to have fun!!!
 Webelos to Boy Scouts Get ready to have fun!!! Scout Ranks Scout Tenderfoot Second Class First Class Star Life Eagle Advancement based on scouting skills Advancement based on leadership and Merit Badges
SAVE THE DATE FOR THE 2014 BLACK RIVER DISTRICT KLONDIKE DERBY! At Camp Akelaland, Trexler Scout Reservation in Effort, Pennsylvania
 SAVE THE DATE FOR THE 2014 BLACK RIVER DISTRICT KLONDIKE DERBY! At Camp Akelaland, Trexler Scout Reservation in Effort, Pennsylvania SCHEDULE (SUBJECT TO CHANGE): January 24-26, 2014 Winter Camping at
early bird fee will be $10/person through 4/10/16. After that, it will be $15/person.
 WHO: Trailblazer District and US Grant District combining forces for a joint Scout experience. WHAT: The Amazing Scout Race, aka Spring Camporee, 2016 WHEN: Friday, April 22, 2016 through Sunday, April
THREE RIVERS DISTRICT 2015 Fall WEBELOSREE LEADER S GUIDE October 2015
 THREE RIVERS DISTRICT 201 Fall WEBELOSREE LEADER S GUIDE 09-11 October 201 Camp Rotary Pipsico Scout Reservation Welcome and Introduction of WEBELOSREE Committee On behalf of the Scouts of the Three Rivers
2018 Webelos Scout Webeloree
 2018 Webelos Scout Webeloree Leaders Guide Maui County Council, Boy Scouts of America 200 Liholiho Street Wailuku, Maui, HI 96793 (808)244-3724 www.mauibsa.org Table of Contents I. General Information
Tenderfoot Rank training: After clicking on the Tenderfoot rank badge, you will be presented with a list of 1 15 different rank requirements.
 The BSA website at http://www.scouting.org/scoutsource/applications/rankvideo.aspx is a tremendous resource for training Scouts on basic skills like the ones that will be used at this year s Camperall.
Merit Badge Information
 Merit Badge Information The Basics: CJM offers more than 55 Merit badges, taught in half-day, one-day or two-day vertical format. This schedule will allow Scouts to earn a variety of merit badges during
Centennial District Camporee 2017 Clash Royale - Battle On!
 Centennial District Camporee 2017 Clash Royale - Battle On! How Legendary are you? September 22-24, 2017 Peaceful Valley Scout Ranch Camp Dobbins Table of Contents Camporee Overview... Game Play - Theme/Clash
Camping Merit Badge Workbook
 Merit Badge Workbook This workbook can help you but you still need to read the merit badge pamphlet. The work space provided for each requirement should be used by the Scout to make notes for discussing
and led Jimmy to the prison office. There Jimmy was given an important He had been sent to prison to stay for four years.
 O. H e n r y p IN THE PRISON SHOE-SHOP, JIMMY VALENTINE was busily at work making shoes. A prison officer came into the shop, and led Jimmy to the prison office. There Jimmy was given an important paper.
All troops will supply 2 or more adults and/or Senior Scouts (16 or older, Star rank and above) to man events/stations, as required.
 to man events/stations, as required.") Please join Troop 364 for the South Mountain District Klondike Derby on Saturday, February 25 th from 8:00 a.m. to 5:00 p.m. at Camp Minsi. Here s your chance to test your survival skills in case of an
Please join Troop 364 for the South Mountain District Klondike Derby on Saturday, February 25 th from 8:00 a.m. to 5:00 p.m. at Camp Minsi. Here s your chance to test your survival skills in case of an